DIY Carrot Patch Spring Decoration

Make this cute DIY Easter Carrot Decor craft project

and add a little whimsy to your spring home decor!

This project uses Dollar Tree craft supplies and StyleTechCraft vinyl

to make the cutest little U-Pick carrot patch.

Materials Used:  *Affiliate Links

Extreme Values Everyday at Dollar Tree – Shop Now!

*Disclosure:  This blog uses ads and affiliate links.  If you choose to make a purchase using one of the links, I receive a small commission (at no additional cost to you) that helps offset the costs of maintaining this blog.  Thanks for your support!

Directions:

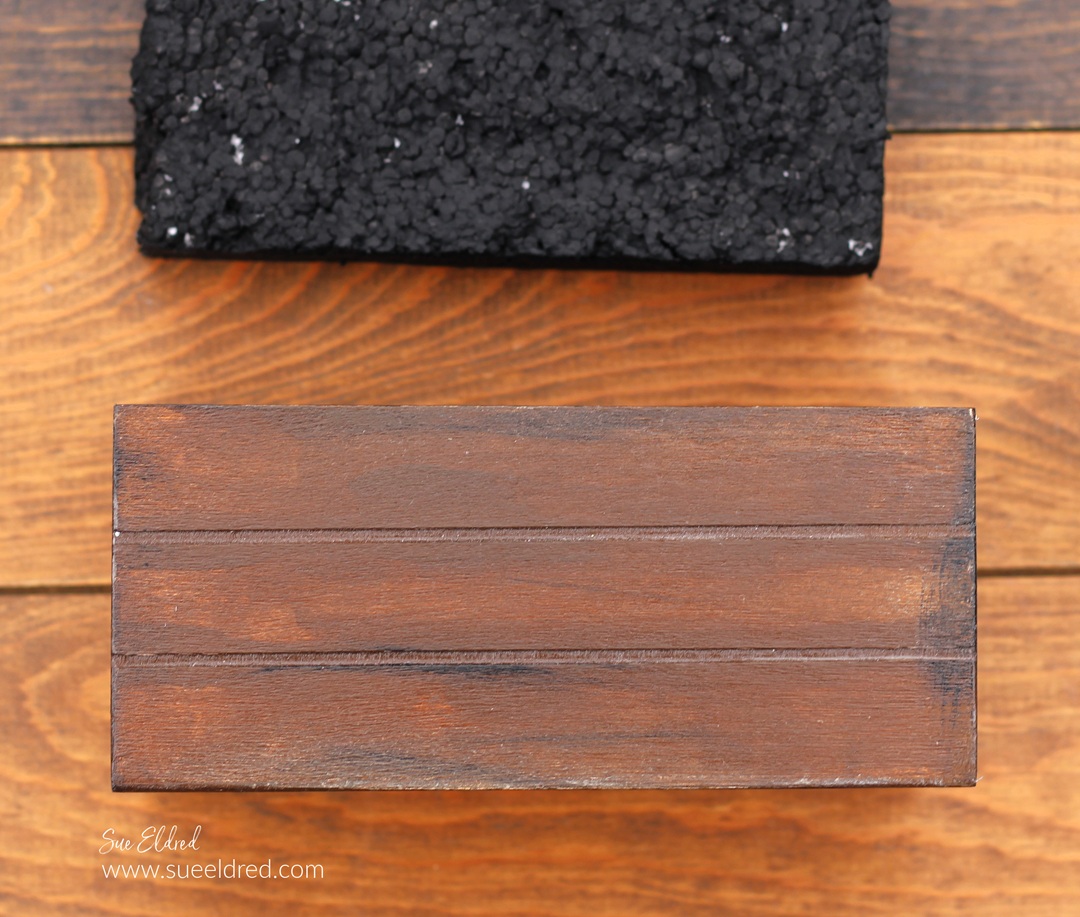
  • Paint the Mini Crate* with brown acrylic paint.
  • To give the crate an aged look, dry brush the edges with black acrylic paint.  Wipe off any extra paint with a damp rag.
  • Seal the crate using Mod Podge Gloss*.  (This makes the crate look like it has been varnished.)
  • Cut a piece of foam to fit inside of the crate.  
  • Paint the foam with black acrylic paint.

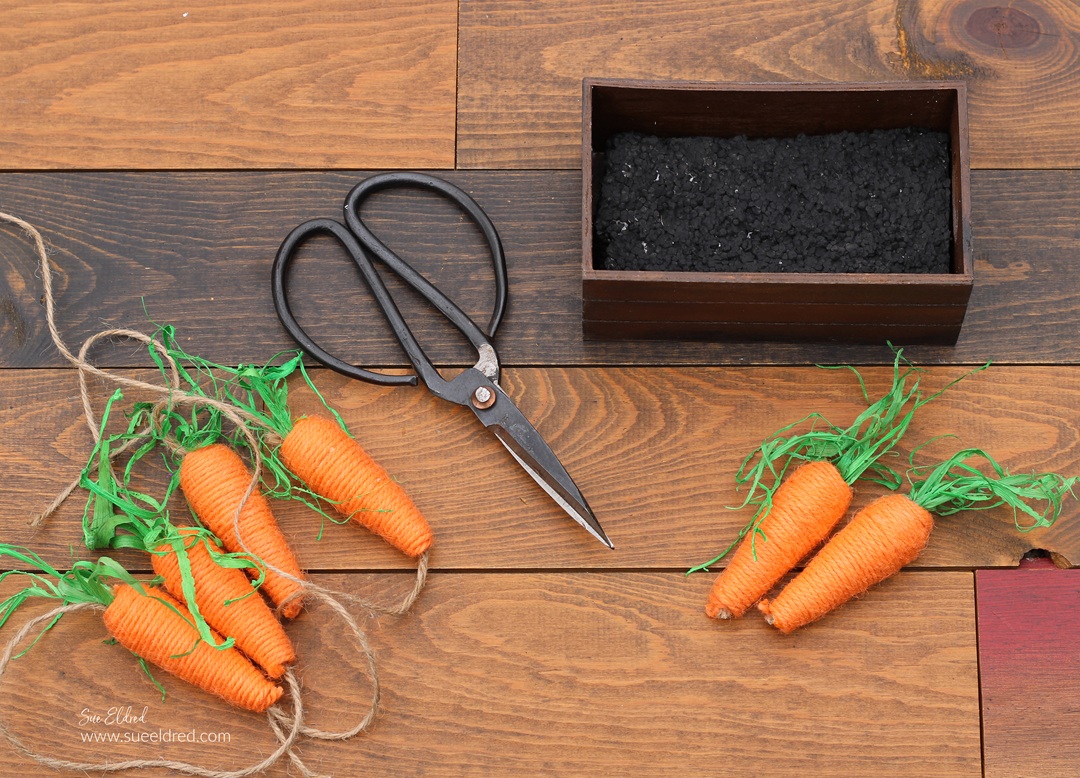
  • Cut the carrots from the garland.

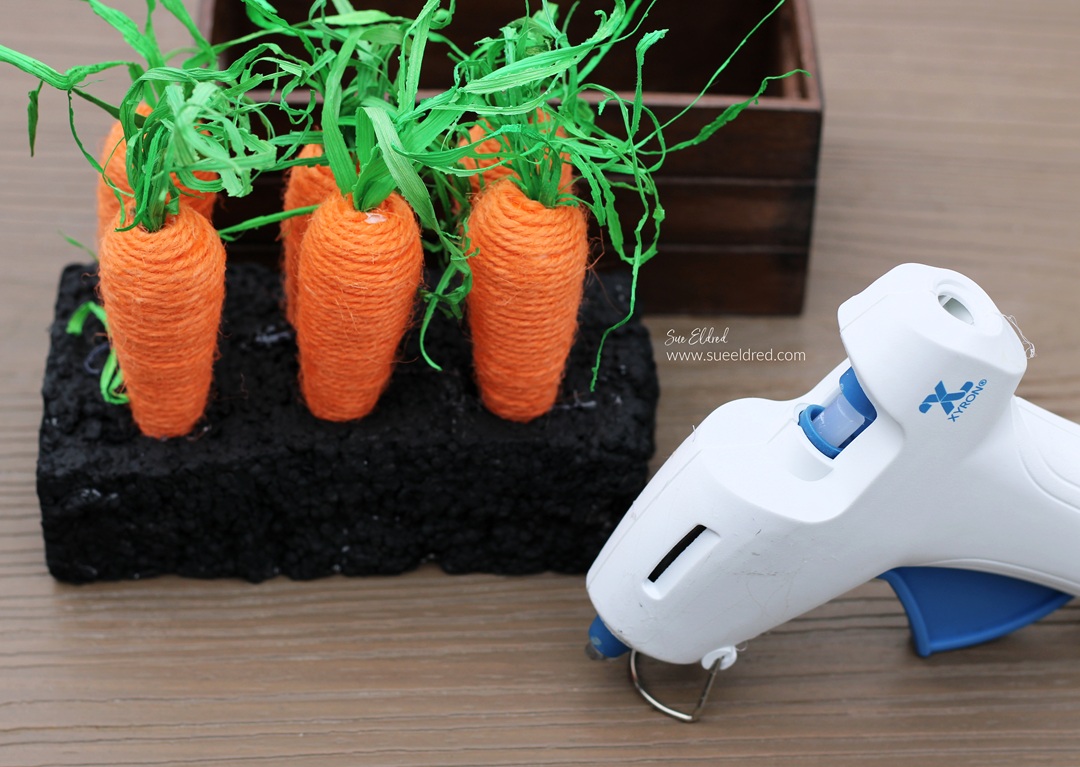
  • Poke holes into the foam that are large enough for the tips of the carrots to fit down into.
  • Hot glue the tips of the carrots in the holes.

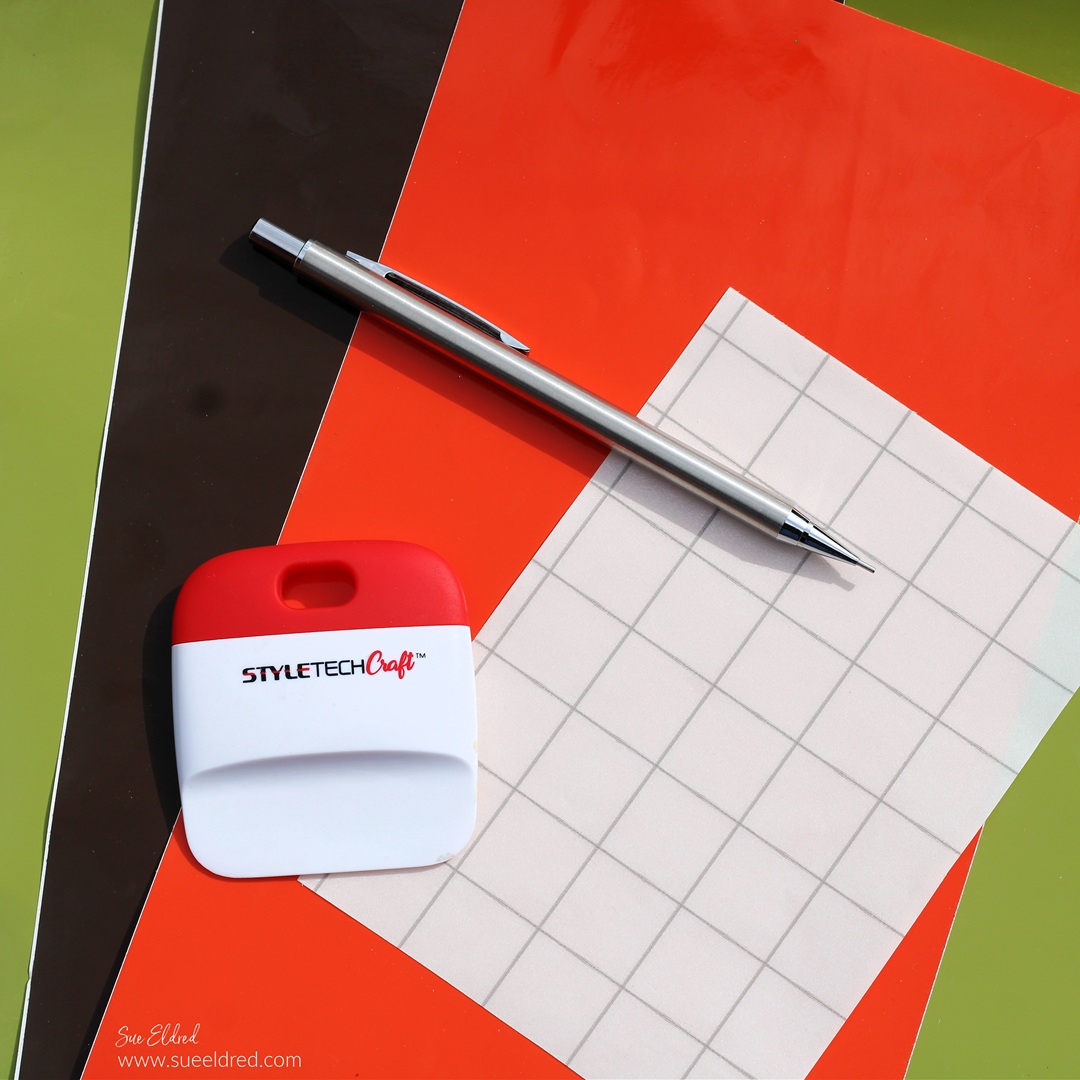
StyletechCraft products brought to you by ATSM Craft*

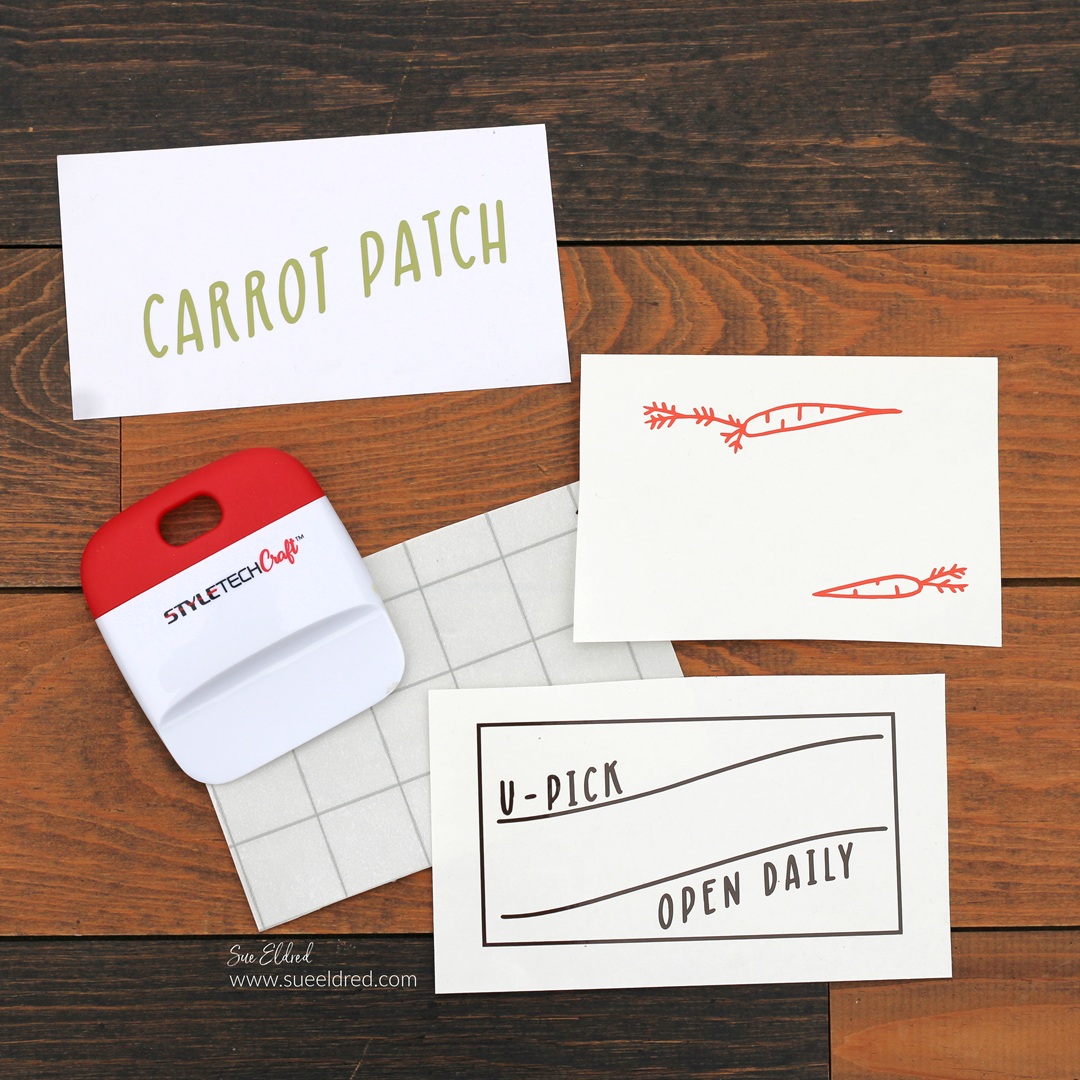
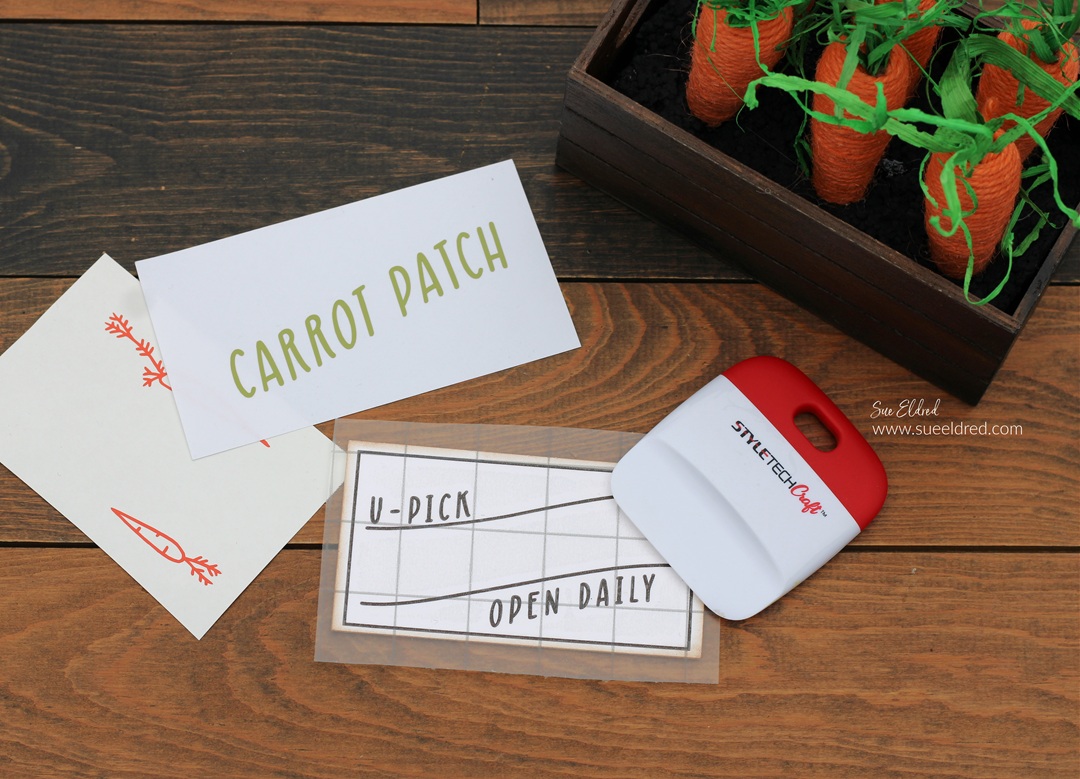
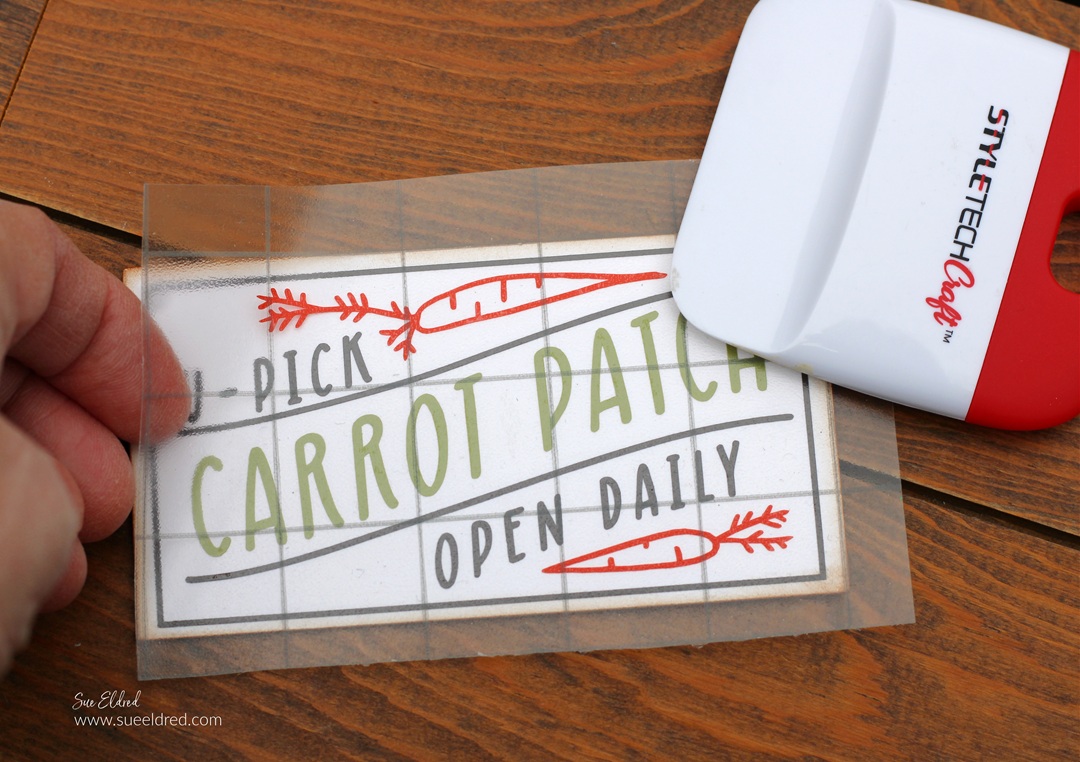
  • Continue adding the additional pieces of the sign.  (Did you know that the transfer tape is reusable?)

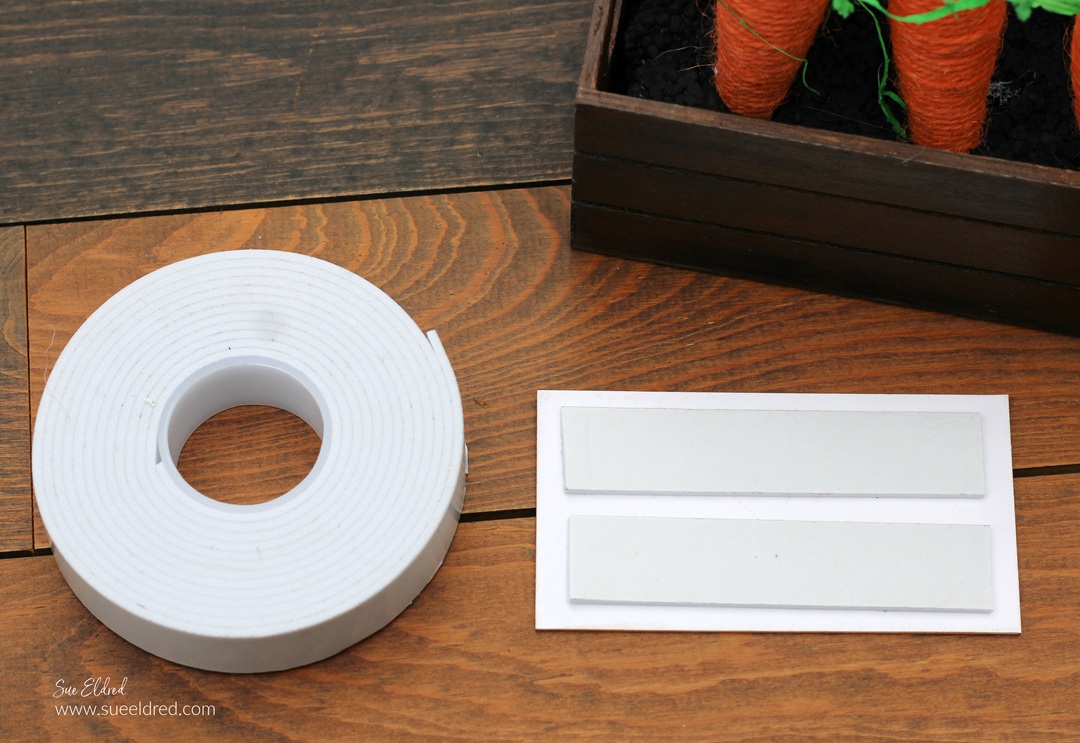
  • Add a couple strips of double-sided foam tape* to the back of the matboard.  
  • Adhere here it to the front of the mini crate.

This little U-Pick Carrot Patch is perfect for displaying on a mantel,

on styled shelves, or in a tiered tray.  There are so many ways to style it!

“This is a sponsored post.  As a member of the StyleTechCraft Design Team I have been provided product and compensation in exchange for my creative ideas.  The views and opinions are my own.

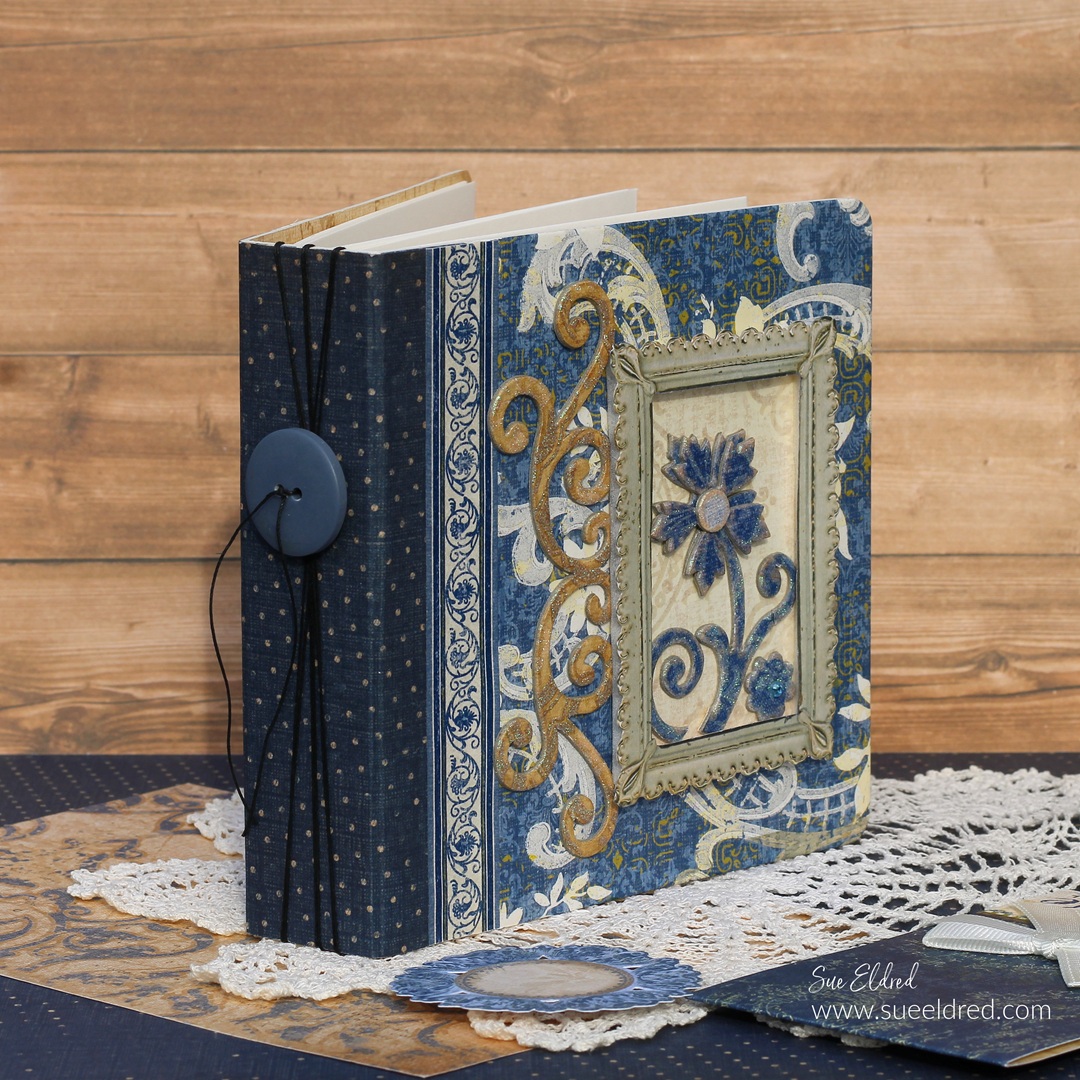
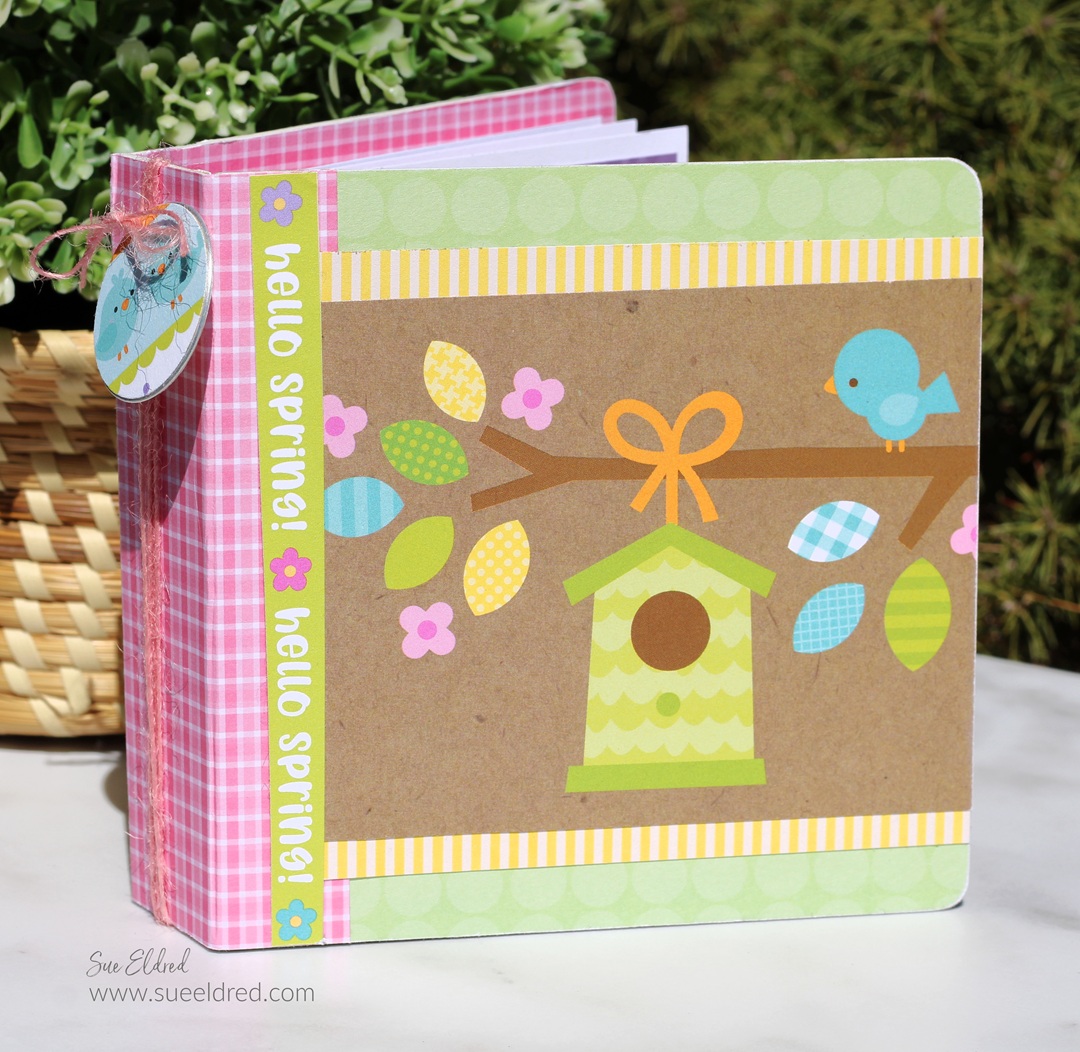
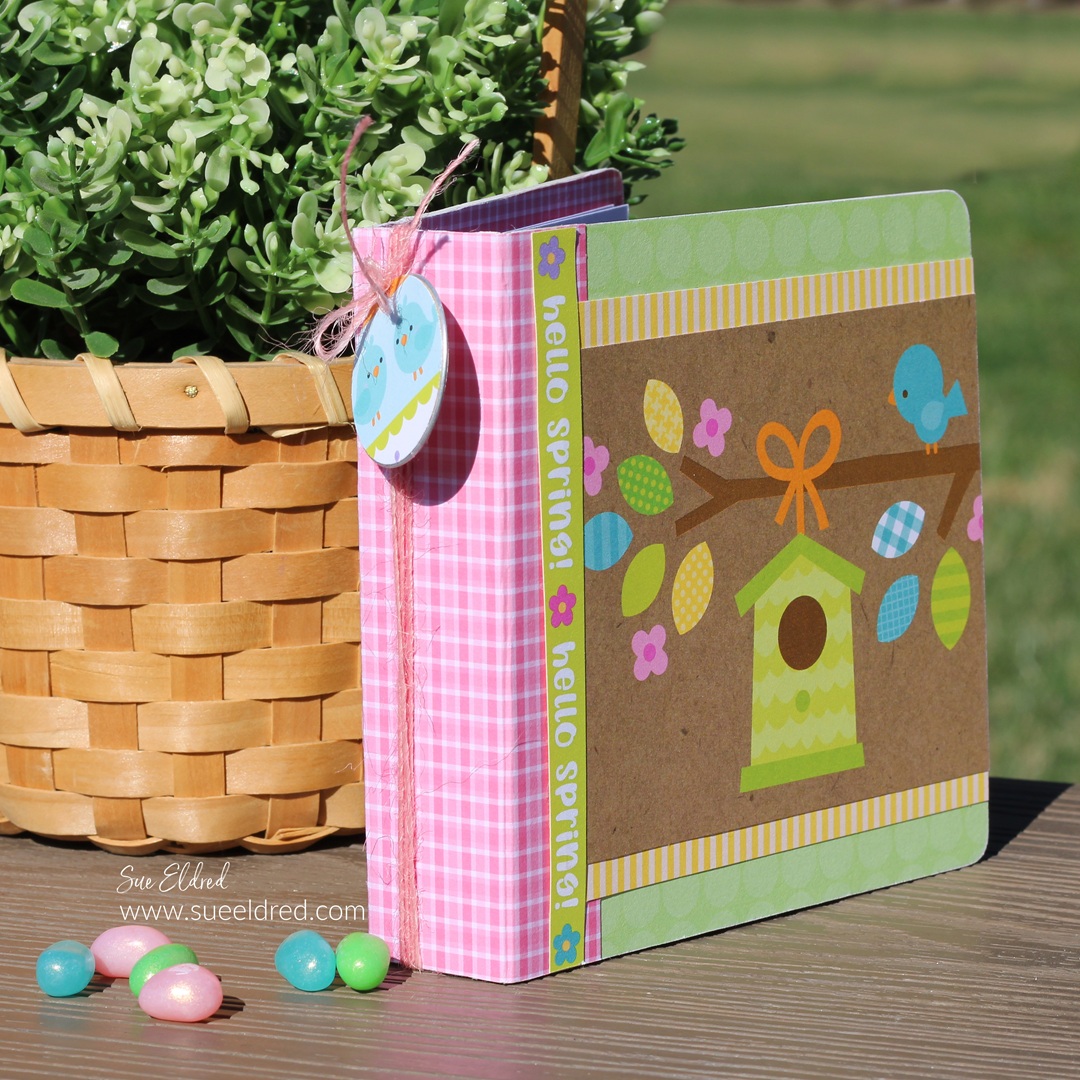
Spring Mini Album (Scrapping My Stash)

Scrapping My Stash

Do you have an enormous amount of saved paper scraps?

Do you have a problem throwing them away?

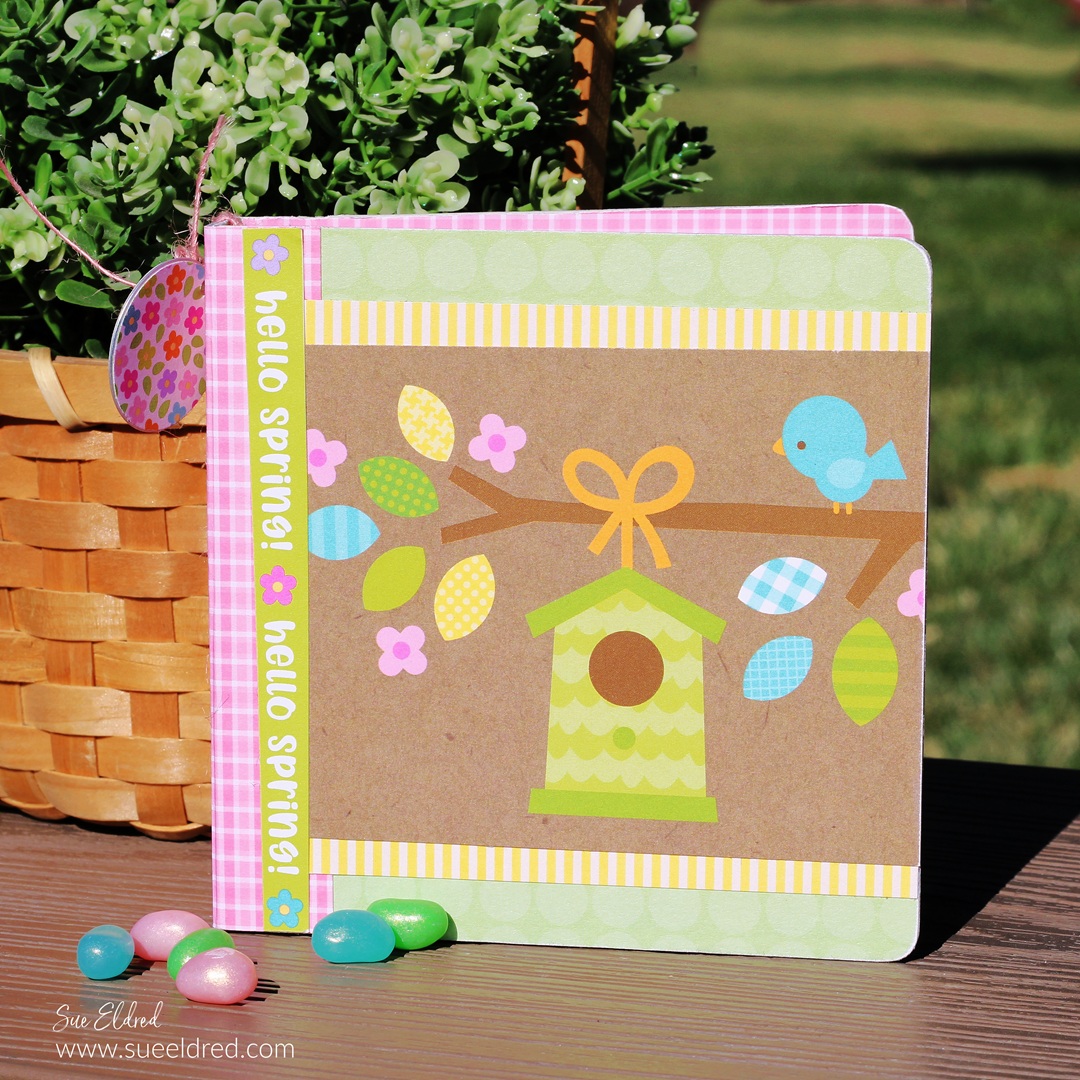
If you do, you may enjoy my Spring Mini Album.

It’s part junk journal and part bits and pieces.

During March Madness Basketball this past weekend,

I took the opportunity to play around in my studio.

The inspiration was a bag of paper scraps from the many

Spring Paper Collections I’ve saved.

With the excessive amount of paper I’ve collected and hoarded

over the years, I’m trying to use what I have.

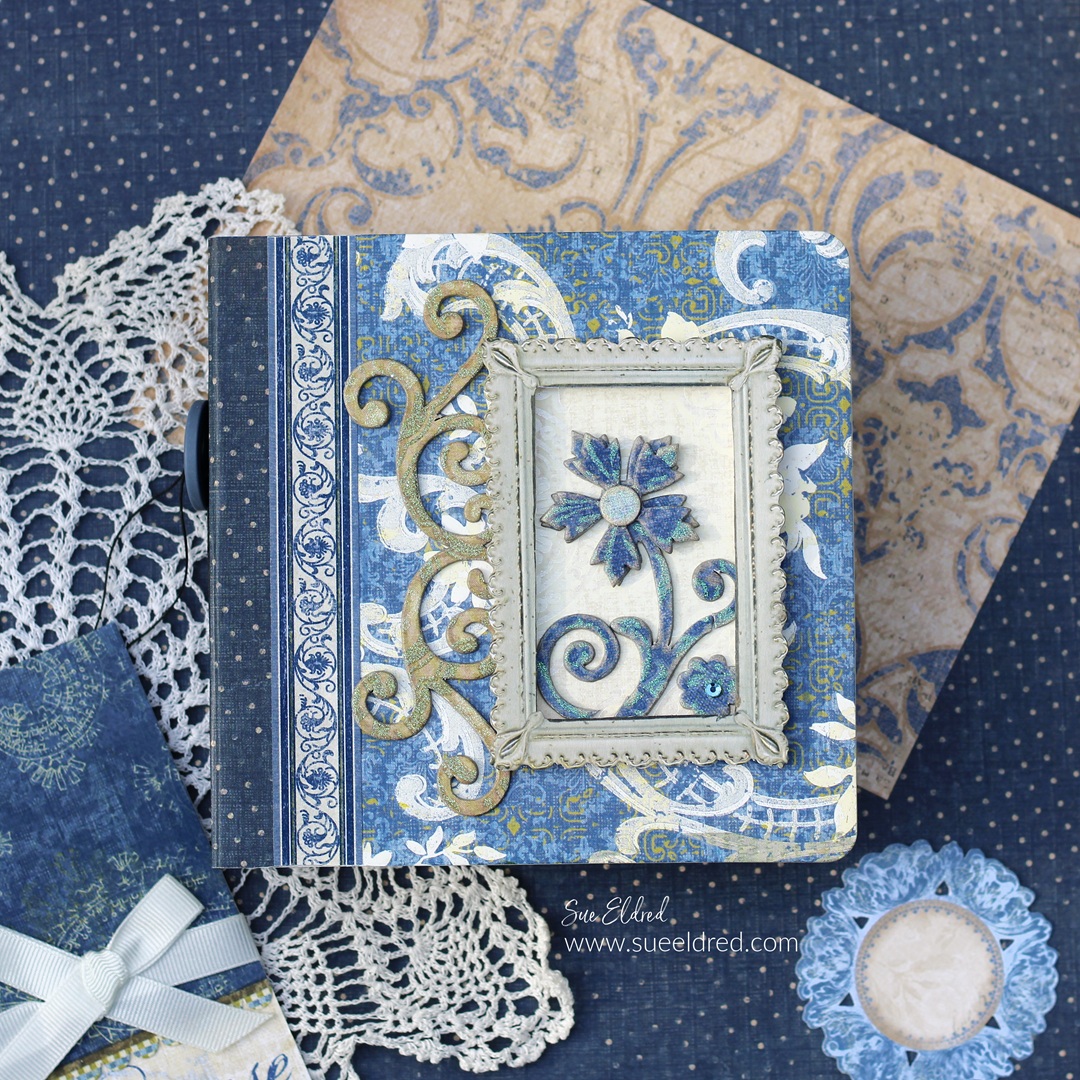
The Spring Mini Album measures 5″ x 5″ and uses the

Sizzix Mini Album by Eileen Hull*.

*Disclosure:  This blog uses ads and affiliate links.  If you choose to make a purchase using one of the links, I receive a small commission (at no additional cost to you) that helps offset the costs of maintaining this blog.  Thanks for your support!

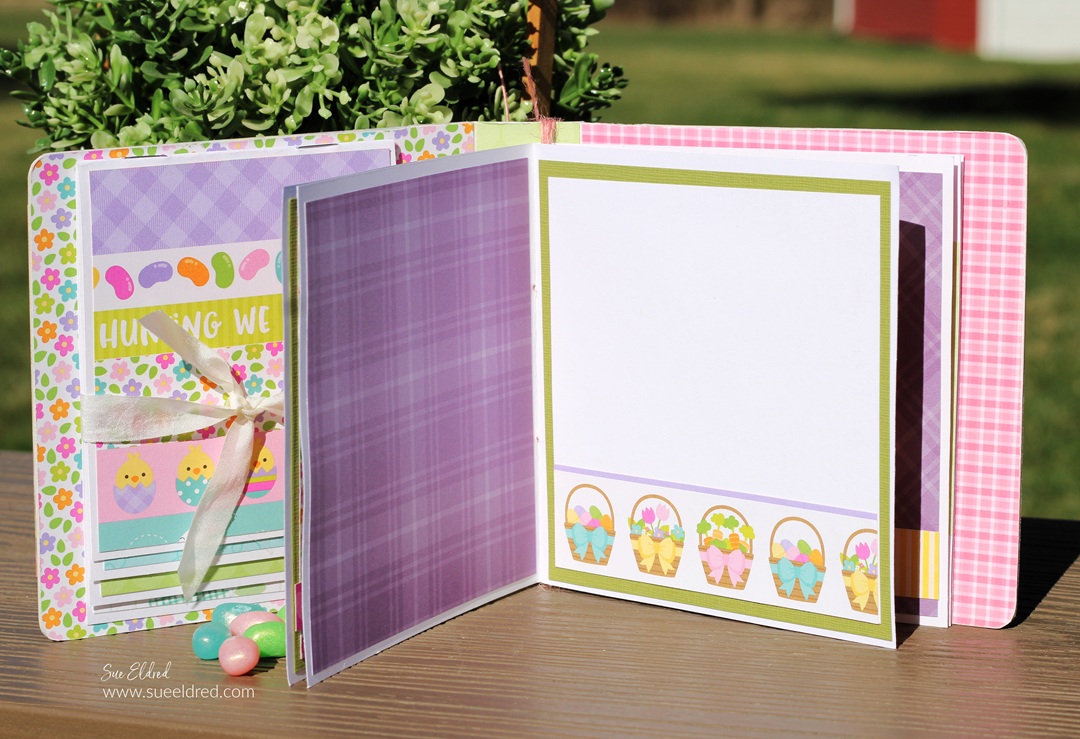
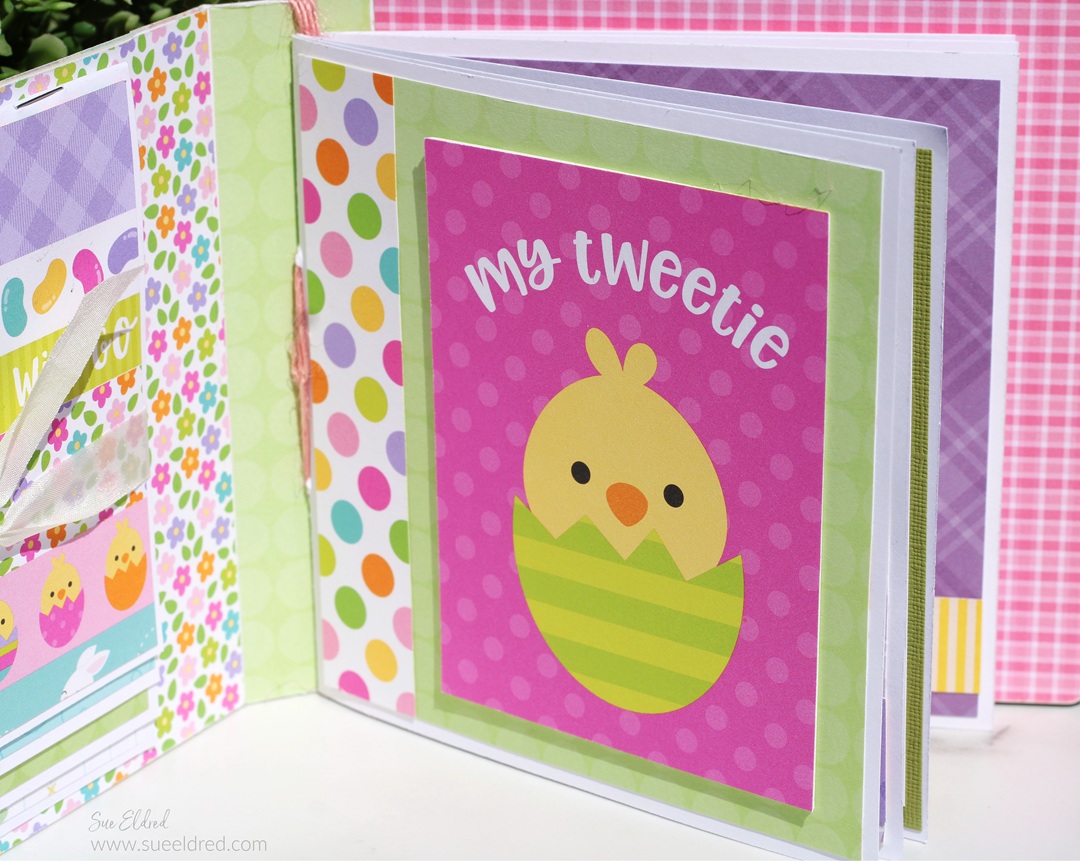
Inside the album, I created a “signature book” that I stitched

together using thin pink twine. I added it to the album by

wrapping the twine several times around the spine.

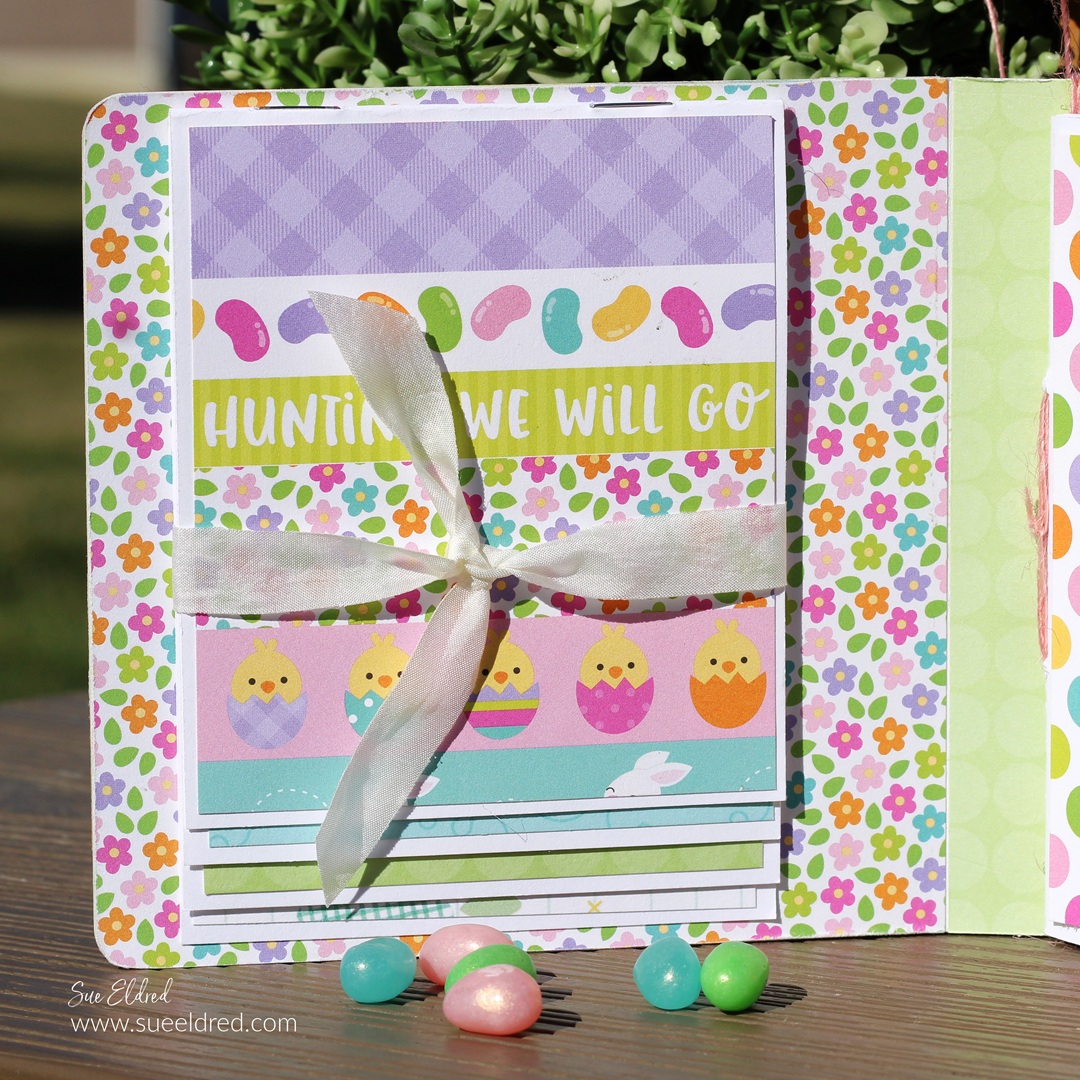
On the other side of the album,

I made a small waterfall album tied with a cream ribbon.

I made a small embellishment using a metal ring tag* and circles

cut from the scrapbook paper and attached it to the spine.

Eileen Hull Educator Logo

Disclosure:  This is a sponsored post.  As a member of the Eileen Hull Inspiration Team, I have been provided product in exchange for my creative ideas.  The view and opinions are my own.

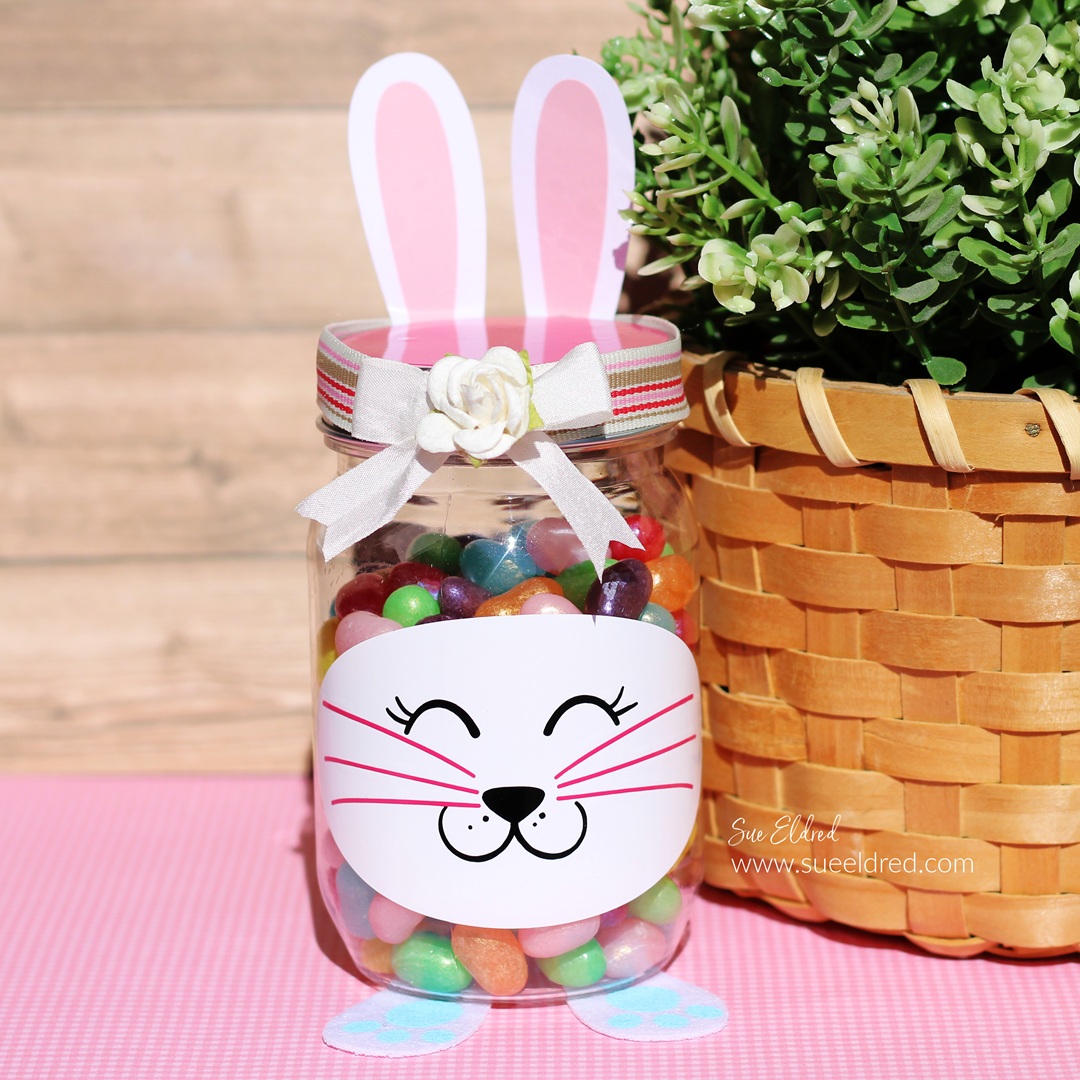
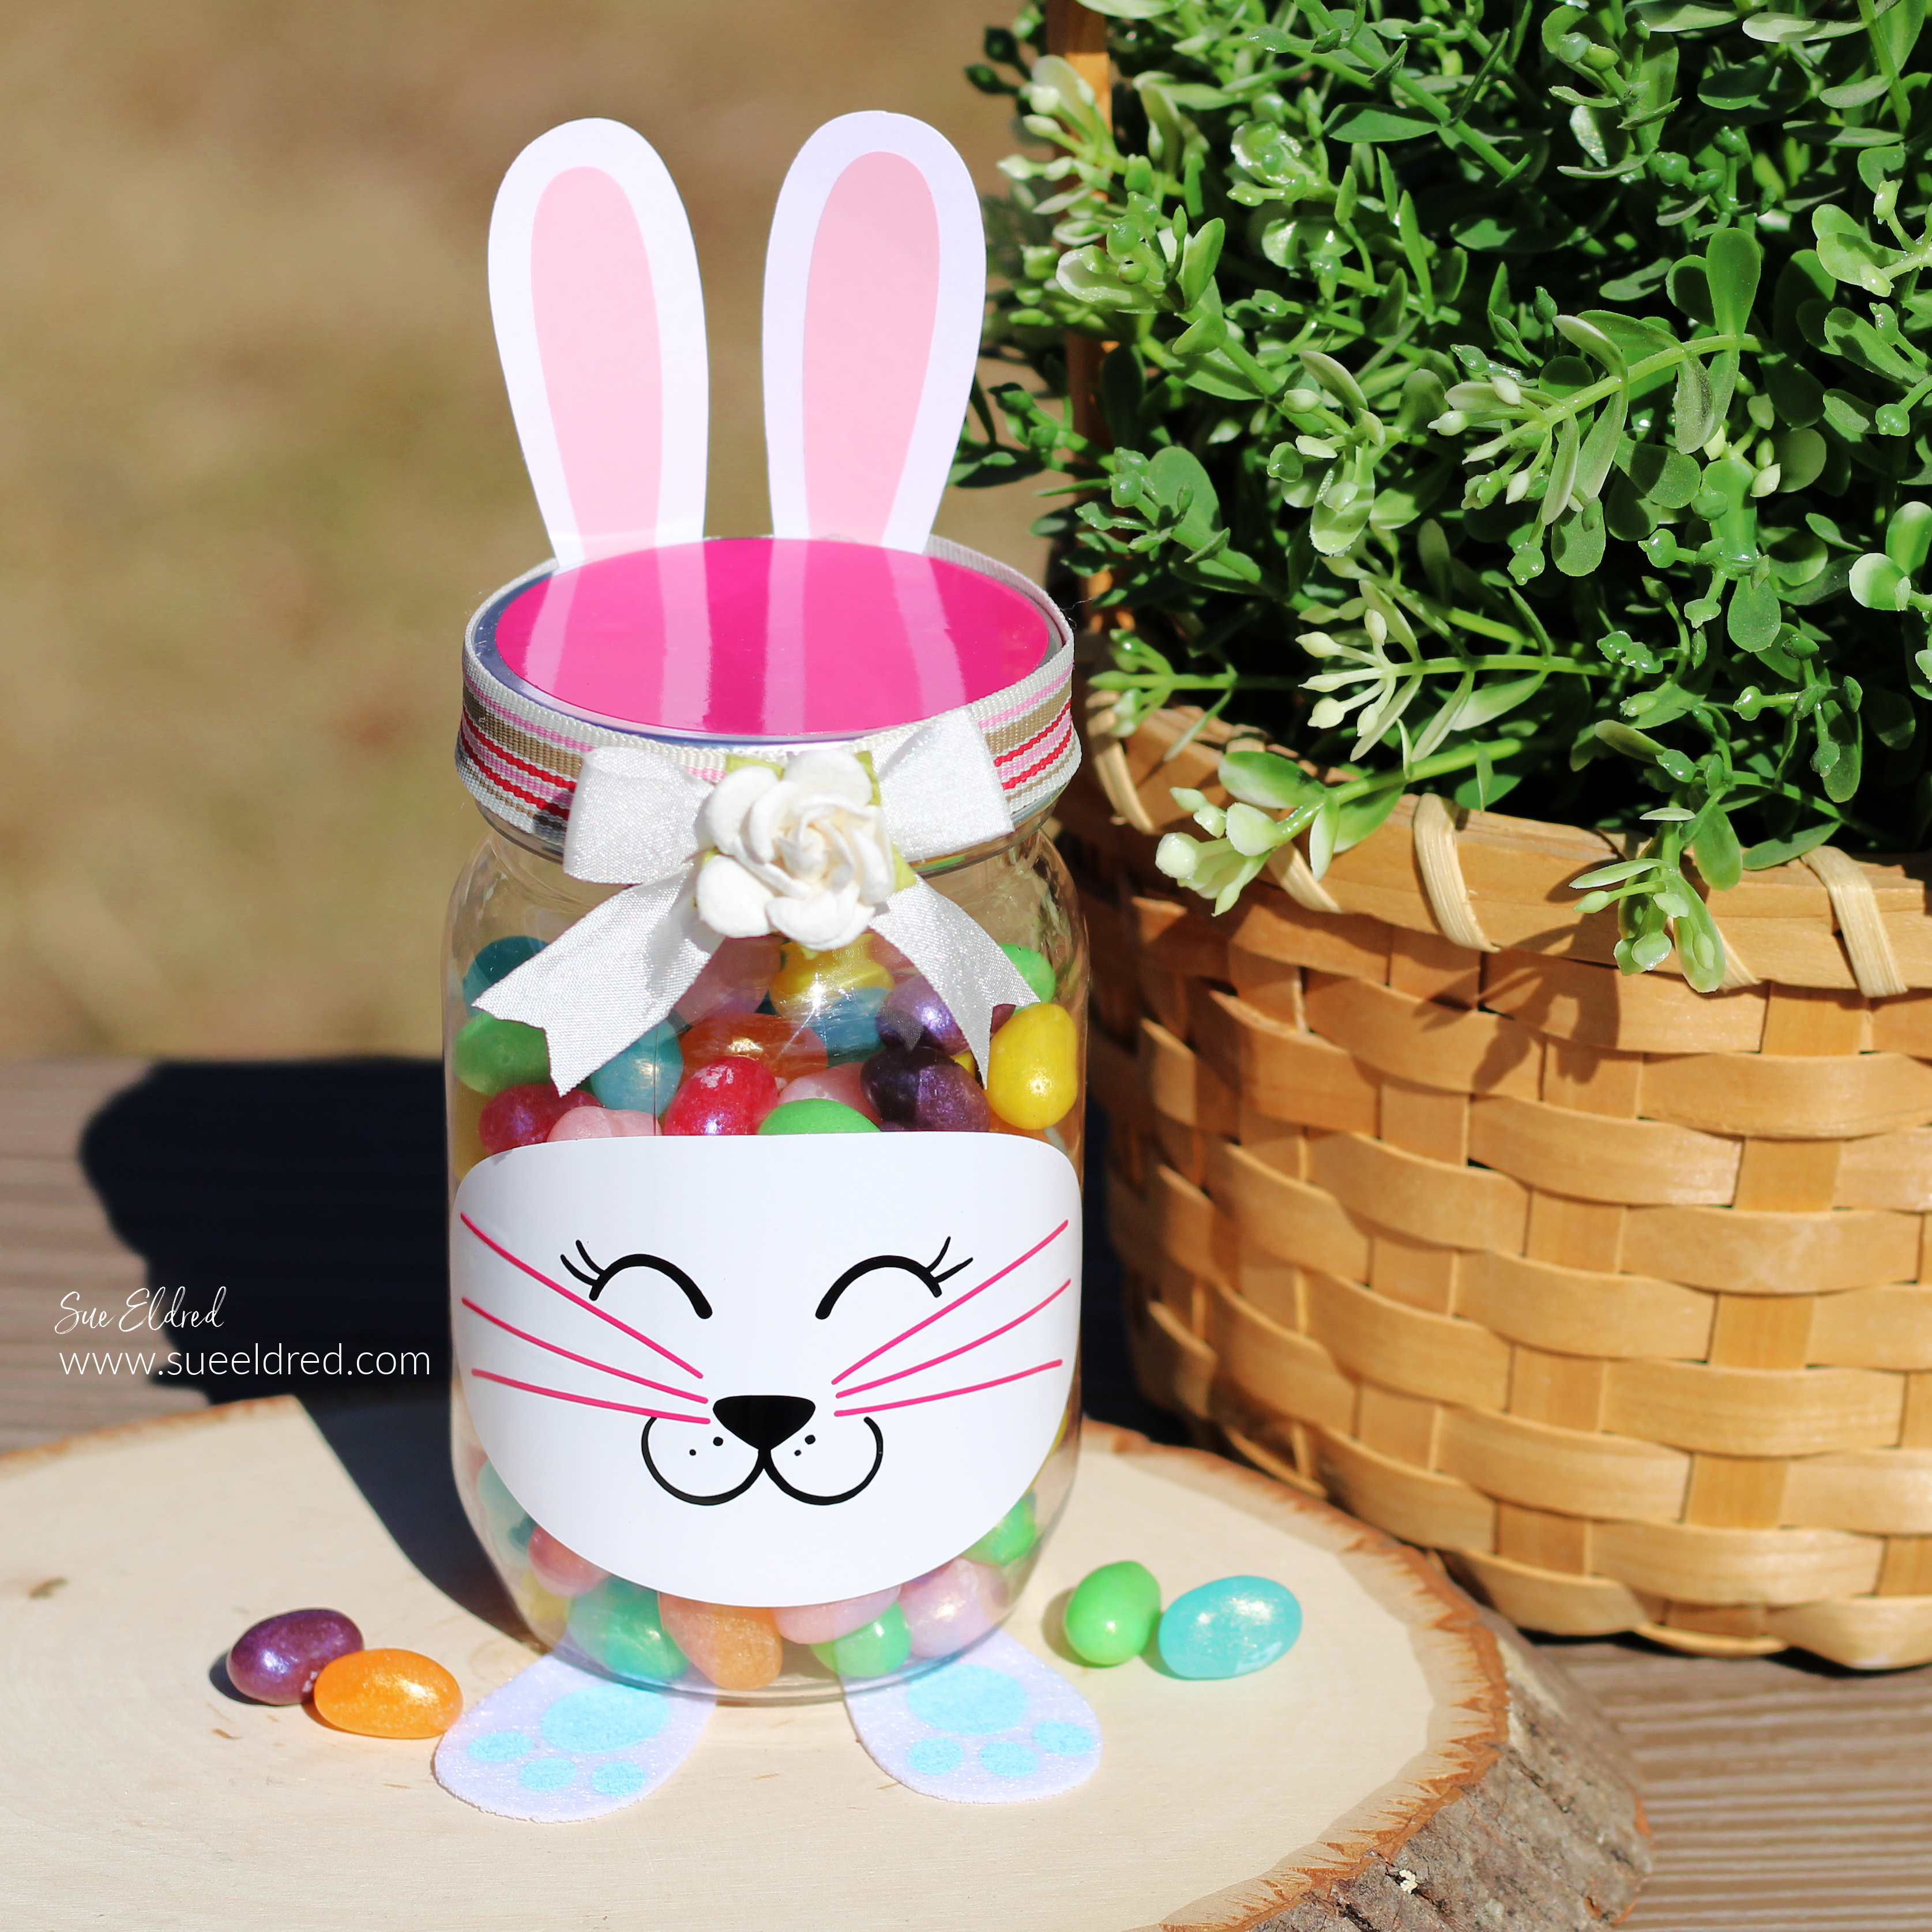
Cute DIY Bunny Treat Container

How to make a Cute Bunny Treat Container

With Spring and Easter around the corner, it’s time to start all things bunnies.

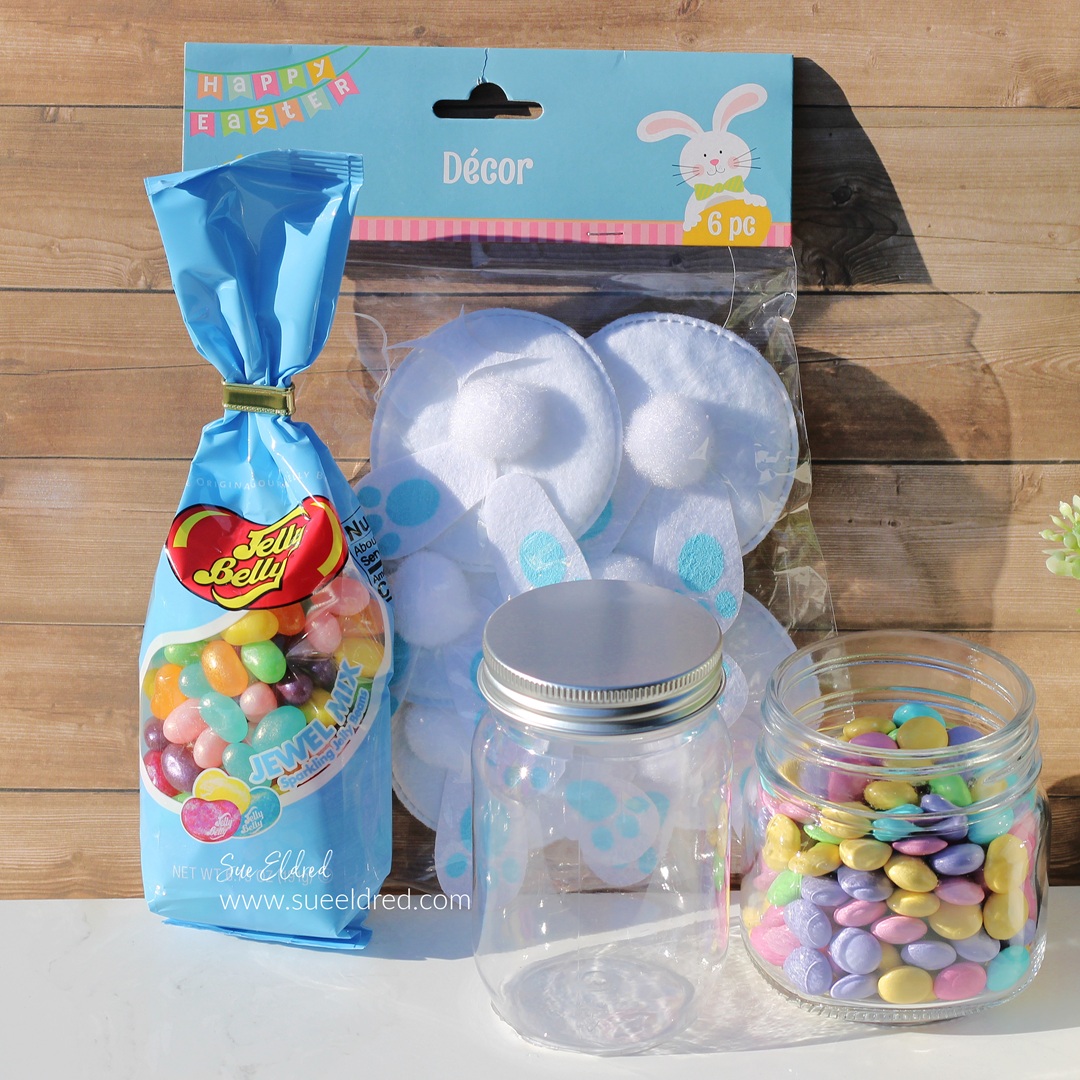
The Bunny Treat Container is a fun Dollar Tree* and StyletechCraft* Spring DIY.

When I stopped at Dollar Tree the other day to pick up a

Clear Plastic Craft Jar* to make an Easter Bunny Treat Container,

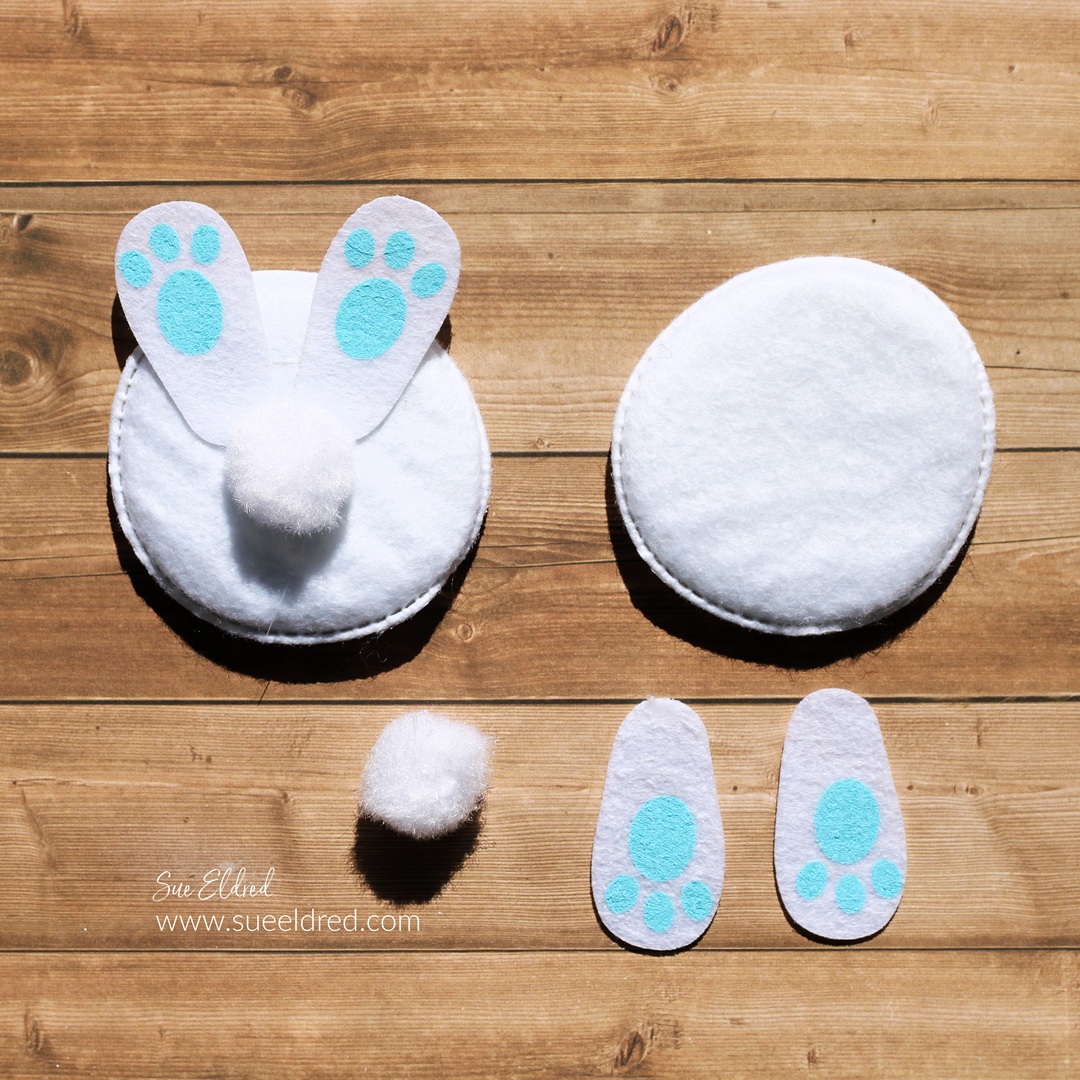
I saw these cute bunny backside embellishments.  

(I’m not sure what the correct description would be.)

I knew they would be great for my little Easter Bunny.

Extreme Values Everyday at Dollar Tree – Shop Now!

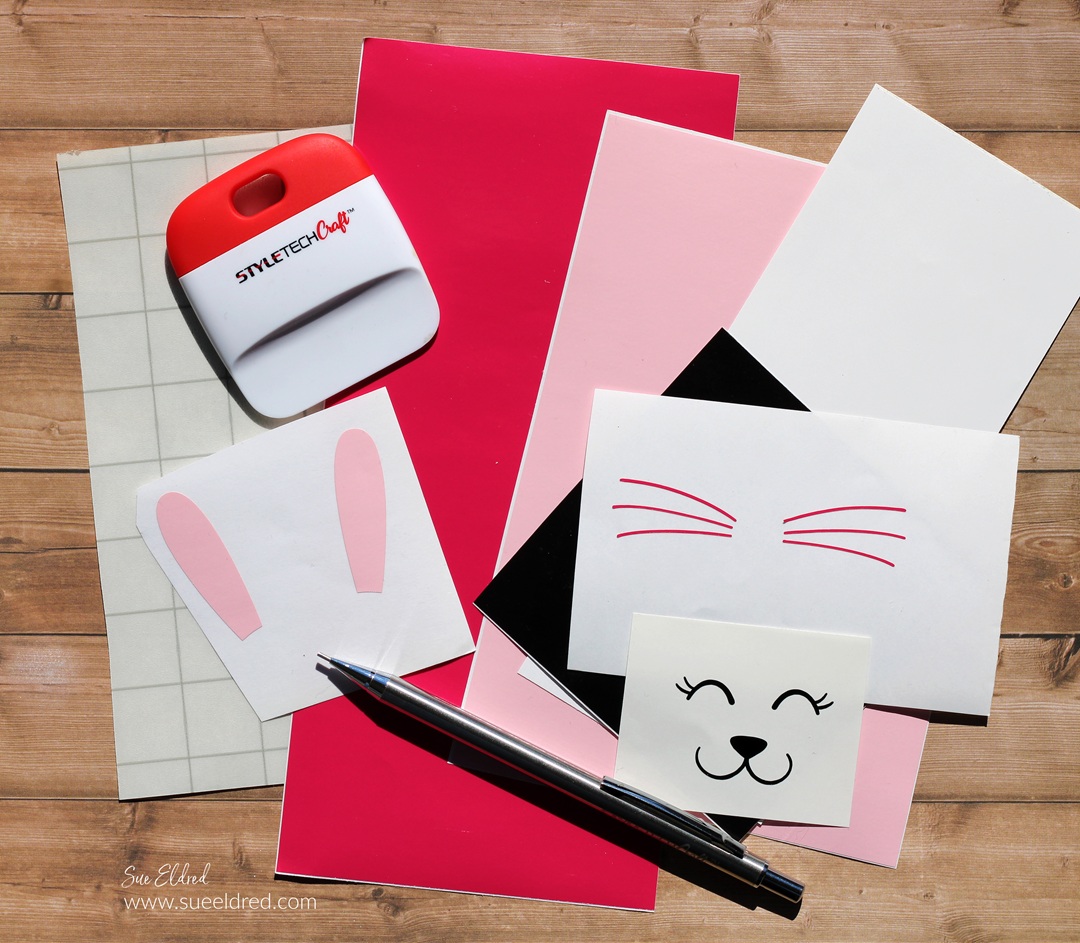
Materials Used:    (*affiliate links)

StyletechCraft products brought to you by ATSM Craft*

*Disclosure:  This blog uses ads and affiliate links.  If you choose to make a purchase using one of the links, I receive a small commission (at no additional cost to you) that helps offset the costs of maintaining this blog.  Thanks for your support!

“This is a sponsored post.  As a member of the StyleTechCraft Design Team I have been provided product and compensation in exchange for my creative ideas.  The views and opinions are my own.
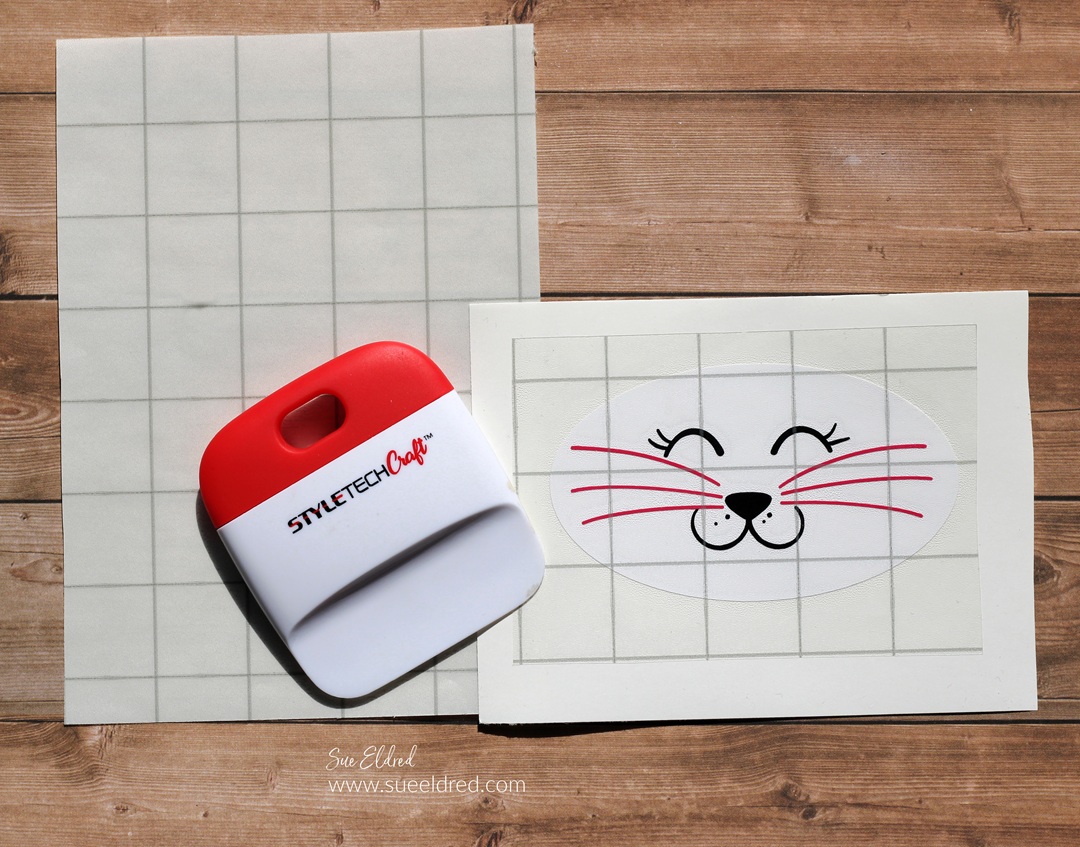
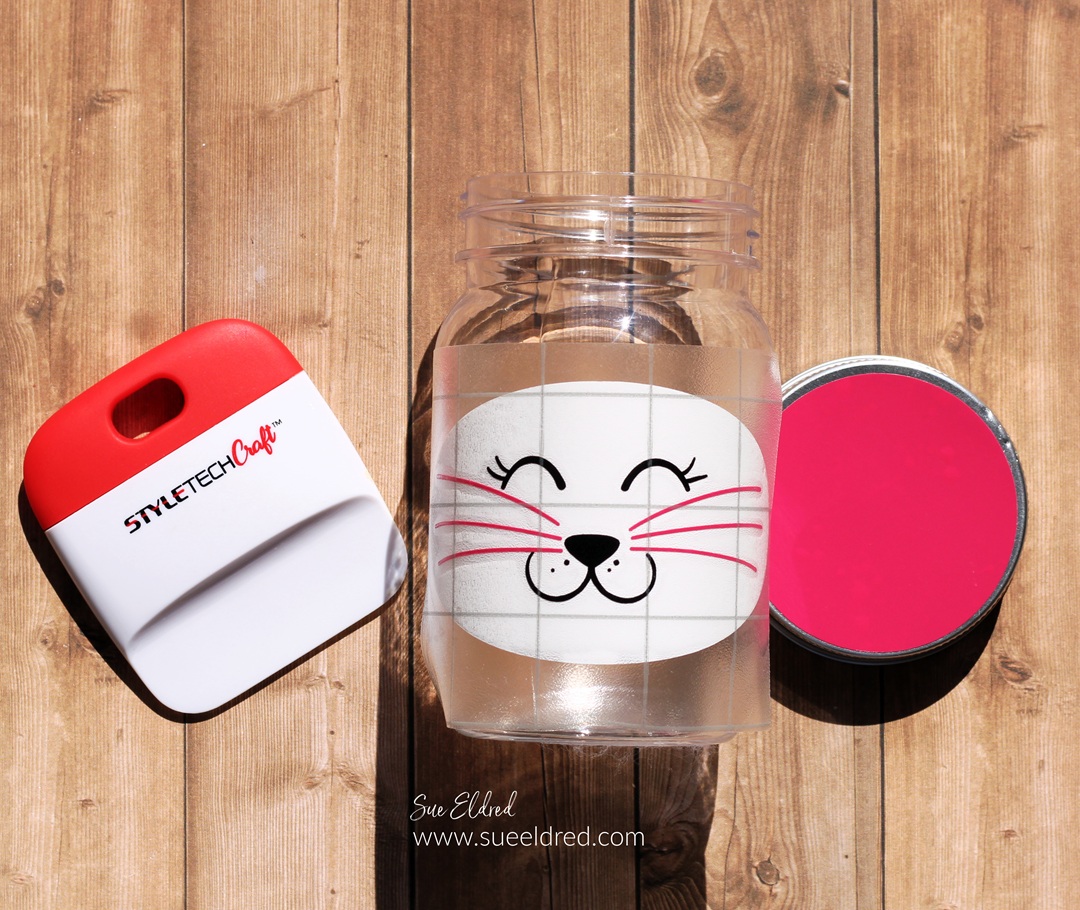
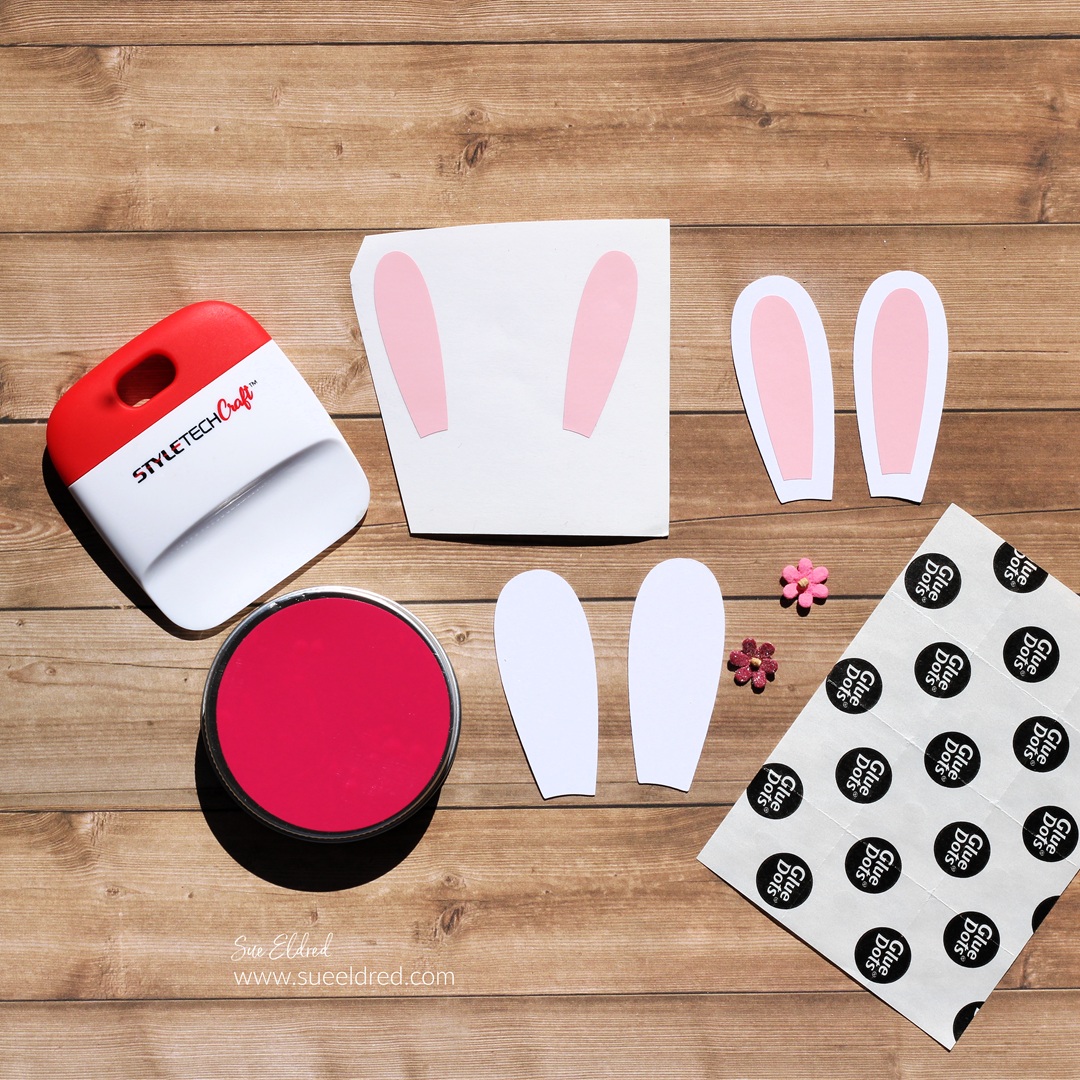
  • Cut a pink circle and bunny ears for the top of the jar.  (The ears for the bunny came with the Bunny Face SVG file.) I used white cardstock for the bunny ears and pink vinyl for the inside.  You could also use felt to create the bunny ears. 
  • Adhere the bunny ears to the lid with Glue Dots* or hot glue.

  • Disassemble the “bunny backside” embellishment.
  • Adhere the feet under the front of the jar.

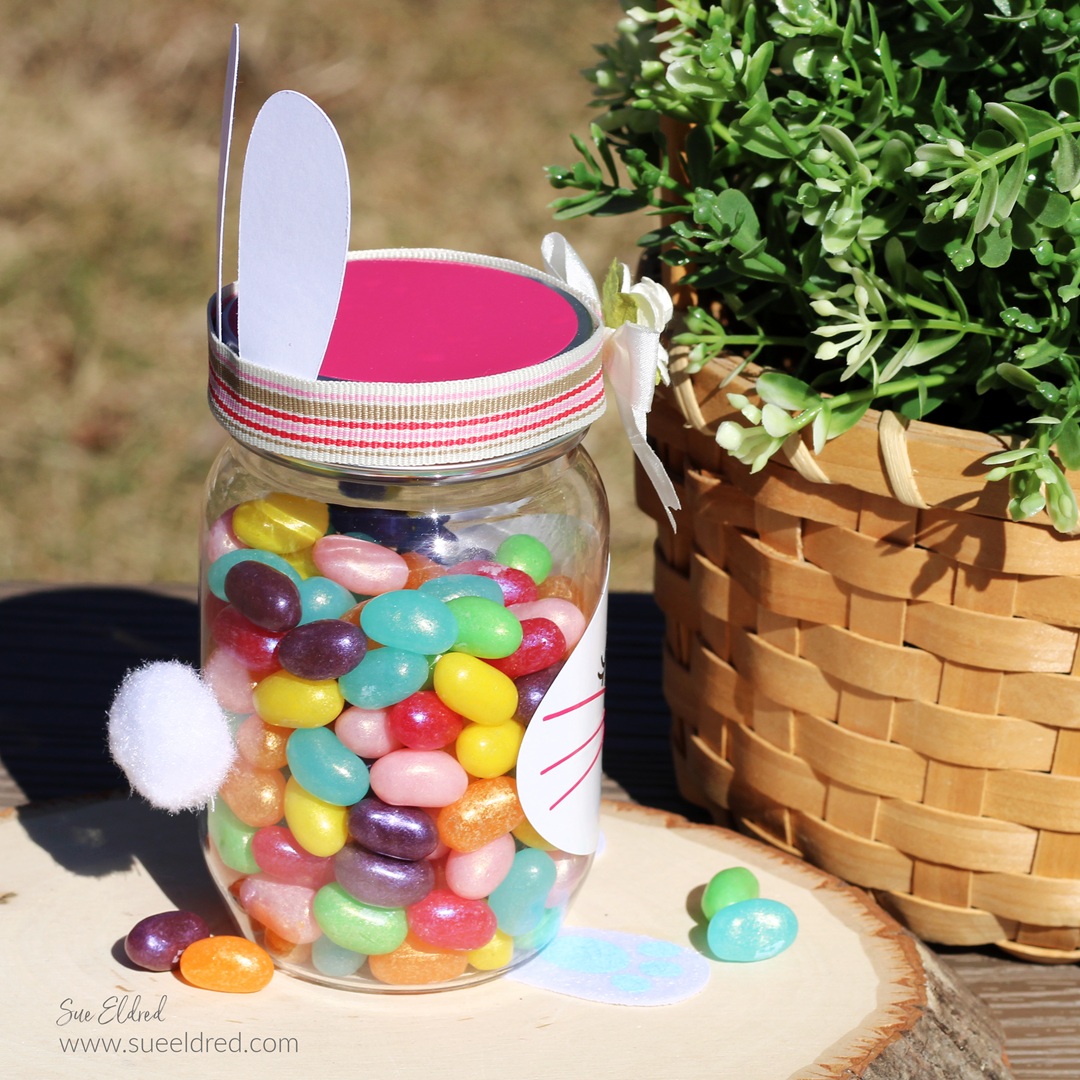
  • Use Glue Dots* to adhere the tail to the back of the jar.

  • Add a ribbon around the top of the lid. 
  • Use Glue Dots* under the ribbon to keep it from slipping.  
  • Glue a small bow and flower embellishment to the front of the lid.  
  • Fill the jar with Spring Jellybeans* or Spring M & M’s*.  (Or your favorite treat.)

Celebrating You

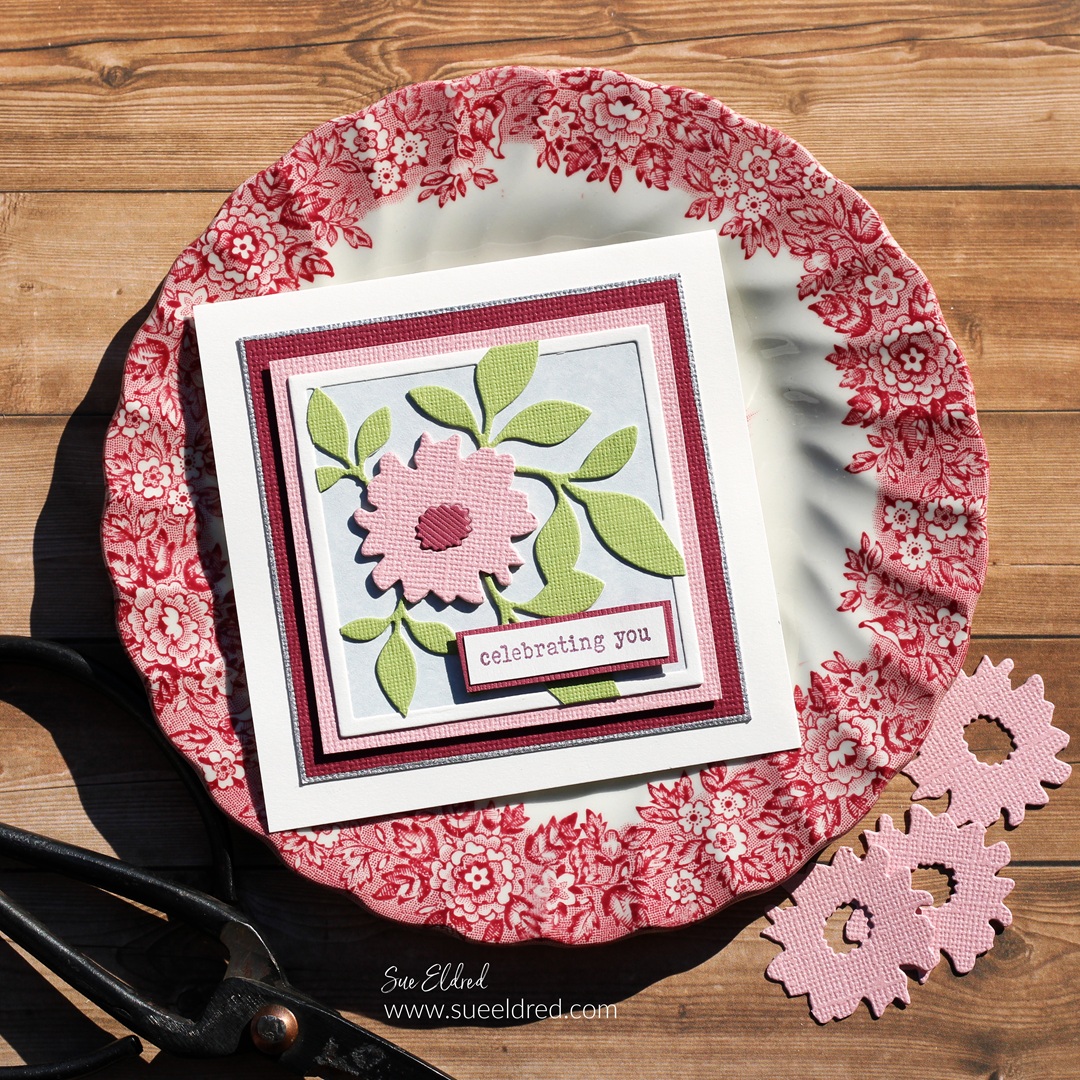
How to make a Celebrating You Gift Card.

I love it when I can use a tool or die set in several different ways.

I think the Sizzix Floral Pockets & Paperclips Die Set by Eileen Hull* is one of those.

And I haven’t even made everything you can make with this set.

Eileen Hull Educator Logo

Disclosure:  This is a sponsored post.  As a member of the Eileen Hull Inspiration Team, I have been provided product in exchange for my creative ideas.  The view and opinions are my own.

Materials Used: (*affiliate links)

*Disclosure:  This blog uses ads and affiliate links.  If you choose to make a purchase using one of the links, I receive a small commission (at no additional cost to you) that helps offset the costs of maintaining this blog.  Thanks for your support!

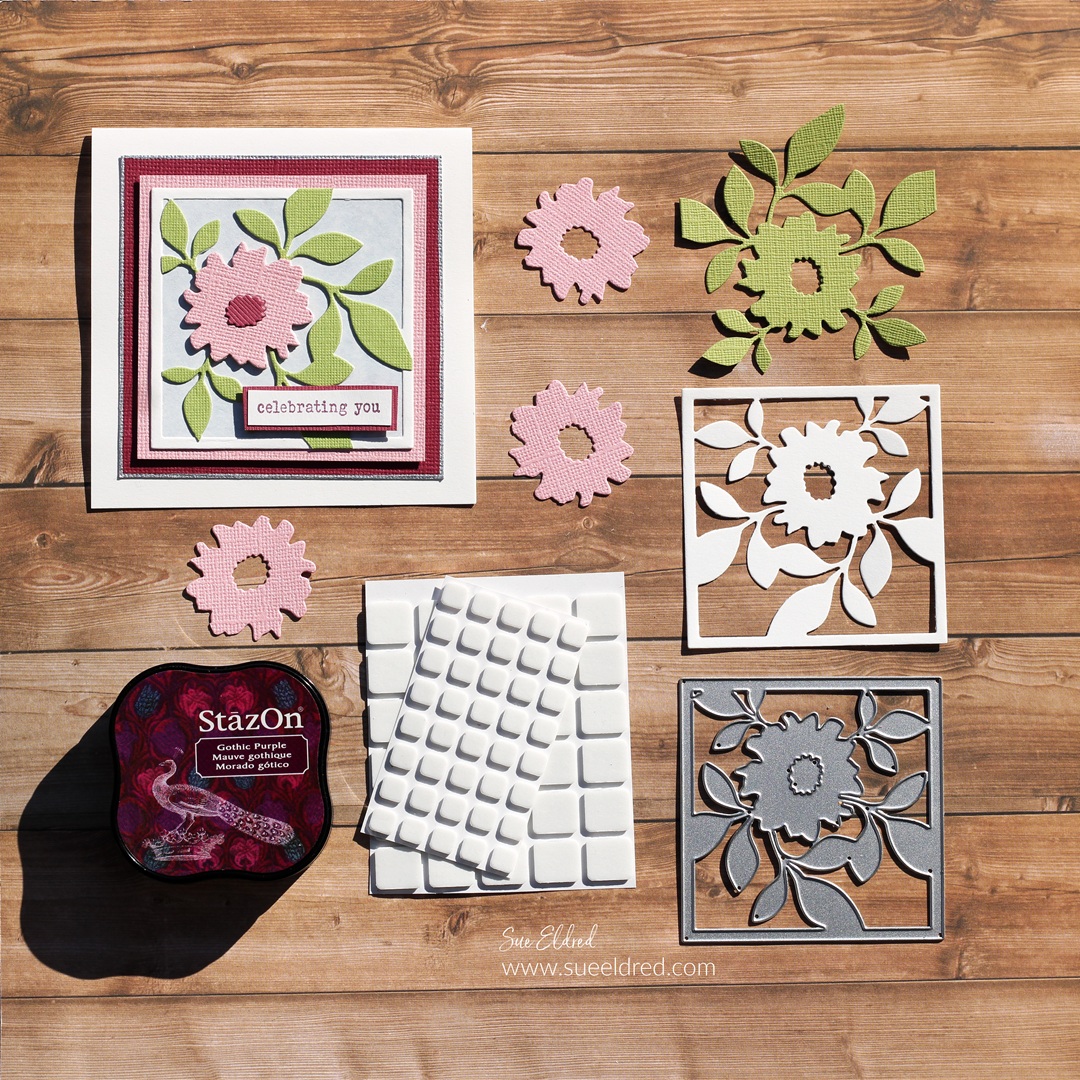
I used the Floral Square Die included in the set and die-cut it several times.

  • I die-cut it once using cream cardstock for the cream frame. 
  • I adhered a small piece of blue parchment cardstock to the back of the cream floral base.
  • I die-cut it using green cardstock and cut off the outside edges that make the frame.  I glued the green layer onto the cream layer.  
  • For added dimension, I cut three flowers out of pink cardstock.  I glued all three flowers together and then glued them onto the green flower.  
  • I used maroon cardstock to die-cut three centers for the inside of the flower.  

  • I adhered the floral die-cut onto a pink cardstock layer.  I added foam mounting squares to the back of the pink layer to give the card added dimension.
  • I used a Silver Calligraphy Paint Pen* to draw a silver edge onto the maroon cardstock layer. 
  • I stamped the words “celebrating you” (from the Fan Favorites Stamp Set*) onto a small piece of cream cardstock and gave it a simple layer.  I added Foam Mounting Squares* to the back of the word layer and added to the front of the card.  

For another quick project, I made a Four Seasons Gift Card Set.

The 10-piece die set* also includes dies to make pockets, tags,

birds, paper clips, labels, notes, and lists.  It’s a very versatile die set.

Create a Custom Stencil using Removable Vinyl

How to Create a Custom Stencil using Removable Vinyl.

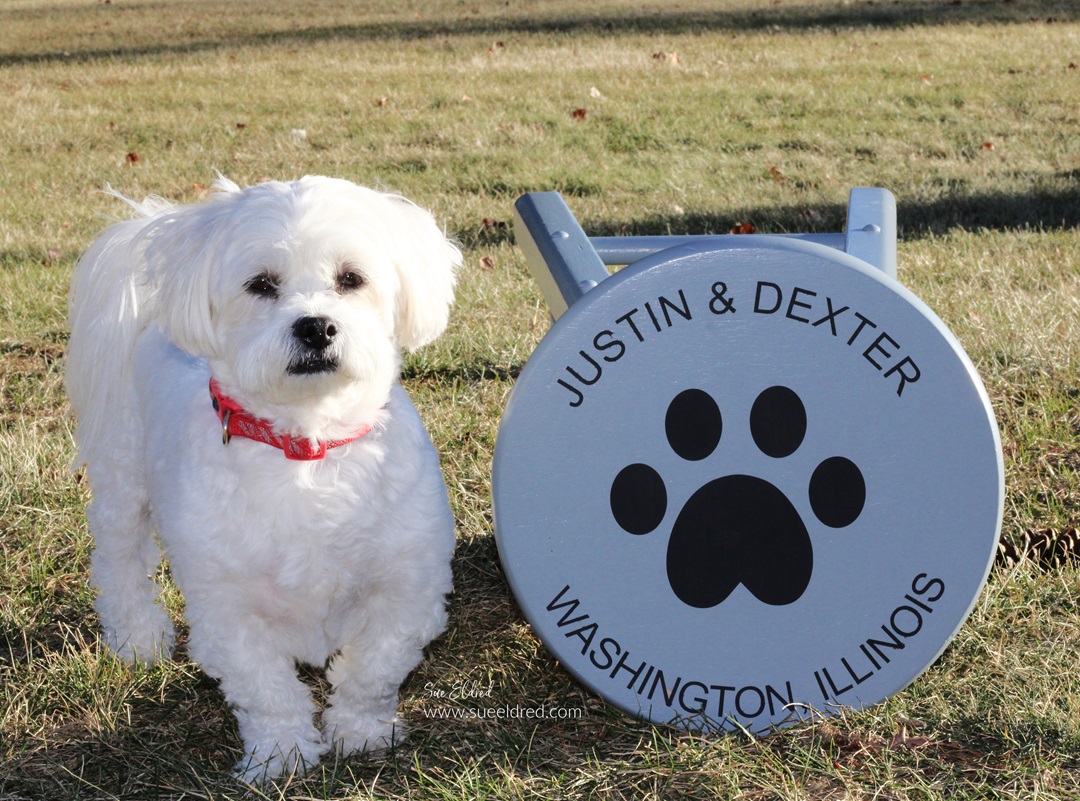
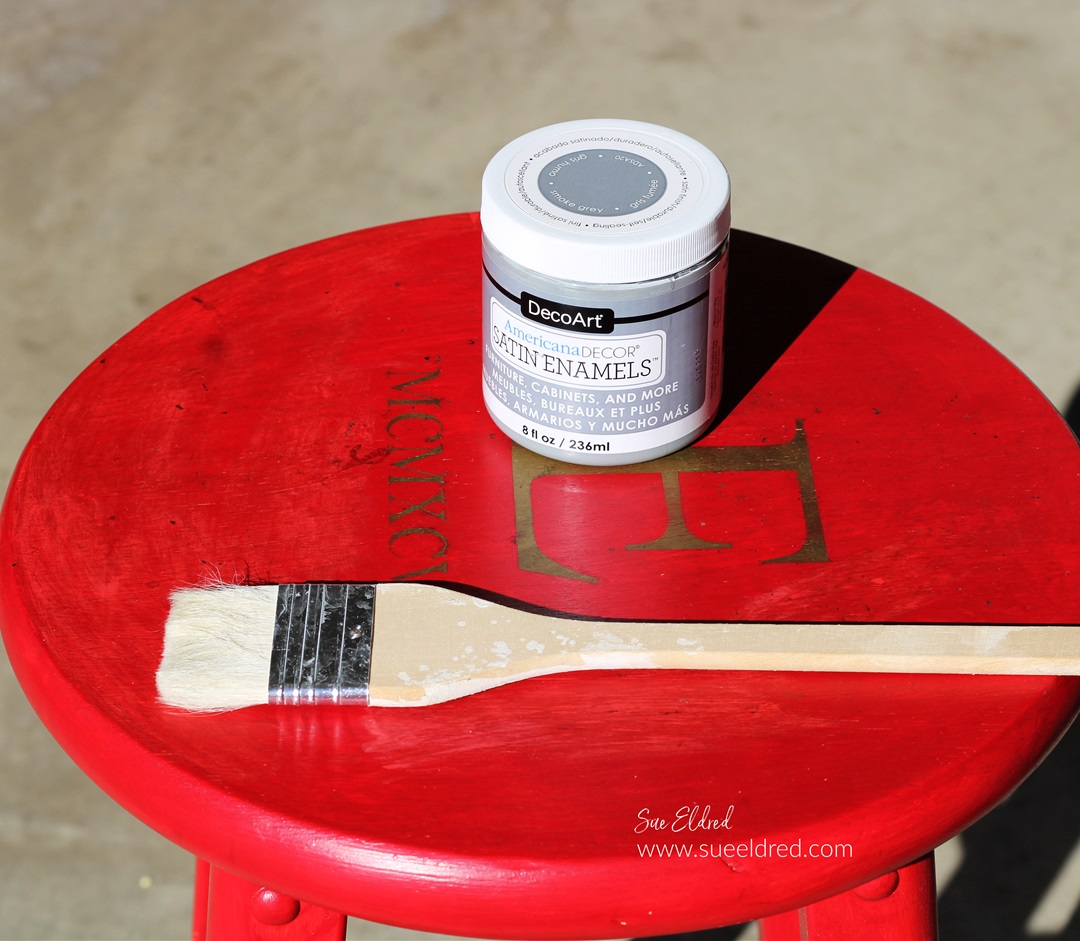
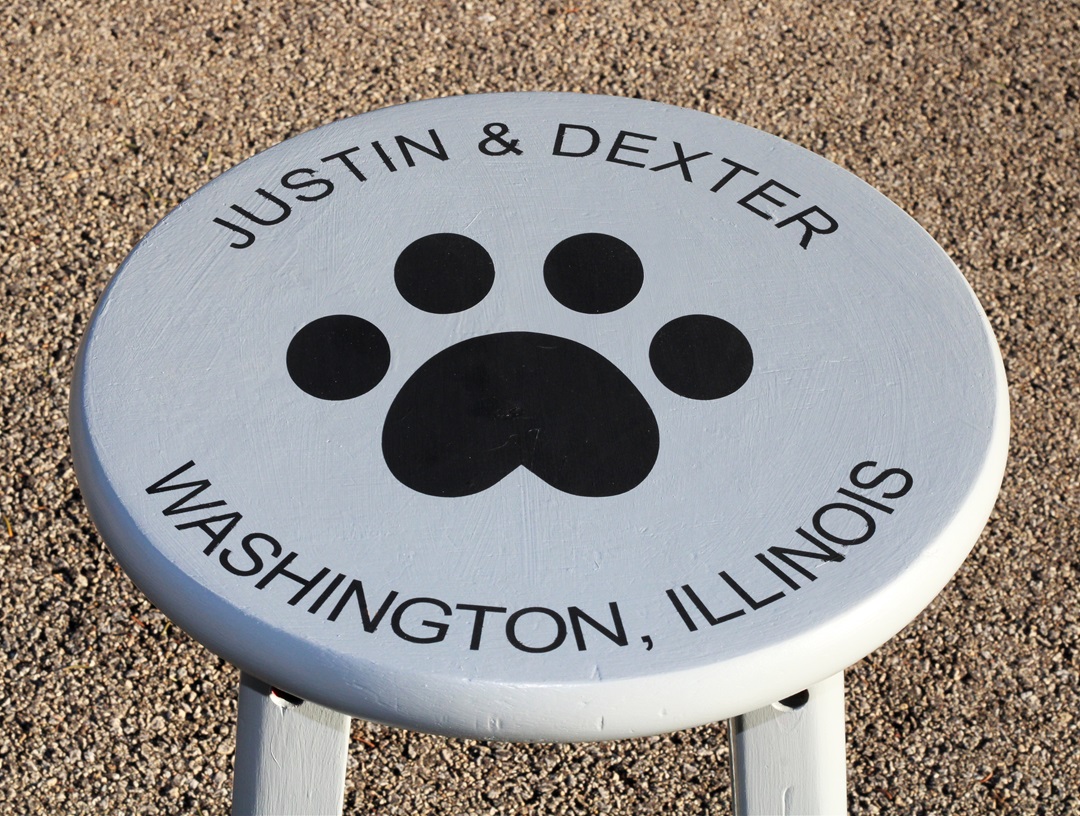
My son Justin asked me recently to help him personalize

an old stool in his room.  It really is fairly simple to do.  

If you have Removable Craft Vinyl* and an Electronic Die-Cutting Machine*,

then you can make a stencil too.

“This is a sponsored post.  As a member of the StyleTechCraft Design Team I have been provided product and compensation in exchange for my creative ideas.  The views and opinions are my own.

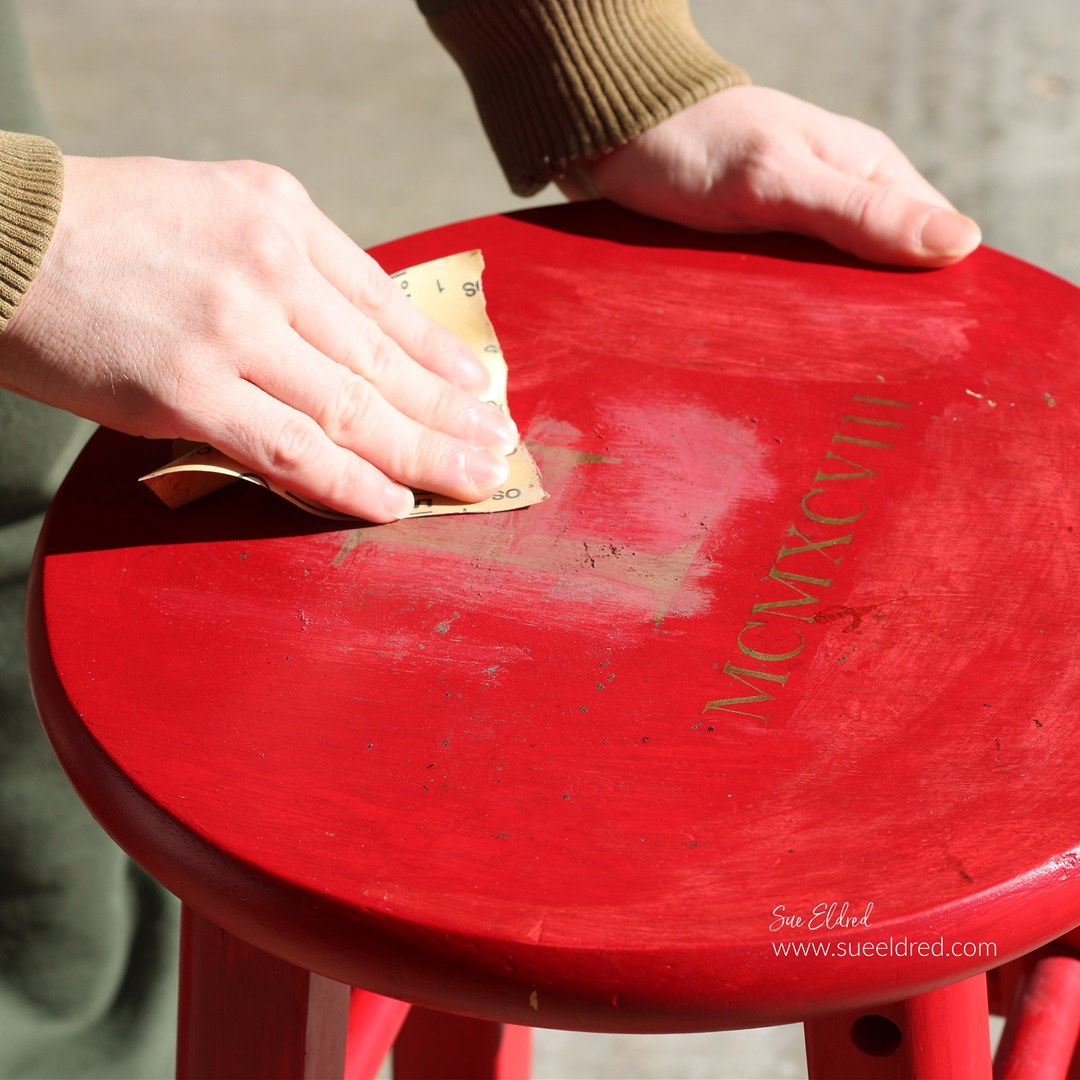
Here’s how we made over Justin’s Stenciled Stool.

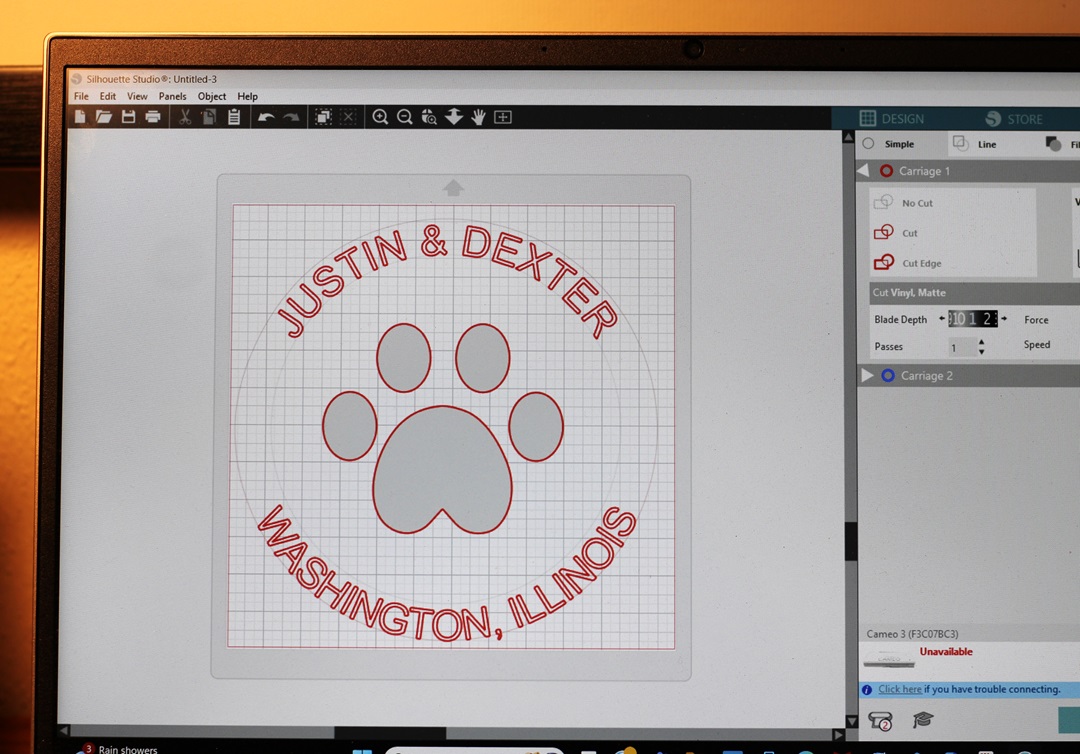
  • I used a Silhouette Cameo Electronic Die-Cutting Machine* to create my design.
  • To make the letters curve you will need to follow a few steps. 
  • Draw a circle shape with the shape tool menu.
  • Use the text tool to type your words.
  • Double-click the text until the green box pops up.
  • Grab the small circle with the crosshairs and drag it to the part of the shape where you want the text to contour to.
  • Adjust the text until it’s just right.
  • Cut your design using REMOVABLE VINYL*.  
  • Your design will be a one-use stencil.  It’s important to use removable vinyl* so it doesn’t stick to the surface you are working on.  
  • I love using StyleTechCraft Removable Vinyl*.

StyletechCraft products brought to you by ATSM Craft*

*Disclosure:  This blog uses ads and affiliate links.  If you choose to make a purchase using one of the links, I receive a small commission (at no additional cost to you) that helps offset the costs of maintaining this blog.  Thanks for your support!

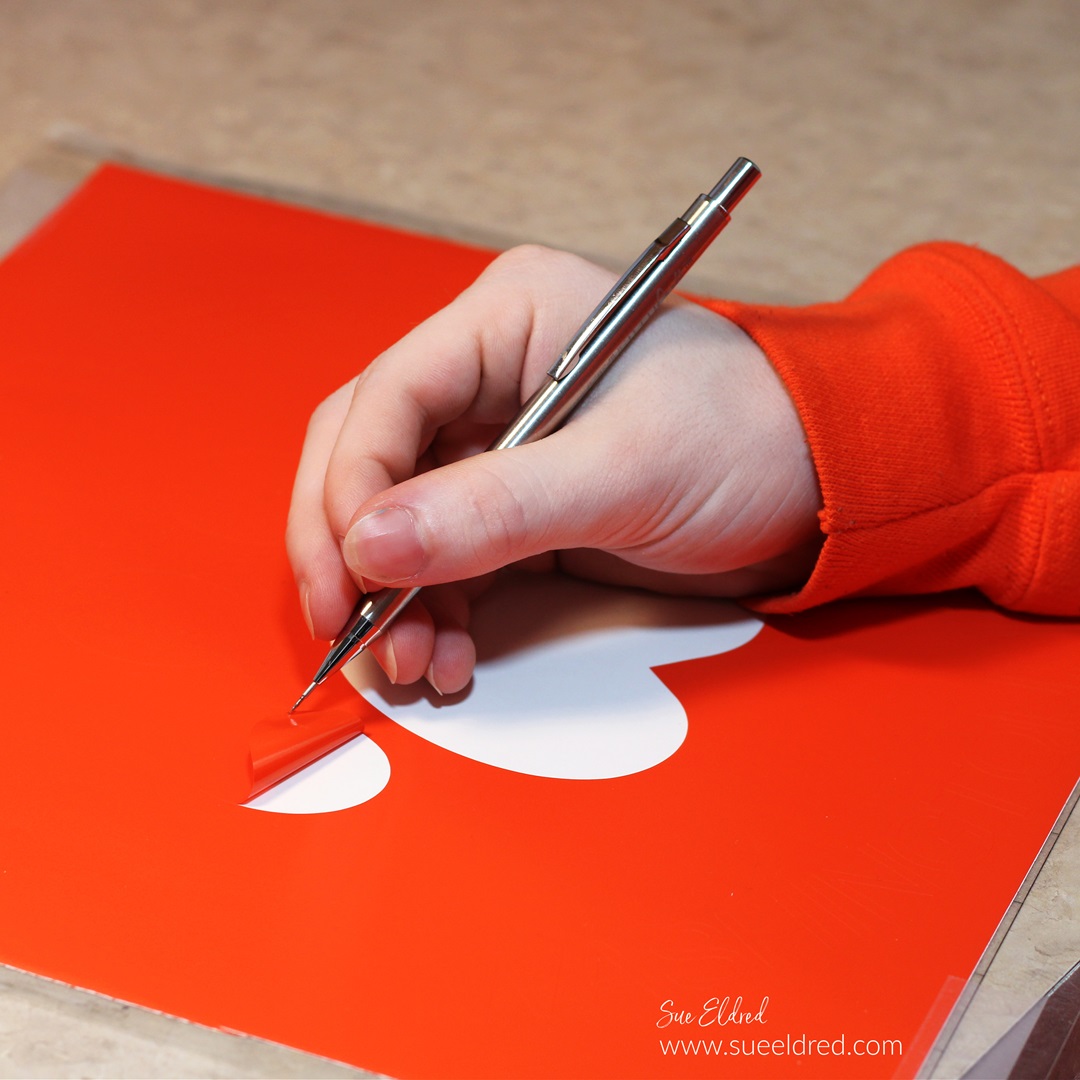
  • Remove the vinyl using a StyleTechCraft Weeding Tool*.
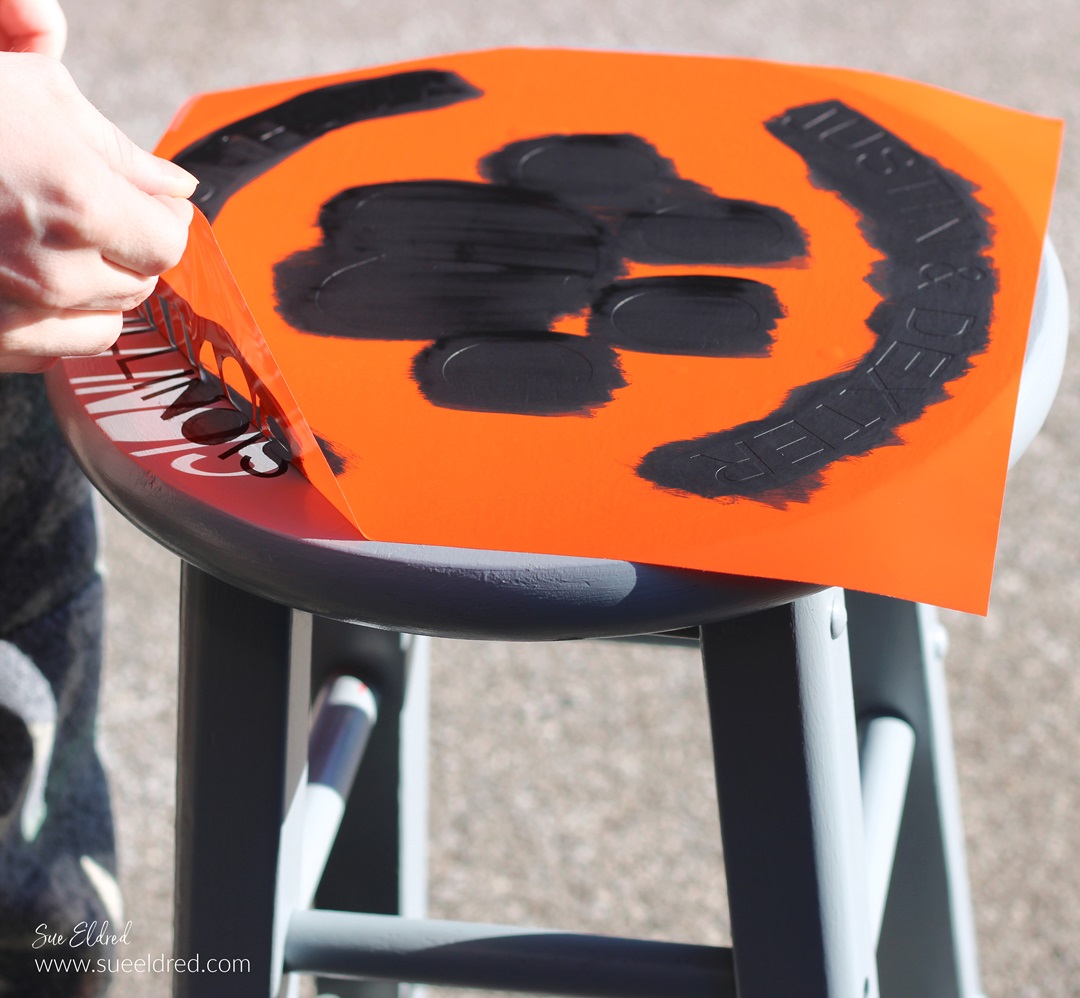
  • Usually, when working with an image on vinyl, you remove the background.  When creating a stencil remove the inside of the design leaving the background.  Remember to leave the inside of the letters.  

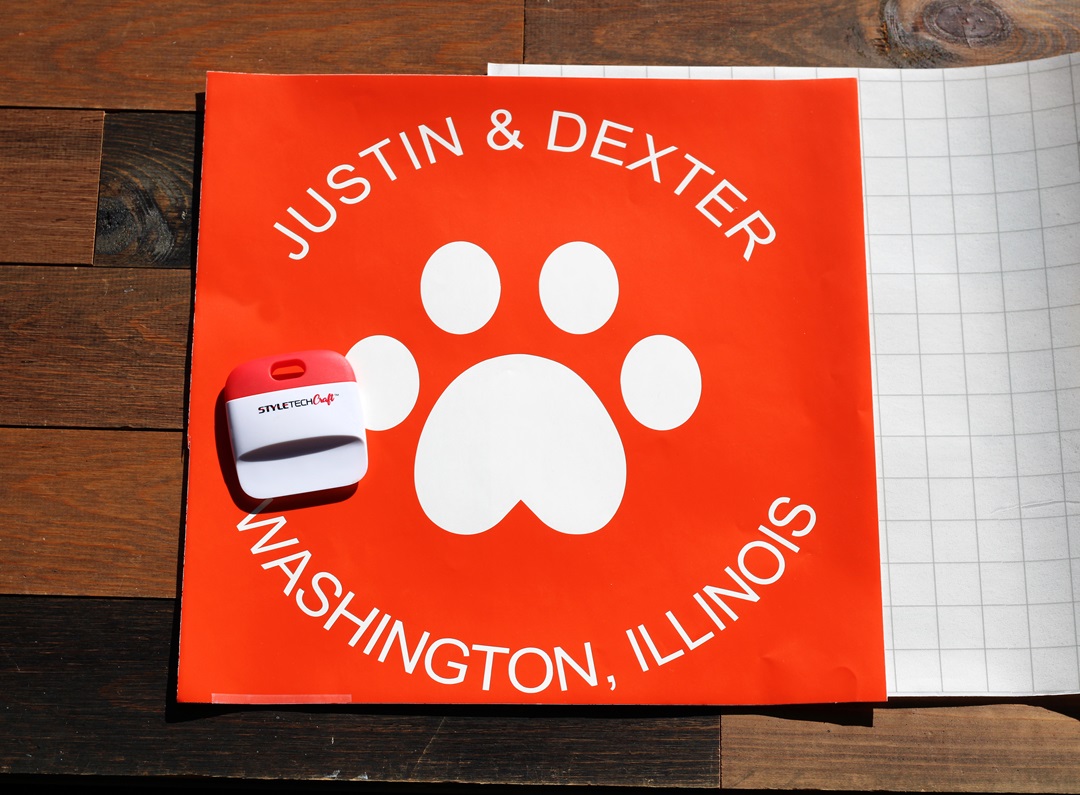
  • Here is the finished design on a 12″ x 12″ piece of removable vinyl.  
  • You will need a large sheet of Low Tack Vinyl Transfer Paper.

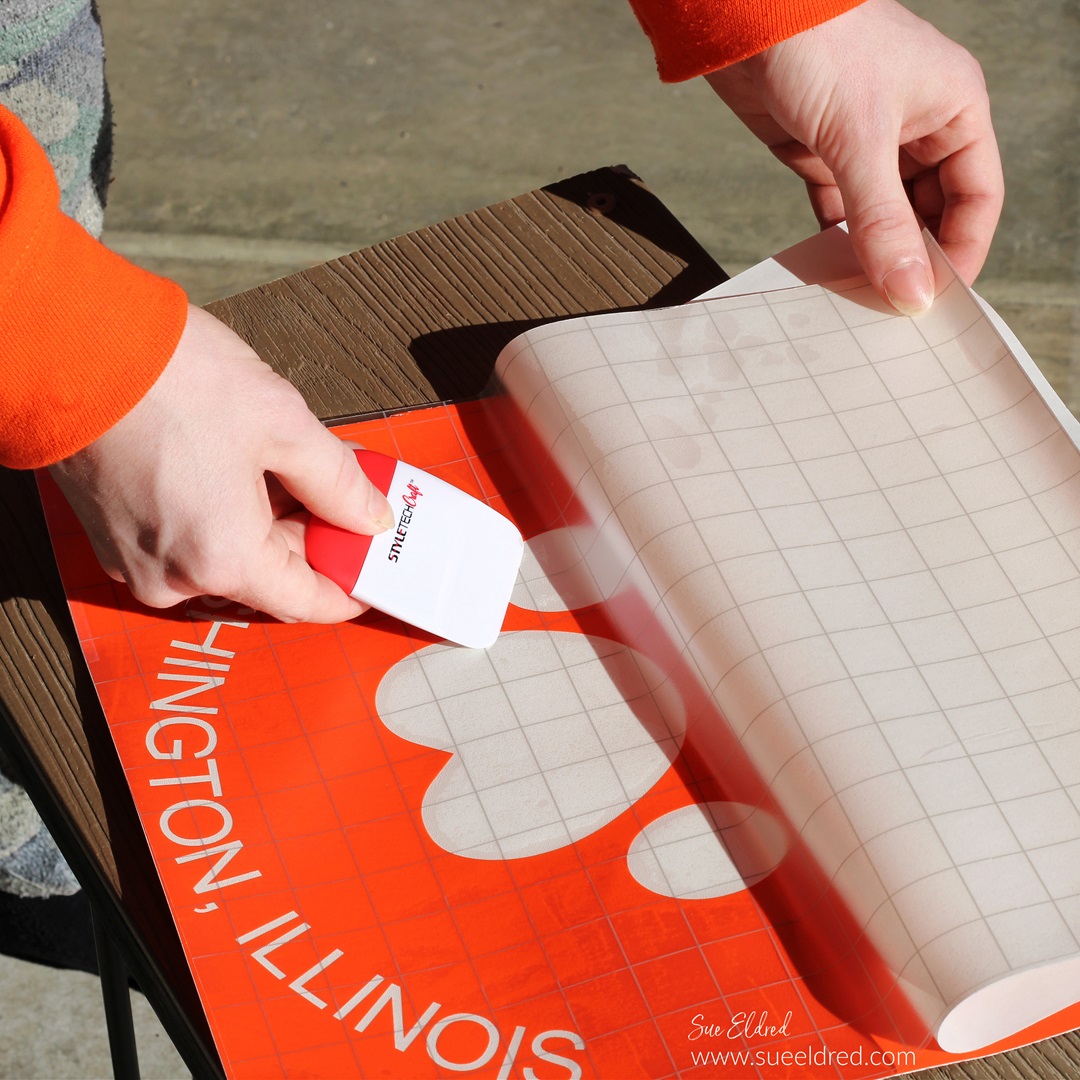
  • Slowly place the transfer paper onto one end of the vinyl.  
  • Pull the transfer paper over the vinyl.  
  • Gently rub over the transfer paper with a vinyl scraper tool to ensure that the vinyl sticks to the transfer paper.  

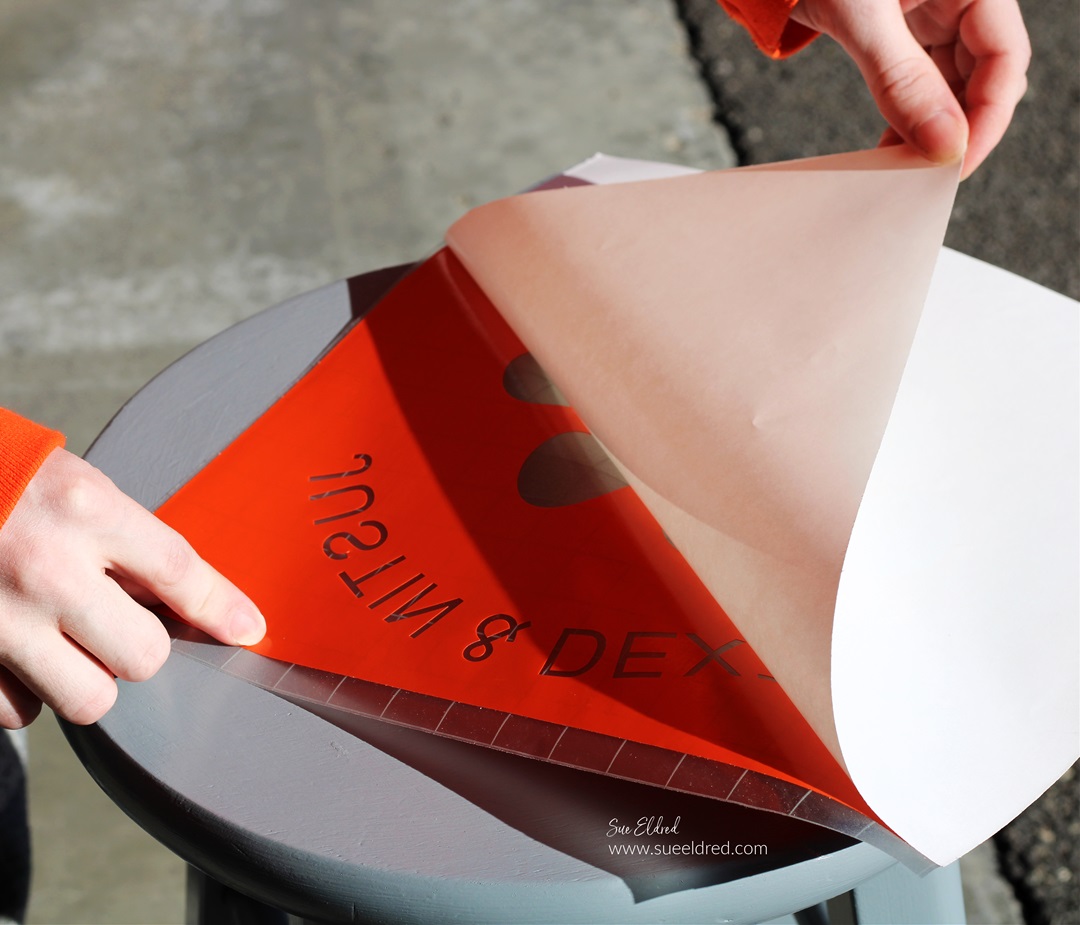
  • Gently lift the white backing paper from the vinyl.  

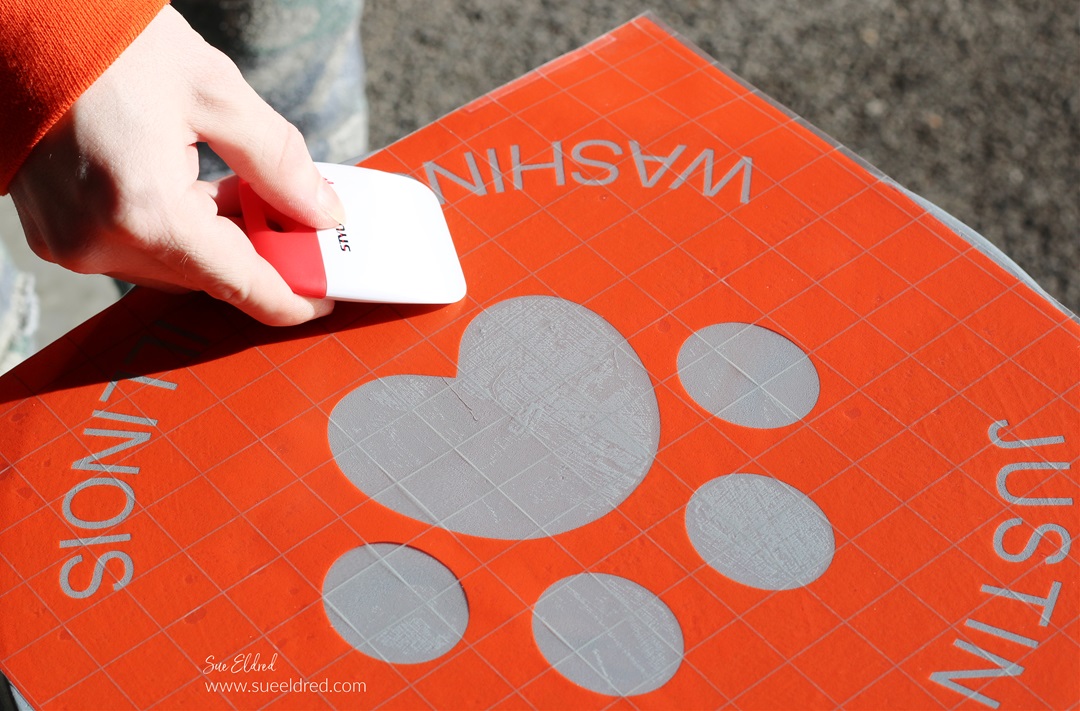
  • Place the vinyl onto the stencil and gently rub to eliminate air bubbles.
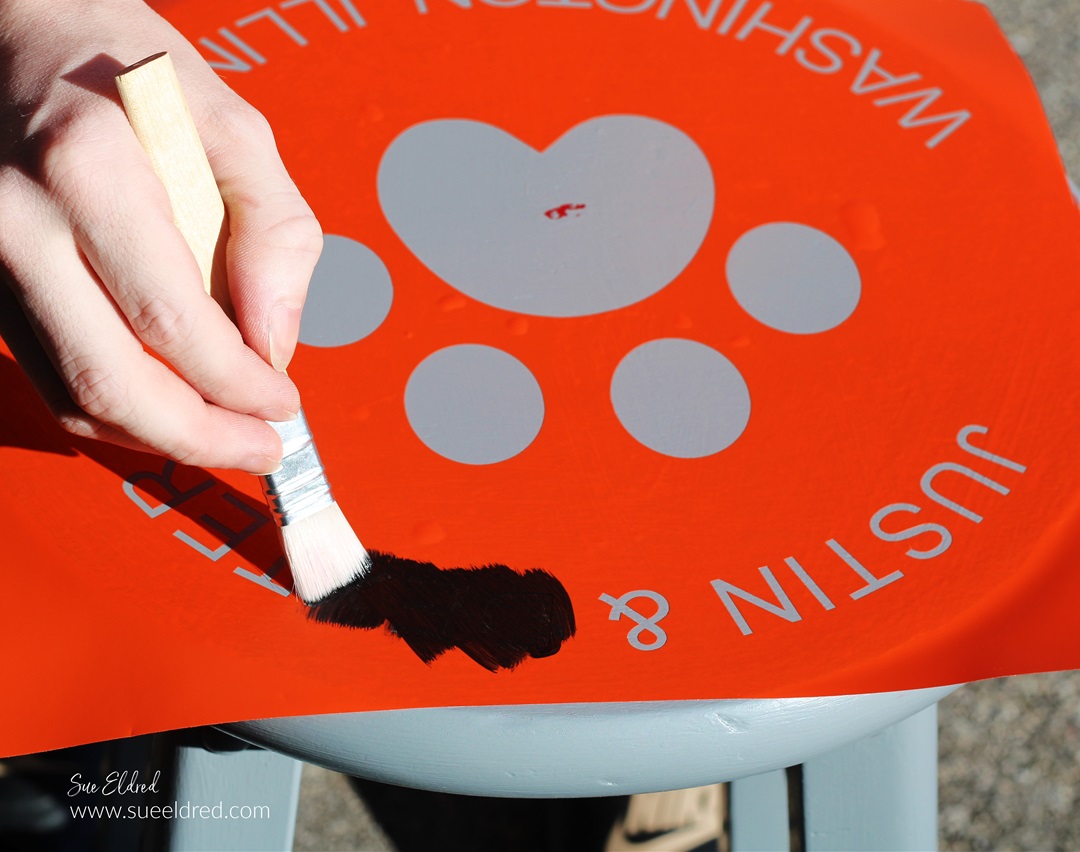
  • Make sure that the stencil is securely stuck to eliminate paint seepage.

  • After the paint has dried, carefully remove the vinyl stencil.  
  • You may need a craft pick* or exact-o knife* to remove the inside of the letters.  

Eileen Hull 2025 Creative Team

I am happy to continue with the Eileen Hull Creative Team.  

The Eileen Hull Creative Team is a talented group of creative paper crafters.  

Each one of us has a unique style that makes it truly special.  

Eileen Hull 2025 Creative Team

Family Game Night DIY Mini Storage Box

Family Game Night

The people in my family love to play games.

When we get the whole big group together for a Family Dinner,

someone usually brings out the dice.

Everyone crowds around the table, and we play a game or two.

Dice is one of their favorite games because even young kids can play along.

(that is until they get bored and leave)

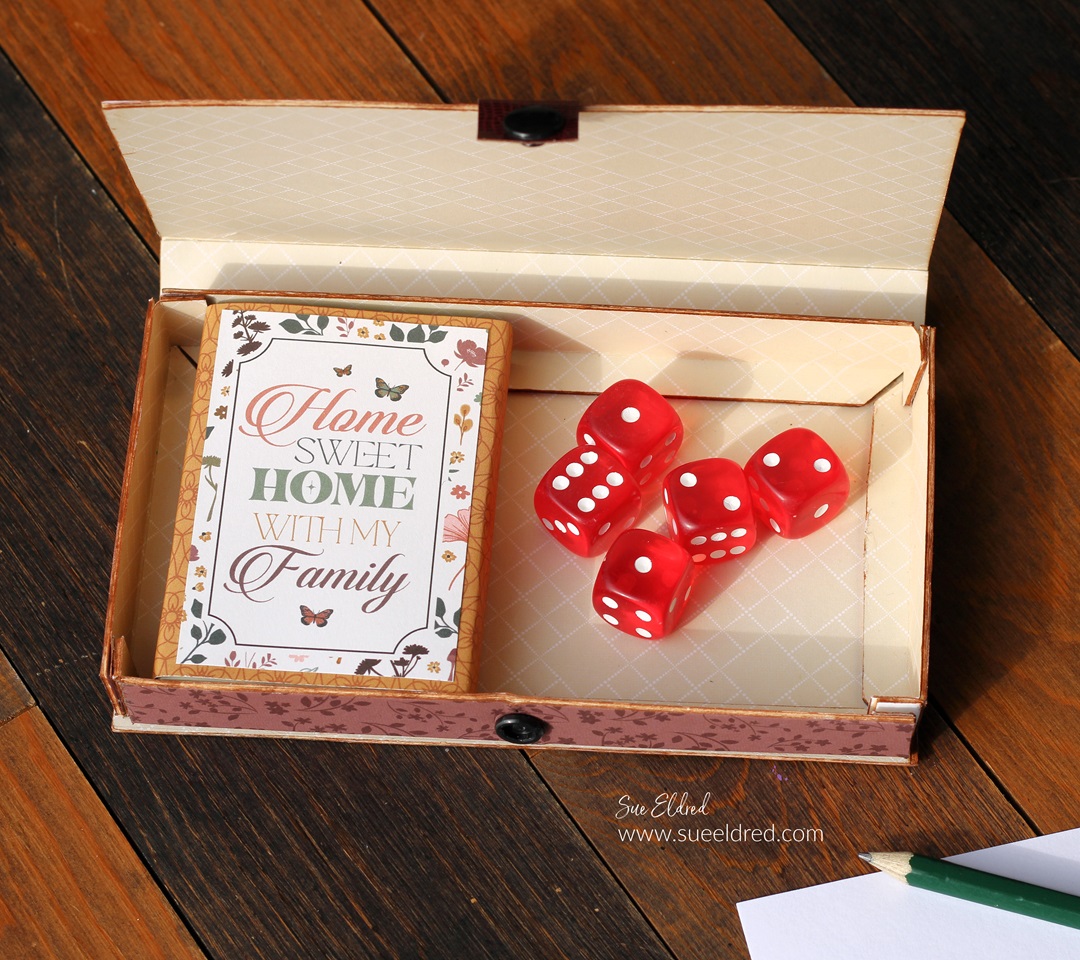
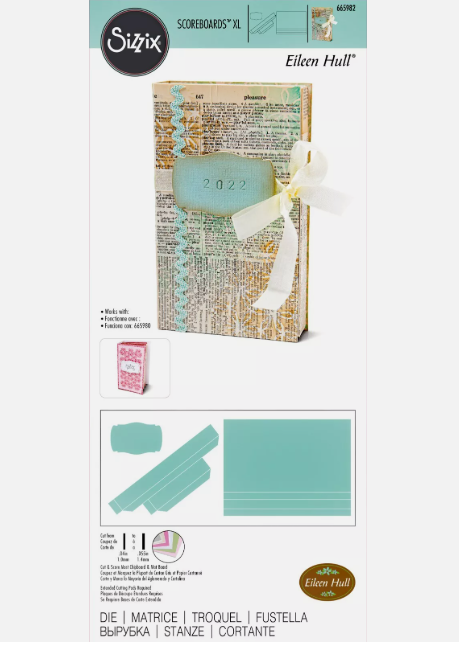
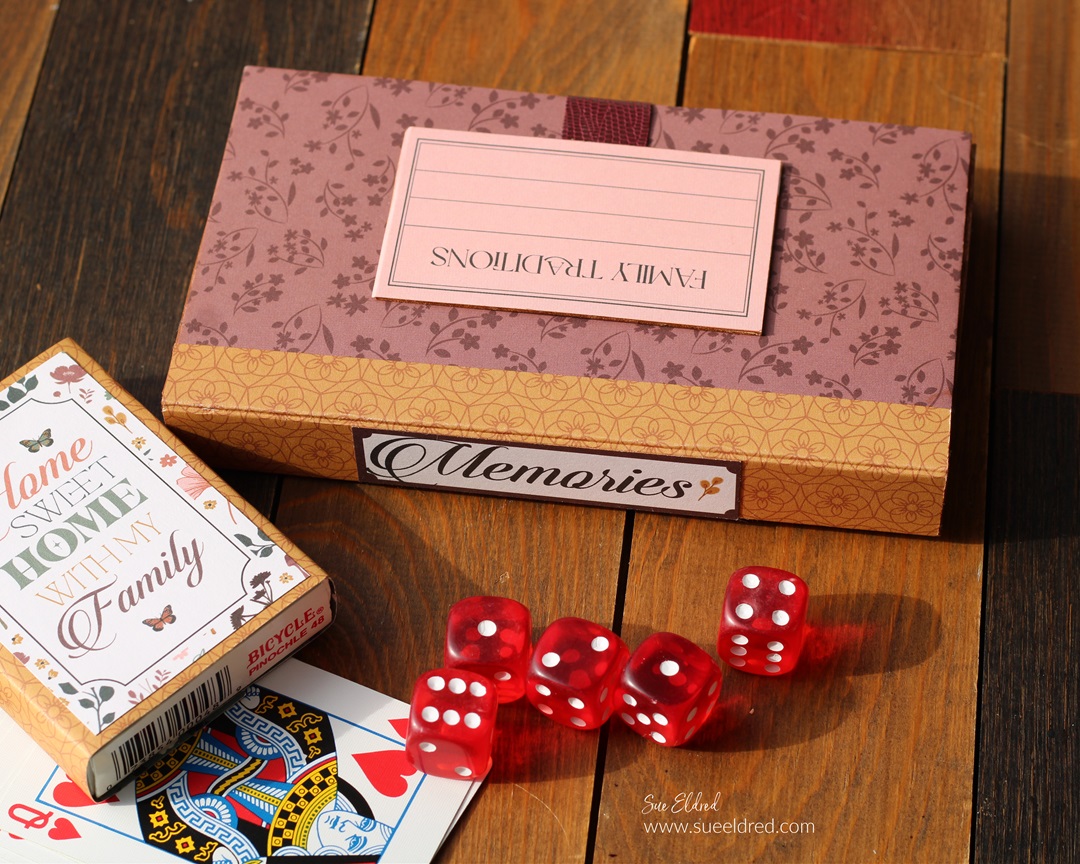
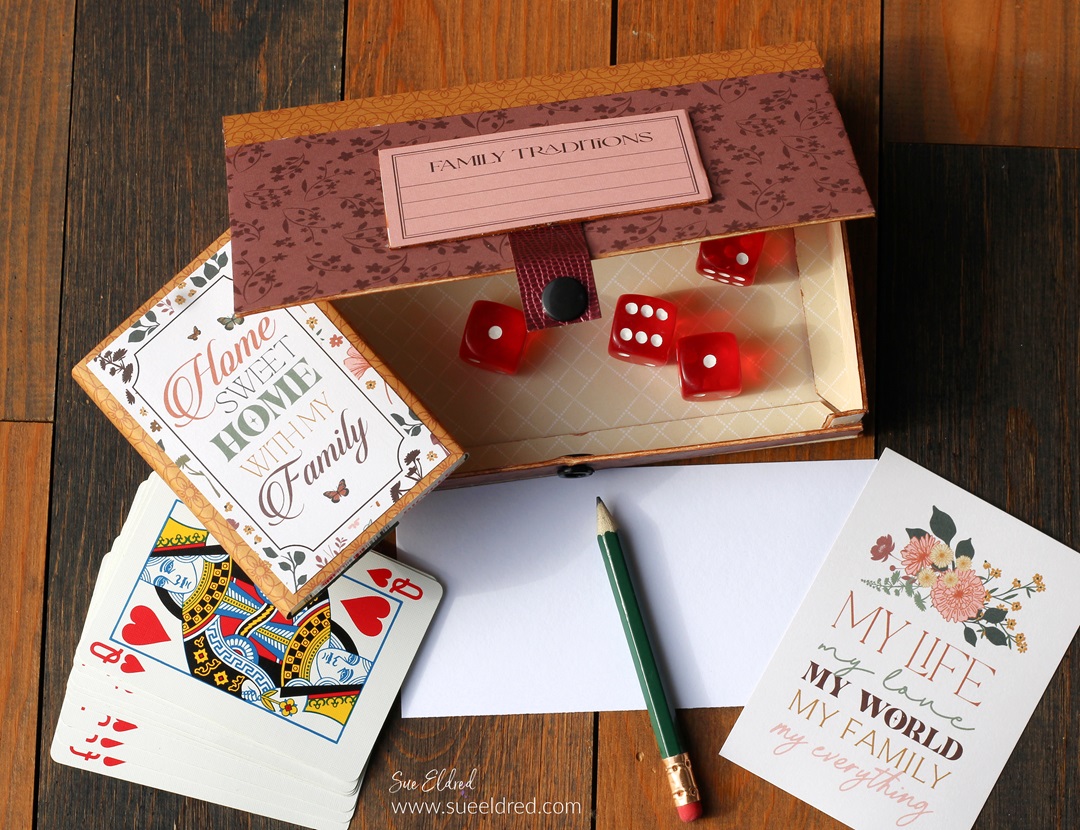
For fun, I made a small box just the right size for holding

a deck of cards and a set of dice.

Inside the box, there is enough space to add a small pencil

and paper for keeping score.

To Make the Box: 

  • Gently fold the scored edges and tabs of the mat board.
  • Adhere the box together using 3/8″ Scor-Tape*.
  • If the white core of the mat board bothers you, go around the edges of the mat board with a brown marker to hide the white core.

*Disclosure:  This blog uses ads and affiliate links.  If you choose to make a purchase using one of the links, I receive a small commission (at no additional cost to you) that helps offset the costs of maintaining this blog.  Thanks for your support!

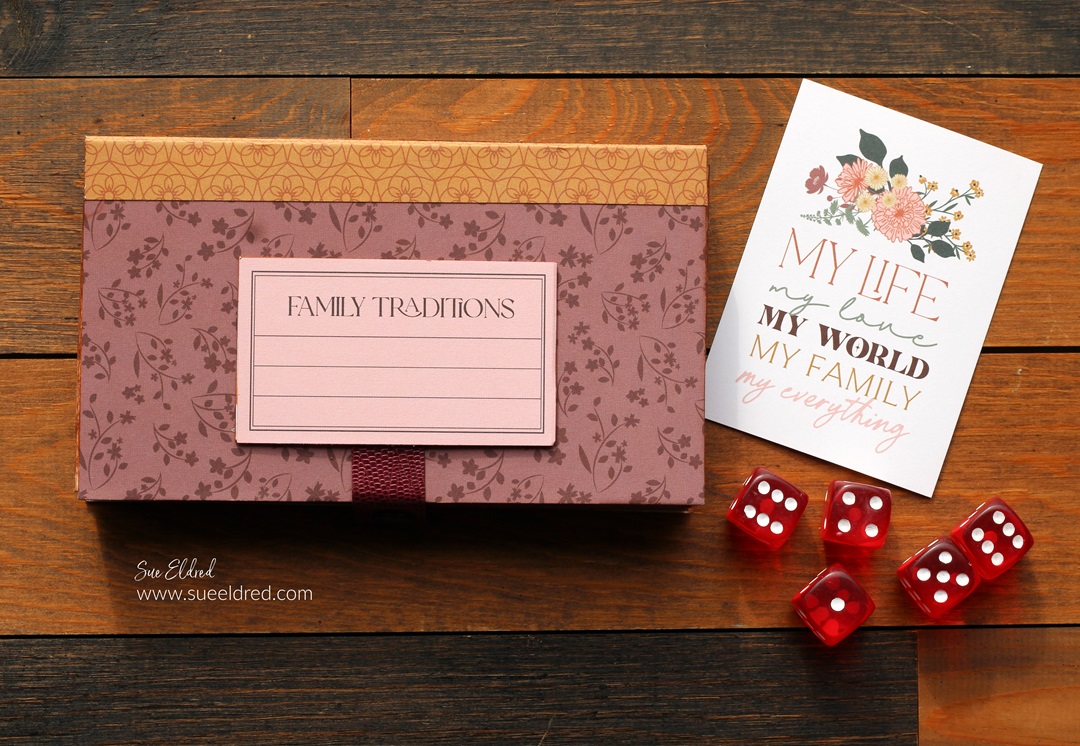
I added the word “Memories to the spine of the box.

Isn’t making memories what it’s all about?

I used a strip of faux leather paper, and a simple snap to

hold the box closed when not in use.

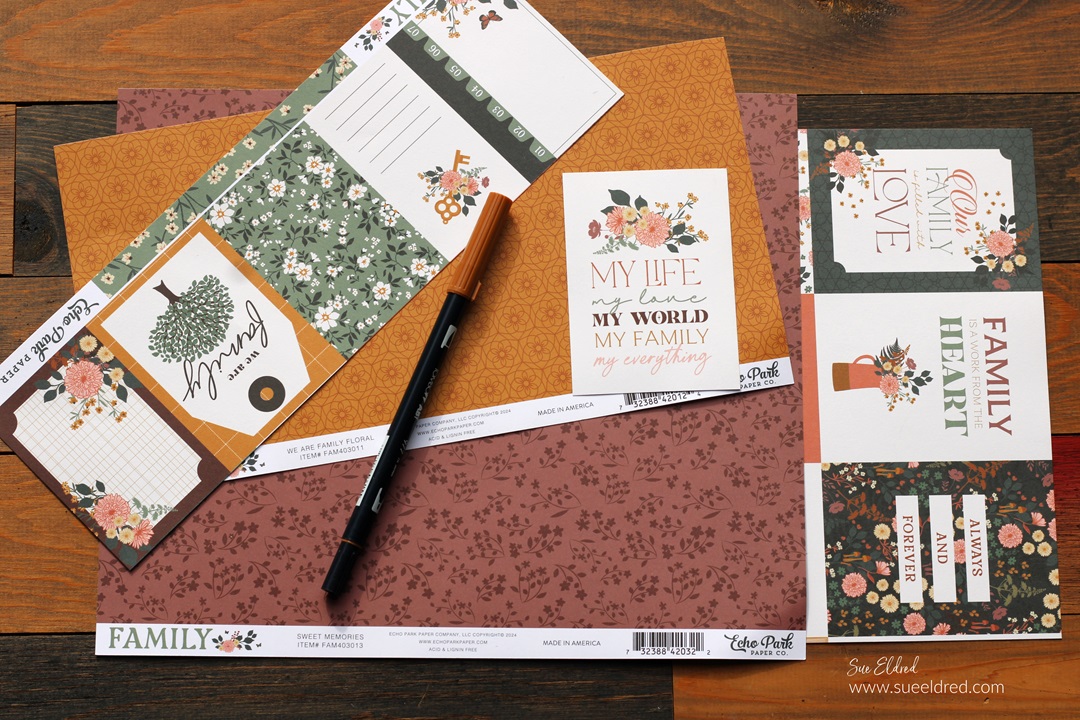
Materials Used:  (*affiliate links)

Shop Tombow

The Puppy Love Album is another project that I made

using the Skinny Mini Book Box Die*.

You can see more here.

Eileen Hull Educator Logo

Disclosure:  This is a sponsored post.  As a member of the Eileen Hull Inspiration Team, I have been provided product in exchange for my creative ideas.  The view and opinions are my own.

Valentine’s Day Candy Dispenser

Valentine's Day Candy Dispenser

Dollar Tree Heart Candy Dispensers

Using Dollar Tree* items and StyleTechCraft Vinyl*,

you can create an adorable, simple,

and inexpensive Valentine’s Day Treat Dispenser.

They make a fun little gift.

“This is a sponsored post.  As a member of the StyleTechCraft Design Team I have been provided product and compensation in exchange for my creative ideas.  The views and opinions are my own.

Valentine's Day Candy Dispensers

While at my local Dollar Tree* the other day, I found

these adorable Candy Dispensers.

I knew they wouldn’t last long there, so I grabbed a couple.

(FYI…they also have Easter Candy Dispensers*.)

Disclosure:  This blog uses ads and affiliate links.  If you choose to make a purchase using one of the links, I receive a small commission (at no additional cost to you) that helps offset the costs of maintaining this blog.  Thanks for your support!

Valentine's Day Candy Dispensers

I decided to make these cute little dispensers even cuter

with the help of StyleTechCraft Glossy Craft Vinyl*. 

Valentine's Day Candy Dispenser

Materials Used:  (*affiliate links)

Directions:

StyletechCraft products brought to you by ATSM Craft*

Top Three Eileen Hull Projects of 2024

Top 3 Eileen Hull Projects for 2024

My top 3 Favorite Sizzix/Eileen project of 2024

Every year the Eileen Hull Teams are asked to pick our three

favorites Sizzix/Eileen Hull projects for the year.

Generally, they’re all my favorites, but these are my top favorites.

(Click on the pictures or links below ↓ to go to the original post with all the details.)

Mini Steamer Trunk

The Steamer Trunk

The first project up is the Steamer Trunk.

Being a fan of all things vintage, it’s my most

favorite project that I’ve made in a while.

It was made using Eileen’s Treasure Box Die*

and the Stacking Drawer Die*.

You can read more about it here.

*Disclosure:  This blog uses ads and affiliate links.  If you choose to make a purchase using one of the links, I receive a small commission (at no additional cost to you) that helps offset the costs of maintaining this blog.  Thanks for your support!

Embossed Wedding Card

Embossed Wedding Card

This simply elegant Wedding card was made using the

Sizzix® 3D Textured Impressions® A5 Embossing Folder-Lace by Eileen Hull*.

You can read more about it here.

Summer Bloom Mini Album

Summer Blooms Mini Album

If you’re looking for the perfect sized pocket-sized mini-album

to make, the Sizzix Notebook Die by Eileen Hull* is great.

You can read the full project tutorial here.

Eileen Hull Educator Logo

Disclosure:  This is a sponsored post.  As a member of the Eileen Hull Inspiration Team, I have been provided product in exchange for my creative ideas.  The view and opinions are my own. 
DIY Christmas Tree Reusable Gift Bag

DIY Christmas Tree Reusable Gift Bag using StyleTechCraft HTV Vinyl

DIY CHRISTMAS TREE REUSABLE GIFT BAG

Are you getting ready for Christmas?

This past Thanksgiving weekend came and went so quickly.
But I am so Thankful that I got to spend it with all three

of my kids and their families.

Family Time is Priceless.

DIY Christmas Tree Reusable Gift Bag using StyleTechCraft HTV Vinyl

While she was here, I asked my sweet little Granddaughter to

model this bag that I made using StyleTechCraft’s Heat Transfer Vinyl*.

It’s made from an inexpensive cotton bag* and is perfect for

carrying gifts for all those Holiday Parties.

Or you can give it as part of the gift.

StyletechCraft products brought to you by ATSM Craft*

*Disclosure:  This blog uses ads and affiliate links.  If you choose to make a purchase using one of the links, I receive a small commission (at no additional cost to you) that helps offset the costs of maintaining this blog.  Thanks for your support!

DIY Christmas Tree Reusable Gift Bag using StyleTechCraft HTV Vinyl

DIY Christmas Tree Reusable Gift Bag using StyleTechCraft HTV Vinyl

  • I cut the image out of both red and green HTV vinyl.
  • I removed the vinyl that I wanted to be green from the red image.
  • With the green image, I cut out only the pieces that I wanted to use with the red layer.
  • Make sure to mirror the image and place the shiny side down on the cutting mat.

DIY Christmas Tree Reusable Gift Bag using StyleTechCraft HTV Vinyl

  • Position the design on your bag.  Use an iron or a heat press* to apply heat and pressure to the design, following the manufacturer’s instructions.
  • Peel off the clear transfer tape.

“This is a sponsored post.  As a member of the StyleTechCraft Design Team I have been provided product and compensation in exchange for my creative ideas.  The views and opinions are my own.