Christmas Mason Jar Shaker Tags

Christmas Mason Jar Shaker Tags

I’m shaking up the Holidays with some cute Christmas Mason Jar Shaker Tags.

These little Mason Jar Dies from The Maker’s Movement make the cutest

Mason Jar Shaker Tags.

And…If you’re a paper crafter like me,

you probably have a lot of special Christmas Paper scraps.

(You know, the ones you can’t throw away.)

The Mason Jar Shaker Tag is a great project to use up those bits and pieces

from “Christmas Paper Past”.  That’s what I did!

Christmas Mason Jar Shaker Tags

Materials Used for the Christmas Mason Jar Shaker Tags:  (*affiliate link)

  • M13583 Nested Shaker Jars Die Set
  • Mini Maker Die Cutting Machine*
  • Clear Acetate
  • Double Sided Adhesive Craft Foam
  • Shaker Sprinkles
  • Scrapbook Paper
  • Xyron Create a Sticker Mini*
  • Twine
  • Christmas Embellishments

*Disclosure:  This blog uses ads and affiliate links.  If you choose to make a purchase using one of the links, I receive a small commission (at no additional cost to you) that helps offset the costs of maintaining this blog.  Thanks for your support!

How to make a Halloween Shaker Tag

These Mason Jar Shaker Tags aren’t just for Christmas.

Click here for my Halloween Tags.

Cardinal Shaker Card

Shaker Sprinkles are great for making Shaker Cards.

Here’s a bonus…The Cardinal Shaker Card is a project from last year’s Holiday Workshop that I never shared.

Maker's Movement

Disclosure:  This is a sponsored post for The Maker’s Movement*.  I have been provided product and compensation in exchange for my creative ideas.  The view and opinions are my own.

Letters to Santa Card and Tags

Letters to Santa Card

Letters to Santa Card

Don’t you just love these cute furry creatures?

I combined The Maker’s Movement’s New Letters to Santa Stamp Set with

The Woodland Friends Stamp and Die Set to make this cute card.

Maker's Movement

Disclosure:  This is a sponsored post for The Maker’s Movement.  I have been provided product and compensation in exchange for my creative ideas.  The view and opinions are my own. 

Letters to Santa Card

The card was stamped in black permanent ink* on white watercolor paper*.

I used Tombow ART Markers* to blend and color.

I added dimension to the card by adding 3D foam to the back of the mailbox and fox.

Letters to Santa Stamp Set from The Maker's Movement    Woodland Friends Stamp Set

Materials Used:  (*affiliate links)

*Disclosure:  This blog uses ads and affiliate links.  If you choose to make a purchase using one of the links, I receive a small commission (at no additional cost to you) that helps offset the costs of maintaining this blog.  Thanks for your support!

Letters to Santa Tag

Santa Gift Tag

For those of us that still believe, a simple gift tag from Santa.

Letters to Santa Card-Shrink Plastic

Mini “Letters to Santa” Tags or Ornaments

My grandson and I had a little fun using the Letters to Santa stamp set and shrink plastic.

We love watching the stamped image shrink.

We even made a video.  (coming soon)

Tombow Holiday Gift Guide

Inky Layered Christmas Wreath Card

How to make an Inky Layered Wreath Card

How to make an Inky Layered Christmas Wreath Card.

Sometimes when I’m making cards, I get the urge to get inky.

Some cards just call for it.  This card was one of those.

I summoned my inner “Tim Holtz” and inked my little heart out.  (It was fun!)

Maker's Movement

Disclosure:  This is a sponsored post for The Maker’s Movement.  I have been provided product and compensation in exchange for my creative ideas.  The view and opinions are my own. 

How to make an Inky Layered Wreath Card

Materials Used: (*affiliate links)

*Disclosure:  This blog uses ads and affiliate links.  If you choose to make a purchase using one of the links, I receive a small commission (at no additional cost to you) that helps offset the costs of maintaining this blog.  Thanks for your support!

How to make an Inky Layered Christmas Wreath Card.

Directions:

  • Optional:  For easier assembly, I used the Xyron Creative Station* to add adhesive to the back of the cardstock before die-cutting.  (As the paper goes through the Xyron Creative Station*, it adds a complete layer of adhesive to the back.)
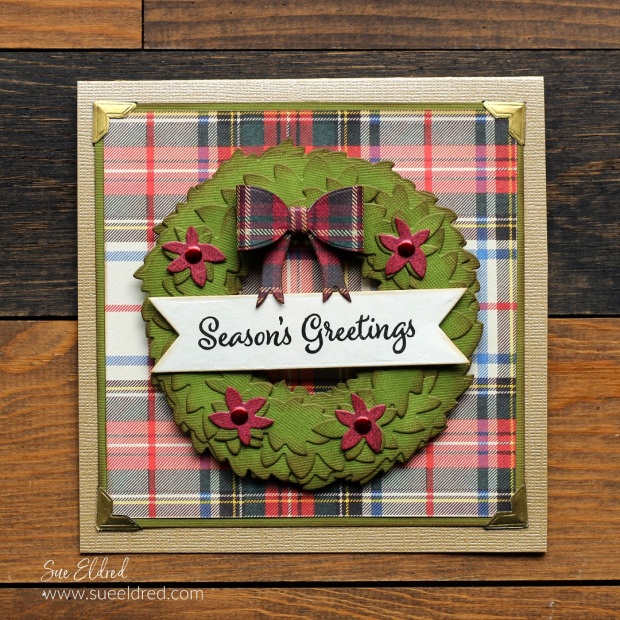
  • Die-cut the pieces for the wreath, as shown above, using the Wreath Die Set and green cardstock.
  • Die-cut the pieces for the bow using plaid scrapbook paper.
  • Using the Ink Blending Tool and Peeled Paint Distress Inkpad, generously ink all over the front of each die-cut piece.
  • Use the blending tool and Gathered Twigs and ink the edges only of the die-cut pieces.

How to make an Inky Layered Christmas Wreath Card.

  • Starting with larger die-cut wreath pieces, apply them to the wreath base.  Continue with the smaller wreath pieces.
  • Die-cut a cream banner using the banner die from the Snowflake Kisses stamp and die set. Stamp “Season’s Greeting” onto the banner using the Black Onyx Versafine Inkpad*. Put small foam dots on each side of the banner and place it centered on the wreath.
  • Create the bow by gluing the two outside edge pieces to the center of the back of the bow.  Wrap and glue the small rectangle piece around the center of the bow.  Glue bow to ribbon end piece.
  • Die-cut four small red wreath pieces to use as flowers for the wreath. Add a small Red Nail Head Sticker to the inside of each flower.

How to make an Inky Layered Christmas Wreath Card.

  • Cut layers to add onto a gold square card. My card measures 5 1/2″ x 5 1/2″.
  • To give the layers a worn look, ink the edges of each layer using Tim Holtz Gathered Twigs Distress Inkpad.
  • Place Gold Foiled Photo Corners* onto the edge of the layers and adhere them to the gold card.
  • Put foam dots onto the back of the wreath and adhere the wreath to the center of the card.

Halloween Shaker Jar Tags

How to make a Halloween Shaker Tag

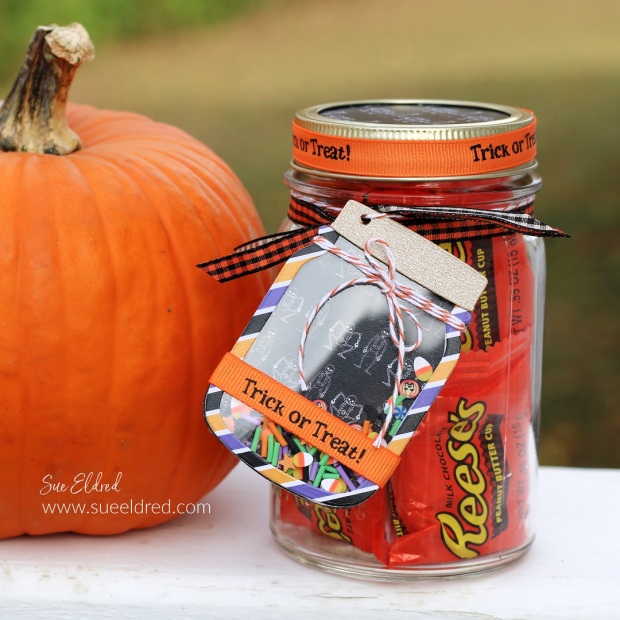
How to Create Halloween Shaker Jar Tags.

A fun Halloween treat for kids of all ages.

How to make a Halloween Shaker Tag

I just received these cute Mason Jar Shaker Dies from The Maker’s Movement,

and of course, I had to hurry up and make a few Halloween Jar Shaker Tags.

These are also going to make super cute Christmas Shaker tags.  (I can’t wait!)

Maker's Movement

Disclosure:  This is a sponsored post for The Maker’s Movement*.  I have been provided product and compensation in exchange for my creative ideas.  The view and opinions are my own. 

How to make a Halloween Shaker Tag using the Shaker Jar Tag

Materials Used:  (*affiliate links)

*Disclosure:  This blog uses ads and affiliate links.  If you choose to make a purchase using one of the links, I receive a small commission (at no additional cost to you) that helps offset the costs of maintaining this blog.  Thanks for your support!

How to make a Halloween Shaker Tag

  • You will need Halloween paper from the Tricks or Treats paper pad, acetate, and craft foam.

How to make a Halloween Shaker Tag

  • Die Cut the pieces using the Mini Maker Die Cut Machine as shown.

How to make a Halloween Shaker Tag

A Tip for Easy Assembly…

  •  Place the striped paper, used for the top of the mason jar shaker tag, into the Xyron Create a Sticker Mini*. Crank the handle to run the paper through the machine. As it goes through the Xyron Create a Sticker Mini* it adds a layer of adhesive onto the back of the paper. Die-cut the paper using the Mason Jar Frame Die. Now the die-cut frame is a sticker, which makes placing it onto the acetate easy. 

How to make a Halloween Shaker Tag

  • Remove the blue protective liner from the acetate.  Place the mason jar frame onto the acetate.
  • Remove one side of the protective liner from the craft foam frame.  Place the foam frame onto the mason jar silhouette.
  • Add Halloween Shaker Sprinkles in the center of the foam.  Don’t overfill.  You want to make sure to leave for shaking.
  • Remove the liner from the craft foam and line up the mason jar frame (with acetate) over the
  • Die Cut two jar tops and adhere them to the top of the shaker jar.
  • Wrap with twine.  Glue the Halloween ribbon around the base of the shaker jar.

How to make a Halloween Shaker Tag

Tie the Halloween Shaker Tag onto a mason jar filled with Halloween Treats.

A Fun Halloween Treat.

Quick and Easy Stenciled Card

Quick & Easy Stenciled Card

How to make a Quick and Easy Stenciled Card. 

Just Add Ink!

Quick & Easy Stenciled Card

Materials Used:  (*affiliate links)

*Disclosure:  This blog uses ads and affiliate links.  If you choose to make a purchase using one of the links, I receive a small commission (at no additional cost to you) that helps offset the costs of maintaining this blog.  Thanks for your support!

Directions:

  • Place the stencil over the cardstock.  Place a piece of removable tape on the corners to keep the stencil from moving.
  • Rub the ink blending tool over the ink pad.  Rub on a piece of extra paper to smooth out the ink before using it on the stencil.
  • Gently rub over the stencil with the ink blending tool.  I started in the middle and worked my way out towards the edges.

Quick & Easy Stenciled Card

  • Remove the stencil to reveal the design.
  • I forgot to remove the removable tape used to hold the stencil down.   So, I have tape lines.  Mistakes lead to opportunities.  Making the most of it, I cut the stenciled design down to size.

Quick & Easy Stenciled Card

  • I adhered the stenciled design onto a 4 1/2″ x 4 1/2″ piece of light gray cardstock and onto a 5″ x      5″ card.
  • I added a small greeting on the bottom right of the card.
  • To finish the card, I tied a sheer cream ribbon on the top of the card.

Maker's Movement

Disclosure:  This is a sponsored post for The Maker’s Movement*.  I have been provided product and compensation in exchange for my creative ideas.  The view and opinions are my own. 

“I only have Pies for You” happy day tag

"I Only Have Pies for You" tag.

My sister-in-law loves to bake pies.

When it comes to Thanksgiving, there is almost a pie-per-person ratio.

It’s not just pumpkin, but peanut butter (my favorite),

cherry, and chocolate pies. (To name a few.)

So, when I saw the new “I only have pies for you” soap from Bath and Body,

I knew I needed to pick it up for her.

It’s not only perfect, but it smells wonderful too.

"I Only Have Pies for You" tag.

Since her birthday is right around the corner,

I thought I’d make her a special pie tag to go with it.

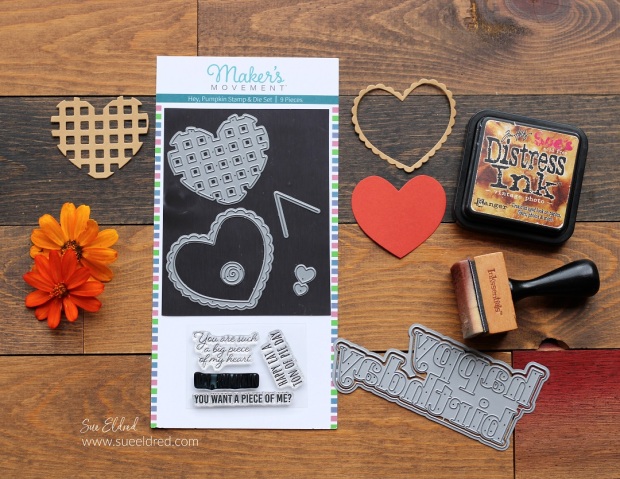
The Hey, Pumpkin Stamp & Die Set from

The Maker’s Movement was just the die to make the tag.

Maker's Movement

Disclosure:  This is a sponsored post for The Maker’s Movement*.  I have been provided product and compensation in exchange for my creative ideas.  The view and opinions are my own. 

"I Only Have Pies for You" tag.

Materials Used:      (*Affiliate Links)

*Disclosure:  This blog uses ads and affiliate links.  If you choose to make a purchase using one of the links, I receive a small commission (at no additional cost to you) that helps offset the costs of maintaining this blog.  Thanks for your support!

"I Only Have Pies for You" tag.

Two of my favorite hardworking little machines.

  • Before I die-cut all the small pieces, I ran the cardstock through the Xyron Create a Sticker Mini*.  It makes all the die-cuts into stickers and that makes assembling the card easy.
  • The Mini Maker Die Cutting Machine* makes quick work of die cutting.  And it doesn’t take up a lot of space.

"I Only Have Pies for You" tag.

A special tag for my favorite pie maker.

Fall Sunflower Get Well Card

Fall Sunflower Get Well Card

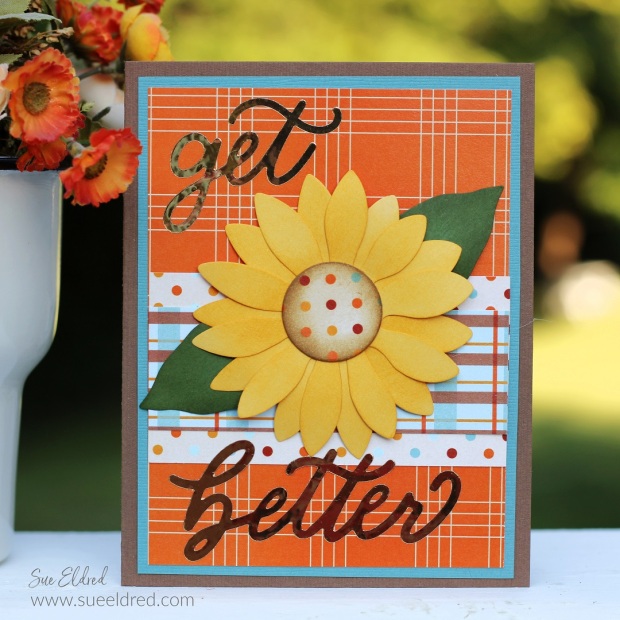
A Bright and Cheery Card to brighten someone’s day.

This simple Get-Well card uses dies and paper from The Maker’s Movement.

Maker's Movement

Disclosure:  This is a sponsored post for The Maker’s Movement.  I have been provided product and compensation in exchange for my creative ideas.  The view and opinions are my own. 

Fall Sunflower Get Well Card

Materials Used:  (*affiliate links)

*Disclosure:  This blog uses ads and affiliate links.  If you choose to make a purchase using one of the links, I receive a small commission (at no additional cost to you) that helps offset the costs of maintaining this blog.  Thanks for your support!

Fall Sunflower Get Well Card

Directions:

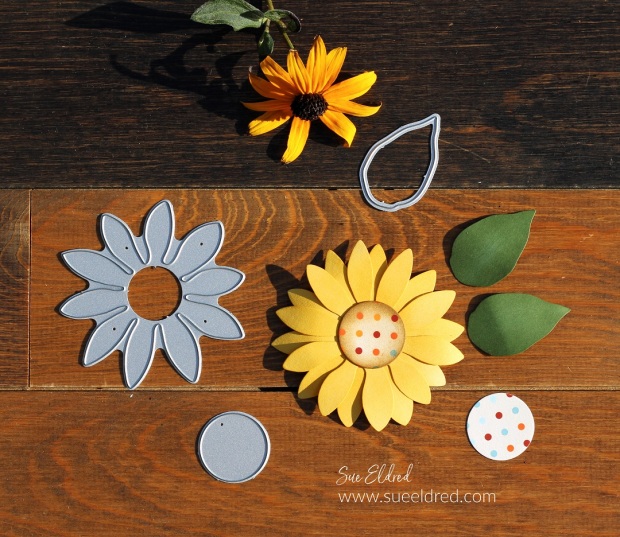
  • Die-cut the pieces for the flower out of cardstock. You will need two flowers cut from the large flower die.
  • Ink the cardstock flower with yellow ink to give the petals a little color variation and depth.

Fall Sunflower Get Well Card

  • Use the side of a pencil to gently round the edges of the petals.

Fall Sunflower Get Well Card

  • Glue the center of the flowers together using Tombow Mono Aqua Liquid Glue*.
  • Instead of a brown center for the sunflower, I cut a circle using polka dot paper from the Autumn Breeze Paper Pad.

Fall Sunflower Get Well Card

  • Die-cut the words “get better” using StyleTechCraft Gold Chrome Adhesive Vinyl*and the Get Better Die Set.
  • The card uses simple layers using the Autumn Breeze Paper Pad.
  • Finished Card Size 4 1/4″ x 5 1/2″.

StyletechCraft products brought to you by ATSM Craft*

Sending Sunshine on a Cloudy Day

Sending Sunshine on a Cloudy Day

Everyone can use a little Sunshine on a cloudy day.

This simple card is made with stamps and dies from The Maker’s Movement.

The card uses a little subtle play with different patterns.

Maker's Movement

Disclosure:  This is a sponsored post for The Maker’s Movement.  I have been provided product and compensation in exchange for my creative ideas.  The view and opinions are my own. 

Sending Sunshine on a Cloudy Day

Materials Used:       (*affiliate links)

*Disclosure:  This blog uses ads and affiliate links.  If you choose to make a purchase using one of the links, I receive a small commission (at no additional cost to you) that helps offset the costs of maintaining this blog.  Thanks for your support!

Sending Sunshine on a Cloudy Day

  • I die-cut pieces using the Stacking Flowers Die out of yellow patterned paper from the Cloudy Day paper pad.
  • The flower was assembled using 3D Thin Foam Squares*.

Sending Sunshine on a Cloudy Day

  • I used the “Hello Sunshine Stamp & Die Set” for the sunshine layers on the bottom of the card.
  • I also used the “Hello Sunshine Stamp & Die Set for the small banner with the stamped words “sending you”.
  • My favorite tip for die-cutting small or thin pieces is to add a layer of adhesive using a Xyron Creative Station®* before die-cutting.

Sending Sunshine on a Cloudy Day.

This card was fast and easy to assemble and is sure to brighten up anyone’s day.

Sunflower Thank You Card

Sunflower Thank You Card

There’s something special about receiving a handmade card.

In a world where kindness is “perceived” to be in short supply,

the power of a well-meaning Thank You note goes a long way.

Sunflower Thank You Card-Sue's Creative Workshop www.sueeldred.com 4975

Do you still send greeting cards?

I’ll be honest I don’t send cards like I used to.

I make them; I don’t always send them.  (Sound familiar?)

It’s too easy to wish someone a special greeting on social media or in a text.

Maker's Movement

Disclosure:  This is a sponsored post for The Maker’s Movement.  I have been provided product and compensation in exchange for my creative ideas.  The view and opinions are my own. 
Sunflower Thank You Card

Materials Used:     (*affiliate links)

*Disclosure:  This blog uses ads and affiliate links.  If you choose to make a purchase using one of the links, I receive a small commission (at no additional cost to you) that helps offset the costs of maintaining this blog.  Thanks for your support!

Sunflower Thank You Card

How to…

Sunflower Thank You Card

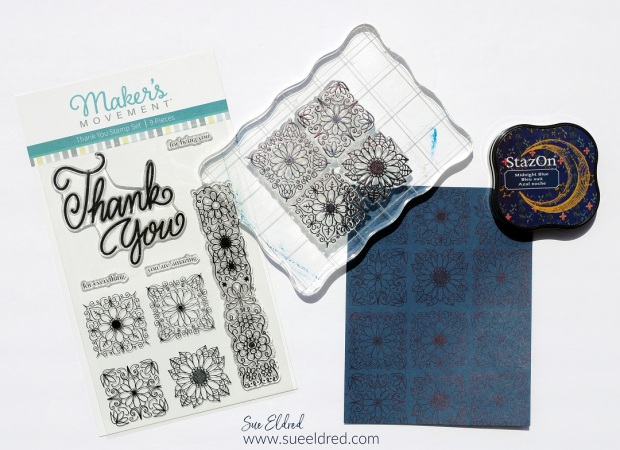
  • Stamp the small sunflower stamp onto white cardstock using a black permanent ink pad. Color in the image using Tombow ART Markers*.  Die-cut the image using the small square die and the Crossover II Die-Cutting System*.
  • Stamp the word “Thank You” using the midnight blue ink* and die-cut the words using the coordinating die.
  • Add background layers onto a white card base and embellish with a yellow ribbon and adhesive enamel dots.

Shop Tombow

Sweet Summer Sentiments Scrapbook Page

Sweet Summer Sentiments Scrapbook Page-Sue's Creative Workshop www.sueeldred.com 4730

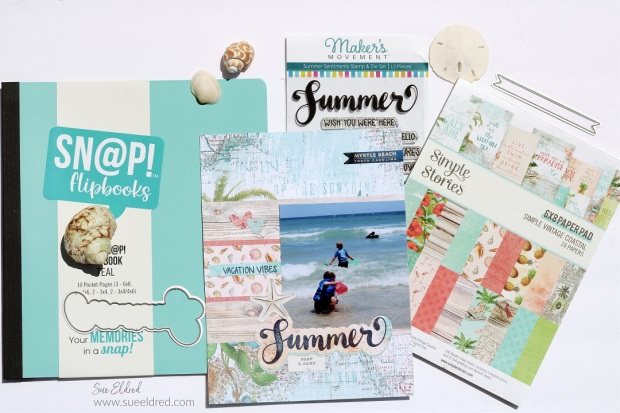
A Sweet Summer Sentiments Scrapbook Page using the Simple Stories Simple Vintage

Coastal Scrapbook Collection and Maker’s Movement Summer Sentiments Stamp and Die Set.

It’s been a while since I’ve done any scrapbooking. 

I thought last year’s pictures from our vacation to Myrtle Beach might be a great

place to start.  (I’ve been meaning to work on them for a while.)

Maker's Movement

Disclosure:  This is a sponsored post for The Maker’s Movement*.  I have been provided product and compensation in exchange for my creative ideas.  The view and opinions are my own. 
Sweet Summer Sentiments Scrapbook Page

Materials Used:   (*affiliate links)

Simple Stories-Simple Vintage Coastal

*Disclosure:  This blog uses ads and affiliate links.  If you choose to make a purchase using one of the links, I receive a small commission (at no additional cost to you) that helps offset the costs of maintaining this blog.  Thanks for your support!

Sweet Summer Sentiments Scrapbook Page-Sue's Creative Workshop www.sueeldred.com 4703

Last year after our trip, I bought a 6″ x 8″ SN@P Flipbook* from Simple Stories to put my pictures in.

I thought the smaller size would be perfect for my vacation album.

Inspired by the Summer Sentiments Stamp & Die Set from The Maker’s Movement

I decided to get out my supplies and start working on the album again.

I used Stazon Midnight Blue Ink* to stamp the words “Summer” and “Vacation Vibes.”

Sweet Summer Sentiments Scrapbook Page-Sue's Creative Workshop www.sueeldred.com 4719

I like to bring home the vacation book with maps and ads to use as ephemera in my album.

I found an ad with the words “Myrtle Beach, South Carolina” in the perfect shade of blue.

I cut the words out using the “banner die” from the Summer Sentiments Stamp & Die Set.

Sweet Summer Sentiments Scrapbook Page

One page done and several more to go.