Vintage Home Sweet Home Layout

Home Sweet Home 3088 Lately, I’ve been noticing more and more people using embossing paste on their scrapbook layouts.

Hmmm…. I haven’t used embossing paste in years.

Matter of fact… my jars of embossing paste are over 10 years old.  (and still good)

So, I thought I’d give it a try with a simple layout and this old house picture.

Quick, Simple and adds a subtle punch to this layout.  I think I like it.

Embossing Paste Border 3092

Using embossing paste is easy: 

  • Lay stencil onto cardstock, fix in place with removable masking tape.
  • Apply a thin layer of embossing paste over the stencil using a palette knife.
  • Remove stencil and allow time to fully dry.
  • Make sure to clean embossing paste off stencil right away.
  • It’s as easy as icing a cake.

Products Used:

Click on the pictures above for more information through Amazon*

Disclosure:  This project was created for and sponsored by Clear Scraps.

I am an Amazon Affiliate.

What do you treasure?

What do you treasure 3165

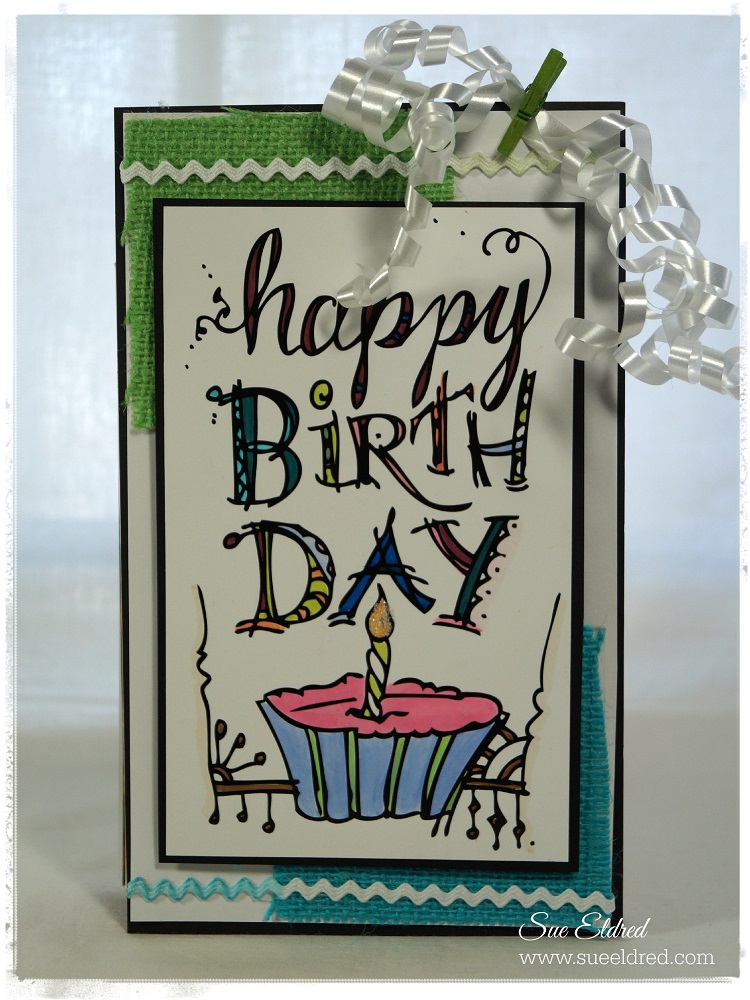
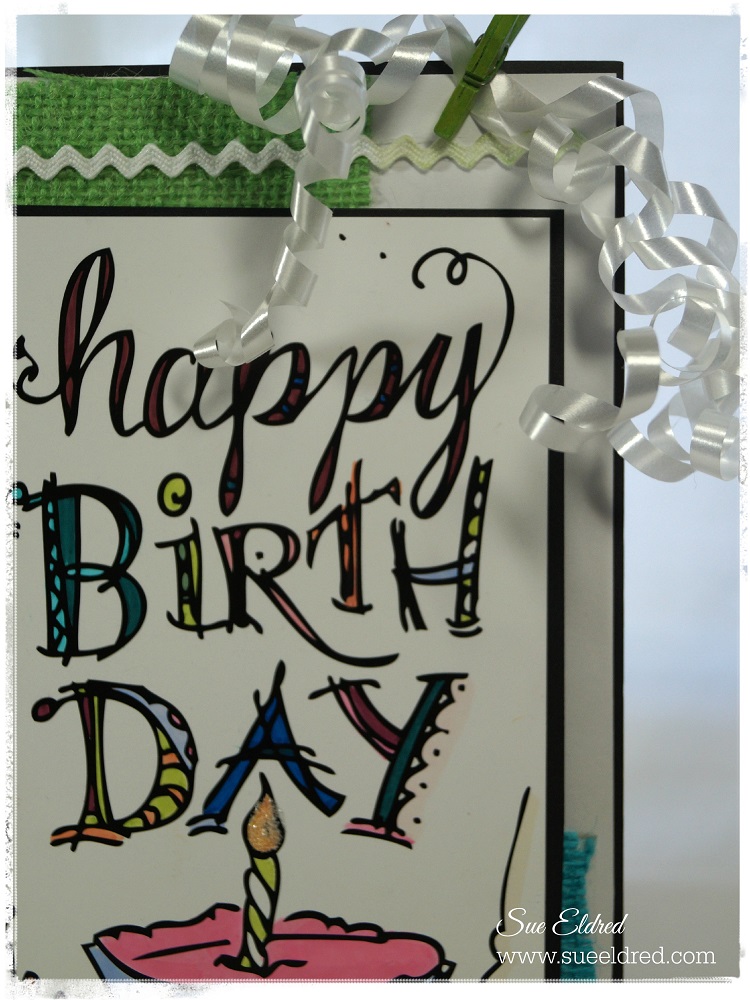
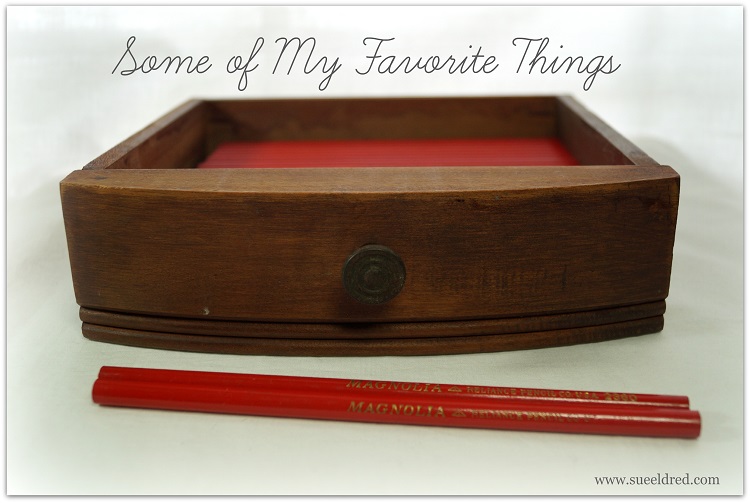
I gave Nicholas an old cigar box to use while he was working on one of “his projects”.

As I was getting ready to put away all his treasures, I was struck by all the bright colors

and the little trinkets in the box.  (So I took this picture.)

When you’re four you need to collect a lot of things.

I’m a few years older than four and I still collect a lot of things.

I’ve often thought, if I only had 20 minutes to grab my most valuable possessions,

what would my treasures be?

Besides my family of course, I’d grab the clock that my parents gave us as a wedding present,

a few pieces of sentimental jewelry and my photo’s and photo albums.

Oh…and maybe the baby books.  (but, I wasn’t too good at filling those things out.)

You see, all those other things are just stuff.

Clothes, furniture, etc…they can all be replaced.

My photo’s are a different thing, they are my treasures, my memories.

So why do I have most of the photo’s from the last several years still on my computer?

Good question.

With my digital camera’s I easily take 25 times more pictures than I took before.

Instead of taking one more picture for good measure, I take 12.

The more pictures you take the better chances of getting that perfect shot. Right?

The problem:

Once I received my first digital camera, I stopped regularly printing pictures.

Unless I was working on a special project or giving them away as a gift,

I never seemed to get around to it.

I currently live in fear of my laptop crashing and losing all my precious photos.

I should back them up on my external hard-drive.  (and I do, sometimes)

So here’s my goal for 2015:

To go through the last few years of pictures and print them out.  (maybe even put them in an album)

I don’t want to risk the chance of losing them forever.

So if you’re in the same place as me…

Print them out!

I use Shutterfly* a lot for printing and photo books and they always have a deal going.

New Customers get 50 free 4″ x 6″ prints for just opening up an account.

Shutterfly Free Stuff

But I should let you know…

If you decide to click on the above picture and just happen to place an order,

I will receive a very small commission.

So… wherever you decide to take your pictures, it really doesn’t matter.

Just as long as we print them out.

Disclosure:  I am a Shutterfly Affiliate.
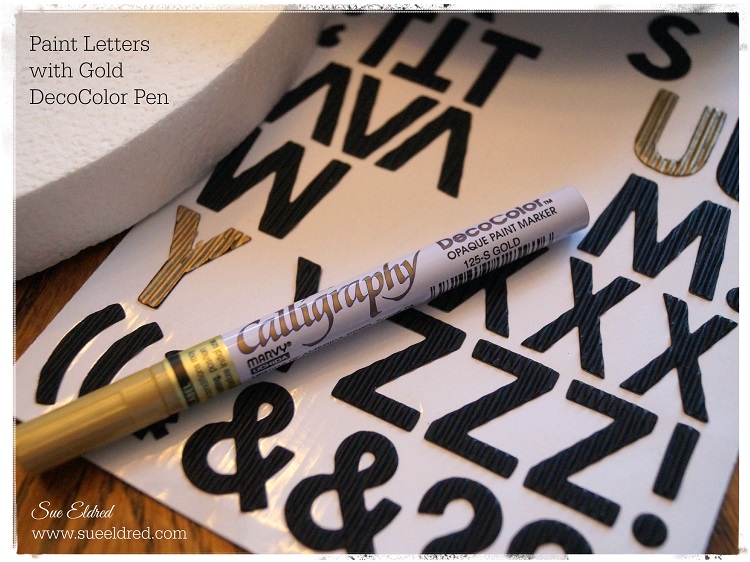
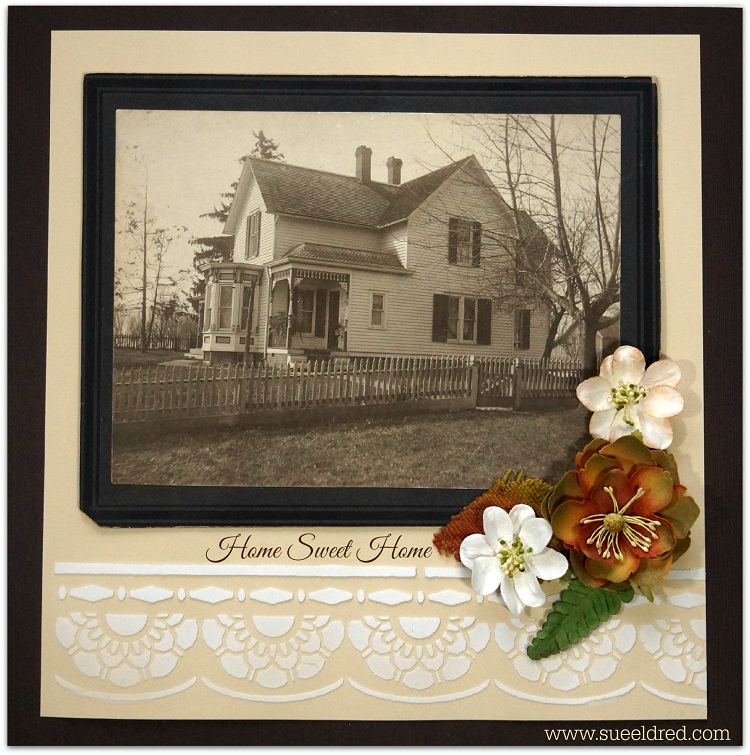
Tattered Tangles: Happy Birthday Tag

Tattered Tangles Birthday Tag 3368

Do you ever need a really large Birthday Tag to make your present “POP”?

Tattered Tangles Birthday Tag Close Up 3370

This tag uses Tattered Tangles a fun doodle art from Canvas Corp. Brands.

Tattered Tangles Collection is printed on a paper called Leather Paper making it

perfect for coloring and different paint techniques.

Supplies Used on the Tattered Tangles Happy Birthday Tag:

  1. Cut Tattered Tangles Birthday image down to 3-3/4″ to 6″.  Color image with colored markers.
  2. Add clear glitter glue to flame on the birthday candle.
  3. Adhere birthday image onto black cardstock.
  4. Adhere small scraps of teal and green burlap onto the corners of a 4-1/2 x 7-1/2″ piece of white cardstock.  Glue rick rack onto the top and bottom.  Layer onto another piece of black cardstock.
  5. Mount birthday image with foam mounting squares onto the burlap and white cardstock.
  6. Curl white curling ribbon and attach to the top of the tag with a small green clothespin.

Happiness Tangled Pack

Disclosure:  This project was created for and sponsored by Canvas Corp Brands and uses affiliate links.

Winter Fun Sledding Layouts

Winter Layout 3153

I finally got around to scrapping the fun sledding pictures I took of Nicholas and his Mom sledding.

What a fun time they had and I had a really great time taking pictures.

Winter Layout 3157

I used Authentique Paper’s Cozy Collection.


Click on picture for ordering information from Amazon*  (I am a Amazon Affiliate.)

Winter Layout Close Up 3142

Warm & Cozy Layout #2 2920

Favecrafts Best Blogger Craft 2015

Capture

Last Sunday, I shamelessly asked for your “vote” in the Best Blogger Craft 2015 Contest.

This Sunday, I decided not to do that.

Instead I’m just going to remind you that if you haven’t checked out all the awesome entries

into the contest that you really should.  http://www.favecrafts.com/voting/Blogger-Contest

And….. if you just happen to want to “vote” for my Precious Baby Girl DIY Gift Tag,

I’d be forever grateful.

Best-Blogger-Voting-Banner-2

You can only vote once.  Voting ends March 10th , 2015 at midnight CST.


Mini Desk Calendar

Deflecto Mini Calendar 2976

Today’s project is one of those quick & easy projects that just make me smile.

You can put together this Mini Desk Calendar in just a few minutes.

I started with a 3″ x 4″ clear acrylic frame from Deflecto Craft Solutions

and a Mini Tear Off Calendar from Taylored Expressions.

Along with some left over scrapbook paper from a class I was working on.

And… because the paper is inserted inside the frame you can easily change

it out with the seasons.  You can make the mini desk calendar with the acrylic

frame upright or laying down.  Either one is cute.

Mini Desk Calendar 3029

“This is a sponsored post. As a member of the Deflecto Design Team I have been provided product in exchange for my creative ideas, views and opinions.”

Shop Amazon Scrapbooking Supplies*

*Disclaimer:  This post uses ads and affiliate links.  If you choose to make a purchase using one of the links, I receive a small commission (at no additional cost to you) that helps offset the costs of maintaining this blog.  Thanks for your support!

Lucky Day Frame

St. Patricks Day Frame 2722

There’s something about turning the calendar page to March that makes me feel happy.

Even though we got snow on March 1rst and ice on March 3rd, I can’t help but feel

that Spring’s just right around the corner.  And… that really makes me happy!

I don’t usually decorate for St. Patrick’s Day…

but after getting this green bordered frame from Deflecto and seeing this “Lucky Day”

collection from Authentique Paper, I was inspired.

Lucky Frame Corner 3118  Flower Close up

I did a little fussy cutting with the hat and shamrocks and adhered them directly onto the front of

the frame.  I also water-colored directly onto the cream paper flower to make it match the flowers

on the scrapbook paper.

“This is a sponsored post. As a member of the Deflecto Design Team I have been provided product in exchange for my creative ideas, views and opinions.”

Fave Crafts 2015 Best Blogger Contest: Baby Girl Tag

This sweet “Baby Girl” tag was made with the products I received after the

2015 Blogger Networking Event at the Craft and Hobby Association Show in January.

The tag is also my submission into Fave Crafts Best Craft Blogger Contest 2015.

(Needless to say, I’ll be shamelessly asking you for your vote at the end of the post.)

Little B Baby Tag 1488 2

Baby Girl Tag

Designed by Sue Eldred

Little B: (littlebllc.com)

  • 100366 Honeycomb Punch
  • 100434 Silver Foil Pink Harlequin Decorative Tape
  • 100418 Pull Flowers Chrysanthemum
  • 100146 Footprints Dimensional Sticker Embellishments
  • 100395 Party Dies

Additional Supplies:

  • Large White Tag 3 1/2” x 6 1/4”
  • Cardstock: White, Pink
  • Large White Button (Buttons Galore and More)
  • Fabri Tac Adhesive (Beacon Adhesives)
  • Tape Runner
  • Thin 3-D Foam Squares (Scrapbook Adhesives by 3L)
  • 5/16 Hole Punch
  • Silver Ribbon (Offray)
  • Computer Generated Font.

Directions:

  1. Punch a 3 1/2” pink cardstock border using the Honeycomb punch.
  2. Add a 3 1/2” strip of decorative tape onto a piece of white cardstock. Trim a very thin border on each side of the tape. Add decorative trim tape piece onto center of the Honeycomb border.
  3. Adhere border on the bottom of the tag.
  4. Cut 12” from the White Pull flowers trim. Fold trim in half and pull strings as directed to create flower.
  5. Add small pink feet stickers to a large white button. Glue embellished button to the center of the flower. Glue flower onto center of the tag.
  6. Create a pink banner from the Party Dies. Add to top of the top using thin foam mounting squares.
  7. Print out the letters: B A B Y using a computer and printer onto white cardstock.
  8. Punch out each letter using a 5/16th hole punch. Add the letters onto the banner with small thin mounting squares.
  9. Tie top of the tag with silver ribbon.

Little B LLC Baby Girl Tag

Confession:  I’m not sure if you noticed or not… 

I did not use a plain white strip under the washi tape on the first picture on this post.

You can see the honeycomb underneath.  I like it better with the white strip.  It’s a little crisper.

I tried retaking the picture of the tag over 100 times.  That one was my favorite.  (so I stuck with it)

Best Blogger Craft 2015

After the favecrafts 2015 Blogger Networking Event at the Craft and Hobby Association Show in January, bloggers received a sample of new products from participating sponsors of that party.  The projects created from these brands and samples are simply amazing! You’re getting the first look at these exclusive projects made with new products hot in the craft market.

They need your help determining which project to crown Best Blogger Craft of 2015! You can only vote once. Voting ends March 10th, 2015 midnight CST.

I submitted this tag as part of Fave Crafts Favorite Blogger Contest.

Please check out all the entries.  (feel free to “vote” for me, if you’d like)

Thrifting Fun

Some of my favorite things 3040

One of my Favorite Things to do is spending time with my daughter.

Because she lives 3 hours away we don’t get to do it as much as I’d like.  So, I was giddy that we got

to spend all day together on Monday.  We went out for lunch, hit a couple of stores and then we went

“thrifting”.  Our favorite spot is closed on Mondays, so we went to Salvation Army and Goodwill instead.

We found some great bargains, but, nothing we really needed.  I picked up a bag of brand new

Red Magnolia Colored Pencils and 50 of these neat little papers for under a dollar.

I figured these pencils would look great once I find the perfect container.  Now I just need to

keep them away from my little buddy who loves sharpening pencils in Grandma’s office.

The little drawer was a “find” that my daughter found while antiquing in Nashville.

I wish I could spend every Monday like this.

pencils and paper 3065

Make a Lucky Hat for St. Patrick’s Day

Feeling a little Irish? 

Need a Lucky Hat for St. Paddy’s Day?

Using only a few Smoothfoam shapes you can make yourself a Lucky Hat centerpiece

in no time.  A fun centerpiece for all your “GREEN” celebrations.

Here’s what you’ll need:                                                                                    (*affiliate link)

Directions:

  1. Paint 8″ Half Ball and 10″ Disc with English Ivy paint.
  2. Repaint Disc and Half Ball with Kelly Green paint, allowing some of the darker paint to show through.
  3. Paint sides of 8″ Disc with Black paint.
  4. Glue 8″ Disc onto the 8″ Half Ball.
  5. Center and glue onto the  10″ Disc.
  6. For a shiny finish, paint the entire piece with Mod Podge.
  7. To create gold letters, paint the chipboard letters with a gold paint pen.

Have a great day and may the “Luck of the Irish” be with you!

 
Click on the pictures for product ordering through Amazon*.

Disclosure:  This post uses affiliate links.  If you choose to make a purchase using one of the links, I receive a small commission that helps offset the cost of maintain this site.  Thanks for your Support!

This project was created for and sponsored by Smoothfoam.

Shop Amazon Scrapbooking Supplies*