Sweet Baby BOO!

My sweet little grandson will be celebrating his first Halloween soon…

Inspired by our newest game, I decided to make him a cute little shirt to wear.

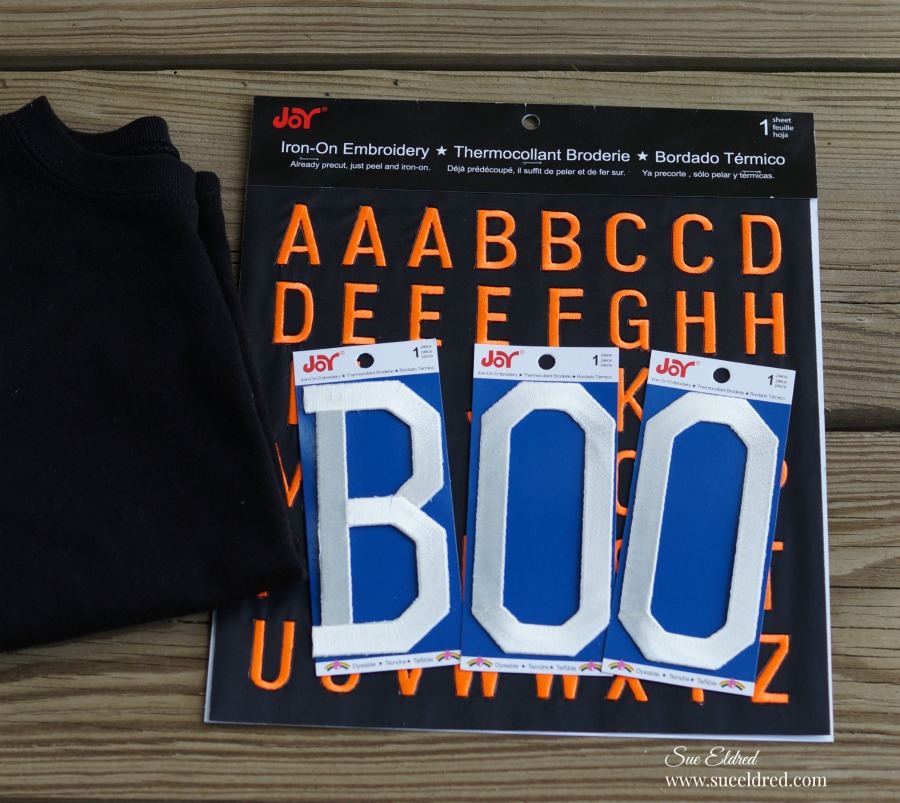
With the help of Iron-on Embroidered letters from Joy making the shirt was super easy.

  • prewash cotton t-shirt
  • set iron to cotton setting
  • position letters with shiny side down on garment
  • cover letters with a fine cloth
  • with firm pressure iron cloth over the letters for 25 seconds
  • turn shirt inside out and iron the back of the letters for 25 seconds
  • allow to cool for 1 minute before cooling
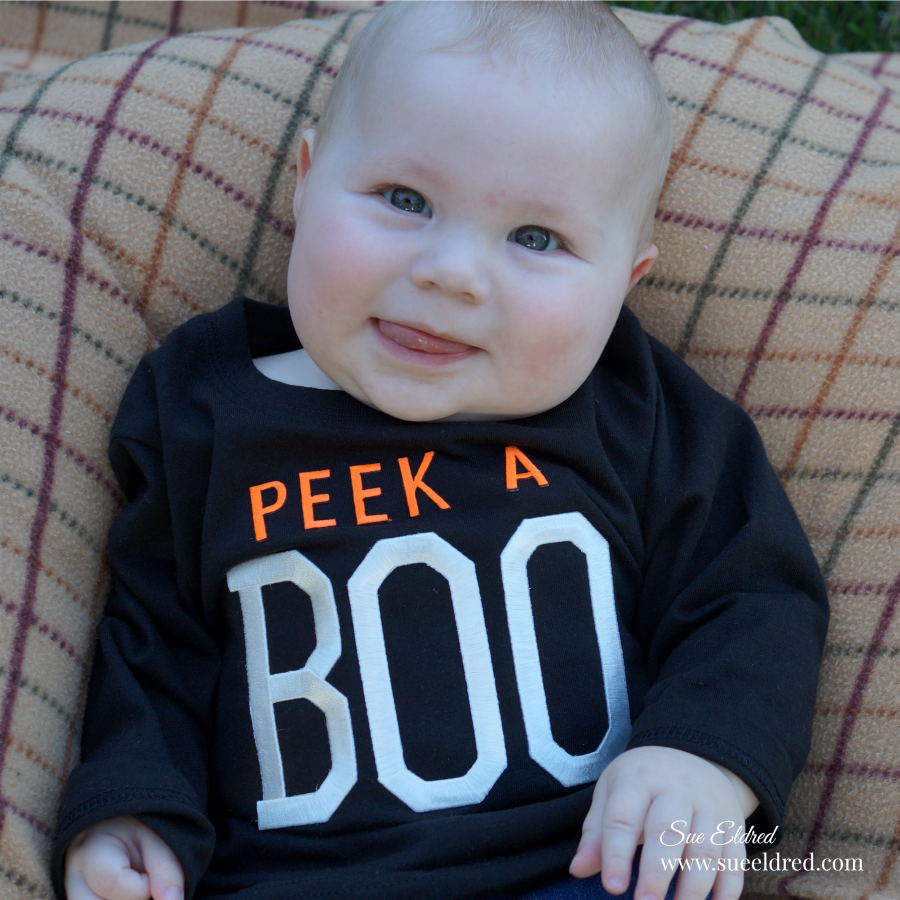
Isn’t he adorable?

Looking at this picture, I’m thinking really big googly eyes would look cute inside the “O’s”.

My “Sweet Baby Boo” shirt was created for and sponsored by Joy SA.

*Disclaimer:  This post uses ads and affiliate links.  If you choose to make a purchase using one of the links, I receive a small commission (at no additional cost to you) that helps offset the costs of maintaining this blog.  Thanks for your support!

Try Amazon Prime 30-Day Free Trial

Boo Door Hanger and Autumn Wreath

autum-wreath-and-boo-door-hanger-sues-creative-workshop-1256

The plan was to make the “Boo Door Hanger” and the “Autumn Wreath”

as two separate projects with two separate blog posts.

But… while I was working on decorating my front porch for Fall,

I tried them together and decided I liked it.

The “Boo Door Hanger” is a separate piece that I can remove after Halloween.

fall-wreath-supplies-sues-creative-workshop

I assembled the wreath using a grapevine wreath, a couple of fall silk floral bouquets, ribbon and my

hot melt glue gun.  After cutting the stems apart from the bouquet, I played around with the

arrangement of the flowers and glued them in place.

A simple bow glued into place finished off the Autumn Wreath.

The entire project took less than a half hour.

sign-tags-stickers-and-paper-1119

The Boo Door Hanger was a little more involved…

I used Black Sign Tags that come with a White Wet Erase Marker from Deflecto Craft Solutions

and Halloween paper and stickers from Paper House Productions.

die-cut-frames-1124

I applied the Halloween paper onto thin chipboard and cut out three die-cut frames.

I cut the sign tags just slightly bigger than the opening of the frame and adhered it to the back.

drawing-the-letters-with-the-chalk-marker-1125

I drew in my letters using the white dry erase pen.

Make a mistake?  Just wipe the sign tag with a damp paper towel and start over.

boo-door-hanger-close-up-1127

I punched two holes in the top and bottom of the first two frames and the top only of the last frame.

I added a black eyelet to each hole and connected the frames with small garment pins.

boo-door-hanger-1129

I embellished each frame with Spooktacular 3D Stickers from Paper House Productions.


“This is a sponsored post. As a member of the Paper House Productions and Deflecto Design Team I have been provided product in exchange for my creative ideas, views and opinions.”