Sometimes the best projects begin with a forgotten sign and a spark of inspiration.
There always seems to be a new project happening around here.
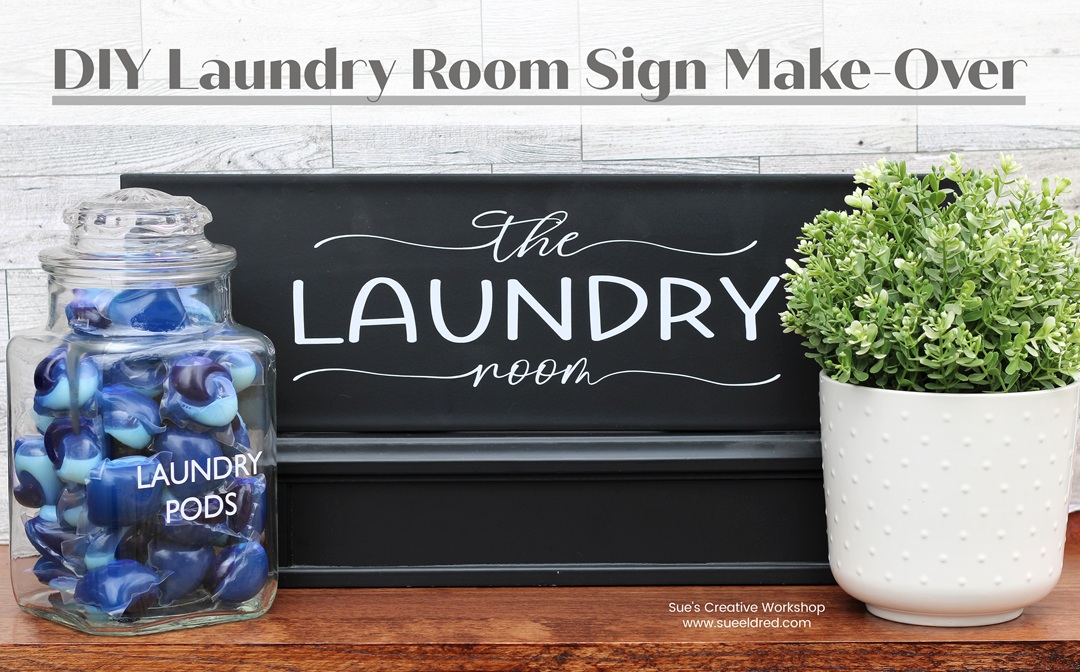
Our latest endeavor is a simple laundry room refresh.
(A lot of good things that I’ll share at the end of the month.)
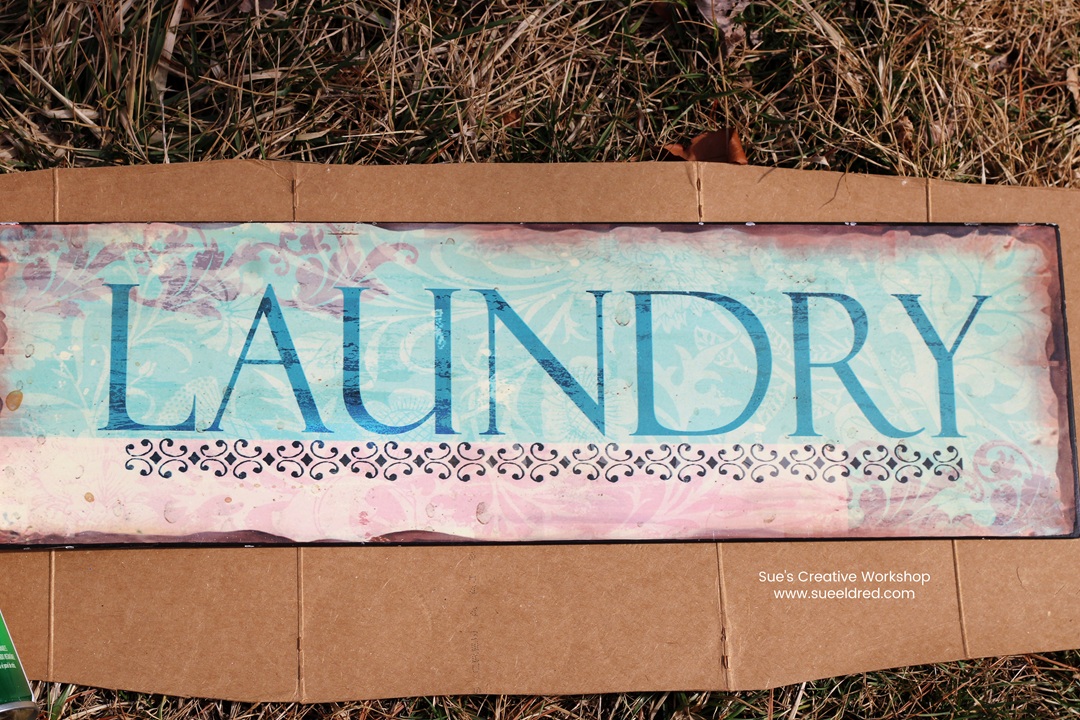
Laundry Room Sign Before…
While preparing the room for a new coat of paint, I removed the old pictures
and laundry room sign. I added the new discards to my “Donate” pile.
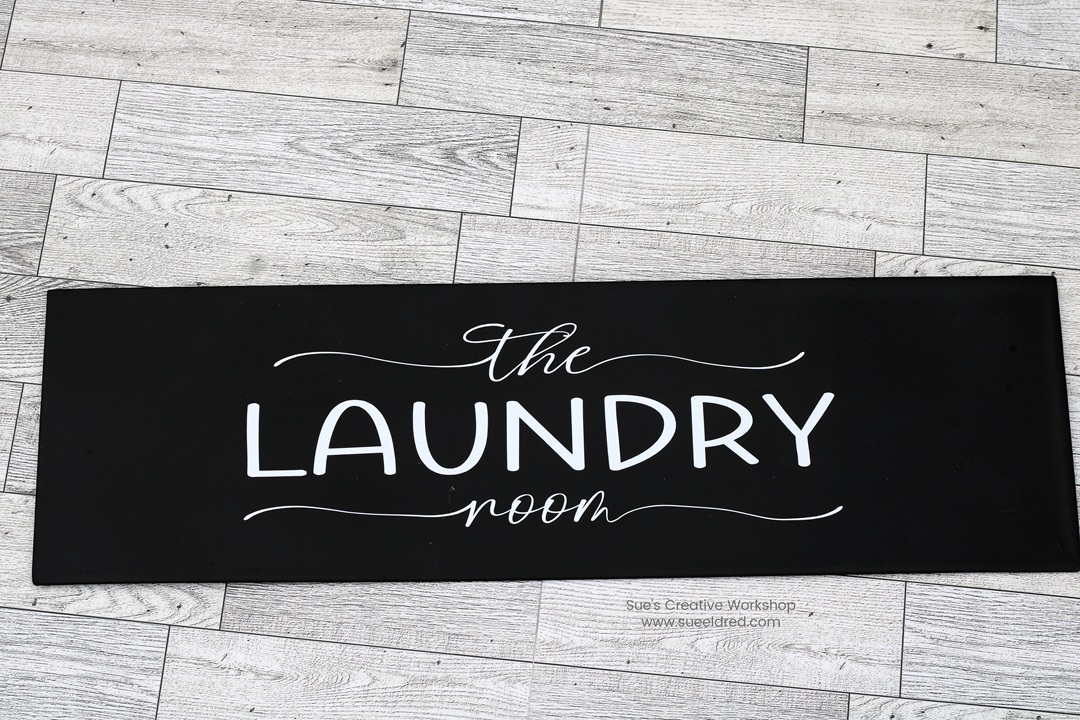
After a second glance, I decided to make-over the sign instead.
I had nothing to lose if I didn’t like it.
To make over the Laundry Room Sign:
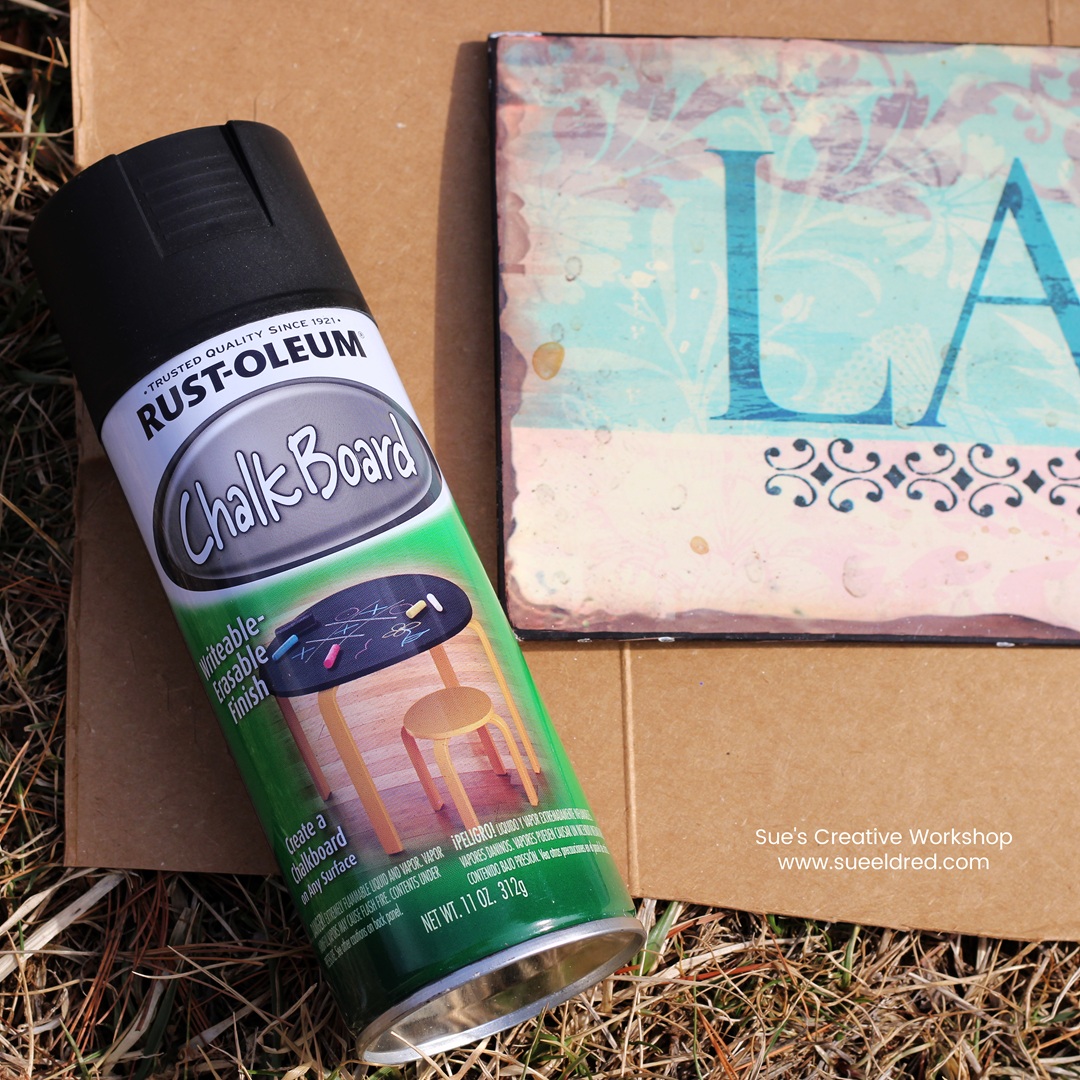
- Wipe the sign with a damp cloth to make sure it’s clean and dust free.
- The metal sign was smooth, so I didn’t prep the sign with sanding.
- I spray-painted the sign with leftover Black Chalkboard paint* to give it a matte finish.
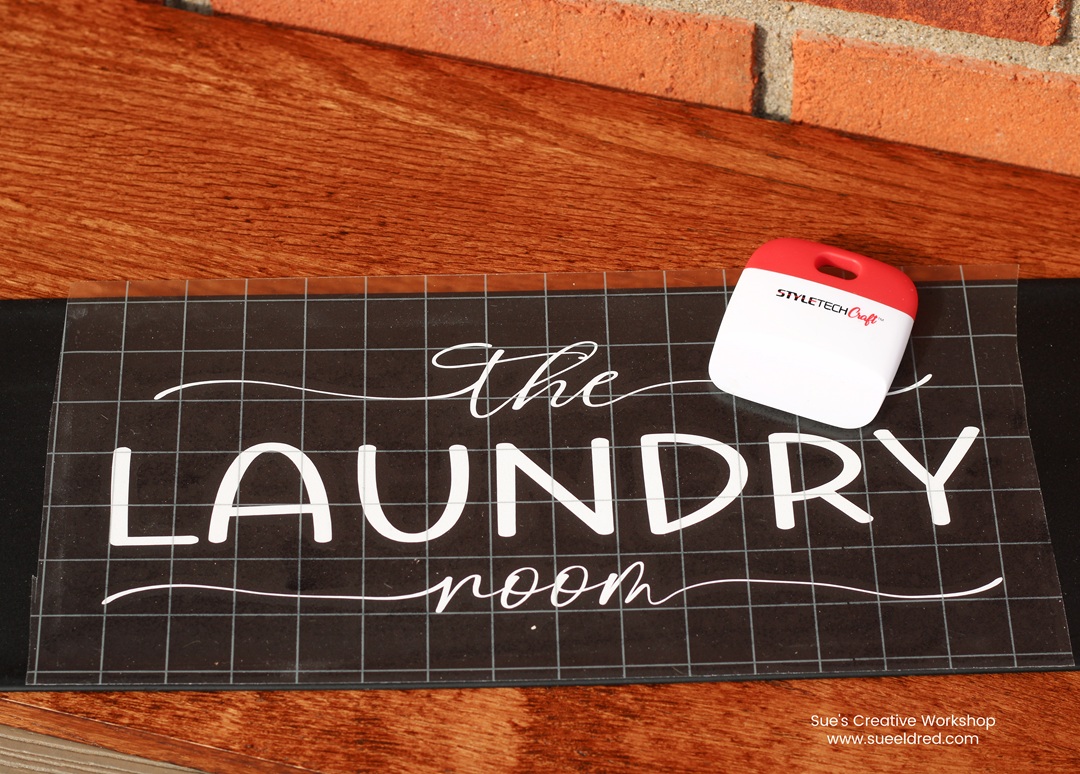
- I used a Silhouette Cameo Electronic Die-Cutting Machine* and StyleTechCraft White Glossy Craft Vinyl to cut the words “The Laundry Room”.
- I got the SVG cut file from The Silhouette Design Store.
- Once the vinyl was cut and weeded, I placed the words onto the sign using transfer paper. I gently rubbed over the transfer paper and sign using a vinyl scraper tool*.
- After the words have transferred on the sign, remove the transfer paper.

*Disclosure: This blog uses ads and affiliate links. If you choose to make a purchase using one of the links, I receive a small commission (at no additional cost to you) that helps offset the costs of maintaining this blog. Thanks for your support!
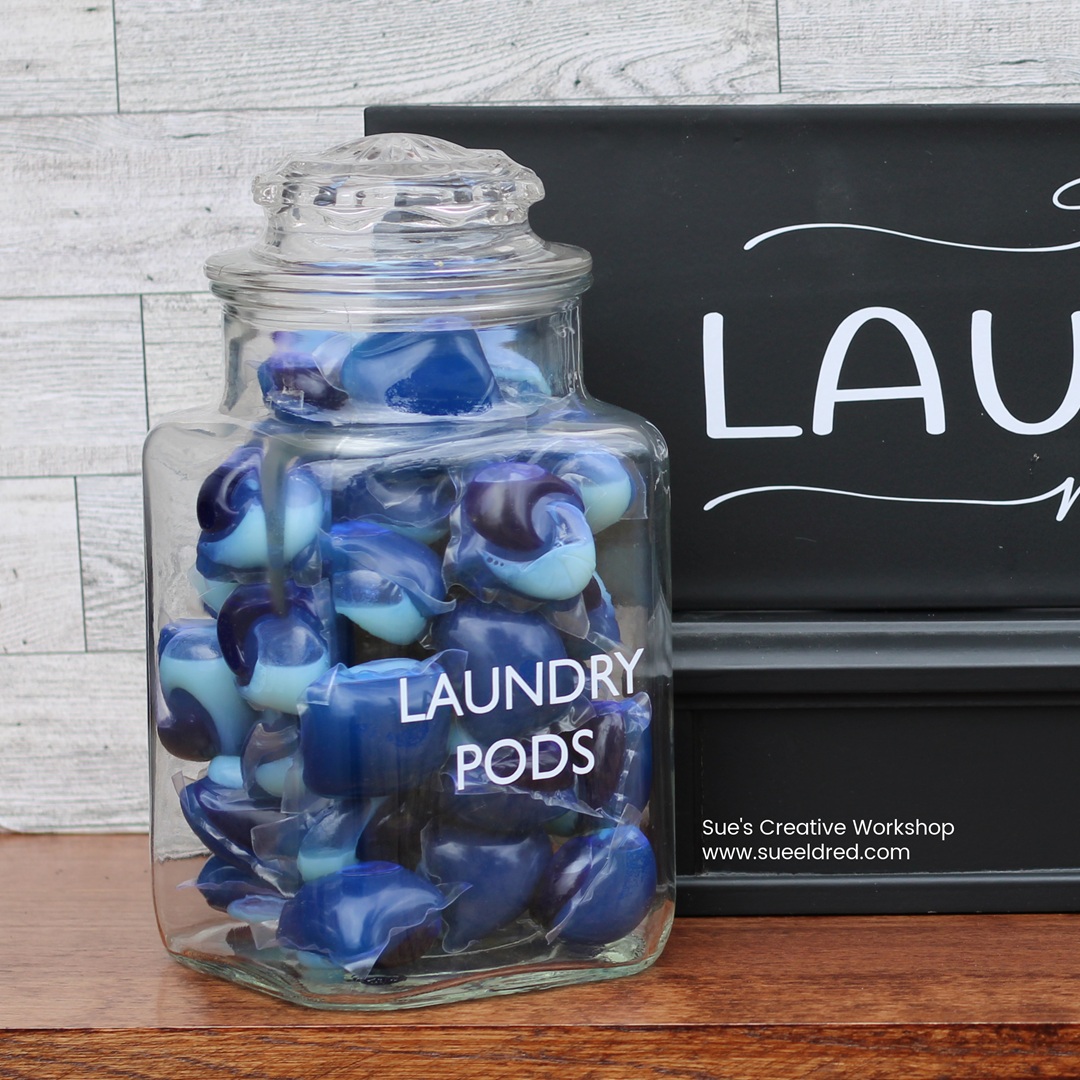
A little extra addition…
While I had my vinyl and machine out, I cut the words “laundry pods”.
I placed it on an old apothecary jar I picked up years ago from a garage sale.
(You can find new apothecary jars here*.)
There’s nothing more satisfying than giving new life to the things I already have on hand with quick and easy makeovers.
![]()
“This is a sponsored post. As a member of the StyleTechCraft Design Team I have been provided product and compensation in exchange for my creative ideas. The views and opinions are my own.