Adding Personality to Create Vintage-Inspired Shower Dispensers.
Last Spring, we started a complete remodel of our upstairs bathroom.
What was supposed to be a 6-week project ended up taking 14 weeks.
Life happens, and I’m generally a patient person.
(But, not necessarily that patient.)
Anyway, I’ve been working on the finishing touches to the bathroom,
and these Vintage-Inspired Shower Dispensers* are the look that I needed.
(FYI…Finished bathroom before and after video coming soon!)
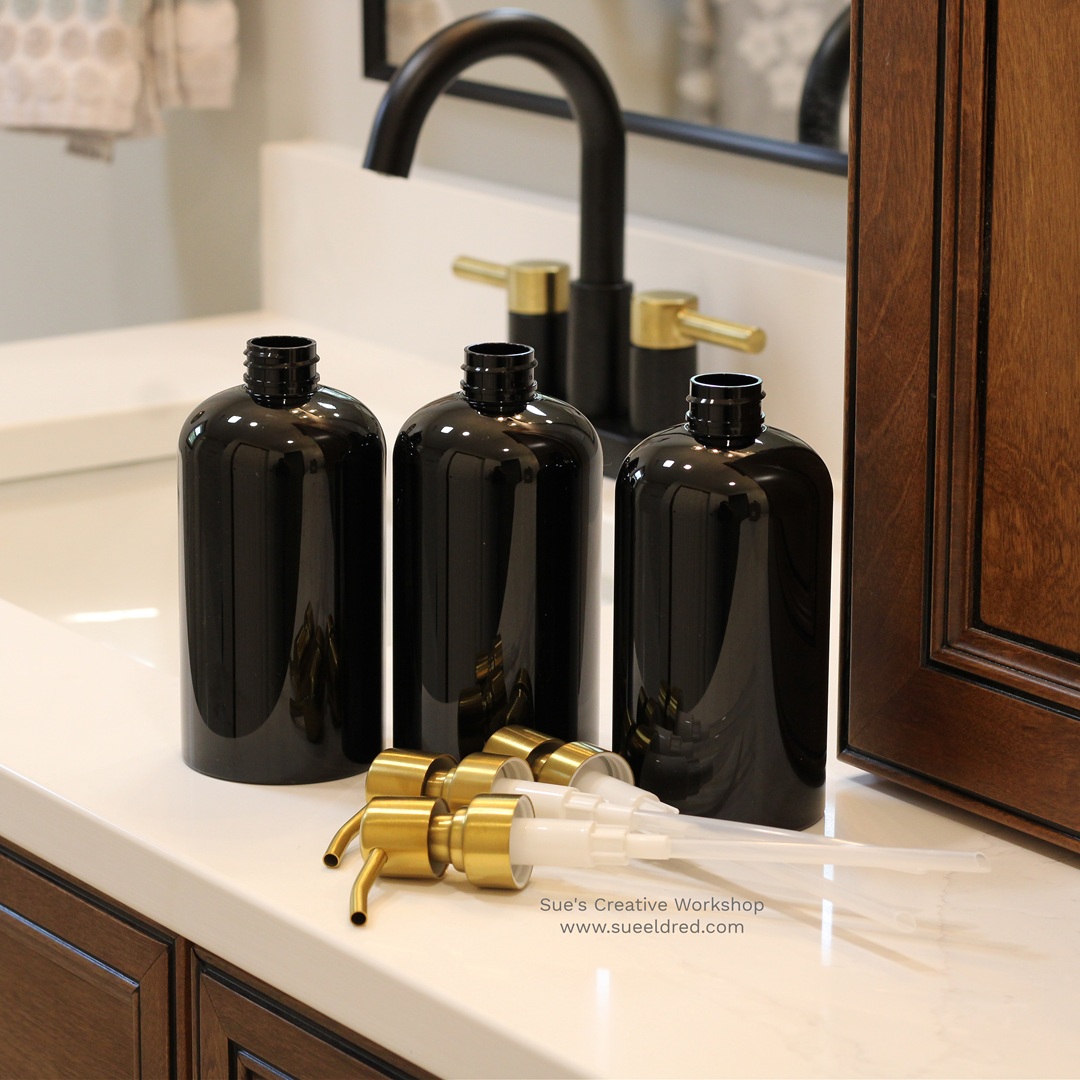
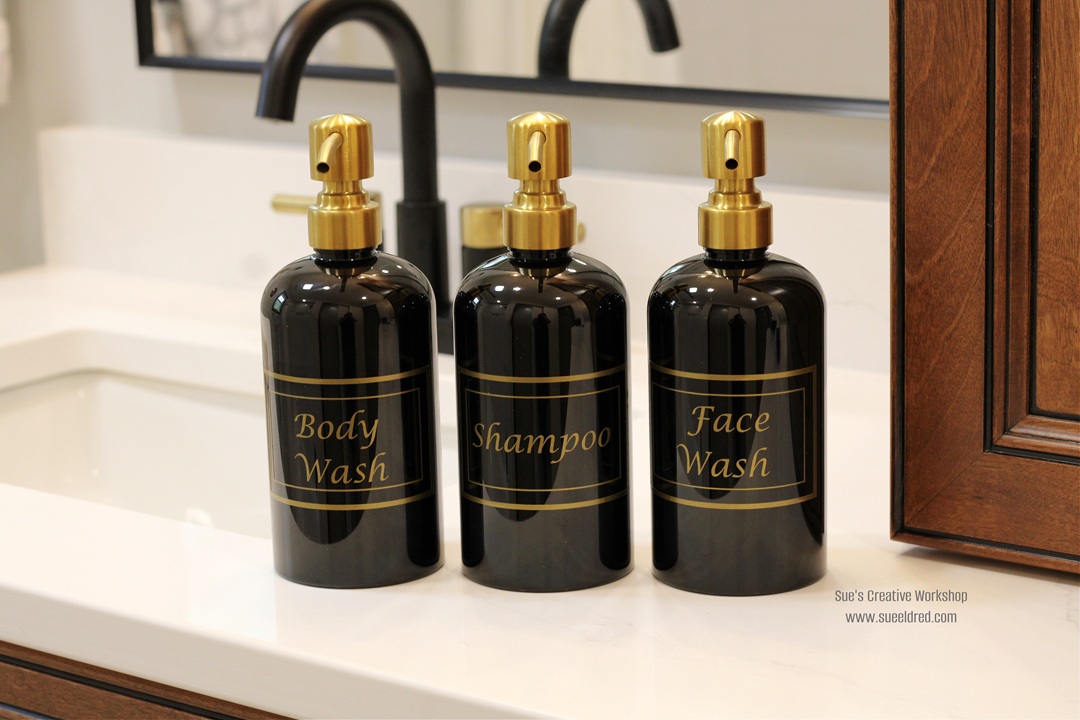
For the shower niche, I found a set of 3 black plastic refillable shower bottles
on Amazon with gold stainless steel pumps.
They fit my style and matched the gold handles on my vanity faucets perfectly.
(This is the link to the exact dispensers I purchased*.)
Adding the Personality…
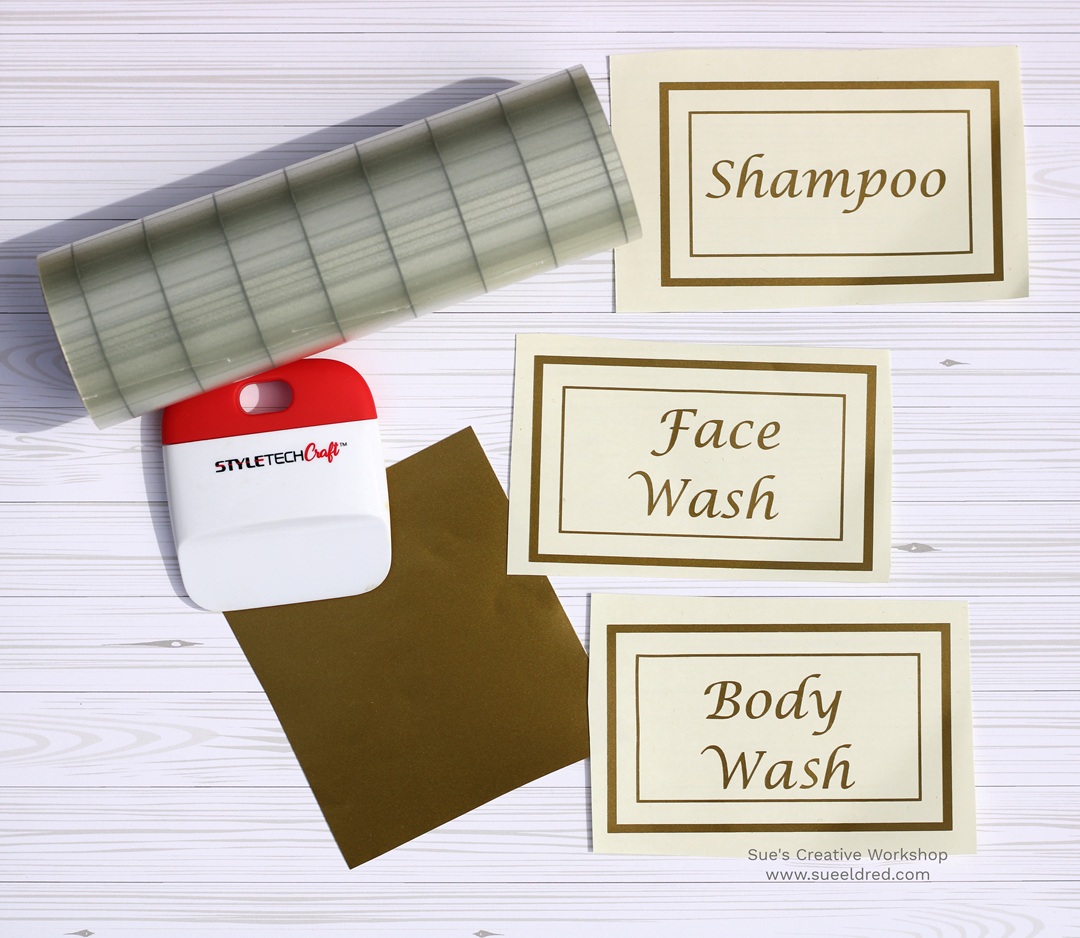
I decided to make gold labels using StyleTechCraft adhesive vinyl
instead of the white labels that came with the dispensers.
Did you know that StyleTechCraft makes several colors of gold vinyl?
The gold craft vinyl ended up being the closest match.

*Disclosure: This blog uses ads and affiliate links. If you choose to make a purchase using one of the links, I receive a small commission (at no additional cost to you) that helps offset the costs of maintaining this blog. Thanks for your support!
Directions:
- I designed the label using a Silhouette Cameo Electronic Die-Cutting Machine*.
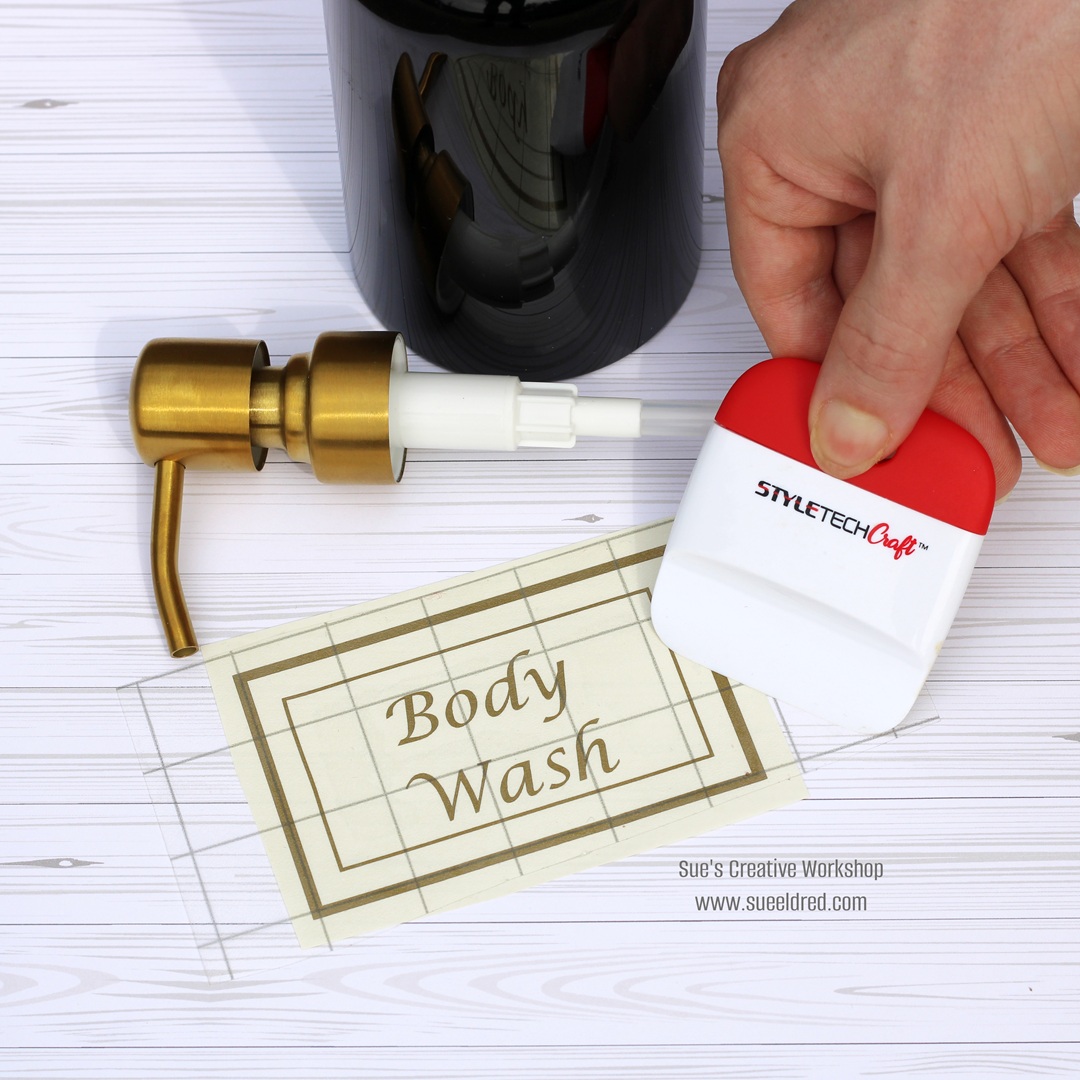
- Once the label has been cut, you’ll need to remove the excess vinyl in and around the letters and frame. (Use a vinyl weeding tool* or craft pick*.)
- To help the vinyl stick securely to the bottle…Wipe the surface of the bottle with rubbing alcohol* to remove any oils or fingerprints.
- Lay StyleTechCraft Transfer Tape* over the label and gently rub over the letters with a vinyl scraper tool*.
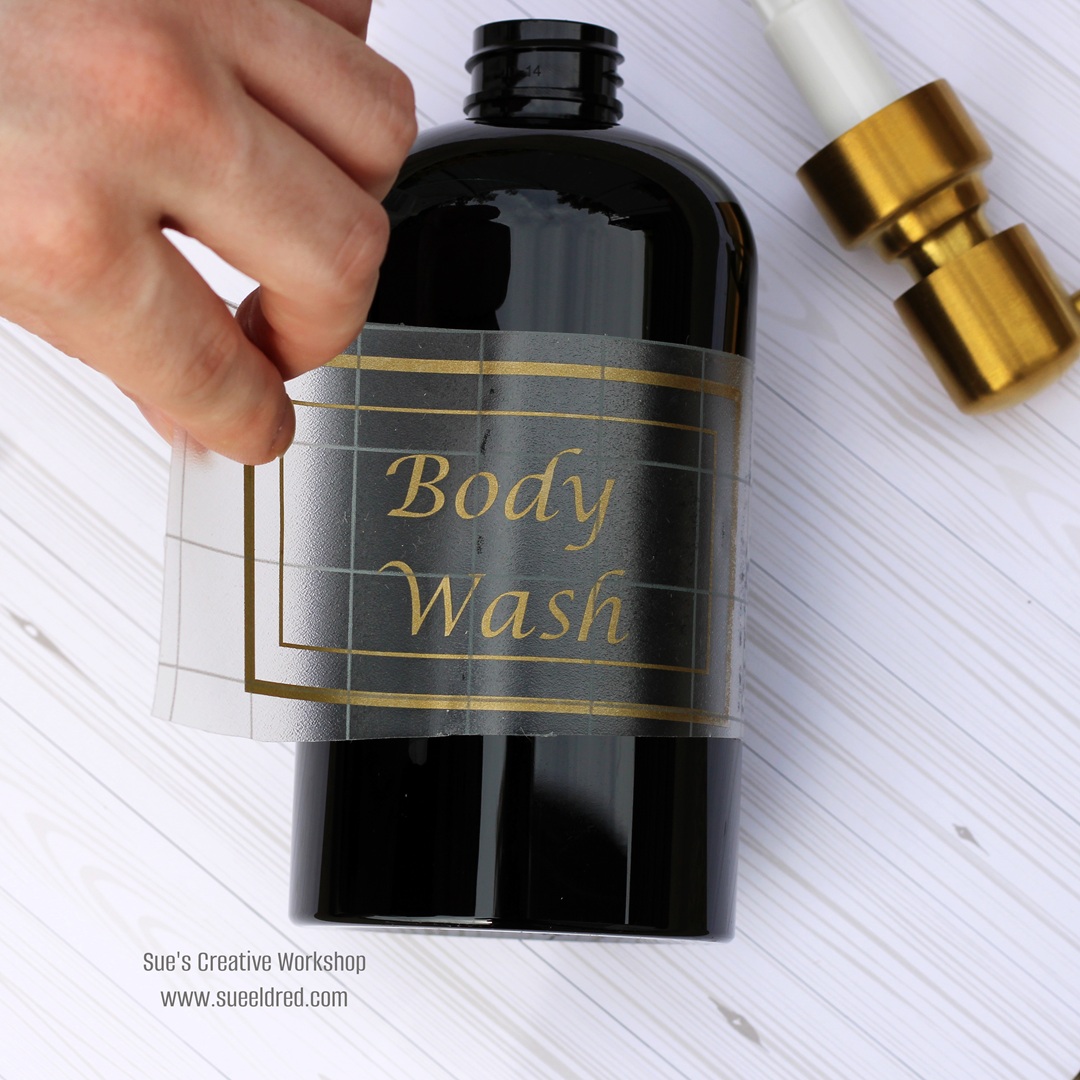
- Remove the StyleTechCraft Transfer Tape* and design from the white protective backing and place it onto the bottle.
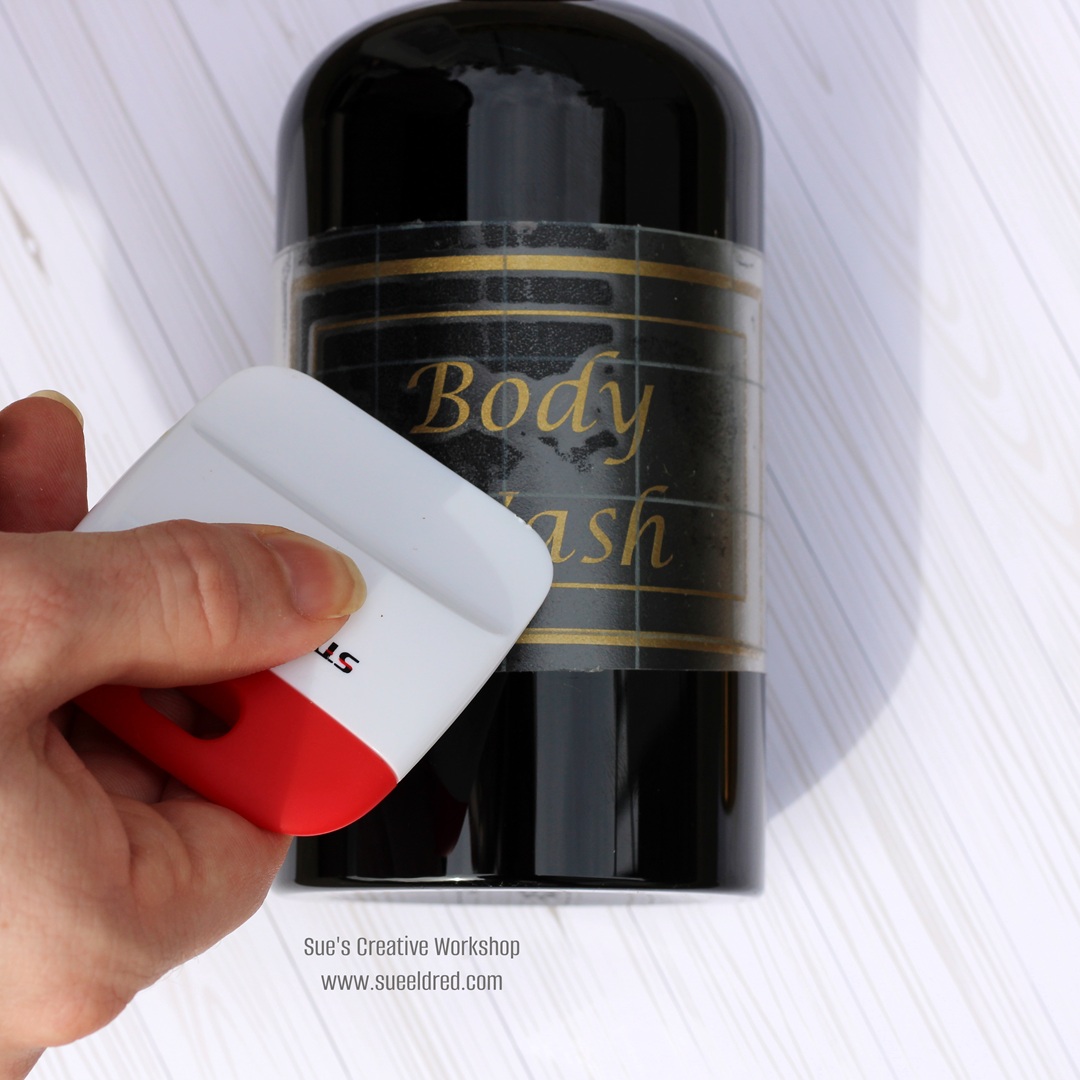
- Rub over the transfer tape* with the scraper tool to ensure the vinyl has transferred.
- Remove the transfer paper.
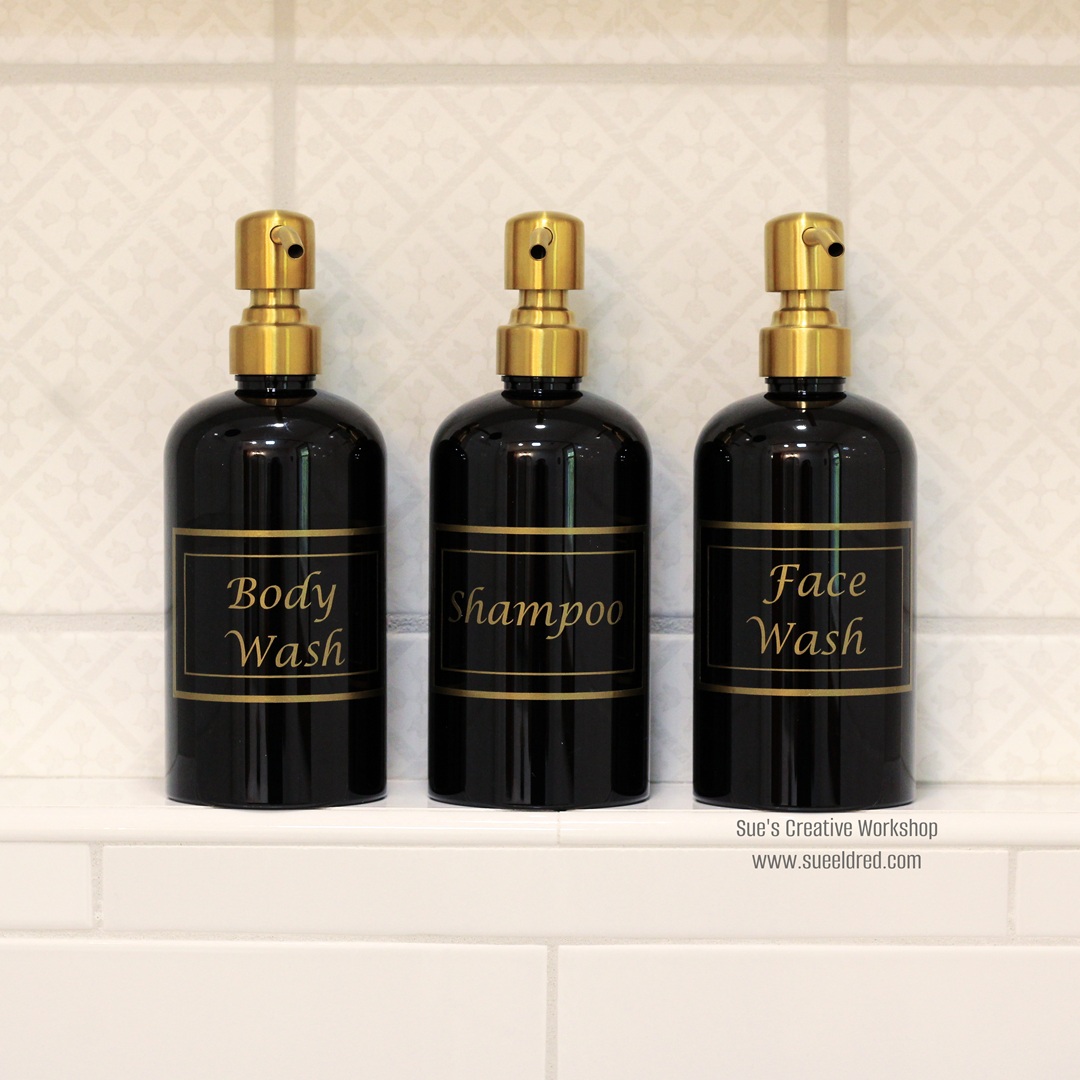
These bottles elevate the Shower Niche with a Classic Vintage-Style.
They look a whole lot better than the bottles that they came in.
![]()
“This is a sponsored post. As a member of the StyleTechCraft Design Team I have been provided product and compensation in exchange for my creative ideas. The views and opinions are my own.