Layout and Cards with Jillibean Soup’s Garden Harvest Collection

Layouts and Cards with Jillibean Soup’s Garden Harvest Collection 

This is one of my favorite pictures of my three kids now that they’ve grown up.

Silly, Carefree and Serious

It captures their personalities perfectly.

I have this picture in a frame in my family room,

but, I wanted to use it for a scrapbook layout as well.  (It is my favorite, after all.)

I used Jillibean Soup Garden Harvest Collection Pack* to make my layout and a few extra cards.

I love a “clean and simple” card.

“You are my happy” card.

Shop Your Fav Brands at Scrapbook.com

*Disclosure:  This blog uses affiliate links.  If you choose to make a purchase using one of the links, I receive a small commission (at no additional cost to you) that helps offset the costs of maintaining this blog.  Thanks for your support!

Love Makes a Family Banner

Create a sweet Home Décor Banner with Rose Appliques and letters.

To make the Love Makes a Family Banner you’ll need:             (*affiliate links)

Directions:
  1. Create a banner by folding the white felt in half lengthways.  Cut diagonally across the bottom from the center fold to a point approx. 3″ from the bottom corner on the outer edges.
  2. Set iron to cotton setting, or follow garment care label.  Position Rose Appliques and letters with shiny side down on felt.
  3. Cover with a fine cloth.  With firm pressure, iron over cloth for 30 seconds.  Turn banner over and iron the back of the letters for 30 seconds.
  4. Cut down 1″ longer than the banner.
  5. Glue or sew the top of the banner over the wood dowel.
  6. Glue gold trim to top of the banner.

You can find Joy® iron-on, embroidered letters, floral appliques at your local craft stores.

“This is a sponsored post.  As a member of the Joy® Design Team I have been provided product and compensation in exchange for my creative ideas.  The views and opinions are my own.

Shop Your Fav Brands at Scrapbook.com

*Disclosure:  This blog uses ads and affiliate links.  If you choose to make a purchase using one of the links, I receive a small commission (at no additional cost to you) that helps offset the costs of maintaining this blog.  Thanks for your support!

Jillibean Soup and Xyron-Siblings Layout

Growing up with you is one of my favorite memories.

This is me with my crazy, wonderful siblings.    (I’m right smack dab in the middle.)

The five of us have been through a lot together.  Especially the last year.

I’m  so glad we have each other to count on.

Even though we drive each other crazy from time to time, there’s a real closeness and love.

This picture was taken last August when the whole family got together for one last

picnic at our family home.

Home… A story of who we are.  A collection of things we love.

That caption from the collection about brought a tear to my eye.

I’m a little nostalgic when it comes to home right now.

Down the hall in my family home was a very large collection of photos.

The pictures covered both sides of the hall walls.  It was like a very big scrapbook.

No one was left out.   (even if you didn’t like the picture)

A collection of everyone they loved.

For my Siblings Layout…here’s what I used:               (*affiliate links)

When you have a lot of little pieces to stick onto a layout I like to use a combination

of my Xyron 3″ Sticker Maker* and my Xyron Mega Runner*.

The Xyron Sticker Maker is real easy to use.  Just place the paper, design side up, into the end of the sticker maker and pull the paper through.  Rub the protective covering and peel back to expose sticker.

This week the Xyron and Jillibean Soup Design Teams have joined forces for one amazing blog hop.  Make sure to join us each day on Facebook for awesome inspiration and a chance to win some cool prizes on both pages.  (make sure to visit both!)

“This is a sponsored post.  As a member of the Xyron Design Team I have been provided product and compensation in exchange for my creative ideas.  The views and opinions are my own.

Shop Your Fav Brands at Scrapbook.com

*Disclosure:  This blog uses affiliate links.  If you choose to make a purchase using one of the links, I receive a small commission (at no additional cost to you) that helps offset the costs of maintaining this blog.  Thanks for your support!

“The Family Tree”

The Family Tree…

In the backyard of my childhood home stands a ginormous Silver Maple tree.

That gigantic tree has been the backdrop for tons of family pictures during it’s 40 plus years.

I’d always thought of it as “my tree” because I was the one who drug it up from the woods

and had planted it.  Up until recently, possibly last year, I found out that it wasn’t my tree.

Dad told me that my tree didn’t make it and he had replaced it with this one.   (Sigh!)

One of my favorite pictures was this one taken on Thanksgiving Day 2006.

The guys were out in the yard playing catch with the football and I asked my sister-in-law

to snap a family picture.  The guys lifted my youngest up in the tree, football still in hand.

As we get my parents house ready to sell, it dawned on me that I need to get another

family picture by “my tree” while we still have the chance.

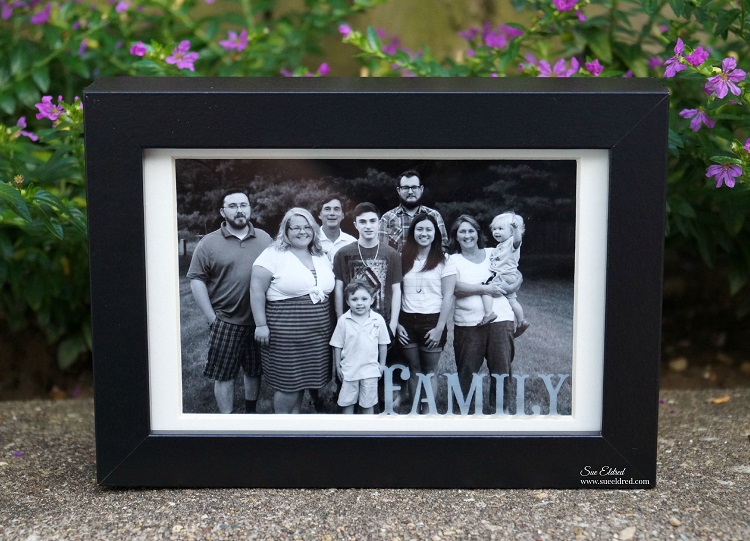
This past week-end, we had one last large family get-together at the home

and took one enormous family picture around that old tree.  (35 in all with only 3 missing.)

We also took this one of my family…Just as we were, sweaty and all.

It was a beautiful evening spent celebrating family.

It was also a little bittersweet as I know Mom and Dad would have loved it.

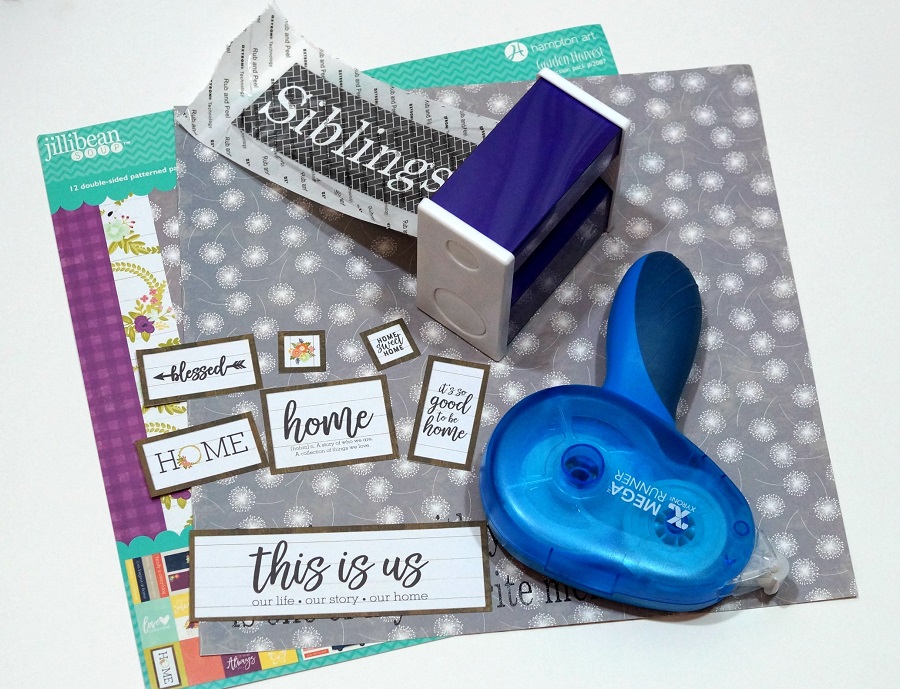
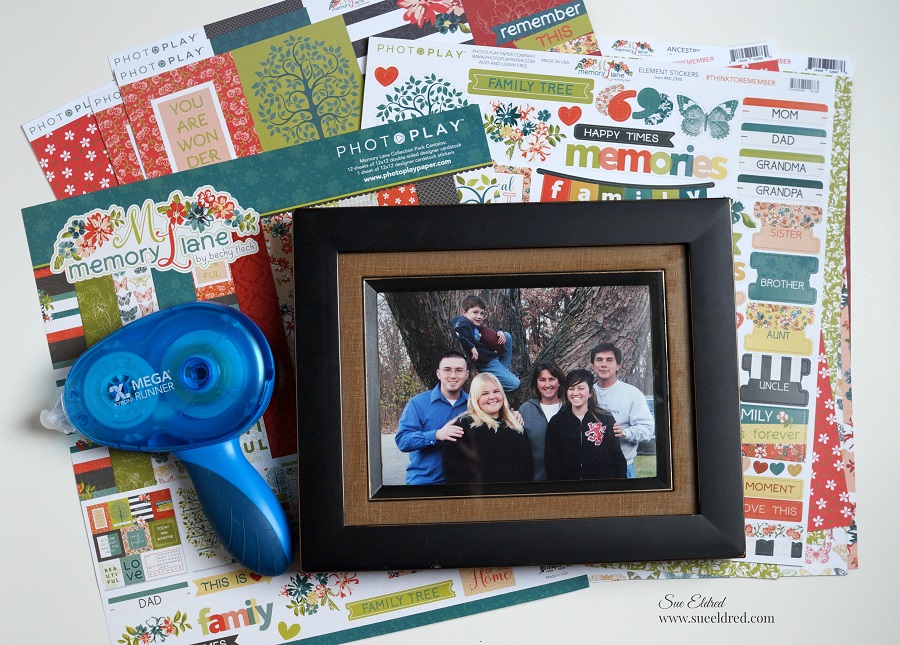
For my Xyron Design Team project this week, the team got the opportunity to pick any

collection we wanted from Photoplay Paper.

The moment I saw the Memory Lane Collection I knew it was perfect for my pictures.

I received the collection which included 12 sheets of beautiful double-sided paper and a full

sheet of beautiful cardstock stickers and a package of the ephemera cardstock die cuts.

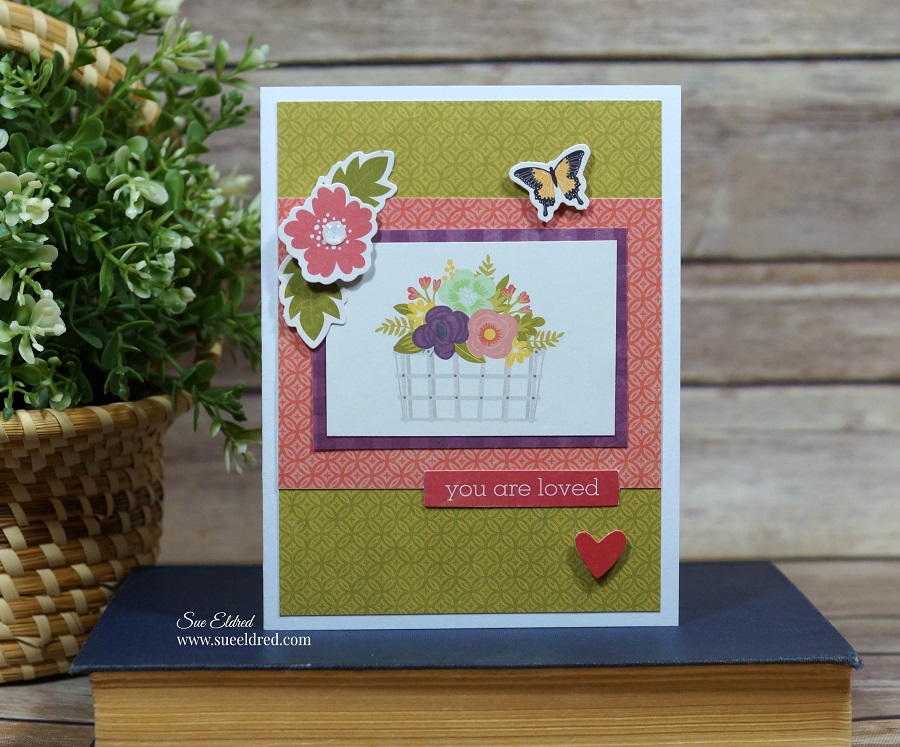
Everything went together smoothly with the help of my trusty Xyron Mega Runner*.

“This is a sponsored post.  As a member of the Xyron Design Team I have been provided product and compensation in exchange for my creative ideas.  The views and opinions are my own.

*Disclosure:  This blog uses affiliate links.  If you choose to make a purchase using one of the links, I receive a small commission (at no additional cost to you) that helps offset the costs of maintaining this blog.  Thanks for your support!

Sue’s Family Flip Album Video

As soon as I received this new flip book from Paper House I fell in love.

This interactive album has plenty of room for photos, and lots of places to write

down memories, plus it has special pockets for keepsakes.

Since mere pictures wouldn’t show you how fun this album is…

I decided to make a short video.

I actually spent more time editing and uploading the pictures to be printed than it took me to put this

album together.  I decided to keep my album simple with just a few stickers.

I’ll go back later and add some journaling.

But…with the extra large spine, you’ll be able to get carried away embellishing. (if you’d like)


The album I used in the video is…

Paper House Productions FB-0004E Flipbook Interactive Album, Wedding Day*

Since the pages of the album are neutral they worked perfect for my family pictures.

To embellish my album I used the Wedding Day 12″ Cardstock stickers.


*This project was created for and sponsored by Paper House Productions.

This post uses Amazon Affiliate links.  If you would choose to purchase an item from Amazon

using this link I will receive a small commission that helps offsets the costs of running this blog.


Etched Family Frame

Etched Family Frame 09191

Whenever I get a chance…

Whenever they’re all home together…

I try to get a family picture.

It only seems to happen a few times per year.

When we’re all together, there’s so much excitement, talking and laughter that I  forget.

Like this summer, after swimming and naps….

I set up the tri-pod, gathered the kids and set up the self timer.

(it’s always good for a few laughs)  All 18 eyes were open,

all those who were running away were captured and everyone was looking.

Phew… not an easy task.  But always worth it in the end.

It was starting to get dark, so the picture’s not as clear as I’d like it.

I decided to print it in black and white and put it in a simple black frame.

Family close up 09196

To capture the sentiment of the picture I etched the word “family” on the glass.

Etched Frame Supplies 08943

Etched Family Frame Products Used:               (*affiliate links)

Directions:

  1. Remove glass from frame.  Clean glass to remove all dirt, fingerprints and oil.  Dry with a coffee filter, paper towel, or lint-free cloth.
  2. Apply “Family” stencil to glass.  Burnish the edges of the stencil.  You want to make sure no edges are coming up.
  3. Mask around the stencil with removable painters tape for extra surface protection.
  4. Apply a heavy coat of etchall® etching crème to the masked area of the stencil.
  5. Leave etching crème on design for 15 minutes.  After etching time has elapsed, use the squeegee to return the crème back into the original container for later re-use.
  6. Rinse etched surface with hot water to remove any remaining crème. Remember to keep crème away from porcelain sinks or ceramic tiles.
  7. To make the etched letters stand out more, apply picket fence distress paint over the letters.  Wipe surrounding area of the glass clean.

Poof and he's gone

and for your viewing pleasure…

Shop Your Fav Brands at Scrapbook.com

*Disclaimer:  This post uses ads and affiliate links.  If you choose to make a purchase using one of the links, I receive a small commission (at no additional cost to you) that helps offset the costs of maintaining this blog.  Thanks for your support!

Try Amazon Prime 30-Day Free Trial

Busy Summer Meal Planning

I was recently thumbing through a magazine and noticed a week of dinner plans.

Each meal was designed to be ready and on the table in 45 minutes or less.

While I like the idea, I looked at the menu and said to myself.

“My family would never go for that.”

Black Bean Burgers with Srirachi Aioli and Greek Cucumber Salad?

Seriously, I wouldn’t even know where to start.

At the risk of sounding horrible…  (Healthy Moms close your eyes)

Here’s what my Busy Summer Menu looked like for the week:

Mon:  Ham Steak, Cheesy Potatoes, Green Beans

Tues:  Fiend for Yourself Night  (Baseball Practice, Dad out-of-town) aka leftovers

Wed:  Crockpot Italian Beef, Baked Mac and Cheese and because we had three extra teen-age boys show up I added a Wal-Mart Pizza for good measure.  (total of 9 for dinner)

Thurs:  BLT’s and Chips.  (Baseball Practice, Dad out-of-town)  Of course, Dad/Grandpa stops by and offers to take me to Cracker Barrel.  Who am I to refuse?  BLT’s another night.

Fri:  Pizza Night  (of course!)

Now if this isn’t your idea of good meal planning, please don’t throw me under the bus just yet.

Once school starts, I’ll do much better.  (I hope)

Until then, you can enjoy your Grilled Steak Panzanella with Pickled Vegetables and Bourbon Peach Limeade without me.


Summer Distractions

Summer Collage 2014

Summer always goes so fast for me.

It’s always around this time in the Summer that I start wondering what I’ve done.

That’s why I’m glad I take a lot of pictures, so I can look back and remember.

No, we didn’t take a big family vacation.  But, we’ve been busy just the same.

33 games of baseball, picnics in the park, swimming whenever the weather

was warm enough, a couple of out of state week-ends trips, unexpected home repairs

and general laziness.

I guess that’s what summer’s really all about.   Enjoying life as it happens.

Cherish Family 1936

I recently ran across this old Family Reunion picture from 1936.

Cherish Family 1936 layout

Because there is over 100 relatives in the picture, I wanted to highlight where my Grandparents are.

Cherish Family 1936 layout tools

I used one of the frames from the “Clear Mixers”.

After removing one side of the protective covering, I painted the edges with Antique Linen Distress

Paint.  I glued a small piece of scrapbook paper under the painted side and trimmed it with an exact-o

knife.  I gently sanded the edges with a sanding block and distressed it slightly with Vintage Photo

Distress Ink before removing the second protective coating.

Cherish Family Layout 1936 close up

My grandfather is the one with the x and my grandmother is sitting to his left holding my Uncle Bill.

I used the Chamberry Collection from Adorn it and a scalloped circle punch and a old border punch

from Marvy Uchida.

This project was created for and sponsored by Clear Scraps.