Merry & Bright: Upcycled Lantern with a Snowman Twist
This season, I set out to add a little extra sparkle to my holiday decor
by transforming a simple thrifted lantern into a merry winter wonderland.
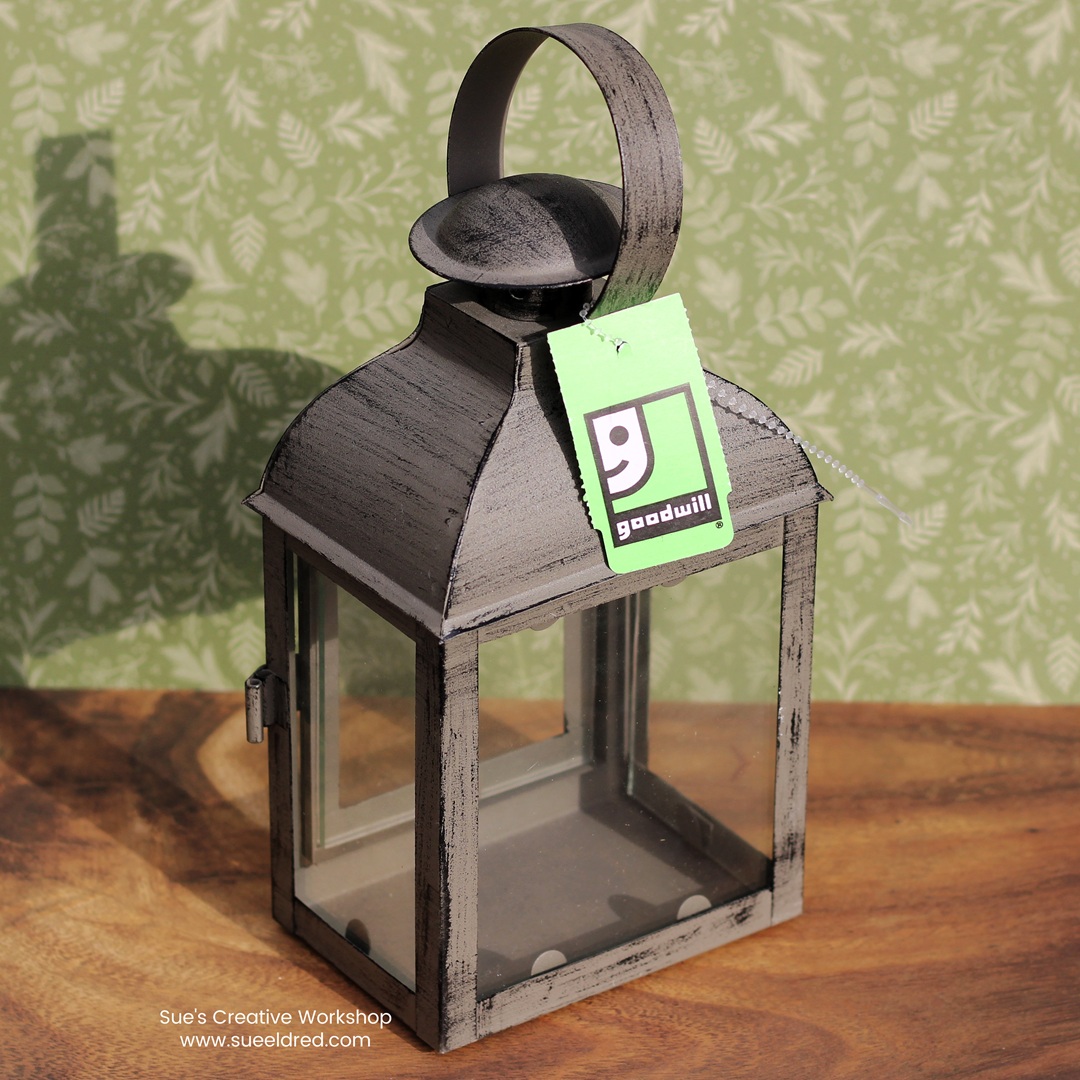
While treasure hunting at Goodwill, this simple lantern caught my eye.
Its $2.99 price tag was too good to pass up, and ideas started swirling
in my mind the moment I picked it up.
To create the Upcycled Lantern with a Snowman Twist:
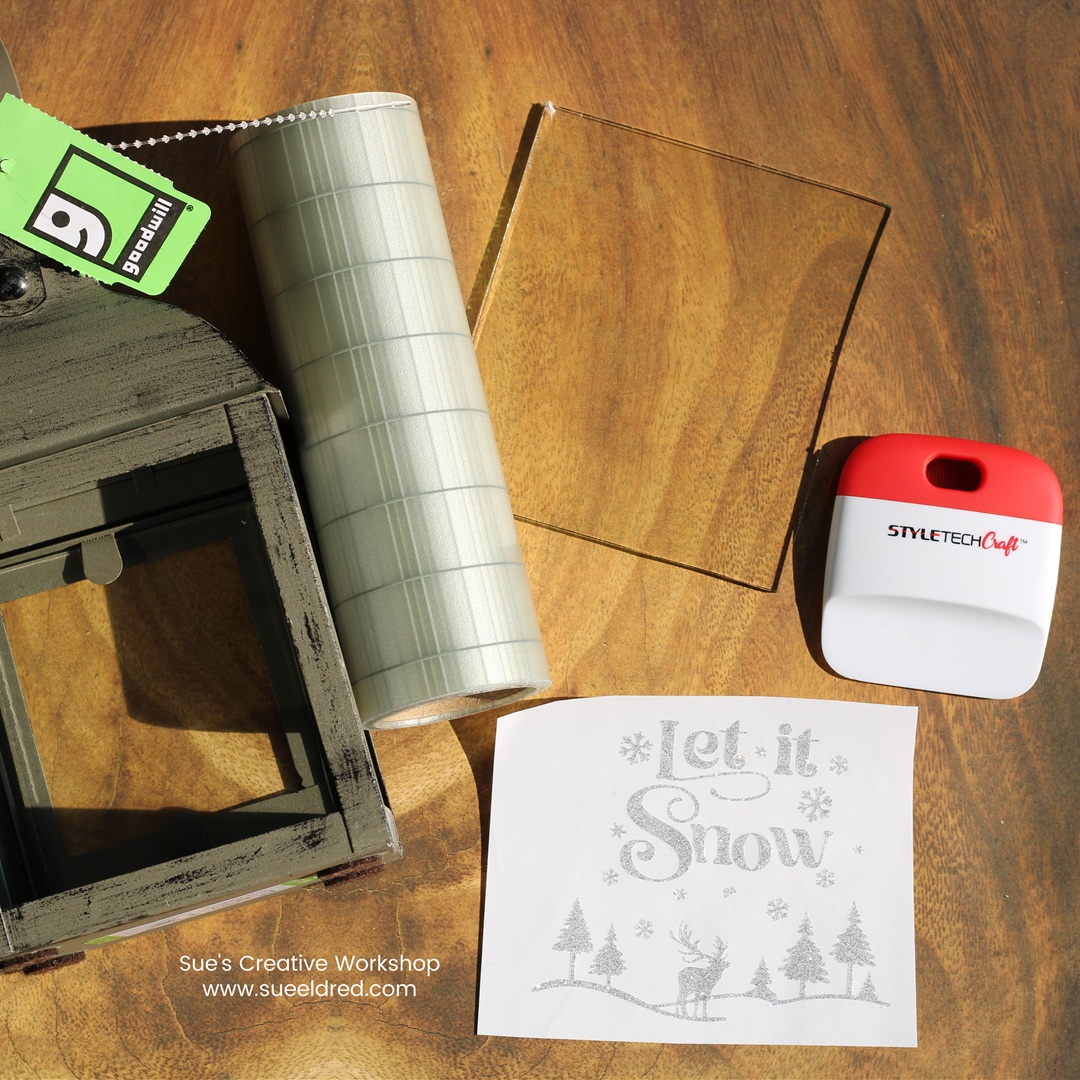
- I used Silver Transparent Glitter Vinyl from StyleTechCraft to create a scene on the outside of the lantern.
- I used a Silhouette Cameo Electronic Die-Cutting Machine* and the “Let it Snow Quote” SVG file from The Silhouette Store to cut the design.
- I was able to remove the piece of glass from the lantern, which made it easy to apply the vinyl.
- Clean the glass with rubbing alcohol to remove fingerprints.
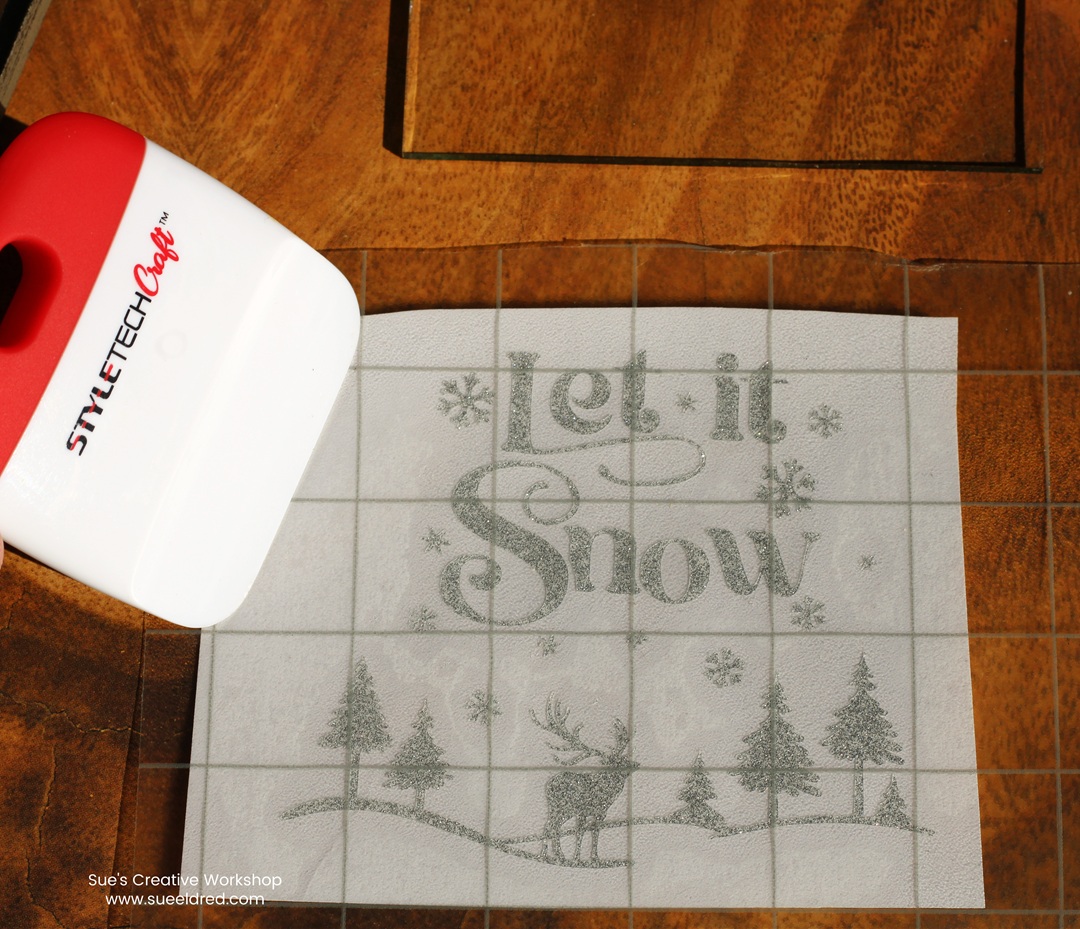
- Once the design has been cut, you’ll need to remove the excess vinyl in and around the design using a vinyl weeding tool* or craft pick*.
- Lay StyleTechCraft Transfer Tape* over the design and gently rub over the letters with a vinyl scraper tool.

*Disclosure: This blog uses ads and affiliate links. If you choose to make a purchase using one of the links, I receive a small commission (at no additional cost to you) that helps offset the costs of maintaining this blog. Thanks for your support!
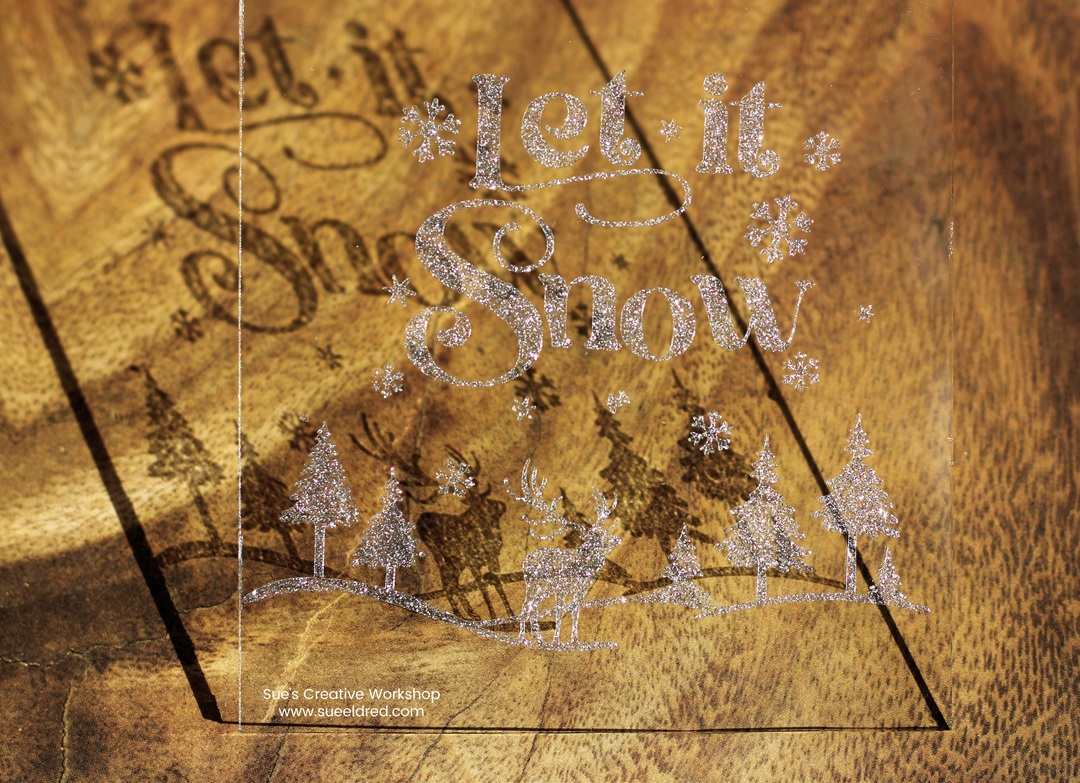
- Lift the design from the white protective liner and place it onto the glass.
- Rub over the vinyl design with the scraper tool and remove the transfer tape.
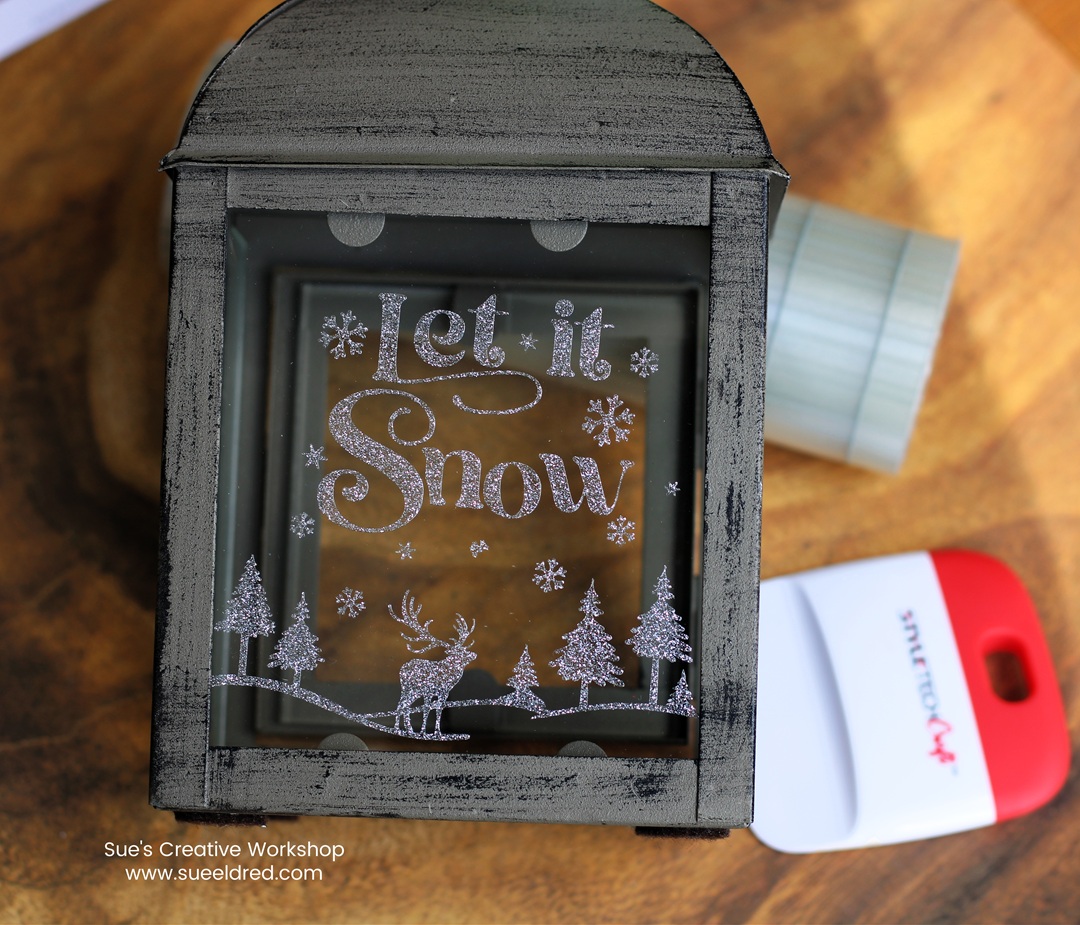
The silver glitter vinyl creates a frosted effect, creating the appearance
of etched glass without the mess or commitment.
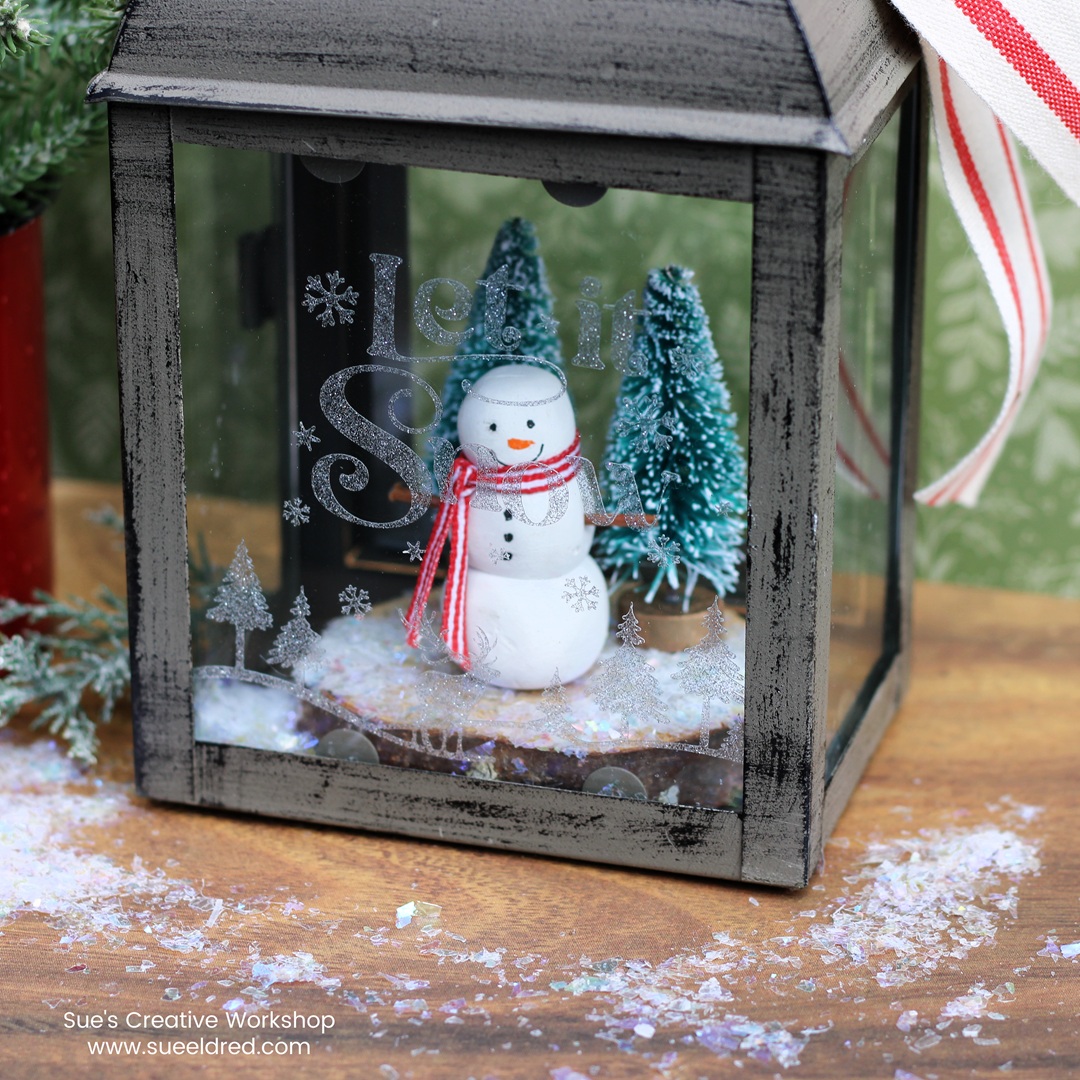
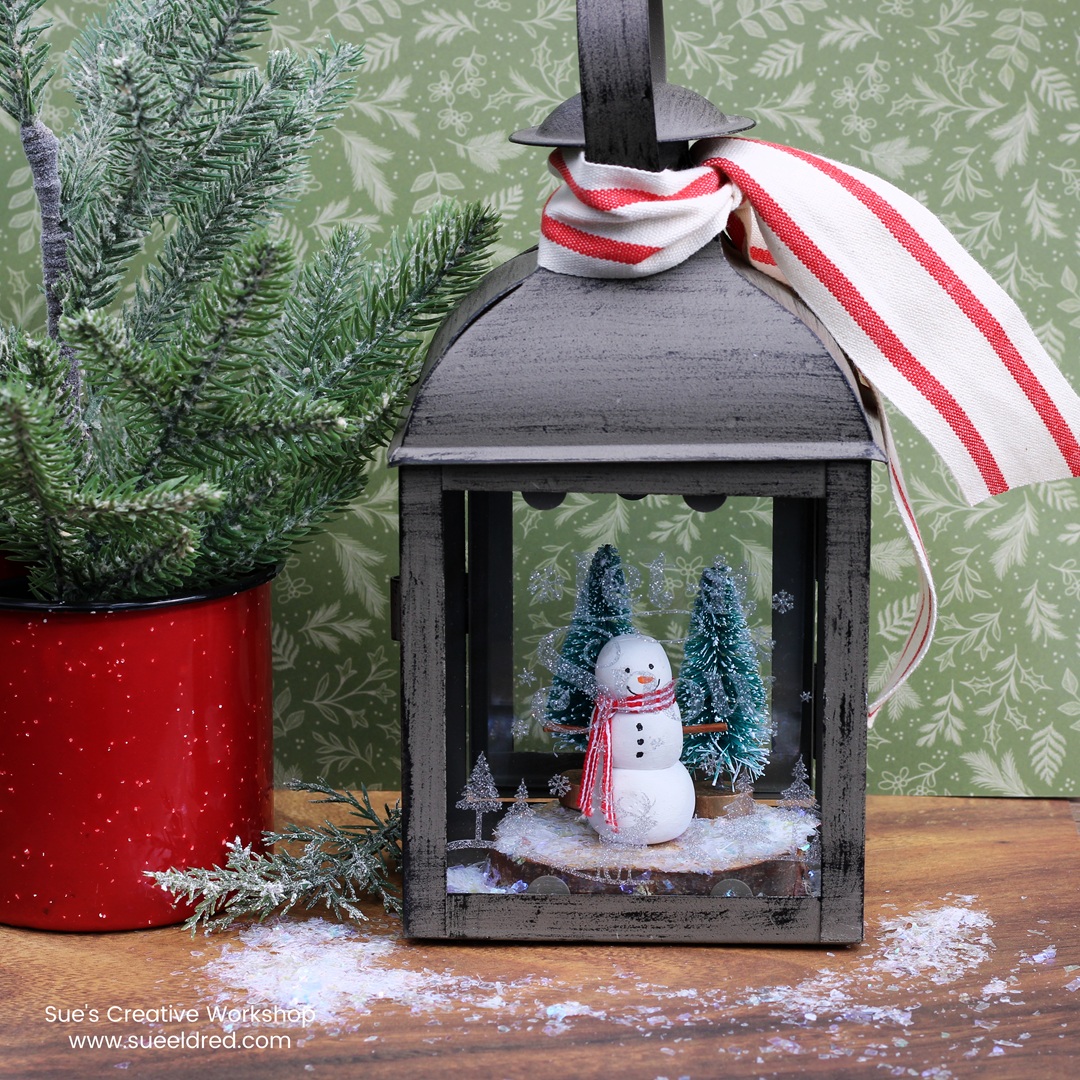
I had so much fun arranging a simple snowy scene inside the lantern,
complete with a cute little snowman and sparkling faux snow.
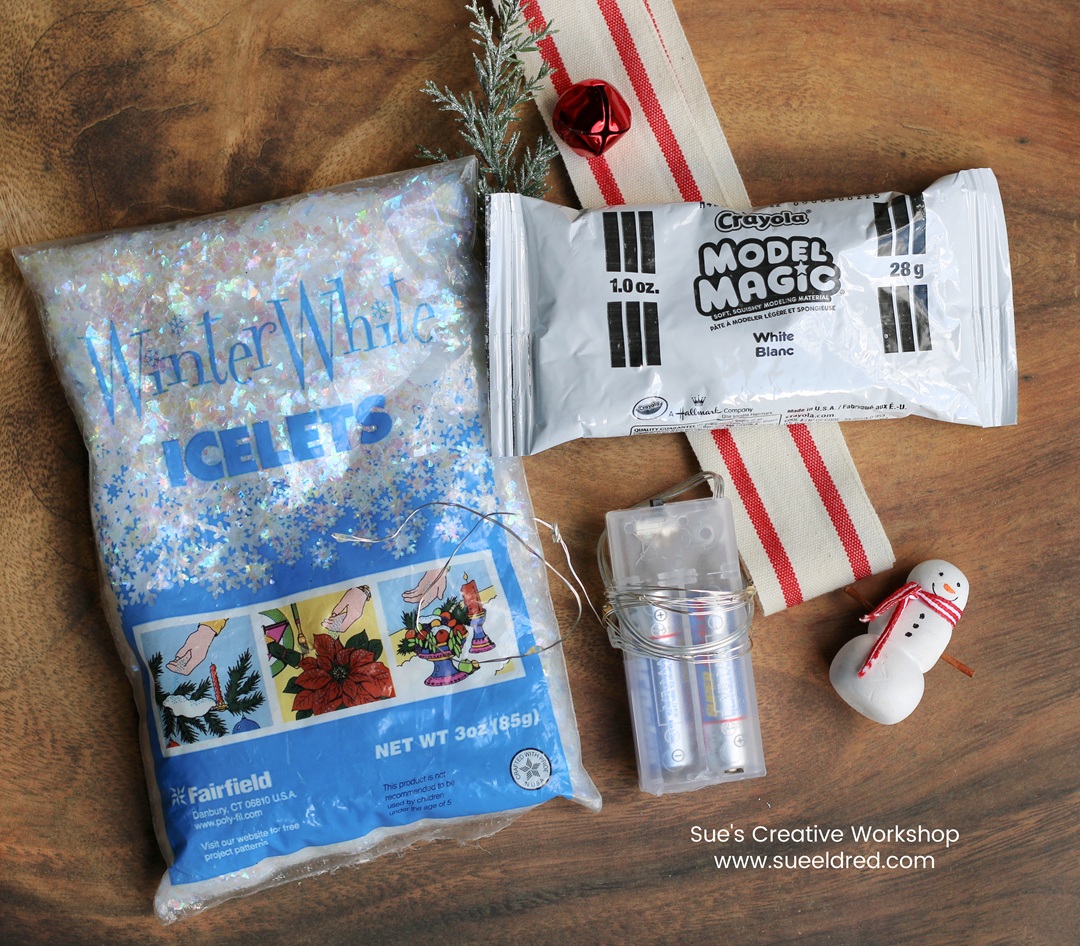
Here’s what I used inside the Lantern: (*affiliate links)
Directions:
- Make a simple snowman using air-dry clay*.
- Use the tips of painted bamboo skewers* for the arms of the snowman.
- Once the air-dry clay has dried, draw on the face using fine-tip paint markers*.
- Tie a thin ribbon around the neck of the snowman for the scarf.
- I added a Small Wood Slice* to the bottom of the lantern to elevate the snowman.
- If the lantern if going to be handled by children or curious adults, glue the snowman and Mini Bottle Brush Trees* to the Wood Slice*.
- Finish off the look with a 1 1/2″ natural cotton red striped ribbon*.
- Optional: Add Fairy Lights* to the inside of the lantern.
Thanks for following along with my latest holiday DIY.
Let your creativity shine, and don’t forget—the best decorations
are the ones that make you smile every time you see them.
![]()
“This is a sponsored post. As a member of the StyleTechCraft Design Team I have been provided product and compensation in exchange for my creative ideas. The views and opinions are my own.