
Looking for An Easy Holiday Dollar Store Craft?
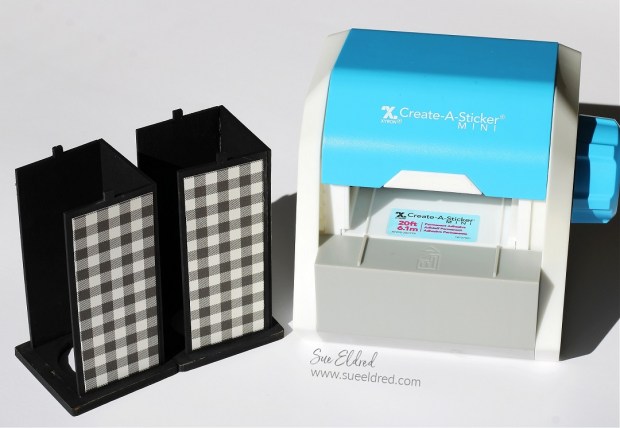
All you’ll need is a couple of Mini Wood Lanterns from Dollar Tree*,
Paint, Scrapbook Paper and an Xyron Create a Sticker Mini*.
![]()
This is a sponsored post for Xyron. I have been provided product and compensation in exchange for my creative ideas. The views and opinions are my own.

Materials Used: (*affiliate links)
- LED Hanging Wood Lanterns*
- Xyron Create a Sticker Mini*
- Xyron Mega Runner*
- Xyron Mini Glue Gun*
- Craft Knife*
- Black Buffalo Plaid Scrapbook Paper*
- Translucent Vellum*
- Black and White Acrylic Paint
- Paintbrush
- Small Snowflakes*
- White Adhesive Enamel Dot*

*Disclosure: This blog uses ads and affiliate links. If you choose to make a purchase using one of the links, I receive a small commission (at no additional cost to you) that helps offset the costs of maintaining this blog. Thanks for your support!

Directions:
1. Using a Craft Knife* to loosen the glue, gently remove the top and front of the
lantern. Remove the small battery votive from the bottom of the lantern.
2. Paint the lantern with black acrylic paint.
3. Measure and cut strips of black buffalo plaid paper to fit the back and sides of the
lantern.
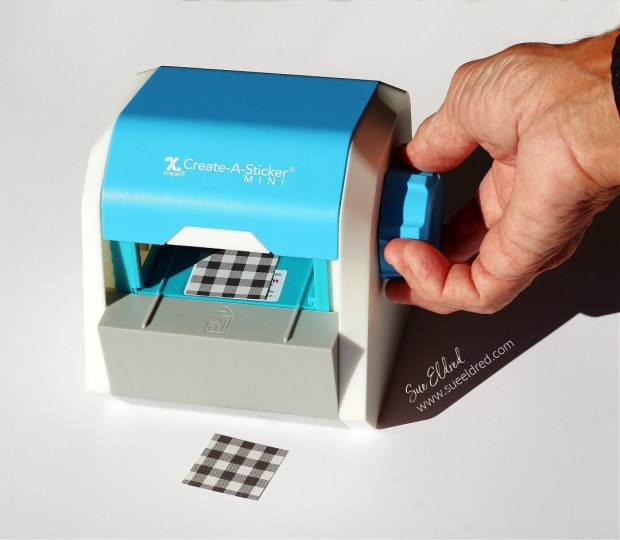
4. Place the strips of paper into the Xyron Create a Sticker Mini* design side-up. Crank the handle
of the Xyron Create a Sticker Mini* to run it through the machine. As it goes through, it adds a
complete layer of adhesive to the back of the paper.

5. Remove the paper from the liner and apply it to the sides of the lantern.
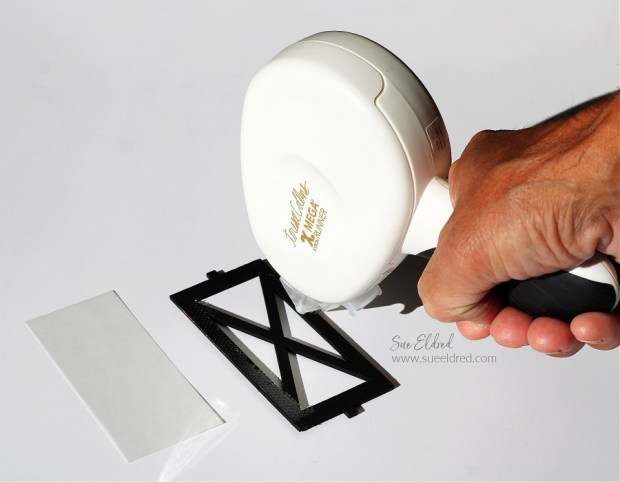
6. Measure and cut a piece of translucent vellum to fit behind the front “X” panel. Use the Xyron Mega Runner* to add adhesive to the center and edges of the front panel. Place the vellum over the front panel.

7. Use the Xyron Mini Glue Gun* to adhere the lantern back together.
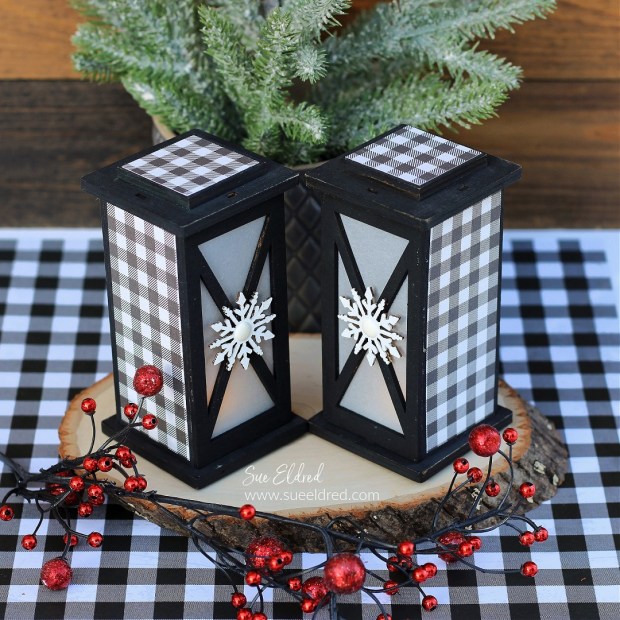
8. Paint the wood snowflakes with white acrylic paint. Glue it to the front of the lantern. Add a white enamel dot to the center of the snowflake.
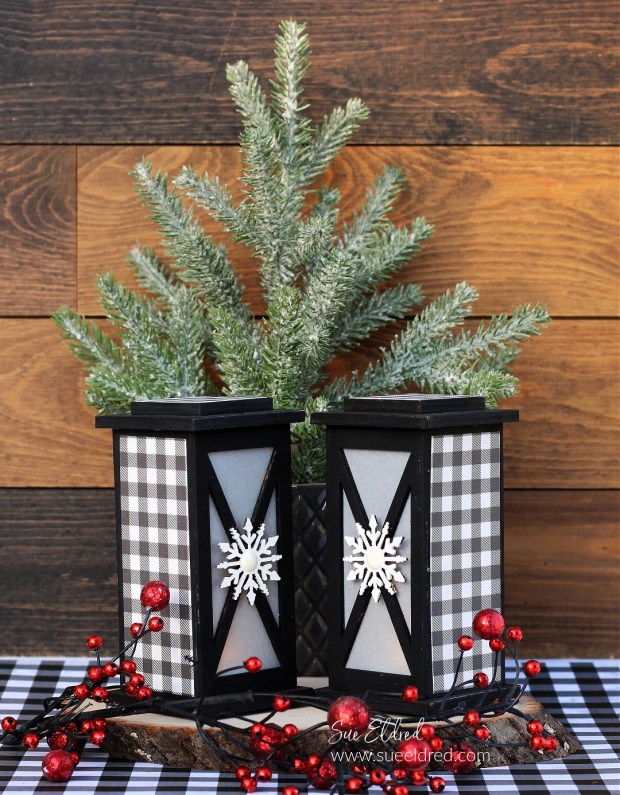
Use as a tabletop decoration or add ribbon to the lantern for hanging on the Christmas Tree.

