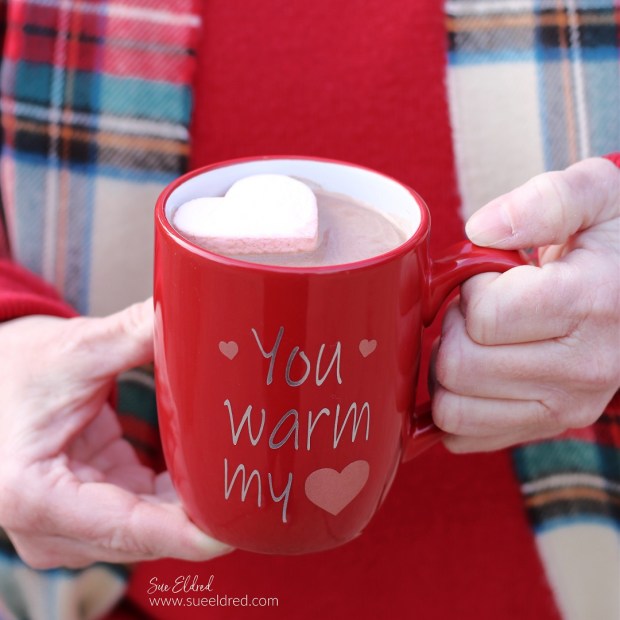
How to make a “You Warm my Heart” Valentine’s Day Mug.
Some girls may want roses and expensive gifts for Valentine’s Day.
Not this girl. Give me something thoughtful and sweet, and I’ll be happy.
(Oh, and a little chocolate never hurts.)
While shopping at my local Dollar Tree…
I found this simple red and white mug*; I was drawn to its color because it is more barn red than fire engine red.
I decided to make a fun Valentine’s mug using my favorite StyleTechCraft Adhesive Vinyl.

Did you know, Dollar Tree* has a lot of glass and ceramic items that are perfect for adding vinyl?
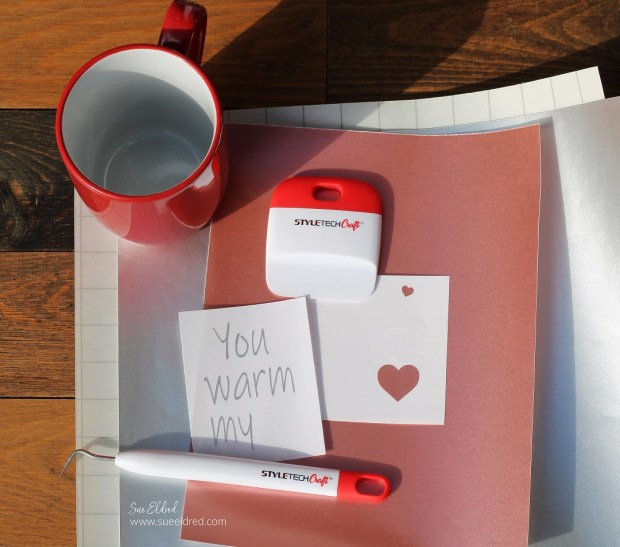
For my Valentine’s Mug I Used: (*affiliate links)
- Royal Norfolk Red & White Mug from Dollar Tree*
- StyleTechCraft Silver Luster Adhesive Vinyl*
- StyleTechCraft Rose Gold Craft Adhesive Vinyl*
- Silhouette Cameo Electronic Die Cutting Machine*
- StyleTechCraft Vinyl Transfer Tape*
- StyleTechCraft Vinyl Tool Kit*
- Alcohol Wipe*

StyletechCraft products brought to you by ATSM Craft*
*Disclosure: This blog uses ads and affiliate links. If you choose to make a purchase using one of the links, I receive a small commission (at no additional cost to you) that helps offset the costs of maintaining this blog. Thanks for your support!
To make the Valentine’s Mug:
- I used an inexpensive red mug found at Dollar Tree*.
- Prep the surface of the mug with rubbing alcohol to remove any oils.
- I used the Silhouette Store “ink-free” font and the Silhouette Cameo Electronic Die Cutting Machine* to cut the words.
- I used StyleTechCraft Silver Luster Vinyl* for the words and StyleTechCraft Rose Gold Craft Vinyl* for the hearts.
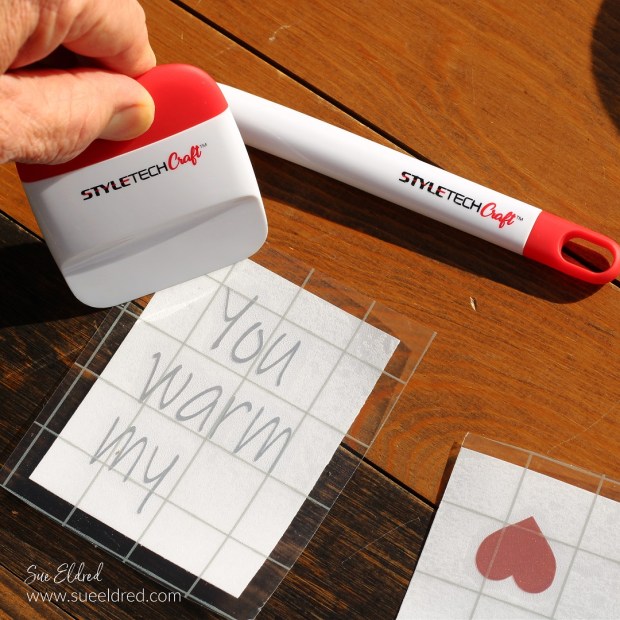
- After cutting, remove the excess vinyl using a Vinyl Weeding Tool*.
- Lay the transfer paper over the words.
- Rub over the transfer paper with a vinyl scraper tool and lift the words from the white paper backing.
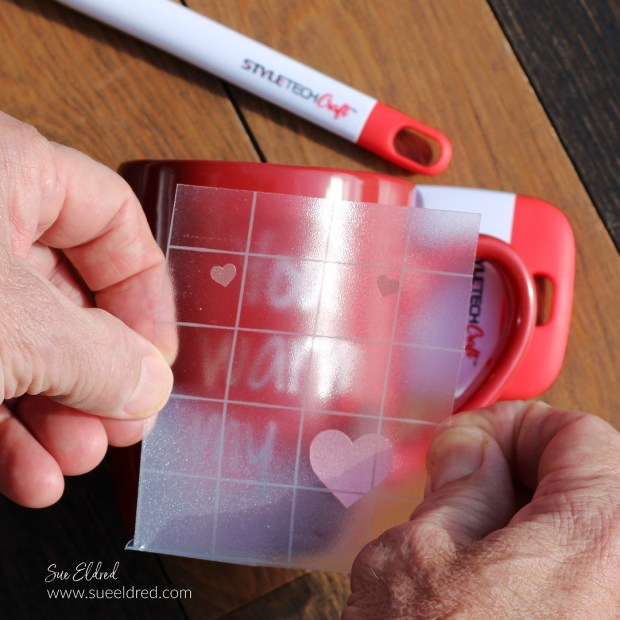
- Lay the transfer paper onto the mug. Since it has a curved surface, start from the center of the words and rub one side at a time using a vinyl scraper tool. The tool allows you to smooth the image and eliminate air bubbles.
- Remove Vinyl Transfer Tape*.
- Line up hearts over the words and apply the vinyl hearts onto the mug.
Allow the vinyl to cure on the mug for four days before use. (Hand Wash Only)
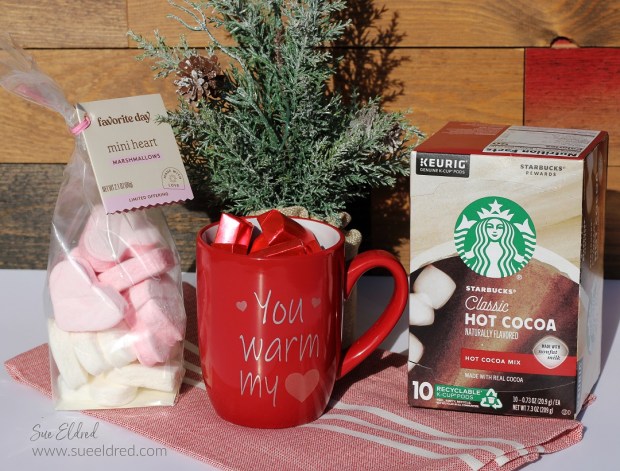
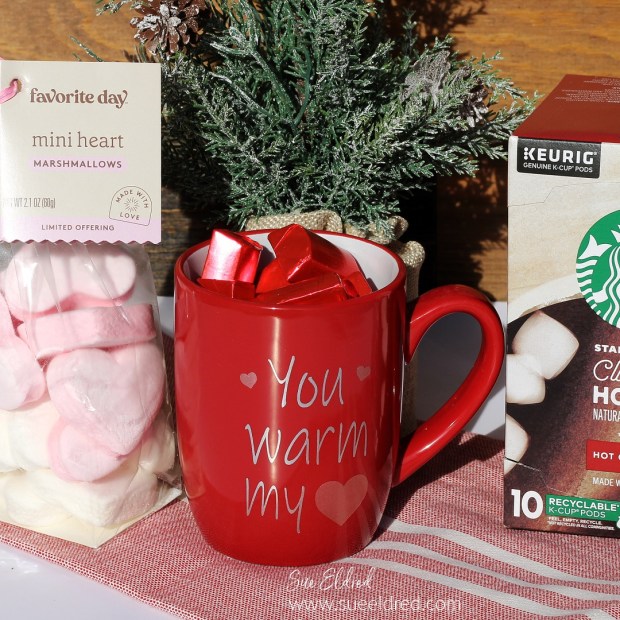
For a Special Valentine Gift Box
Add a package of heart marshmallows (I found at Target), chocolates, and a box of Hot Cocoa Mix
for a sweet and thoughtful Valentine’s Gift.
![]()
“This is a sponsored post. As a member of the StyleTechCraft Design Team I have been provided product and compensation in exchange for my creative ideas. The views and opinions are my own.