
How to Create a Beautiful Poinsettia Christmas Card using Distress Ink.
I like making clean and simple cards.
But everyone once in a while, a card just calls out to be inked.
This card was one of those projects. (It’s still kind of clean and simple.)

Disclosure: This is a sponsored post for the Maker’s Movement. I have been provided product
and compensation in exchange for my creative ideas. The view and opinions are my own.
Materials Used: (*affiliate link)
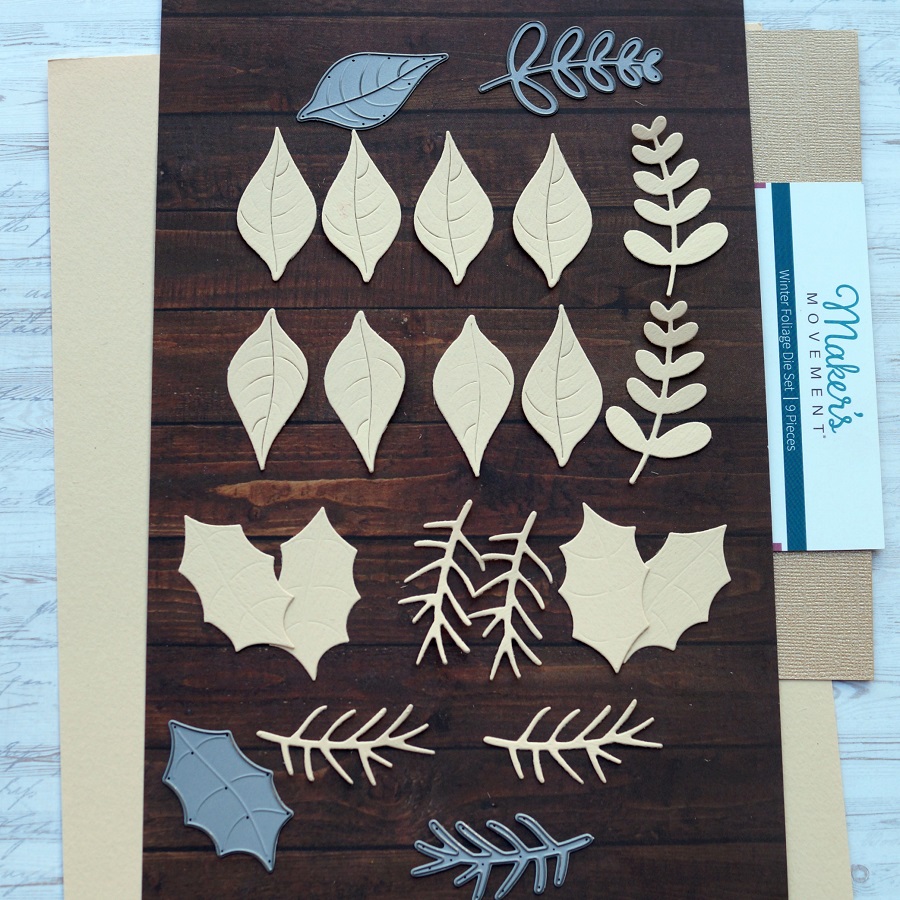
- MOD301 Winter Foliage Die Set
- MOD300 Be Merry Die Set
- Crossover II Fabric & Paper Cutting System*
- Ranger Tim Holtz Distress Ink Pad, Peeled Paint*
- Ranger Tim Holtz Distress Ink Pads, Mini, Barn Door*
- Ranger Tim Holtz Distress Ink Pad, Gathered Twigs*
- Ink Blending Tool*
- Cream Card Stock
- Woodgrain Scrapbook Paper
- Xyron 3″ Disposable Sticker Maker*
Directions:
- Run several strips of 3″ cream cardstock through the Xyron Sticker Maker*. The sticker maker adds an even layer of adhesive to the back of the cardstock. Do this before die-cutting to make each small piece a sticker. (it makes assembly so much easier)
- Using the Winter Foliage Die Set and the Crossover II Die-Cut Machine*, die-cut the pieces out of cream cardstock. You will need 8-smooth leaves for the flower, 4-pointed leaves for the foliage, 4-pine branches, and 2-small leaf die-cuts.
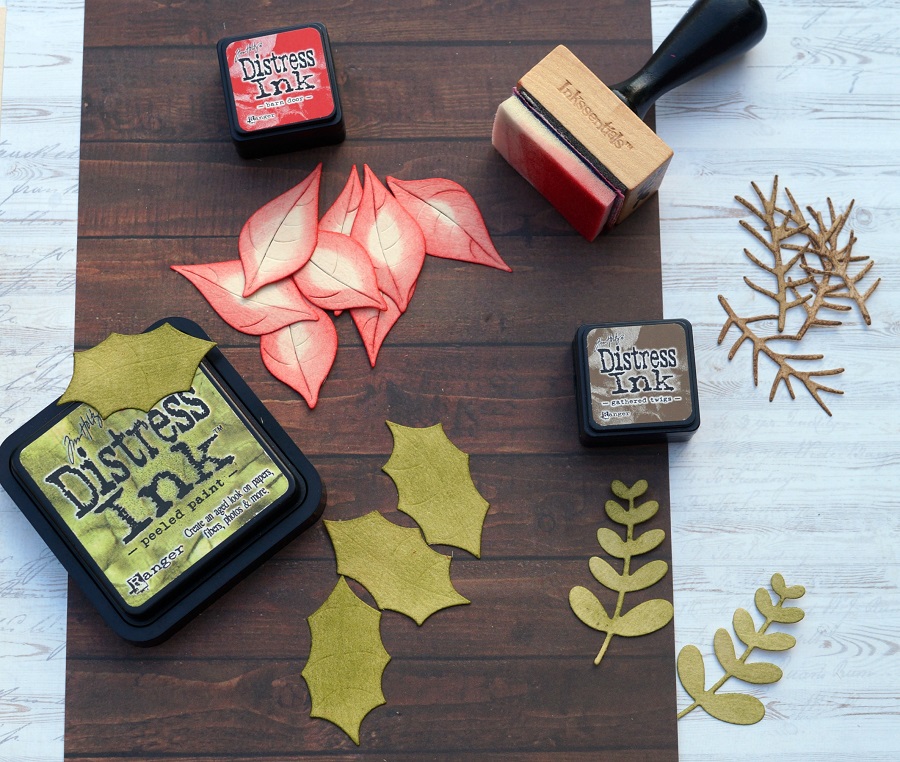
- Ink the edges of the leaves using an Ink Blending Tool* and the Distress Inks.
- For the base of the card, cut 4 3/4″ x 6 3/4″ piece of woodgrain scrapbook paper. Adhere the woodgrain paper onto a 5″ x 7″ gold cardstock layer. Adhere both layers onto a 5 1/4″ x 7 1/4″ cream card base.
- Start with 4 of the smooth leaves inked with the Barn Door Red Ink and place onto the front of the top of the card. Place them so that they line up opposite of each other.
- Place and stager the four additional red leaves on top of the first layer of leaves.
- Adhere the leaves, foliage and, pine stem under the poinsettia flower.
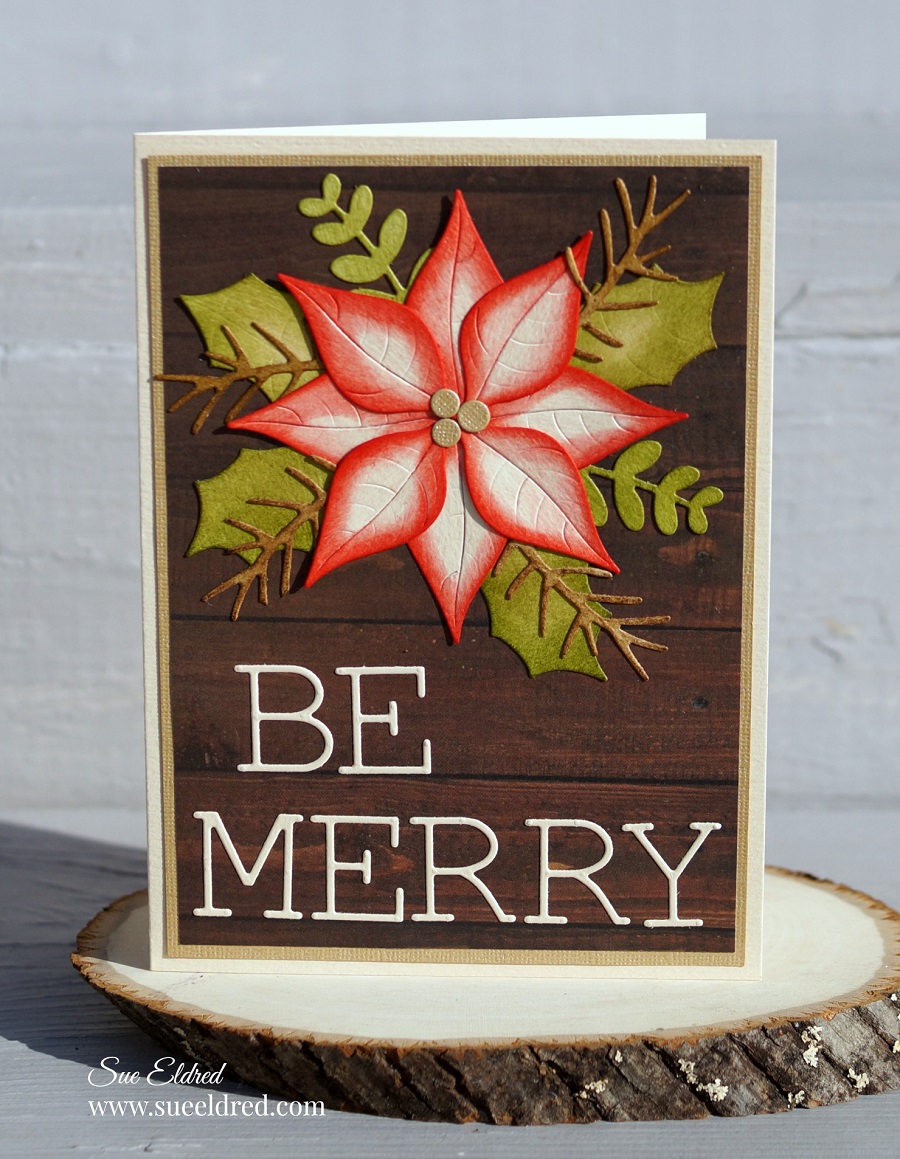
- Die-cut three small circles (from the Winter Foliage Die Set) out of gold cardstock and adhere to the center of the flower.
- Die-cut the words “Be Merry” out of cream cardstock ran through the Xyron Sticker Maker* and place the stickered “Be Merry” onto the front of the card.

*Disclosure: This blog uses affiliate links. If you choose to make a purchase using one of the links, I receive a small commission (at no additional cost to you) that helps offset the costs of maintaining this blog. Thanks for your support!


