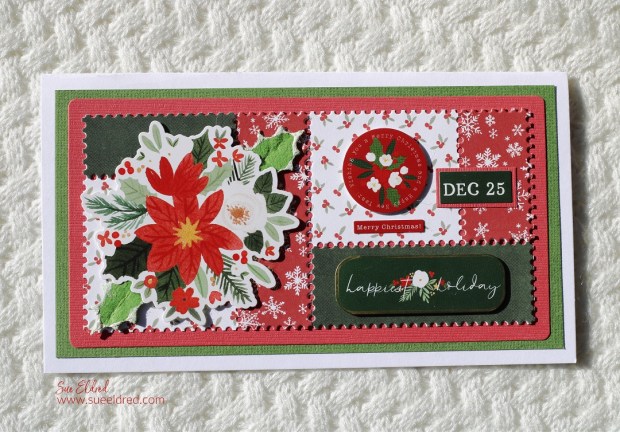
Spring Quilt Cards made with Eileen Hull’s Faux Postage Die from Sizzix.
Over the weekend, I decided to make a couple of floral Spring cards using the New Faux Postage Die from Eileen Hull*.
I know the dies are perfect for making little faux postage stamps.
But, I like to think of the pieces like a quilt.
It’s all good no matter how you use the die.
![]()
Disclosure: This is a sponsored post. As a member of the Eileen Hull Educator Team, I have been provided product in exchange for my creative ideas. The view and opinions are my own.

Materials Used: (*affiliate links)
- #666560 Faux Postage Die by Eileen Hull*
- Carta Bella Flora No. 5 paper pad* (6″x 6″)
- Sizzix Big Shot Die Cutting Machine*
- Coordinating Cardstock
- Thin 3D Foam Squares*
- Small Nose Scissors* (for Fussy Cutting)
- Tape Roller*

*Disclosure: This blog uses ads and affiliate links. If you choose to make a purchase using one of the links, I receive a small commission (at no additional cost to you) that helps offset the costs of maintaining this blog. Thanks for your support!

The Thank You Card reminds me a sweet floral quilt for a little girl’s bed.
It really is easy to find coordinating paper when using a paper pad.
I cut out flowers from one of the large floral-patterned papers.
To make them dimensional, I added Thin 3D Foam Squares*
underneath the flowers.

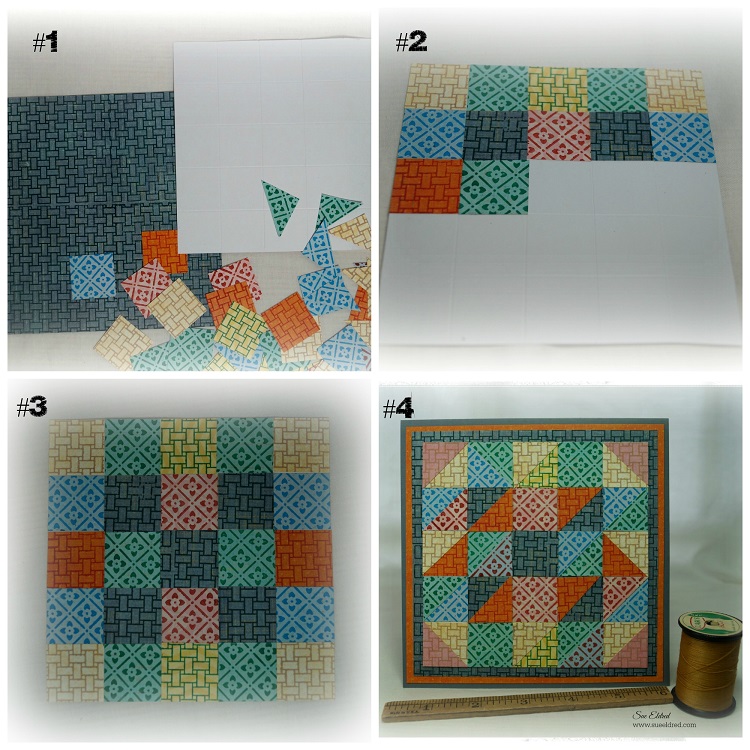
Would you believe the paper for the Enjoy Card was from the same floral paper pad.
I die-cut the black floral paper using the faux postage die.
I used one small section from the die-cut paper to create my card.
I again “fussy cut” a few flowers to put on the front of the card.
After adding several layers, my card measured 4 1/4″ x 4 1/4″,
the perfect size for putting into a A2 envelope*.