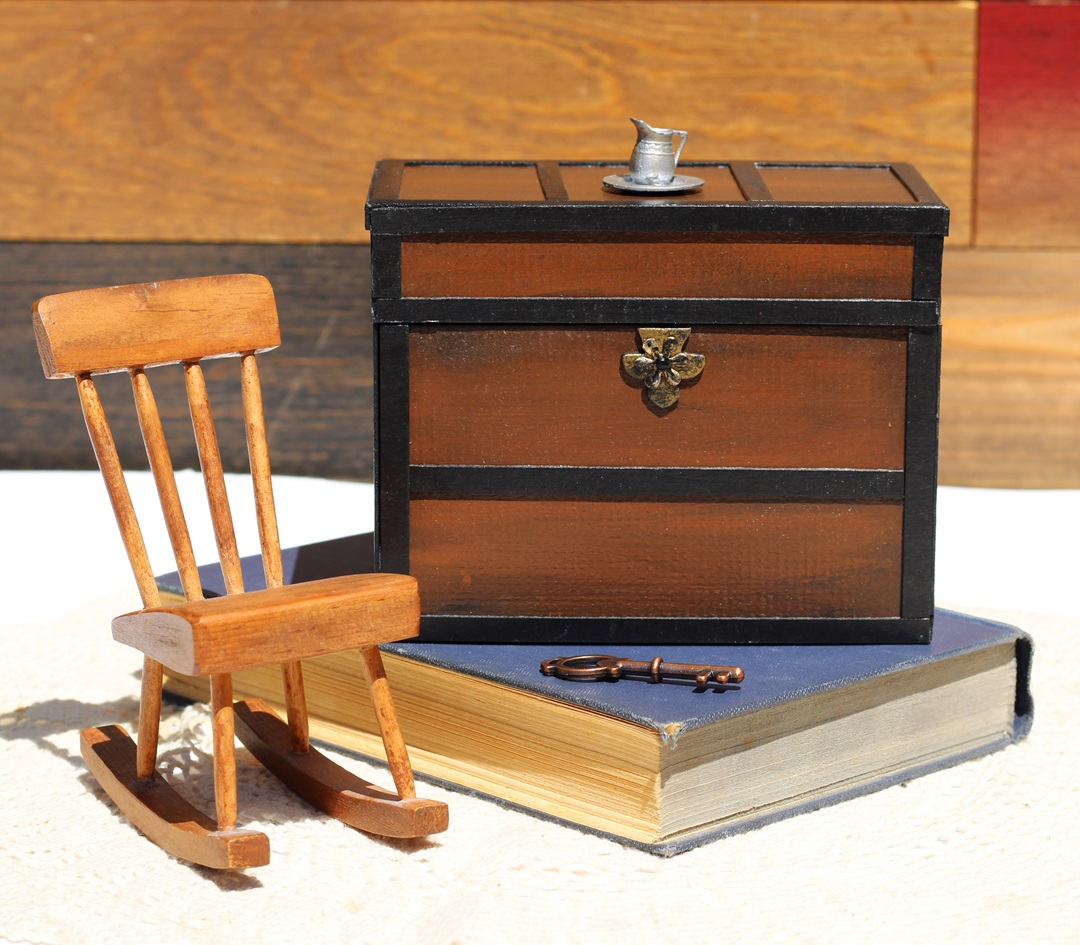
The Mini Steamer Trunk
I have been fascinated with old vintage things for a long time.
Just look around my house.
You will find vintage items sprinkled in every room.
Some items have a good story or are family keepsakes.
The others are there because they make me happy
So… When Sizzix and Eileen Hull re-released the Treasure Box Die*
and the Stacking Drawer Die*, I decided to make a Miniature Steamer Trunk.

*Disclosure: This blog uses ads and affiliate links. If you choose to make a purchase using one of the links, I receive a small commission (at no additional cost to you) that helps offset the costs of maintaining this blog. Thanks for your support!

A little Inspiration…
Sometimes, I get lucky, and I get a vision of how I want a project to turn out.
The mini steamer trunk was one of those projects.
I found an image online for my inspiration.
(I’m so happy with the way it turned out.)
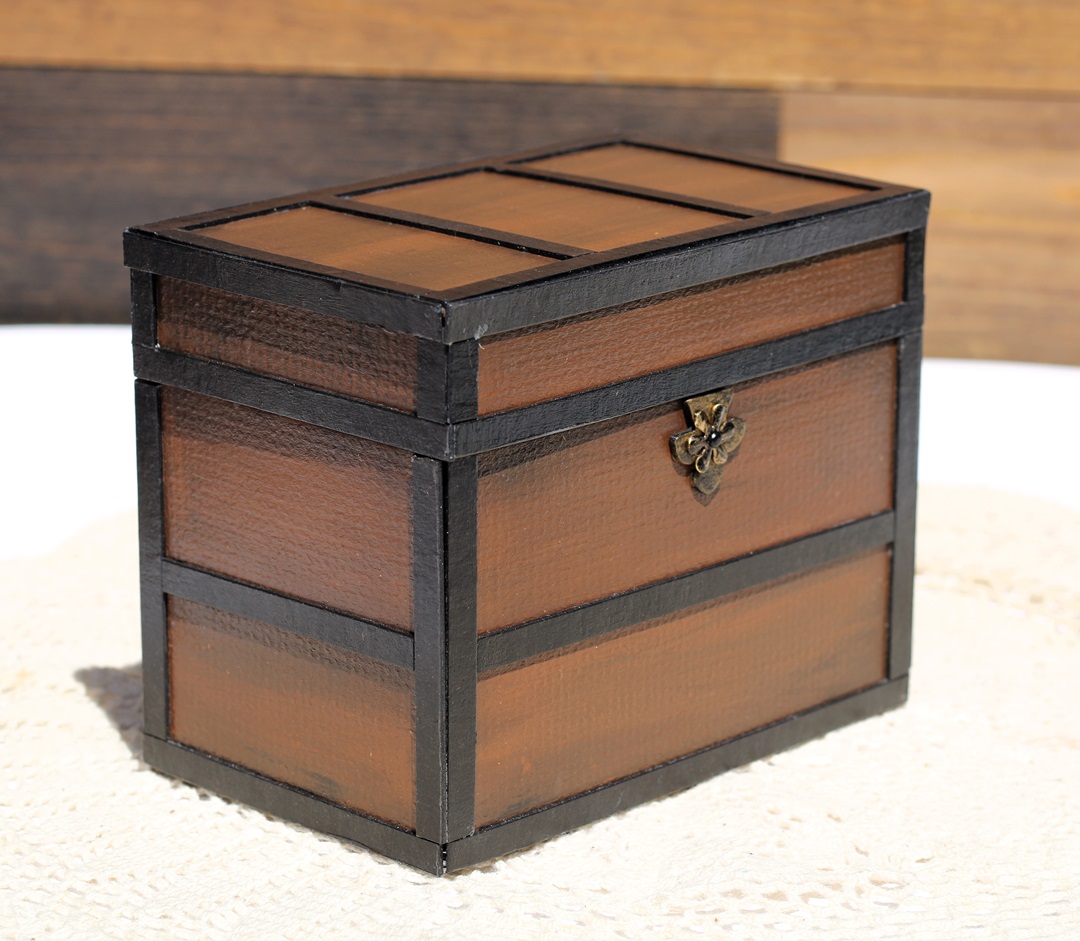
The base of the Steamer Trunk was die-cut using a black textured mat board.
I painted the trunk with a mix of browns, and black acrylic to give it a woodgrain look.
To make it look like a steamer trunk, I glued thin strips of black mat board
to the top and sides of the trunk.
To give it a shine I painted the trunk with Mod Podge Satin Sealer*.
The Treasure Box* measures 3 1/4” x 5 1/4” x 4”.
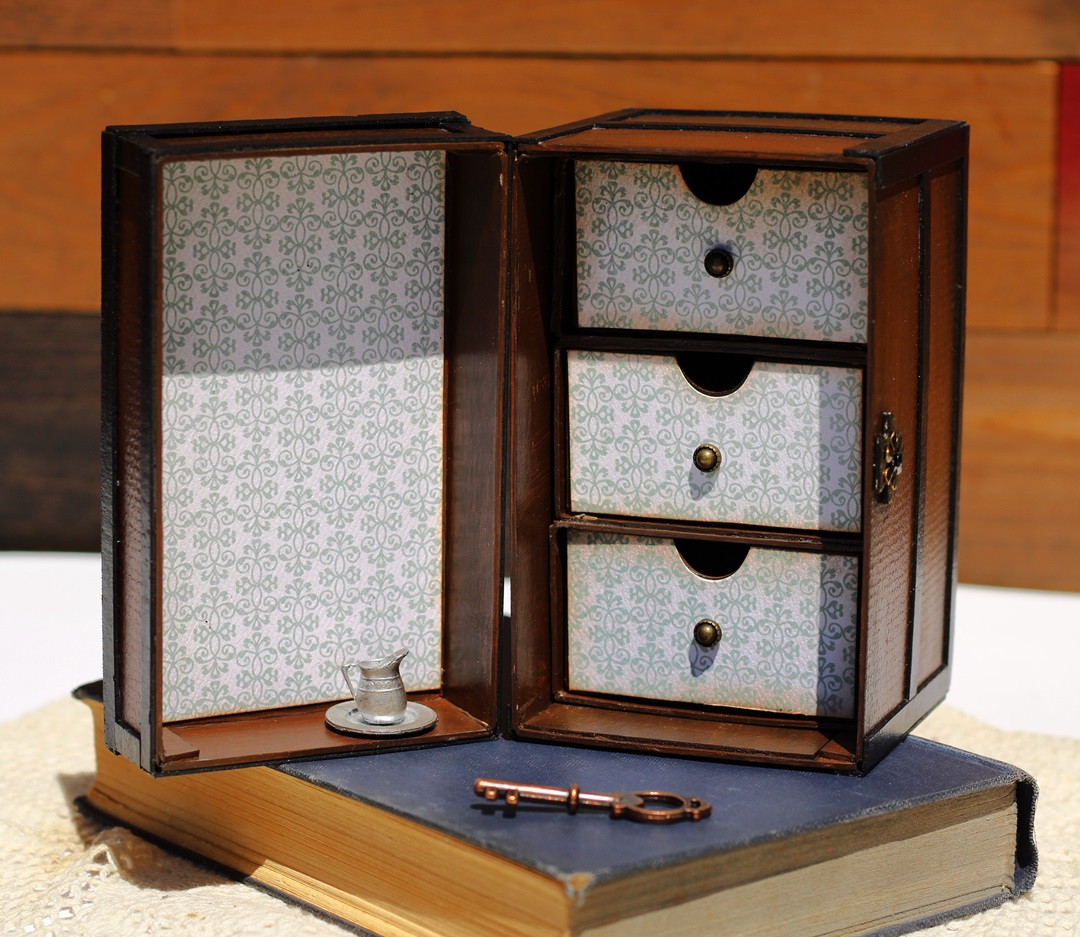
I painted three Stacking Drawers* the same as the base of the trunk.
I added decorative scrapbook paper on the front of the drawers and
the inside of the lid. I think it looks like old wallpaper.
The Steamer trunk is one of the projects I made for the Eileen Hull and Sizzix June Release Party.
(see below for more information)

A Little Gift Box using the Stacking Drawer Die*
The Stacking Drawers* also make a perfect little gift box.
I will have a tutorial on how I made this little gift box later this month.
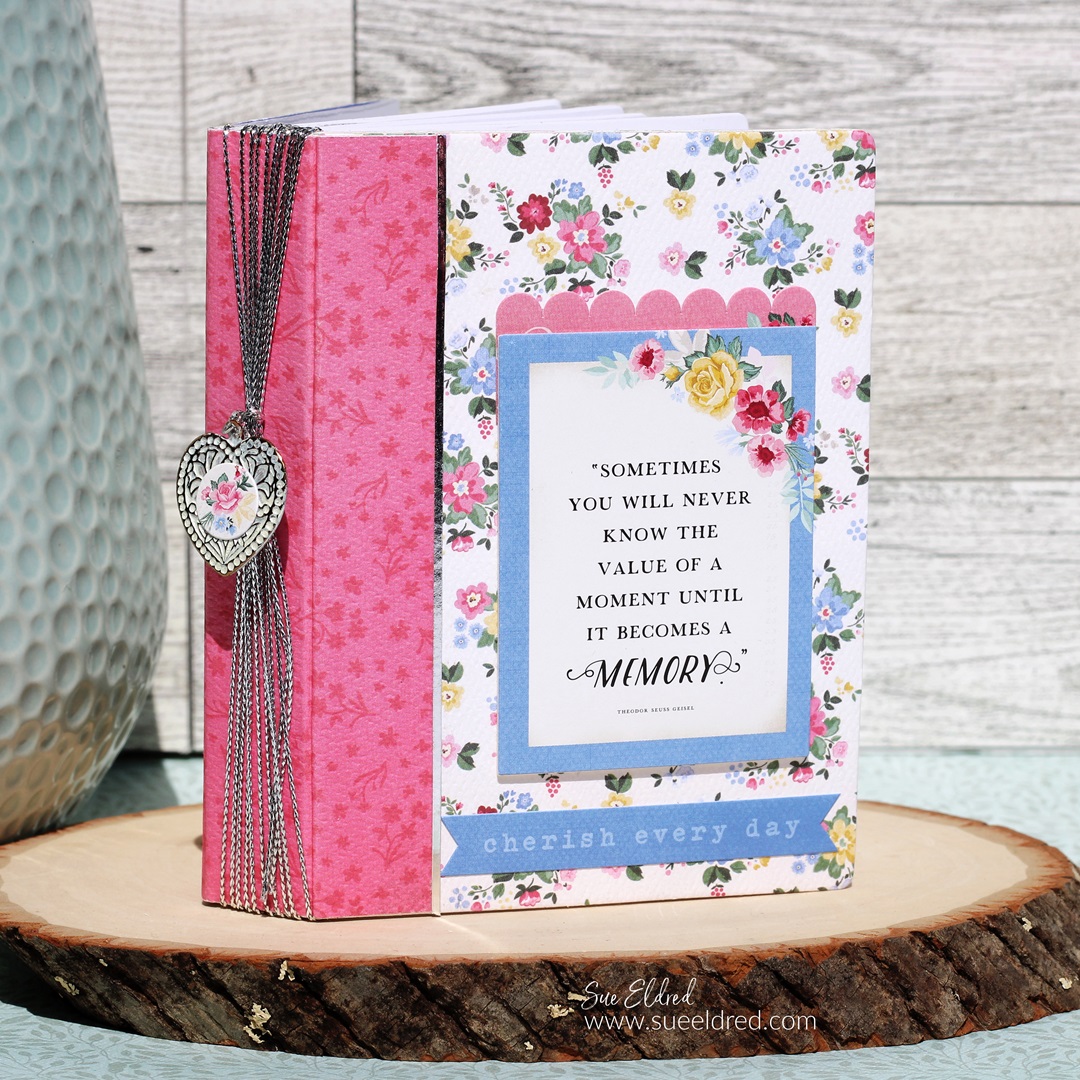
Summer Blooms Mini Album
Summer Blooms Mini Album was made using Eileen’s Notebook Die*.
Click here for the Summer Blooms Mini Album Tutorial
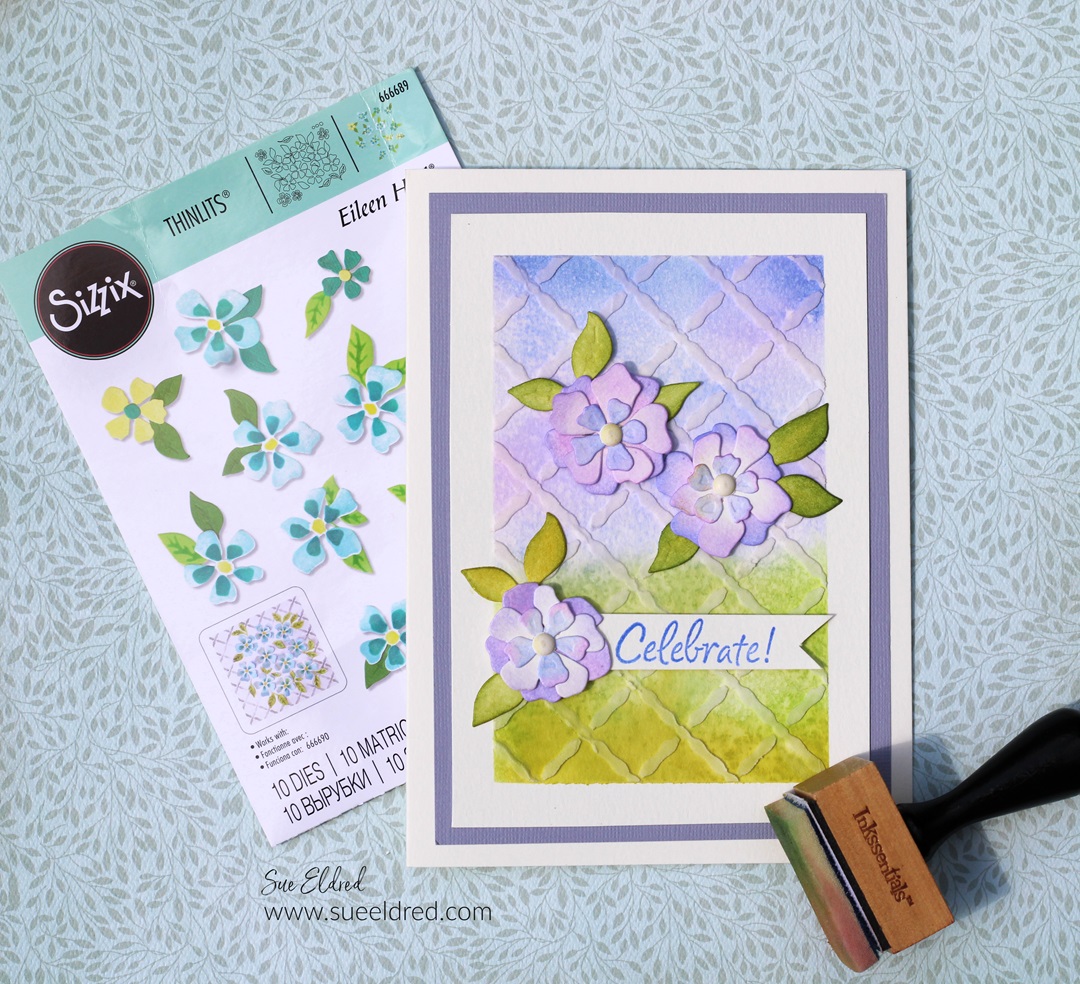
The Floral Lattice Card was made using the
NEW Painterly Blooms & Background Thinlet Dies from Eileen Hull*.
I inked the background of the card using dye inks on watercolor paper.
I spritzed the paper with a mini mister* to give the background a mottled effect.
I used a palette knife* to spread white embossing paste* over the lattice stencil
from the Watercolour Flowers & Lattice Layered Stencils Set*.
FYI…The Watercolour Florals & Lattice stencil set* was inspired by a watercolor picture that Eileen painted.
The set included 4 stencils. Three stencil layers give dimension and the fourth layer, a versatile lattice design, that can be used to create a plaid pattern!

For more great projects from Eileen Hull’s Design Teams, we’re having a Blog Hop with tons of awesome inspiration. Click here for Eileen’s Blog.
We hope you will watch our release party on June 4th at noon Eastern to see lots of samples and alternate ideas for ways to use these dies. There will be a GIVEAWAY!!!
![]()
Disclosure: This is a sponsored post. As a member of the Eileen Hull Educator Team, I have been provided product in exchange for my creative ideas. The view and opinions are my own.