
When we bought our house in 1996, a beautiful Southern Colonial…
we fell in love with the large trees and expansive yard.
What we didn’t fall in love with was the kitchen.
My husband hated the dark dated 80’s cabinets and blue and white windmill tile backsplash.
Being the frugal person that I am, I didn’t mind the tiles and wanted to live with it for awhile.

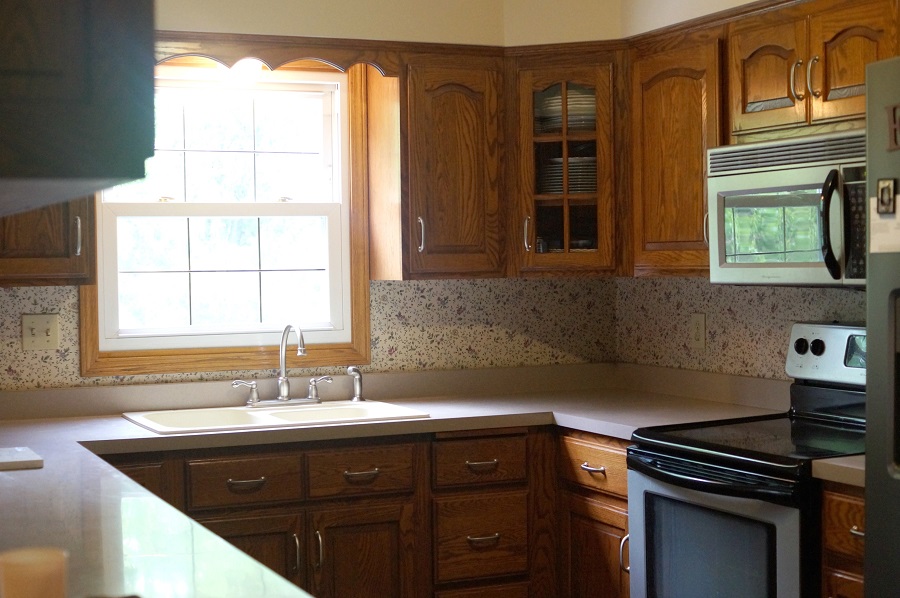
(2018 Kitchen Before Make Over)
Persuaded that the updates “had” to be done, we made over the kitchen in true 90’s fashion.
Victorian was the trend, so a nice tea cup border and complimentary wallpaper was installed.
To keep costs low, we decided to keep the original footprint and the 6″ x 6″ terra cotta tile floor.
I was young and inexperienced.
Because we didn’t have a lot of expendable money…
we’ve spent the last few years doing minor changes.
The first to go was the tea cup border and terra cotta floors.
We had large 18″ x 18″ tiles installed to help the small kitchen look bigger.
Since I knew I wanted to eventually go with a lighter counter top,
a darker color was used on the floor.
Fast forward to 2018…
It was around this time last year when we started discussing a Kitchen Remodel.
We visited a Kitchen Showroom and talked to a designer on how we could refigure our kitchen.
We have a large peninsula in our small kitchen with cabinets overhead. (a 80’s trend)
It gives us a lot of great counter space and storage.
The problem, it closes off the kitchen and doesn’t allow natural light to come in.
And…if you’re taller than 5′ 2” (which isn’t a problem for me) it’s hard to have a
conversation with anyone in the dining room. It completely blocks their view.
We made arrangements for the designer to come and look at our kitchen.
The first thing she said was “your kitchen has a good flow”. (her first mistake)
She drew up 3 designs for our approval. None of the designs really had what we wanted.
She didn’t come up with a solution for all the cabinets that I’d be giving up. (mistake #2)
We’d also need to re-do the kitchen tile and patch the wood floor in the dining room.
Not to mention the fact that we’d spend $20K plus to have the work done.
We weren’t sure we had the energy for a complete remodel of this scale.
(I’m not young and inexperienced anymore.)

So after a lot of contemplation and discussion, we decided to try cleaning the cabinets.
We used Murphy Oil Multi-Use Wood Cleaner*to clean the cabinets and
Rejuvenate Cabinet & Furniture Restorer*to give them back their original shine.
It took several days of cleaning and polishing the cabinets. (2-3 coats for a good shine)
I was pleasantly surprised at how well the cabinets looked.
We had originally discussed painting the cabinets and decided to “try” cleaning and polishing
them first. My husband had promised, that if I wasn’t happy we could try painting them.
I was happy with the results of the cleaning and polishing.

*Disclosure: This blog uses ads and affiliate links. If you choose to make a purchase using one of the links, I receive a small commission (at no additional cost to you) that helps offset the costs of maintaining this blog. Thanks for your support!

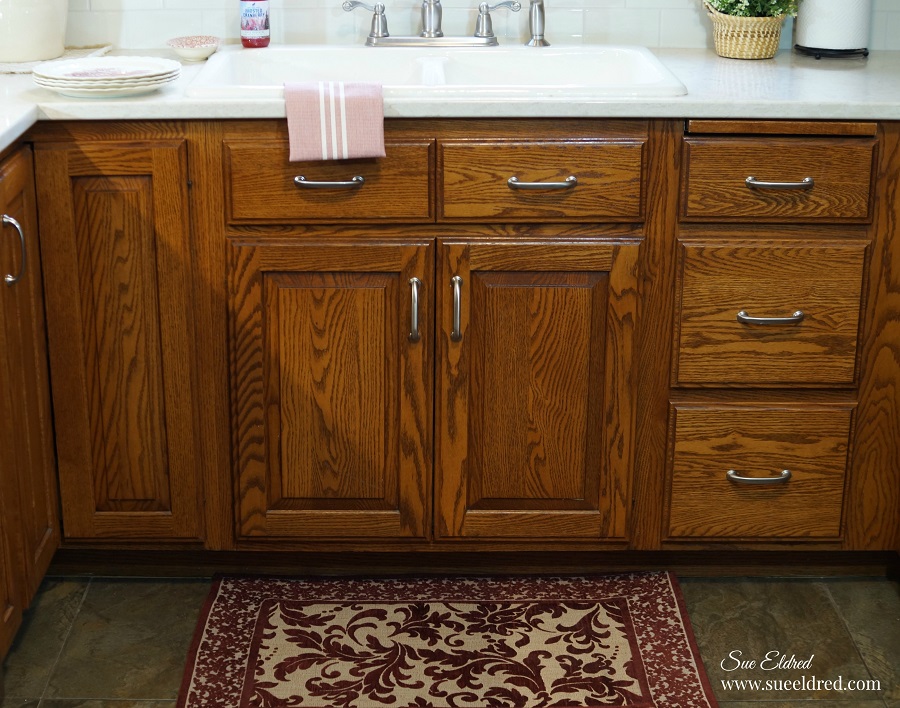
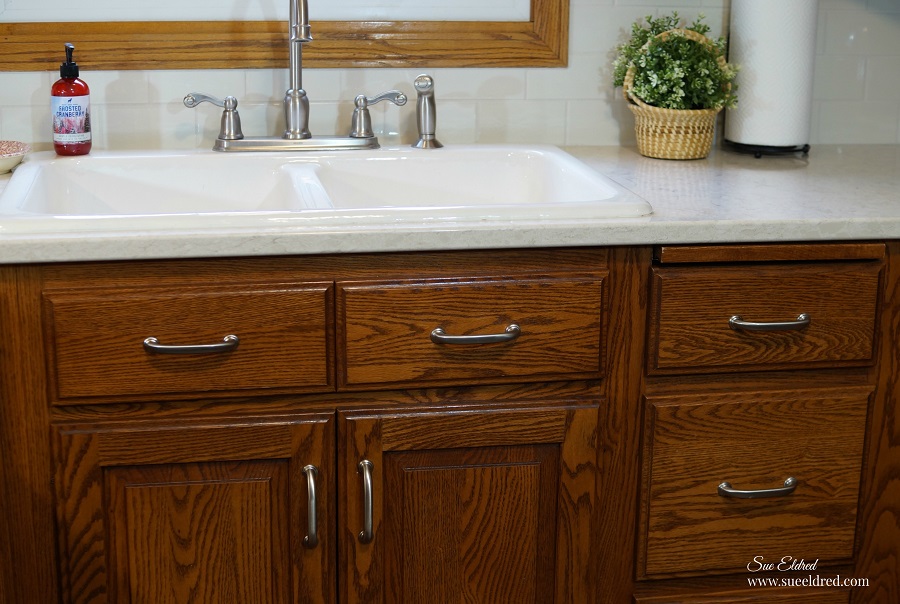
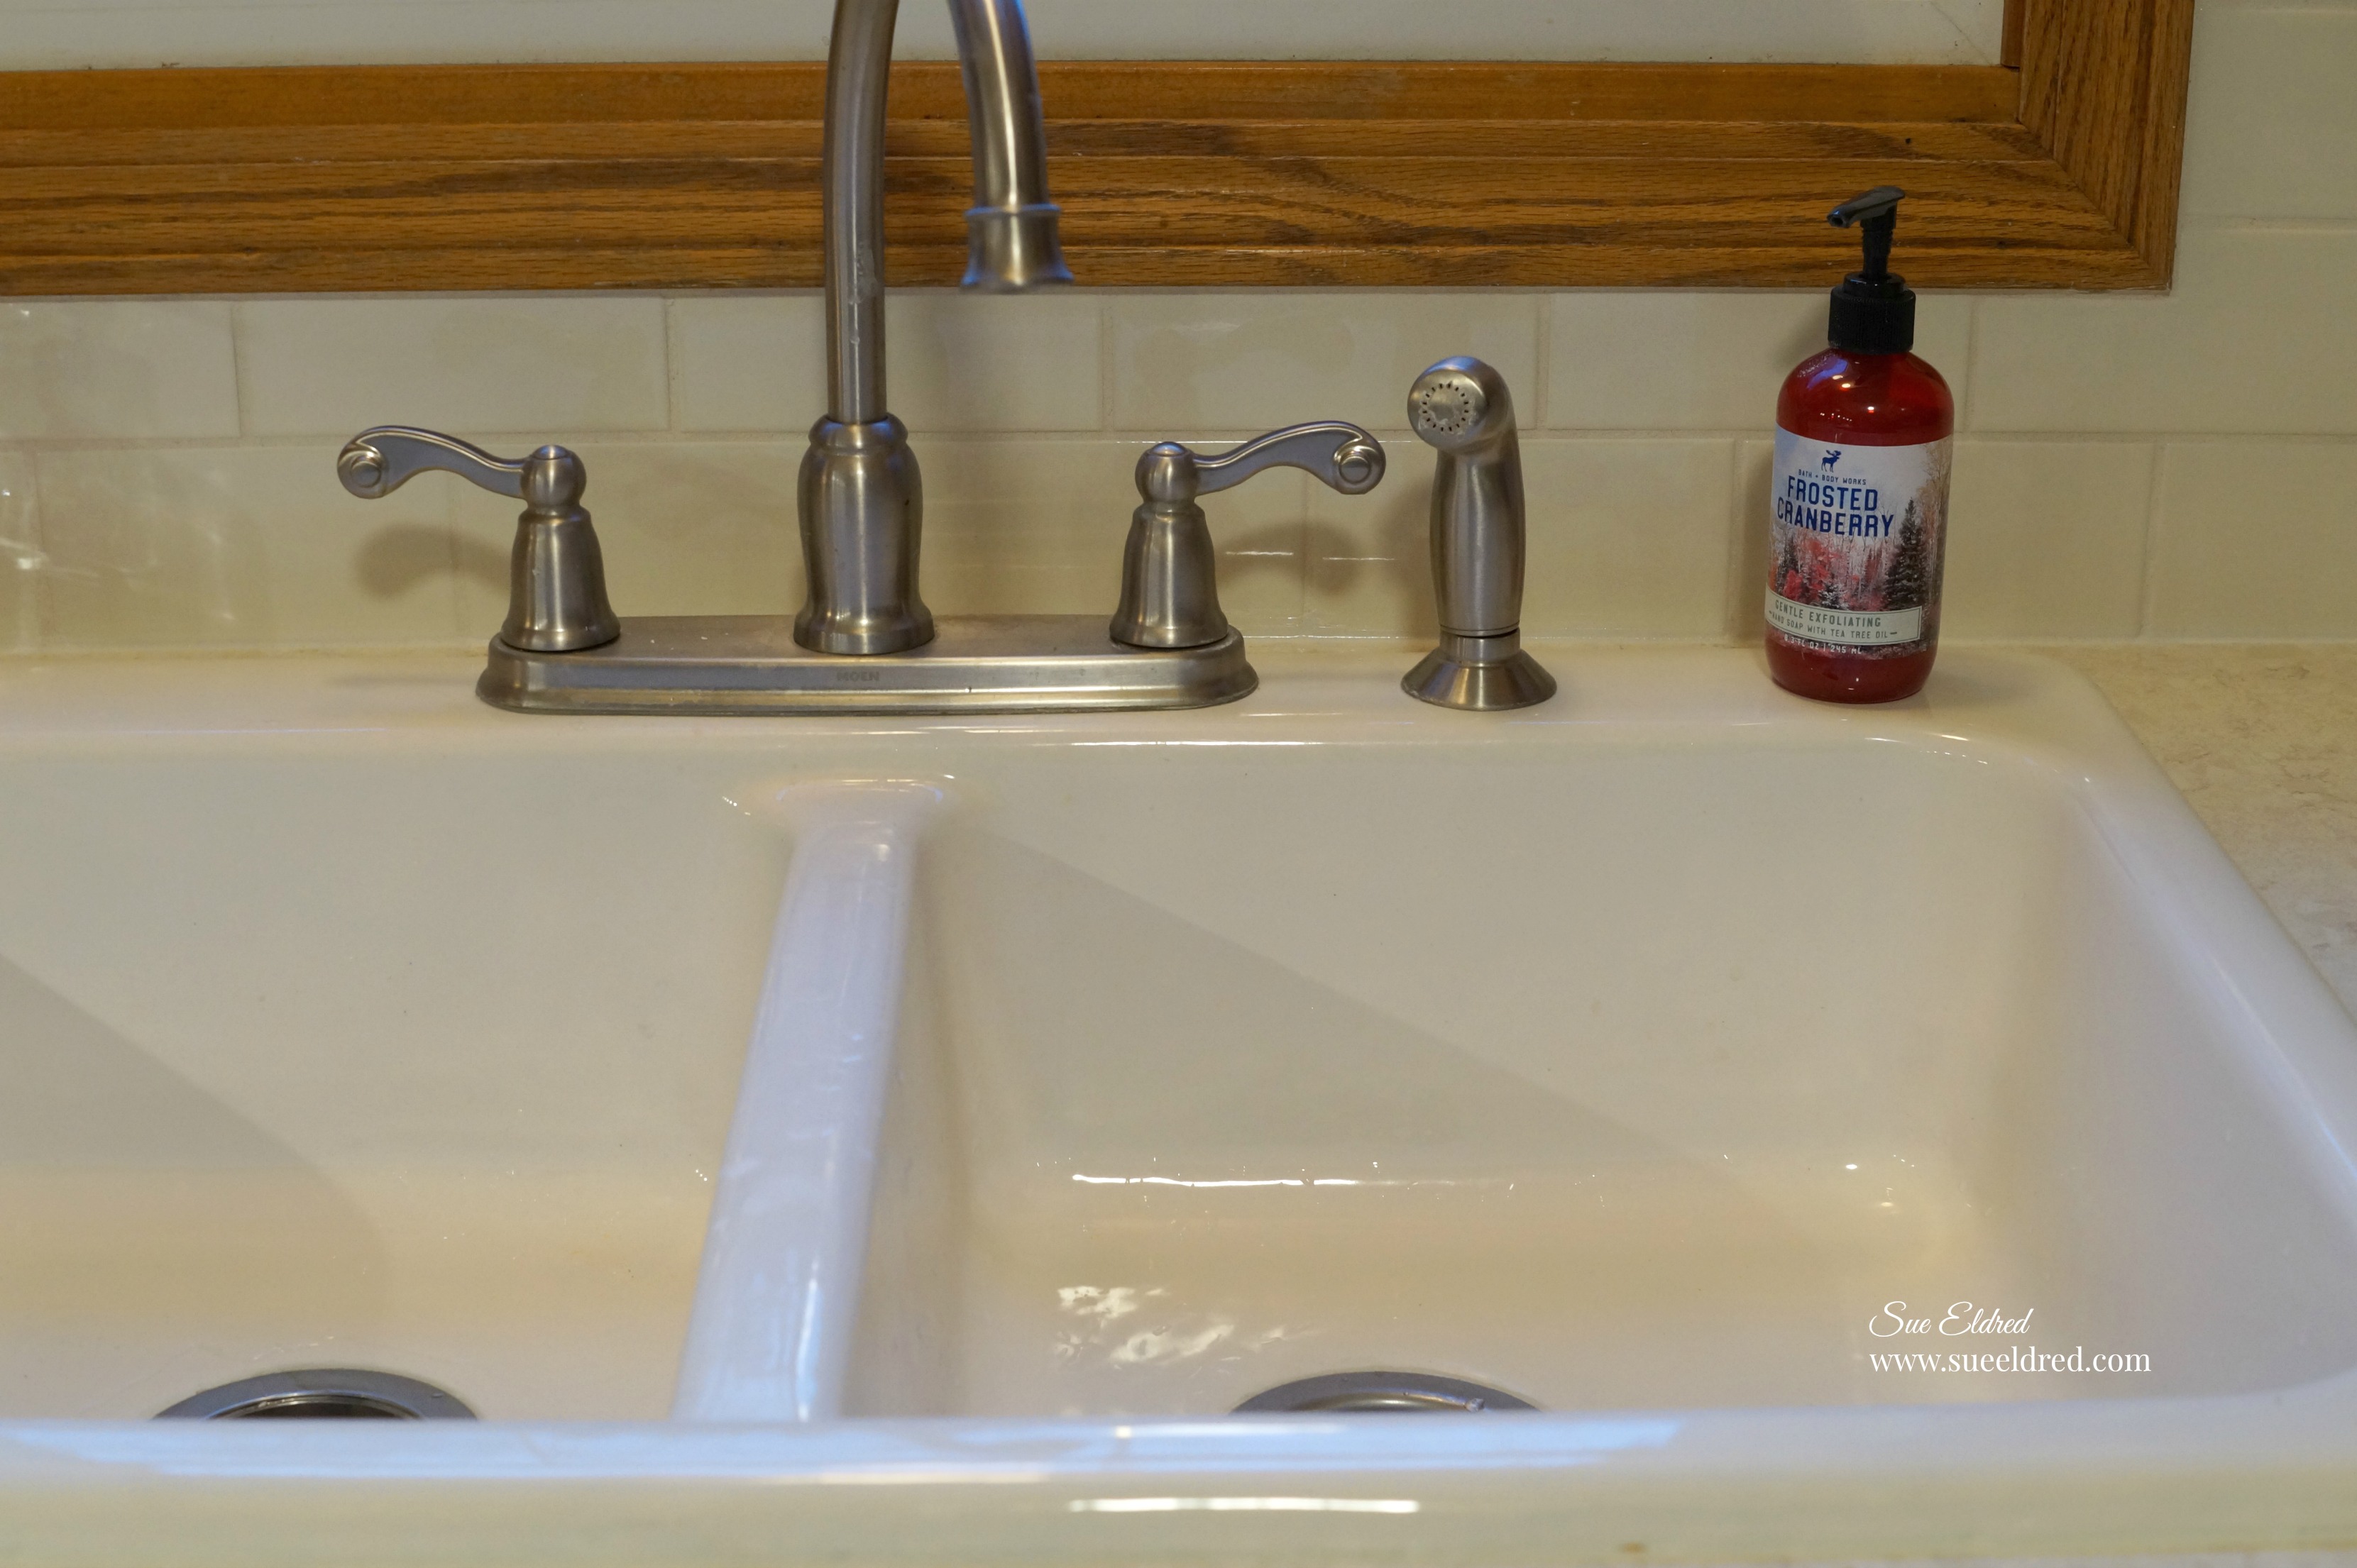
Then for $220 we added new polish nickel hardware to replace the old brass ones.
We also installed new LED lighting under the peninsula.
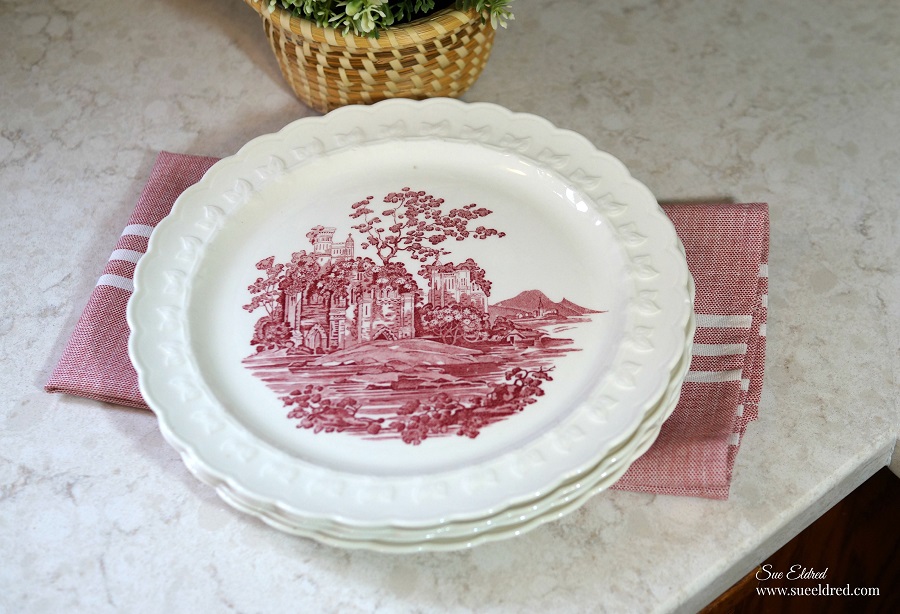
Since I was saving so much money…I splurged by picking a beautiful quartz counter top.
It looks lovely with my red and white dishes.
Next, came the issue of the kitchen sink.
I wanted a off-white “bisque” porcelain sink to complement the beautiful counter top.
We looked around at several of the big box Home Improvement Stores.
We finally found the sink I wanted, only to find out that because of a fire
in one of the main manufacturing locations the sink wouldn’t be available until June.
I’d waited this long what’s a little more.
Then…I found out I couldn’t get the sink until July, then we were told they weren’t sure
when it would be available, then I was told November. (Say What?)
I’ve had a “busy” looking kitchen for so long, what I wanted now was clean and simple.
Picking a tile should of been easy.
I had it narrowed down to 2 or 3 tiles depending on how the sink dilemma went.
I was told to wait before choosing to see how everything went together.
Not wanting to wait until November, we decided to go with a in-stock white porcelain sink.
We paid to have the white sink installed and it didn’t look bad.
All I had to do was decide on the tile.
Within a few days of the sink installation, I noticed spots around the edges of the sink.
It looked like rust.
The plumber came back out, re-caulked the sink and low and behold the spots came back.
My husband called the manufacturer of the sink, we had a couple options,
we could take the sink out and paint the bottom and see if that solved the problem
or they could send us a new sink.
During the conversation with the customer service guy,
my husband mentioned that we originally had wanted the “bisque” sink.
“I can send you the bisque sink if you want?”
It was decided to send the bisque sink (which costs almost double than white).
In the meantime…the white sink had started to grow on us
and the tile selection had come down to which sink we decided to use.
Porcelain sinks are very heavy, so it wasn’t a “let’s just try it out” kind of decision.
With the plumber charging $400 to install, a final decision had to made in advance.
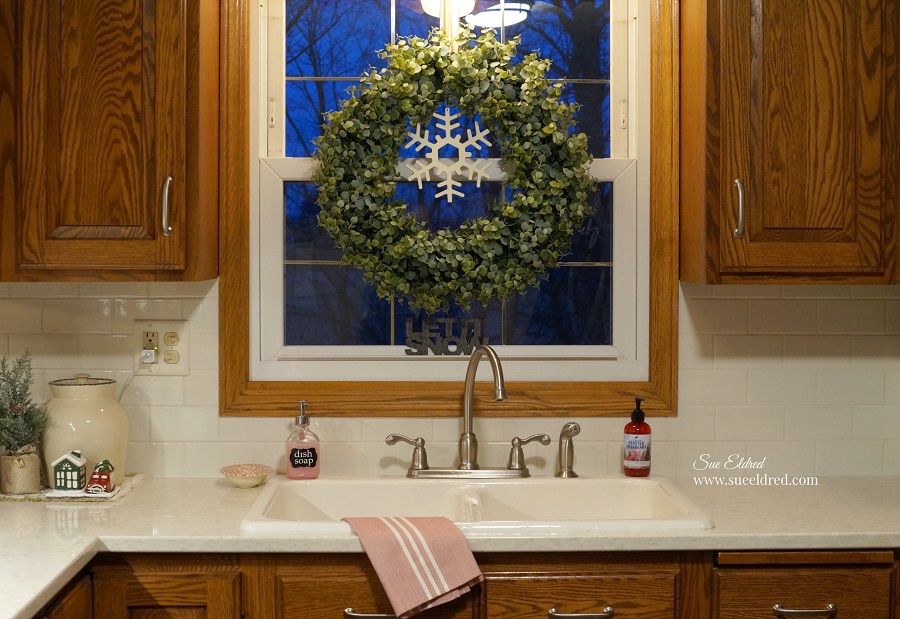
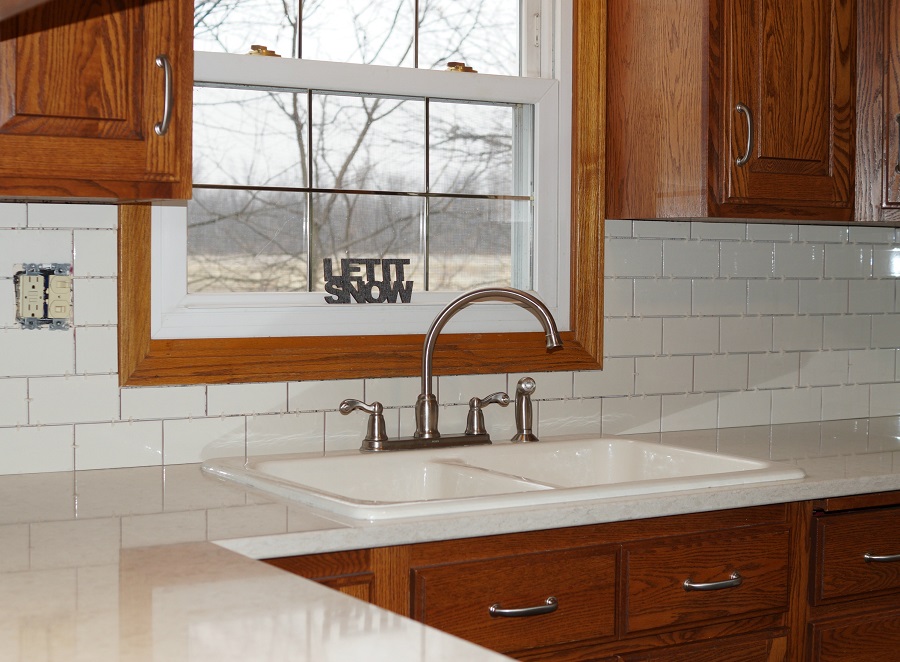
In the end, we decided to go with the bisque sink and off white subway tile.
The tile was installed a week before Christmas.
And.. I am Happy! (phew…what a process)

I love my “new kitchen” and the way the light reflects off the tile and counter.
It is bright and cheery with the clean and simple look I was going for.
Final tally…The cost of the make-over ended up being approximately 1/4 of what a total
kitchen remodel would have been.

On a curious side note… I just got an email last week from the kitchen designer following up on her designs. (her third mistake)


Don’t Miss a Thing…Make Sure to Follow me
