Crafting with Candy Wrappers

The Sweet Life Tiny Book

The Sweet Life Tiny Book.

The theme for Eileen Hull’s teams this month was “Crafting with Unconventional Materials”.

I do love a crafty challenge. I’ll admit this one stumped for a minute or two.

Crafting with Candy Wrappers

This challenge had my waistline taking one for the team.

The mini Reese’s Peanut Butter Cups were leftover from Easter.

I can’t think of a better way to use them up.
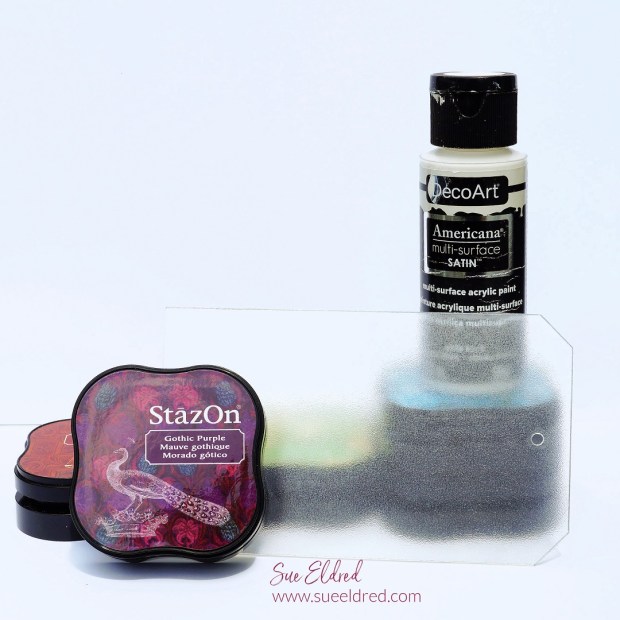
Crafting with Candy Wrappers

Materials Used:

*Disclosure:  This blog uses ads and affiliate links.  If you choose to make a purchase using one of the links, I receive a small commission (at no additional cost to you) that helps offset the costs of maintaining this blog.  Thanks for your support!

Crafting with Candy Wrappers

Directions:

  • Carefully unwrap the peanut butter cup wrappers.  Smooth out the wrinkles using your fingernail.
  • Place the wrappers into the opening of the disposable sticker maker.  Pull the wrappers through on the back of the machine, tear.

Crafting with Candy Wrappers

  • Cut the wrappers into smaller strips and pieces.

Crafting with Candy Wrappers

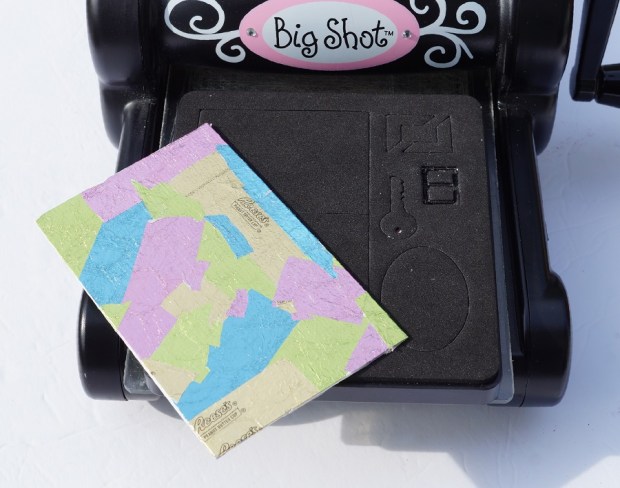
  • Carefully peel the wrappers from the adhesive backing and place them randomly onto a 3 1/2″ x 5 1/2″ piece of matboard.
  • Lay the matboard on the Sizzix Tiny Book Die facedown.
  • Run the die through the Big Shot Die-Cutting Machine* to cut out the Tiny Book cover.

Crafting with Candy Wrappers

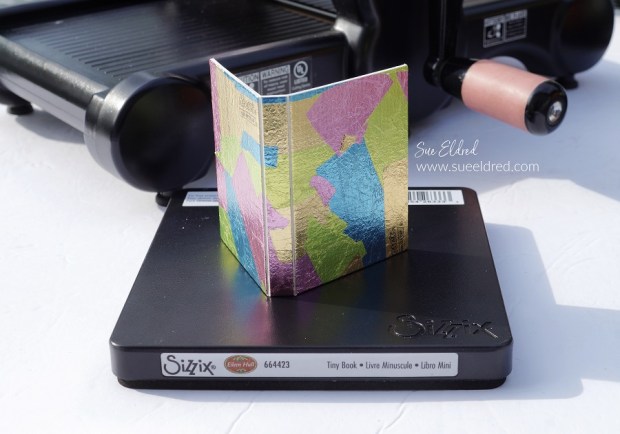
  • Carefully fold the book on the score lines.
  • Cut two pieces of white cardstock 2 3/4″ x 11″.  Score both pieces of cardstock every 2 1/8″ to create a long accordion piece.  You will end up with a small tab at the end of both strips.  Use the first tab to connect the strips.  Cut the second tab off.  Refold to make a long accordion strip.
  • Adhere both ends of the cardstock into the front and back cover.

Crafting with Candy Wrappers

Using Stazon Ink on Acrylic

Using Stazon Ink on Acrylic

How to Create a Multi-colored Acrylic Tag using StazOn Ink.

I tried this technique last year and have been wanting to recreate another project

so that I could share the process with you all.  (I’m not sure what took me so long.)

And with so many different acrylic sizes and shapes available, the ideas are endless.

Every Moment Counts Acrylic Tag

StazOn Ink is a permanent ink that is archival-quality.

It dries very quickly and can be used on porous (cardstock) and non-porous (glossy paper, vinyl, glass, acrylic) surfaces.

Using Stazon Ink on Acrylic

Materials Used:     (*affiliate links)

*Disclosure:  This blog uses ads and affiliate links.  If you choose to make a purchase using one of the links, I receive a small commission (at no additional cost to you) that helps offset the costs of maintaining this blog.  Thanks for your support!

How to use Stazon Ink on Acrylic

Directions:

  • Most acrylic pieces usually come with a thin protective covering on both sides of the acrylic.  Remove protective covering off only one of the sides.  You will be working on one side at a time so only remove the protective cover off one side.  If your acrylic doesn’t have a protective covering you’ll need to make sure to protect the other side.
  • Give the acrylic piece a quick once over with a sanding block.  This helps ensure that everything adheres.
  • Rub the StazOn ink pad directly onto the acrylic to add the first color.

How to use Stazon Ink on Acrylic

  • Continue adding additional colors to the tag.  
  • You can experiment with different swipes and swirls to find the pattern you like.

Using Stazon Ink on Acrylic

  • Paint one or two coats of light multi-surface acrylic paint over the ink.  The multi-surface paint is perfect for surfaces like acrylic.  The paint makes the colors of the ink pop and not as translucent.

Using Stazon Ink on Acrylic

  • For added protection and a scratch-resistant tag, I sprayed the tag with a matte acrylic sealer. (the color won’t be coming off my tag)
  • After everything has fully dried, turn the tag over and remove the second piece of protective covering from the acrylic.

Using Stazon Ink on Acrylic

For the other side of the tag.  

  • I created a saying using an SVG file from the Silhouette Store and cut it out of white glossy adhesive craft vinyl using my Silhouette Electronic Die-Cutting Machine*.
  • I used the vinyl tools to remove the excess vinyl in and around the letters.
  • Cut a piece of Clear Transfer Tape* slightly larger than the word.
  • Using the vinyl scraper tool, gently rub over the letters to make sure they have transferred.
  • Lift the word off the white backer paper.

Apply Craft Vinyl to Acrylic Tag

  • Center and position the words over your acrylic tag and gently rub over the transfer paper with the vinyl scraper tool.
  • Carefully remove transfer paper from the acrylic tag.
  • Add ribbon or twine through the hole of the tag.

Makes a great inspirational bag tag.

Every Moment Counts Acrylic Tag

Interested in the Products Used on the Every Moment Counts Tag?

Click on Images below for Amazon Ordering.

Amazon Audible Promo    Amazon Audible Free Trial*