How to make a Floral Chalkboard

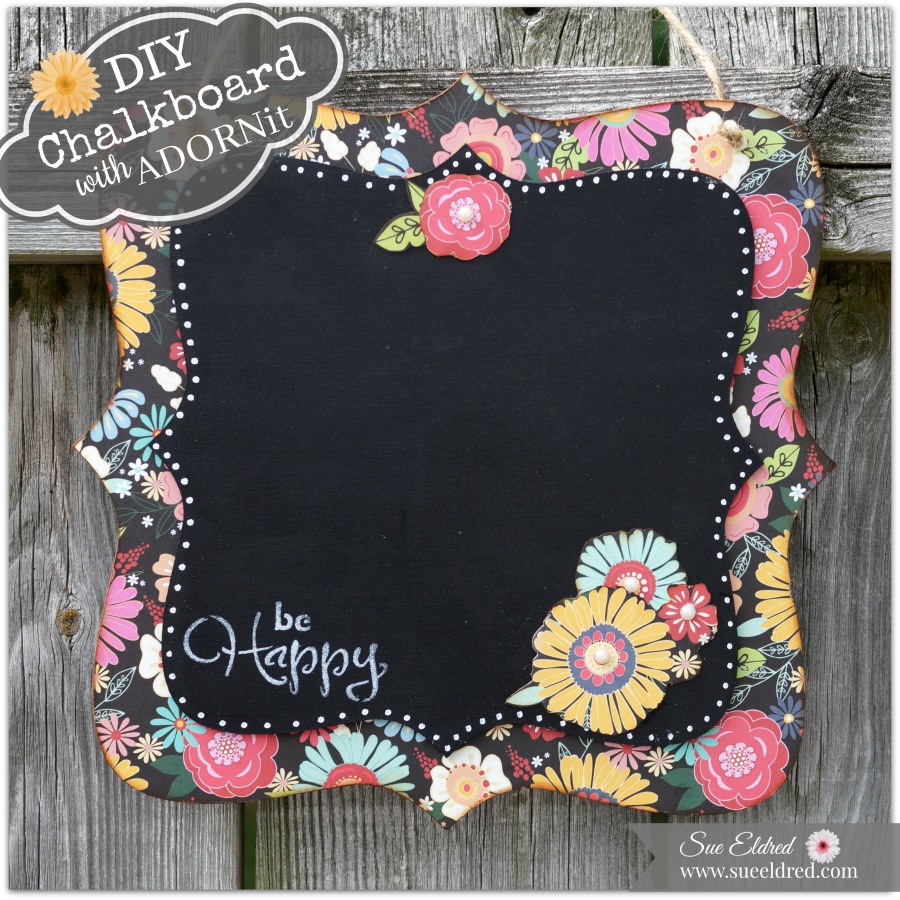
DIY Chalkboard with Adornit…

The Floral Chalkboard makes a fun decorative Home Décor piece and is really easy to make.

To make the Floral Chalkboard you’ll need…        (*affiliate links)

Shop Your Fav Brands at Scrapbook.com

Directions:

  1. Apply an even coat of Mod Podge* over the larger Wood Bracket shape.  Lay decorative scrapbook paper over shape and smooth with your hand.

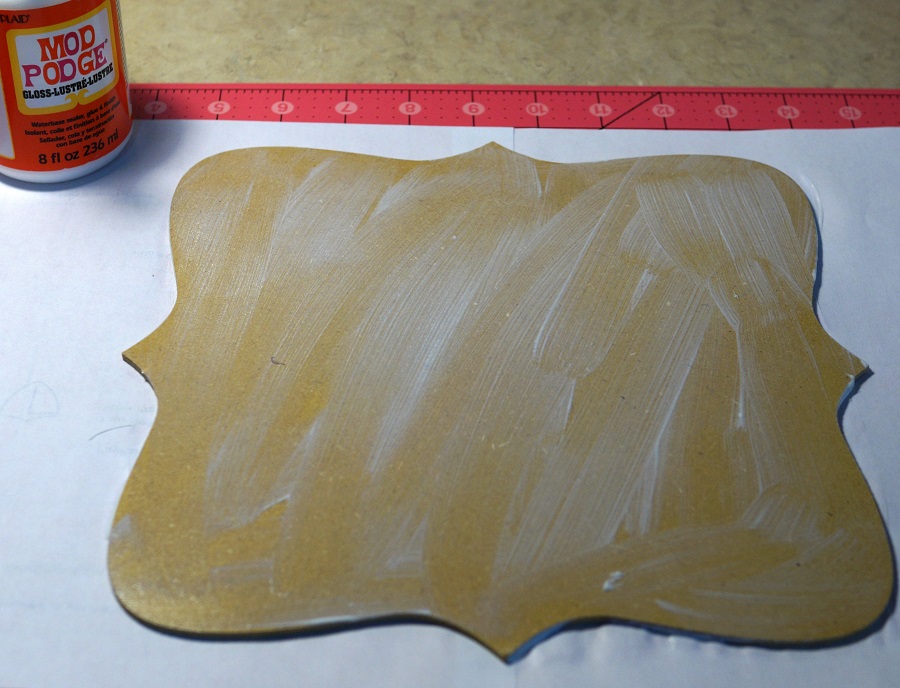
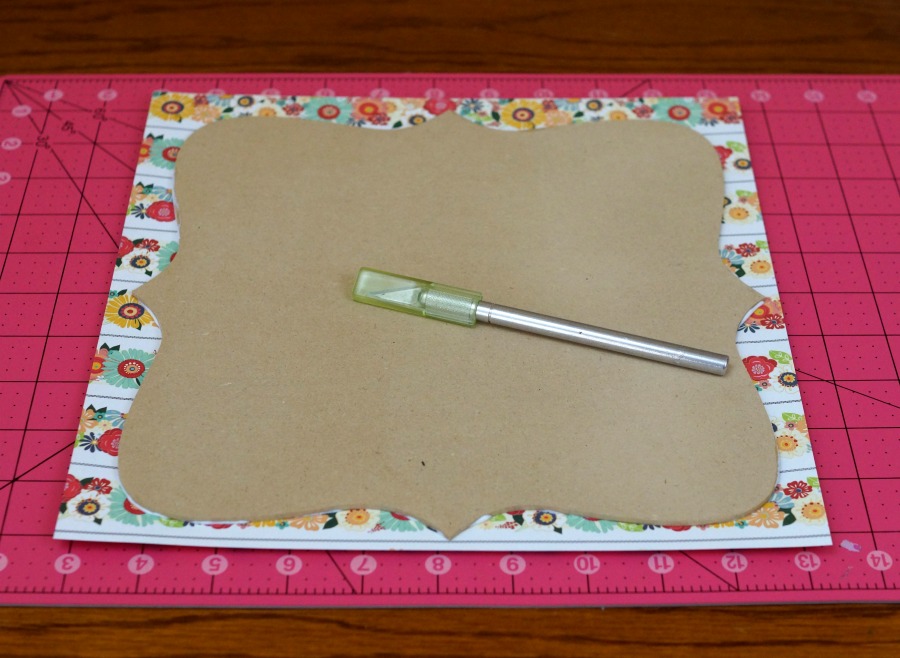
2.  Using an x-acto knife and cutting mat, cut excess paper away from the Wood Bracket.

3.  Rub Vintage Photo Distress Ink*onto the outside edges of the wood shape using the Ink Blending Tool*.

4.   Paint the smaller wood shape with the Black Chalkboard Paint*.  Add small white dots around the outside of the wood shape with the white paint marker*.

5.  Stencil the words “be Happy” onto the chalkboard using white acrylic paint and the Deco Art Americana Decor Stencil, Inspiration*.

6.  Cut a few flower shapes using the second sheet of scrapbook paper.  Apply a thin coat of Mod Podge* to the back of the flowers and glue to the front of the chalkboard.  Add decorative pearl embellishments to the inside of the flowers.

7.  Glue chalkboard to the front of the floral base using Beacon’s Quick Grip All-Purpose Permanent Adhesive*.

8.  Drill two holes on the top of the chalkboard and add Twine* for hanging.


This Chalkboard was sponsored by Adornit as an“it girl” Ambassador.

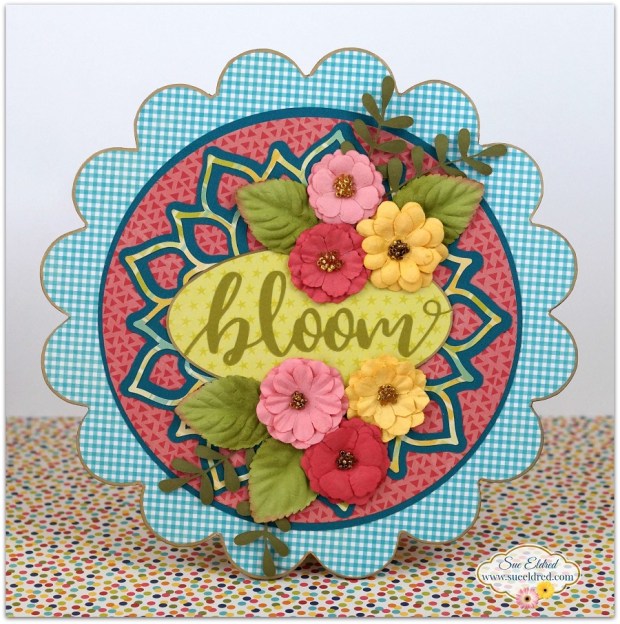
If you liked the Floral Chalkboard, you might also like the DIY Bloom Floral Plaque.

You can see the full tutorial here.


Don’t Miss a Thing…Make Sure to Follow me

Shop Amazon Scrapbooking Supplies*

*Disclosure:  This blog uses ads and affiliate links.  If you choose to make a purchase using one of the links, I receive a small commission (at no additional cost to you) that helps offset the costs of maintaining this blog.  Thanks for your support!


I love my Calendar Girls

I love, I love, I love my calendar girl.

You ever get a song stuck in your head?  (over and over again)

When I finished up with these samples last night, I couldn’t get that song out of my head.

For those of you not old enough to remember the song Calendar Girl by Neil Sedaka,

I suggest you “google” it.  Then you’ll have it rolling around your head just like me.

(*amazon affiliate link)

It all started with the Calendar Girls Mini Coloring Book* from ADORNit.

I simply water colored the image using a variety of inks from ink pads and a waterbrush.

(It makes me feel like an artist)

The mini coloring books are now available on Amazon*.

And… if you use the code MINIBOOK (all caps) you will be able to buy 2 and get 1 free!  

Try Amazon Prime 30-Day Free Trial

Disclaimer:  This blog uses ads and affiliate links.  If you choose to make a purchase using one of the links, I receive a small commission (at no additional cost to you) that helps offset the costs of maintaining this blog.  Thanks for your support!

ADORNit: “Embrace Each Day” card

A bright and cheerful card for all you Moms out there.

It doesn’t matter if put your feet up, take a walk, plant those flowers or hug those little ones…

What ever you need to do to embrace the day.  (fyi…I plan on doing all the above)

Happy Mother’s Day.

Card Details…                                                                          (*affiliate link)

This card was sponsored by ADORNit as part of being an ADORNit “it girl” ambassador.

Disclaimer:  This blog uses ads and affiliate links.  If you choose to make a purchase using one of the links, I receive a small commission (at no additional cost to you) that helps offset the costs of maintaining this blog.  Thanks for your support!

Life’s a Journey

Of all the goodies I received from ADORNit as part of being an “it girl”  this wood plaque

was the first project I wanted to tackle.

So…on a night when I had so many things I could/should have done,

I spent a relaxing evening just painting.

I haven’t done this in such a long time.  It was just what I needed.

I started with this plain life’s journey plaque from ADORNit.           (measures 11″ x 13″)

I used a small flexible nail file to run through the grooved channels to clean it up a bit.

I base coated the entire plaque with gray acrylic paint.

Having the gray paint, deep in the grooves of the plaque, works as the outline between colors

to make the colors stand out.

For me, having grooved channels made it so easy to paint and stay in the lines.

FYI…You might want to seal coat your project once your finished.

I’ll be honest… I’ve never been camping in my life. 

I’m not sure what drew me to this plaque so much.

My idea of roughing it is a bad hotel room.

Hmmm…Maybe if I had a cute little camper like this, I might even try it.

Life’s a Journey, Make the Most of it!

Sue’s ADORNit Unboxing Video

You may remember last month when I mentioned that I’d been given the opportunity

to be a ADORNit Brand Ambassador.

I patiently waited for my Happy Mail to arrive.  They said it’d be worth the wait.

They weren’t kidding.

For the next three months…

I will be sharing with you a variety of fun projects using their products.

I thought it might be fun to show in a video you what was inside.

I’m not the best at making video’s and this one gave me quite a few unexpected challenges.

But being fully determined, I finally got it done.  (Thanks in to my son Justin.)

To see all that ADORNit has to offer make sure to visit them at http://www.adornit.com.

Want to know a little secret?

adornit-it-girl

I’m excited to let you in on a little secret.

I have been chosen, for the next three months, to be an ADORNit Ambassador

for the Art, Coloring, Paper Crafting and DIY categories.

It’s going to be crazy fun.

I’ll be sharing lots of fun projects here and on all my social media outlets

using their great products.  I can’t wait to get started.

So…STAY TUNED!

Kindness Matters

Kindness Matters.  All Day.  Every Day. 

This card was made using Art Play Paintables and Blender Basics.

I water colored the image using a waterbrush and a variety of inks from markers and inkpads.

Happy Friday Everyone!

Shop Your Fav Brands at Scrapbook.com

*Disclosure:  This blog uses ads and affiliate links.  If you choose to make a purchase using one of the links, I receive a small commission (at no additional cost to you) that helps offset the costs of maintaining this blog.  Thanks for your support!

Crazy Quilt Card

Crazy Quilt Card 2

I am fascinated by quilts.  Old ones, new ones, it doesn’t matter…

I love all the colors and patterns.

I once thought I might enjoy making a quilt.

But… I knew I’d never have the patience to finish the job.  (So I quit before I even started.)

Crafter's Ink 87508-Canyon

I recently received some new stamps and inkpads from Ann Butler Designs and

Clearsnap to use for a Blog Hop with a few other designers.

The stamps I received are quilt themed stamps and the Crafter’s ink is perfect for fabric, wood and

more.  Being a paper crafter… my first thought was a quilt card.  (Now that’s a quilt I can make.)

Crazy quilt card Collage

Quilt Card Supplies Used:

  • ColorBox® Background Basics by Ann Butler  Basket 1 and Picnic 1
  • ColorBox Crafter’s® by Ann Butler Canyon, Ocean Breeze, Desert Sand, Evergreen, Deep Woods
  • Blender Basics Paper Pack from Adorn It

Here’s how I made the card:

  1. Cut 1″ squares from the pre-stamped colored paper.  Make extra so that some of them can be cut in 1/2 diagonally.  I stamped the “basket” stamp several times on a 5 1/2″ x 5 1/2″ piece of paper to create my background piece.
  2. I made a 5″ x 5″ scored grid to glue my 1″ squares on.  You don’t necessarily need to make a grid; you could actually glue it right onto the background piece.  I found it easier to arrange and re-arrange my squares on the grid before gluing.   It also helped me keep the squares straight when gluing.
  3. Once pattern is glued down, create secondary pattern by adding cut 1/2″ squares.
  4. Adhere quilt card onto 5 1/2″ stamped square and additional layers.  Finished card is 6″ x 6″.

Shop Amazon Scrapbooking Supplies*

Disclaimer:  This blog uses ads and affiliate links.  If you choose to make a purchase using one of the links, I receive a small commission (at no additional cost to you) that helps offset the costs of maintaining this blog.  Thanks for your support!

Art Play Paintables

The other day while I was procrastinating…

I decided to get out my Art Play Paintables and do a little water coloring.

I love these fun sheets from Adorn It call Art Play Paintables.

So many wonderful images to fill in.

Great for watercolors, color pencils and markers.

You know… I think I need to take more time to just play.

Happy Friday!

ADORNit Blog Hop and Giveaway

Have you seen ADORNit’s Art Play Paintables Collection by Lindsay Ostrom?

These papers are a card makers dream.

All these wonderful images without having to buy a ton of stamps.

The papers are perfect for coloring with color pencils, markers or painting

with water colors or inks.

I like to watercolor with my inks and markers and a waterbrush.

If my inks have a flexible lid, I squeeze color into the lid and use that as my palette.

If not, I dab the ink onto a non-porous surface and paint away.

(These cards were created for and sponsored by Adorn It.)