Sue’s 2018 Holiday Workshop

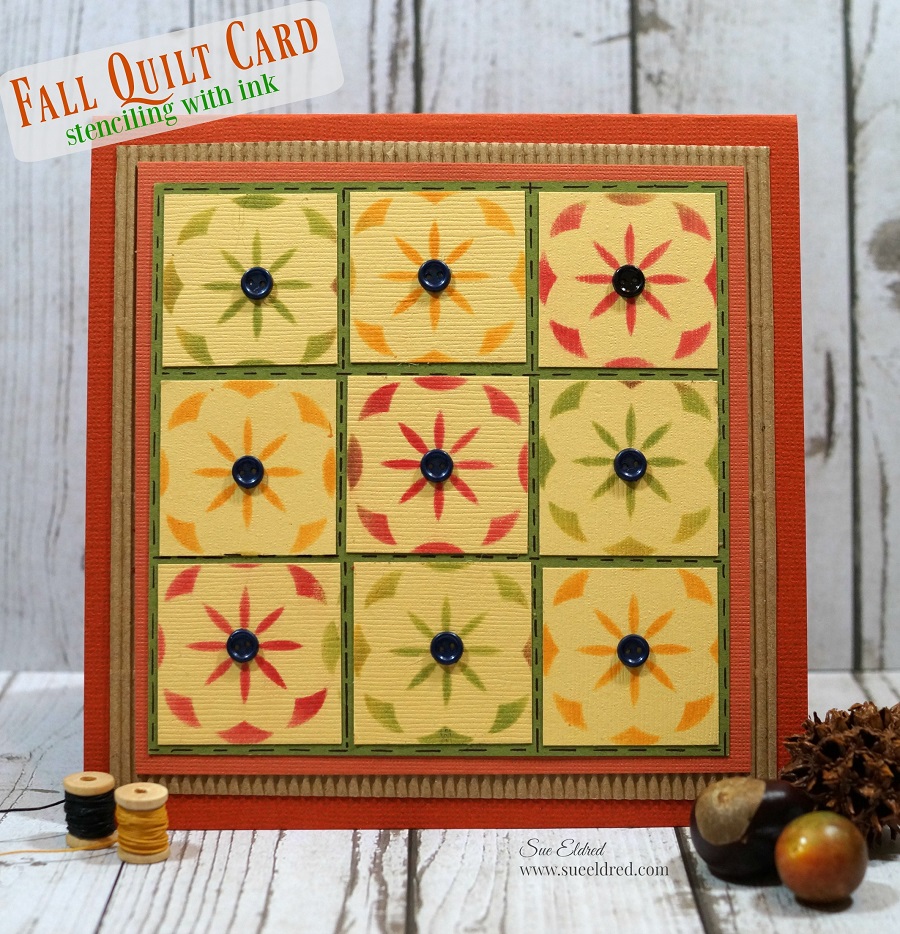
Registration is now open for Sue’s Holiday Workshop… 

Saturday, November 10th 

10:00 a.m. to 3:00 p.m.

Sue’s Holiday Workshop is a great jumpstart into the Holiday Season and…a good way to spend quality time laughing and creating with friends.

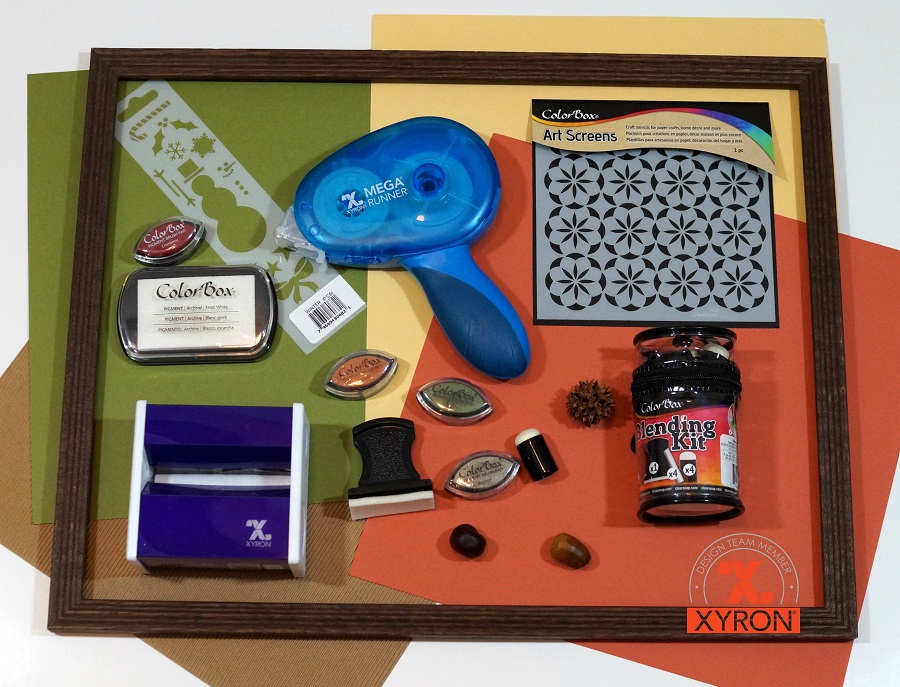
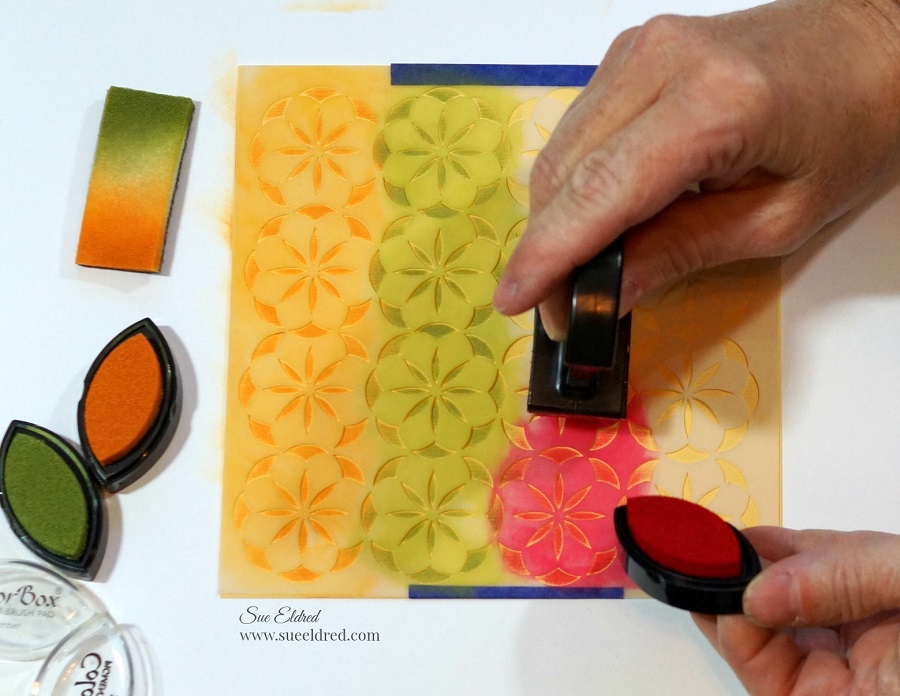
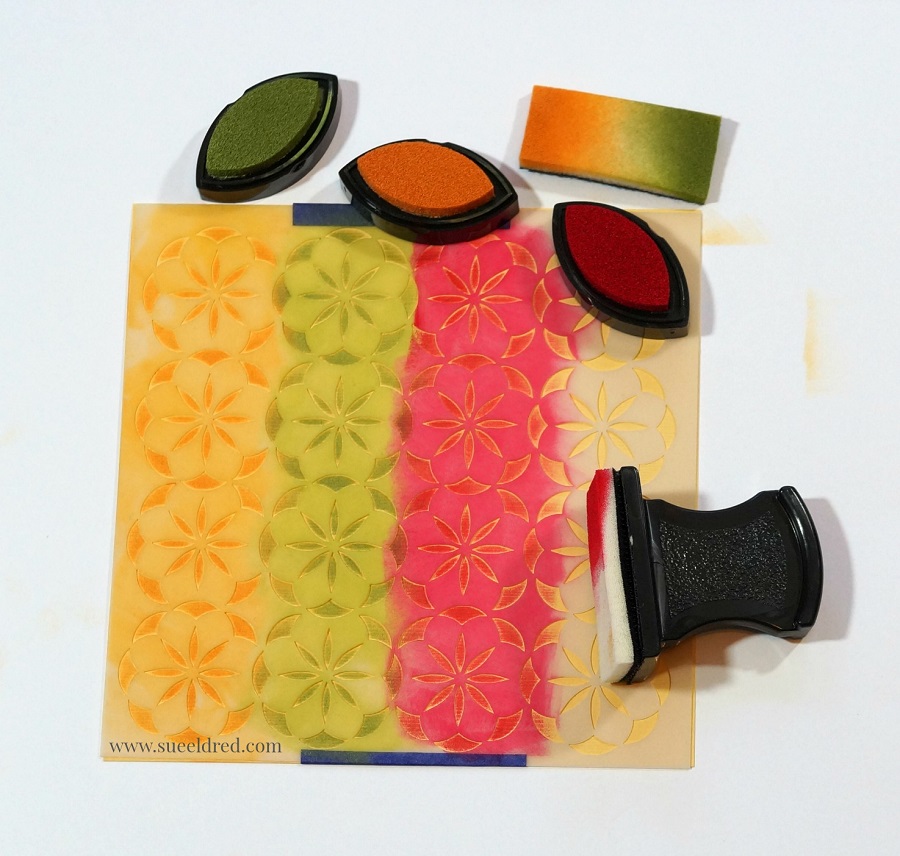
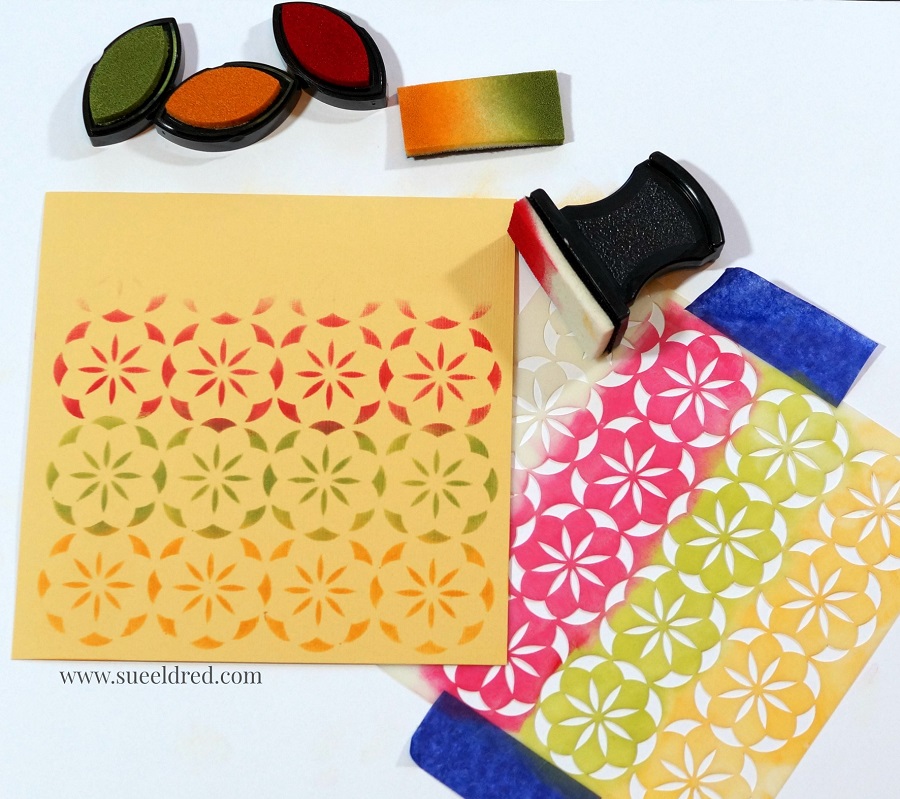
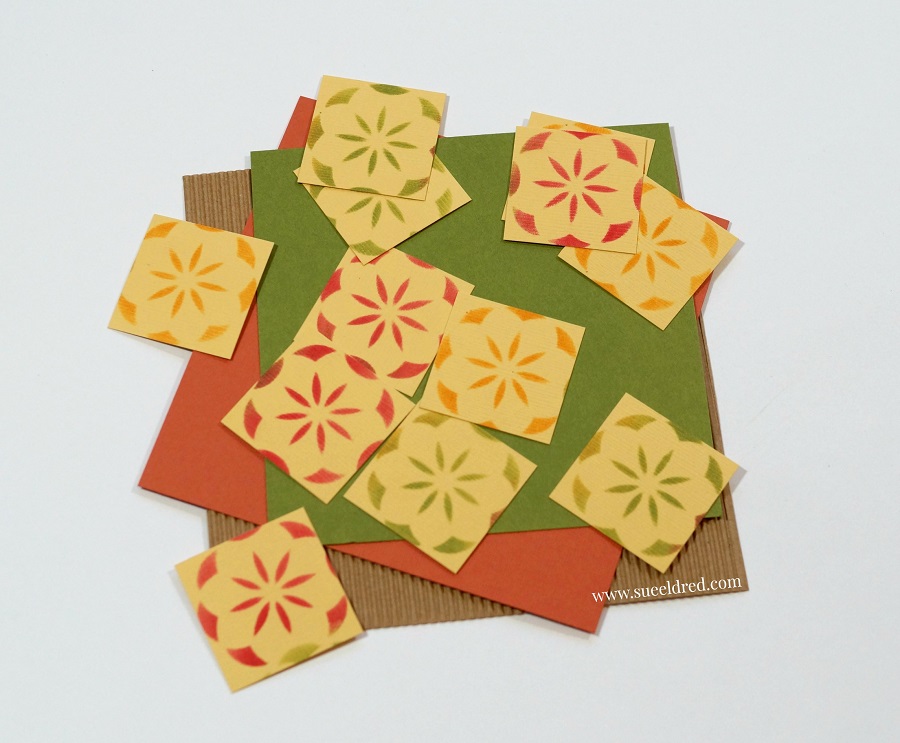
For the card makers…This year we will be making even more cards and tags using the “Simple Vintage Christmas” Collection from Simple Stories.

For the Holiday Crafters… We will be making a cute Felt Santa, Rae Dunn Inspired Ornaments, Wood Holiday Sign and Bonnie will be teaching you how to make an adorable Origami Star.  (Additional Holiday Workshop Samples pictures coming soon.)

The cost of the Holiday Workshop is $45…
which includes your workshop supplies*, hot lunch, yummy cookies and lots of prizes.  (Did I mention every wins a prize?)

Sue’s Holiday Workshop will be held at St. Mark’s Lutheran Church,
200 S. Main St., Washington, IL  in my church’s large Family Life Center.
Great lighting and plenty of space to spread out.

It’s going to be a fun day.

Invite a friend and reserve your spot today.
RSVP: suesholidayworkshop@yahoo.com

Payment is due by Nov. 1st.

Fall Quilt Card…stenciling with ink

Fall Quilt Card…stenciling with ink

a quick and easy fall card.

This week the Xyron® Design Team partnered up with Clearsnap® the maker of Colorbox® inkpads and more for some fun projects.

Here’s what I used:                  (*affiliate link)

Directions:

Place the stencil onto yellow cardstock and secured it with removable painters tape.

Ink the cardstock using the blending tool and Amber, Turtle and Cranberry Colorbox Inks.

The Art Screen stencil cleans up easily with water.

Cut the stenciled cardstock into small squares.    (Mine were slightly smaller than 1 inch.)

Place the squares through the Xyron 3″ Sticker Maker* for the perfect little sticker.

Adhere all the card layers using the Xyron Mega Runner*.

For added detail…draw in small stitch lines using a fine point marker and glue teeny tiny buttons into the center of each square..

“This is a sponsored post.  As a member of the Xyron Design Team I have been provided product and compensation in exchange for my creative ideas.  The views and opinions are my own.

*Disclosure:  This blog uses affiliate links.  If you choose to make a purchase using one of the links, I receive a small commission (at no additional cost to you) that helps offset the costs of maintaining this blog.  Thanks for your support!

Too Stinkin Cute with Xyron and Derwent Markers

Clean and Simple Card made with Xyron and Derwent Markers.

You know that look on a kids face when he knows he being “super cute”.

This Super Hero picture of my son taken when he was 3 is one of my all time favorites.

He knew he was being “so stinkin cute”!

I always love getting new things to play with and try.

This month the Xyron Design Team was sent Derwent Markers and Paper to play with.

To Make my Card…

I used a small coloring sheet from a mini coloring book for adults as my card base.

I simply colored in the words with my Derwent Markers for a quick and easy layered card.

But… Because I’m a perfectionist and my coloring skills are adequate at best,

I embellished my card with a few small flowers, twine and enamel dots.

(No mistakes… just more opportunities for embellishments.)

Here’s what else I used to make my Clean and Simple Card:

“This is a sponsored post.  As a member of the Xyron Design Team I have been provided product and compensation in exchange for my creative ideas.  The views and opinions are my own.

*Disclosure:  This blog uses affiliate links.  If you choose to make a purchase using one of the links, I receive a small commission (at no additional cost to you) that helps offset the costs of maintaining this blog.  Thanks for your support!

Simple Water Colored Posies

Simple Water Colored Posies Card

My love of water color started in my High School Art class.

Unfortunately for me, I’m not very good at drawing.

Except simple little objects.

For my Xyron Design Team project this week…

Derwent Academy sent us some awesome goodies to play with.

For my card…I cut the watercolor paper to 3 ¾” x 5″ and drew simple little flowers

on the bottom.  (Can’t get much easier than this.)

I colored in my flowers and leaves using the water color pencils.

I used the lighter pencil first and then added a little shading with the darker pencil.

You don’t have to fill the entire image.

Use a wet paint brush and go over pencil marks to blend the colors.

For my Words…I took a small piece of the water color paper and did a scribble background

with the blues and purple water color pencils.

Blend the colors together with a wet paintbrush.

After the paper was completely dry, I inserted it into my Xyron 3″ Sticker Maker*.

The Xyron Sticker Maker* is great to use when cutting out small dies.

It adds complete adhesive and makes the perfect little word sticker.

I used my Xyron Creative Station* to add adhesive to the back of my layers.

That way, I don’t have to worry about any warpage on my watercolored layer.

A simple bow finishes off this simple watercolored card.

“This is a sponsored post.  As a member of the Xyron Design Team I have been provided product and compensation in exchange for my creative ideas.  The views and opinions are my own.

*Disclosure:  This blog uses affiliate links.  If you choose to make a purchase using one of the links, I receive a small commission (at no additional cost to you) that helps offset the costs of maintaining this blog.  Thanks for your support!

Cheery Little Birthday Card

A Cherry Little Birthday Card

Who doesn’t love receiving a Cheery Little Birthday Card?

I know I do.

This week the Xyron Design Team is all about Lawn Fawn…

and I had a blast.  I loved using their dies to make this fun card.

Here’s what I used:                     (*affiliate link)

*Disclosure:  This blog uses affiliate links.  If you choose to make a purchase using one of the links, I receive a small commission (at no additional cost to you) that helps offset the costs of maintaining this blog.  Thanks for your support!

  • When working with small dies, I like to run the paper through my Xyron 3″ Sticker Maker*.
  • Rub and peel the top cover off the paper.

  • Run the paper and die through your die cutter for the perfect little sticker.
  • Just the perfect amount of adhesive and so easy to use.

  • Look how cute this terra cotta pot turned out.
  • Ink the edges of the paper pieces with Vintage Photo Ink* for a realistic looking pot.

The card was so easy to put together using the Xyron Sticker Maker* for all my little pieces.

A really fun card to make.

A special thank you to Lawn Fawn for sending the dies and paper used on this project.

“This is a sponsored post.  As a member of the Xyron Design Team I have been provided product and compensation in exchange for my creative ideas.  The views and opinions are my own.

Scootin by with Newton’s Nook and Xyron

Scootin’ by to say hello!

This week the Xyron Design Team teamed up with Newton’s Nook for some fun inspiration.

And…a great chance to win some goodies for you.  (see below)

Click on each of the links below to leave your comments all week for a chance to win a Xyron Mega Runner and a $25 Newton’s Gift Card.

XYRON FACEBOOK

NEWTON’S NOOK BLOG


For my project, I picked out this cute little Newton Scoots by” stamp set and matching dies.

I also picked out the Floral Lace Stencil* to use on the background.

I used my stencil brush and a light blue dye inkpad to create the subtle background.

Using my Xyron Creative Station* made quick work in putting all my layers together.

I’ll be honest…this was the first time I’ve used a stamp and matching die set.

I love how clean it looks.  Super Easy to use.  No messy fussy cutting needed!

“This is a sponsored post.  As a member of the Xyron Design Team I have been provided product and compensation in exchange for my creative ideas.  The views and opinions are my own.

*Disclosure:  This blog uses affiliate links.  If you choose to make a purchase using one of the links, I receive a small commission (at no additional cost to you) that helps offset the costs of maintaining this blog.  Thanks for your support!

Splatter Painting

Splatter Painting

When you get an opportunity to look absolutely ridiculous…

have a little fun and make a really big creative mess, well…you just need to take it!

Last year at the Creativation Show, there was a clear acrylic booth set up called

the “Splatter Room”.  As the name suggests, splatter painting is extremely messy.

So…dressed in a hazmat suit and goggles,

I went to town choosing paint and splattering it all over my canvas.

Oh, what a glorious mess! 

It was so much fun and the highlight of my day.

The Shimelle “Box of Crayons” collection from American Crafts was the perfect collection

for my crazy, colorful pictures taken on my Splatter Day.

Last Saturday, National Scrapbooking Day, I spent my day divided between playing with

paper and playing in the dirt.  (I do love a glorious mess.)

The “let’s be friends” card was another project that I made using the “box of crayons” collection

and my Xyron Tape Runner*.

“This is a sponsored post. As a member of the Xyron Design Team I have been provided product and compensation in exchange for my creative ideas.  The views and opinions are my own.”

*Disclosure:  This blog uses affiliate links.  If you choose to make a purchase using one of the links, I receive a small commission (at no additional cost to you) that helps offset the costs of maintaining this blog.  Thanks for your support!

American Crafts… Shimelle “box of crayons” collection. 

Spring Quilt Card

It’s been a while since I’ve used rubber stamps to make a card… 

and I’ll admit that it felt really good to sit and watercolor a image again.

Interesting fact…In 1996, my creative journey was started with rubber stamps.

This week the Xyron Design Team has partnered up with Deep Red Rubber Stamps.

I choose the Color Me Spring Quilt cling stamp to use in my project.

Spring Quilt Card products used:      (*affiliate links)

I like using art markers ( and dye ink pads) to water color my stamped image.

I scribble using the marker onto a piece of acetate. (or anything non-porous) and pick up

the ink from the marker with the water-brush and paint the image.

When layering the card…

The Xyron Creative Station* is great for adding adhesive to the back of intricate pieces.

For simple layers I use my Xyron Tape Runner*

I also use the XYRON Adhesive Eraser* to remove any extra adhesive that might show.

Embellish the card using self adhesive flower rhinestones and a sheer ribbon bow.

“This is a sponsored post. As a member of the Xyron Design Team I have been provided product and compensation in exchange for my creative ideas.  The views and opinions are my own.”

*Disclosure:  This blog post uses affiliate links.  If you choose to make a purchase using one of the links, I receive a small commission (at no additional cost to you) that helps offset the costs of maintaining this blog.  Thanks for your support!

Souper Celebrations Birthday Cards

A little birthday card-making fun…

using Jillibean Soup Souper Celebration Collection Pack*.

A fun collection for any age.

I love the cute characters and bright colors.

Jillibean Soup Products Used on the Cards:                           (*affiliate link)


*Disclosure:  This blog uses ads and affiliate links.  If you choose to make a purchase using one of the links, I receive a small commission (at no additional cost to you) that helps offset the costs of maintaining this blog.  Thanks for your support!

Shop Your Fav Brands at Scrapbook.com

Enroll Today!

Coloring with Derwent and Xyron

I recently received a special box of Derwent Procolour Colored Pencils* to try out along with

the Derwent Big Book*.  As soon as I got them, I couldn’t wait to try them and scribble in my

new sketch book.  I have used several different brands of colored pencils through the years and

I was impressed by the smooth clean lines and easy blending.


Happy with my scribbling…I decided to keep the page and add the words “Be Happy”.

This would be a great start to a scrapbook layout.


I also used my new Derwent Procolour Colored Pencils* to color in a page from a

Mini Coloring Book* for grown-ups.  I adhered the coloring page to cardstock using my

Xyron Mega Runner* for a quick and easy card.

 “This is a sponsored post. As a member of the Xyron Design Team I have been provided product and compensation in exchange for my creative ideas.  The views and opinions are my own.”

*Disclosure:  This blog post uses affiliate links.  If you choose to make a purchase using one of the links, I receive a small commission (at no additional cost to you) that helps offset the costs of maintaining this blog.  Thanks for your support!