The New Deflecto Design Team

Deflecto Design Team Picture 2015-2016

I have a bit of fun news to share with you today….

I will be continuing with the Deflecto Craft Solutions Design Team for another year.

This year there are several new faces.  I look forward to getting to know these girls and seeing all

the wonderful new projects that’ll be heading your way.

Check out their blogs:  (leave a comment and tell them Sue sent you)

Happy Friday!

Crafting with Office Supplies

crafting with office supplies 2 07793

When you think of crafting do you ever think office supplies?

Would you believe…

the “be happy” sign, which is now sitting happily on my fireplace mantel,

started out as a office name plate holder

A few stickers, chipboard letters, washi tape and voila a happy little reminder.

There are surfaces everywhere just waiting to be embellished.

Name plate 2

Deflecto Interior Image Sign Holder, 8.5 x 2 Inches, Nameplate (89105) (affiliate link)

“This is a sponsored post. As a member of the Deflecto Design Team I have been provided product in exchange for my creative ideas, views and opinions.”

Join Amazon Kindle Unlimited 30-Day Free Trial

Disclaimer:  This blog uses ads and affiliate links.  If you choose to make a purchase using one of the links, I receive a small commission (at no additional cost to you) that helps offset the costs of maintaining this blog.  Thanks for your support!

Craft Ideas Fall 2015

Craft Ideas Fall 2015 cover

I’m So excited….

I have two projects in the latest issue of Craft Ideas magazine.

A Back to School Announcement Board on page 11 and a simple Back to School Card on page 53.

You can see the instructions for the Back to School Announcement board here on Craft Ideas.

Craft Ideas Fall 2015 8474

Make sure to pick up your copy.


Painting on Acrylic Frames

Painting on Acrylic Frames

With all this new Home Décor chalk paint out on the market…

with it’s claims of being able to paint on most anything.  I decided to give it a test.

I’ve used it on wood, old frames, stuff like that.

Acrylic frames?  It was worth a try.

Creating a mask 5889

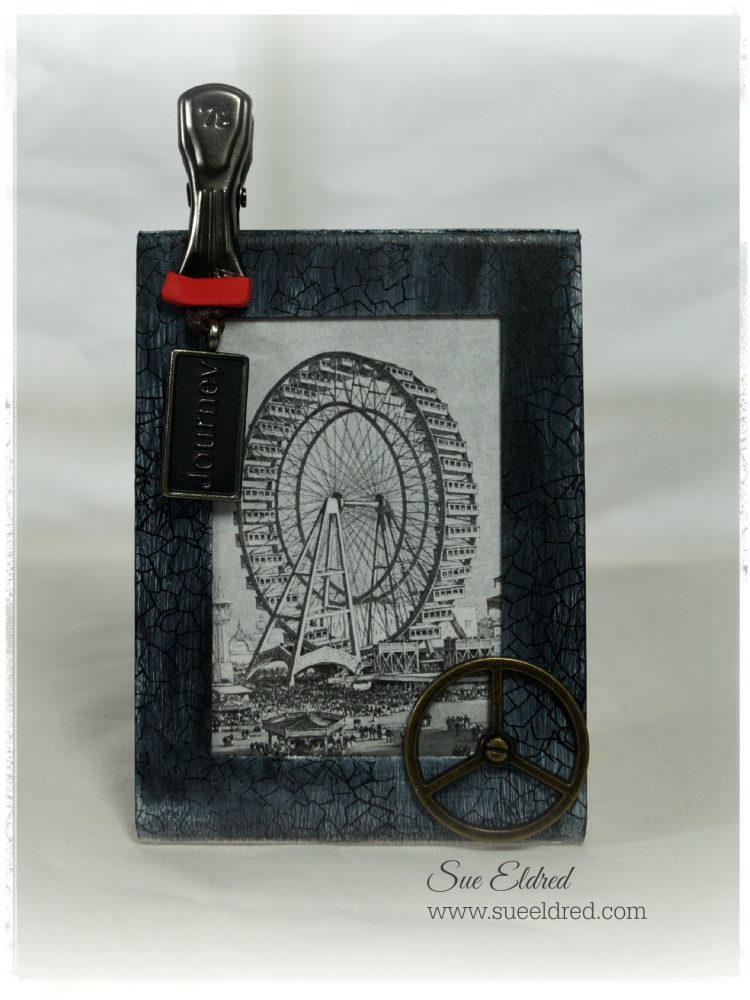
I created a mask using blue painters tape and applied it onto the front of a

Mini 3″ x 4″ Sign Holder* (*affiliate link) from Deflecto Craft Solutions.

Make sure to burnish the edges of the tape.

adding red paint 5890

I painted the surface of the frame with:

FolkArt Home Decor Chalk Furniture & Craft Paint in Imperial*

I used 3 coats of paint.  Make sure to allow good drying time in between coats.

adding black paint 5897

After allowing plenty of time for the red paint to dry and cure.

I gave the frame an aged look by applying a layer of Tattered Angels Decor and DIY Paint*

I wiped it off with a damp paper towel.  Leaving bits of the black streaks.

Crackle Stamp 5899

I stamped around the edges of the frame with a crackle background stamp

and  Tsukineko StazOn Ink Pad, Jet Black*

Carefully remove the blue painter’s tape mask.

At this point, I stopped and admired my frame for almost a month.

Just waiting for inspiration….

Rachael Cunningham Parr 7560

Meet Rachael Cunningham Parr. 

I found Rachel, a tin type, years ago while hunting for treasures.

If Rachael is your relative, I’m pretty sure she wasn’t really a gypsy.

(She really is a beautiful woman.)

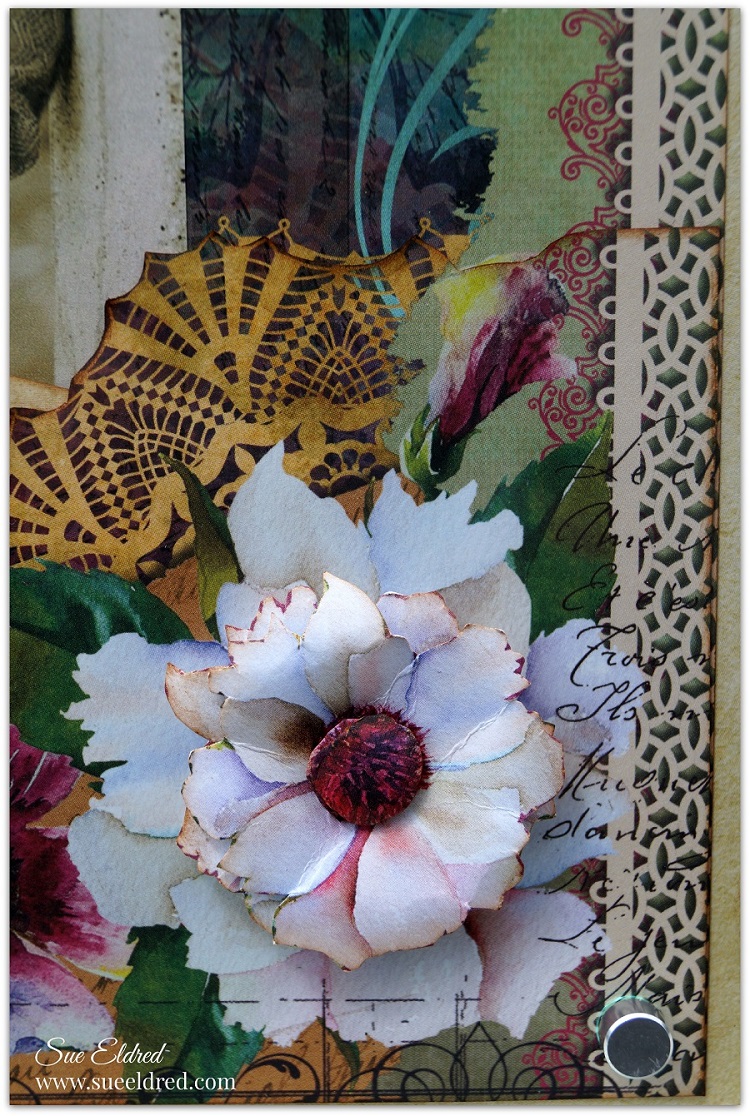
I embellished the frame with some vintage rickrack, key, and a tiny flower.

“R is for Racheal” was made with Metal Type Charms by Tim Holtz*

Once inspired…  I created a couple more frames.

The frames uses charms and hardware from Canvas Corps Brands 

and Chitchat Word Stickers by Tim Holtz*.

Now to try this on a bigger frame!

 “This is a sponsored post. As a member of the Deflecto Design Team I have been provided product in exchange for my creative ideas, views and opinions.”

*Disclaimer:  This blog uses ads and affiliate links.  If you choose to make a purchase using one of the links, I receive a small commission (at no additional cost to you) that helps offset the costs of maintaining this blog.  Thanks for your support!

Quick & Easy Washi Tape Make-Over

Quick & Easy Washi Tape Make Over 7015

Quick and Easy, Keep It Simple.  Sounds like a great DIY plan. 

With a little creativity you can transform plain into something fun and personal.

Deflecto Black Pencil Cup 6944

I started with a plain pencil cup from Deflecto.

With a little Washi Tape wrapped around the top and bottom of the cup, a couple of stickers and

accessories…  I now have a cute pencil cup to set on my desk.

I added a couple of my favorite pictures of my special guys from last year.  (boy have they grown)

Quick & Easy Washi Tape Make Over 7014

Need a couple “brownie points” for the upcoming back to school?

This would make a great teacher gift.

Just add the Teacher’s Name, Grade or “Welcome Back to School” along with a apple sticker or two.

Great for Dorm Rooms too.

“This is a sponsored post. As a member of the Deflecto Design Team I have been provided product in exchange for my creative ideas, views and opinions.”

 Featured on Hometalk.com

Three Sided Vacation Memory Frame

Make the memories last this summer with a three sided Vacation Memory Frame.

Travel Frame close up3984

One of my favorite things to do with my family is spending time at the beach.

Lazy Days, Soaking Up the Sun, Playing in the Water…

It’s a special time and I want to remember those times forever.

Deflecto Three Sided Travel Frame 4000

Deflecto Vacation Tri Frame 3954

Relax and Enjoy

Deflecto Three Sided Travel Frame 04003

For my frame I used a Marketing Holders Classic 3 Sided Plastic Sign Holder, 4 x 6 Clear

from Deflecto and paper from Canvas Corp Brands.

Canvas Corp Brands:

Deflecto Three Sided Travel Frame 3999

“This is a sponsored post. As a member of the Deflecto Design Team I have been provided product in exchange for my creative ideas, views and opinions.”

Sue’s Fussy Cutting for Beginners

Deflecto Hot off the Press Frame 5497

What is Fussy Cutting you ask?

Fussy Cutting is a quilting term meaning: the selective cutting of a fabric based on a particular element or design.  To cut pieces of fabric so that a particular part of the printed design is centered or featured.

Scrapbookers and Paper Crafters have adopted the term using it to select and cut around specific images on a printed paper.

When I fussy cut, I look for larger, whole images that are easy to cut out.  You’ll need to have a good, sharp pair of scissors with a fine tip so you’ll be able to cut smaller detailed images.  For layering, my favorite thing to use is thin 3D foam mounting squares from Scrapbook Adhesive by 3L.

HOP Paper Pack

Above is a picture I created using Hot Off the Press Artful Watercolor collection.  The paper pack comes with two sheets of each design.

Below is the framed picture broken down into sections.

Deflecto HOTP Frame numbered

  1. I used a second sheet of the scrapbook paper (with the large white flower) and cut along the design to create a pocket.  The pocket was inked with brown ink to make it stand out more.
  2. I added my daughter’s picture right at the top of the pocket.  I cut post cards from a another sheet from the collection and inserted into the pocket covering the bottom of the picture.  The picture and postcards are secured into place with my double adhesive tape.
  3. I cut out two white flowers from the floral scrapbook sheet from the collection.  Cut close around the image.  I gave the flowers shape by rubbing the back of the flower with a large ball stylus tool on a soft foam or rubber surface.  Adhere the flowers together with a thin foaming mounting square.
  4. Cut the center only from two additional flower images.  Round the centers (step #3).  Adhere to the center of the white flower using a small thin foam mounting squares.
  5. Place finished picture into the floating beveled frame.  Mount layered flower on top the large white flower that is under the glass.

Deflecto Hot off the Press Frame 5486         Maya Angelou Frame 5641

Close up of the flower.                      Maya Angelou Quote in a 4 x 6 clear acrylic frame.

“This is a sponsored post. As a member of the Deflecto Design Team I have been provided product in exchange for my creative ideas, views and opinions.”

DIY Graduation Frame with Tassel

DIY Graduation Frame 5398

Some years I don’t have any Graduations to celebrate. 

This year there are three.  One from High School, Two from Junior High.  (not mine!)

I decided to make a Graduation Frame to use as one of the gifts.

After the ceremony the Graduate can take out the greeting and add a picture.

DIY Graduation Frame Collage

For my frame I used:                                                                                    (*affiliate link)

  1. To make the tassel:  Wrap the red twine around a piece of chipboard several times.  The size of the chipboard determines the length of the tassel.
  2. Cut a piece of twine to gather and tie tightly around the twine at the top of the wrapped chipboard.
  3. Cut open the bottom loops from the chipboard.
  4. Wrap thin gold wire around the top of the tassel to imitate the look of a gold band.
  5. Trim the bottom of the tassel to even the length.
  6. Create computer generated greeting and insert inside the frame.
  7. Ink white chipboard numbers gray using the ink applicator.  Stick on front of the frame.
  8. Make a small garland from small 1/2″ strips of paper adhered to a piece of red twine.
  9. Adhere the tassel to the back of the frame with a small piece of tape.  That way the Graduate can reposition the tassel if needed after adding photo.

FYI:  When my oldest graduated from High school his younger sister also graduated from Junior High.  Four years later when it was time for her to graduate High School he was graduating from College.

SO….for all you young people thinking of starting a family. 

Don’t space your kids 4 years apart.  (The magic number is three.)  Just saying!

“This is a sponsored post. As a member of the Deflecto Design Team I have been provided product in exchange for my creative ideas, views and opinions.”

Shop Your Fav Brands at Scrapbook.com

*Disclosure:  This post uses ads and affiliate links.  If you choose to make a purchase using one of the links, I receive a small commission (at no additional cost to you) that helps offset the costs of maintaining this blog.  Thanks for your support!

How to Make a Garden Butterfly Sign

Welcome to My Garden Butterfly Sign 4758

How to make a Garden Butterfly Sign.

A fun technique using Black Sign Tags from Deflecto Craft Solutions.

According you my you tube account it’s been 4 years since I made my first video.

I guess it was finally time for my second one.  (let me know what you think)

“This is a sponsored post. As a member of the Deflecto Design Team I have been provided product in exchange for my creative ideas, views and opinions.”

Home Sweet Home Cookbook

Sue Eldred's Graphic 45's Home Sweet Home Cookbook with Deflecto Pouches 4737

There’s something about good old family recipes that’ll bring a smile to your face. 

Warm, Comforting, a little piece of Home.

So… When I saw the Home Sweet Home Collection from Graphic 45, I knew a cookbook was in order.

I paired the Home Sweet Home collection with the new 5″ x 7 1/4″ flexible pouches from

Deflecto Craft Solutions.  Using the pouches not only helps protect your recipes from stains and spills

but they also make it easy to swap recipes in and out.

Deflecto Flexible Pouches 4699

  • My cookbook album was put together by covering chip board with the scrapbook paper and distressing the edges with Vintage Photo Distress Ink.
  • I made the stickers dimensional by adding each one to chipboard and cutting them out.
  • The circle stickers that spell the word “recipes” were stuck on round buttons and then glued onto the book.
  • The pouches were punched and the book bound using the Cinch Binding Machine.

Graphic 45 Home Sweet Home Cookbook with Deflecto Pouches 4744

Products used:


  Product Ordering Information through Amazon*  (see disclosure policy)

“This is a sponsored post. As a member of the Deflecto Design Team I have been provided product in exchange for my creative ideas, views and opinions.”