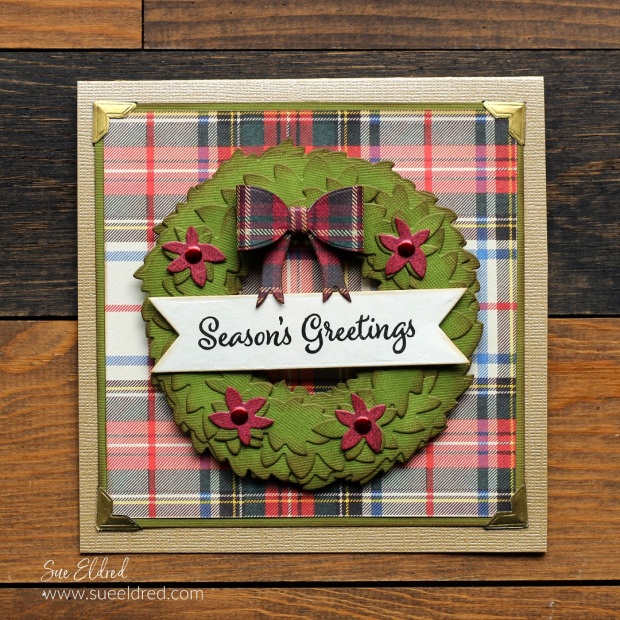
Halloween Shaker Jar Tags

How to make a Halloween Shaker Tag

How to Create Halloween Shaker Jar Tags.

A fun Halloween treat for kids of all ages.

How to make a Halloween Shaker Tag

I just received these cute Mason Jar Shaker Dies from The Maker’s Movement,

and of course, I had to hurry up and make a few Halloween Jar Shaker Tags.

These are also going to make super cute Christmas Shaker tags.  (I can’t wait!)

Maker's Movement

Disclosure:  This is a sponsored post for The Maker’s Movement*.  I have been provided product and compensation in exchange for my creative ideas.  The view and opinions are my own. 
How to make a Halloween Shaker Tag using the Shaker Jar Tag

Materials Used:  (*affiliate links)

*Disclosure:  This blog uses ads and affiliate links.  If you choose to make a purchase using one of the links, I receive a small commission (at no additional cost to you) that helps offset the costs of maintaining this blog.  Thanks for your support!

How to make a Halloween Shaker Tag

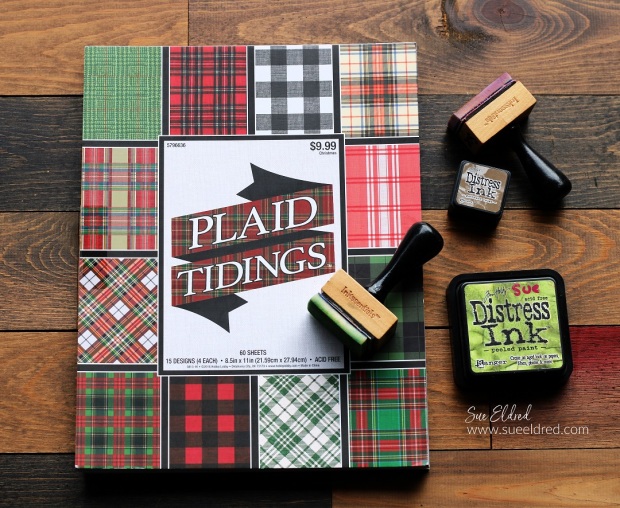
  • You will need Halloween paper from the Tricks or Treats paper pad, acetate, and craft foam.

How to make a Halloween Shaker Tag

  • Die Cut the pieces using the Mini Maker Die Cut Machine as shown.

How to make a Halloween Shaker Tag

A Tip for Easy Assembly…

  •  Place the striped paper, used for the top of the mason jar shaker tag, into the Xyron Create a Sticker Mini*. Crank the handle to run the paper through the machine. As it goes through the Xyron Create a Sticker Mini* it adds a layer of adhesive onto the back of the paper. Die-cut the paper using the Mason Jar Frame Die. Now the die-cut frame is a sticker, which makes placing it onto the acetate easy. 

How to make a Halloween Shaker Tag

  • Remove the blue protective liner from the acetate.  Place the mason jar frame onto the acetate.
  • Remove one side of the protective liner from the craft foam frame.  Place the foam frame onto the mason jar silhouette.
  • Add Halloween Shaker Sprinkles in the center of the foam.  Don’t overfill.  You want to make sure to leave for shaking.
  • Remove the liner from the craft foam and line up the mason jar frame (with acetate) over the
  • Die Cut two jar tops and adhere them to the top of the shaker jar.
  • Wrap with twine.  Glue the Halloween ribbon around the base of the shaker jar.

How to make a Halloween Shaker Tag

Tie the Halloween Shaker Tag onto a mason jar filled with Halloween Treats.

A Fun Halloween Treat.

Nuts for Fall Acorn Door Hanger

Nuts for Fall Acorn Door Hanger

A Fall Dollar Store Craft

As much as I love the summer weather, I do love Fall.

The cooler weather, the beautiful colors… 

I only wish it’d turn right back to summer when it was done.

“This is a sponsored post.  As a member of the StyleTechCraft Design Team I have been provided product and compensation in exchange for my creative ideas.  The views and opinions are my own.

Nuts for Fall Acorn Door Hanger

I found this cute Acorn Shape* and Faux Leather Leaves* at Dollar Tree* and knew it would be even cuter with a little StyleTechCraft Vinyl.

Materials Used:  (*affiliate links)

*Disclosure:  This blog uses ads and affiliate links.  If you choose to make a purchase using one of the links, I receive a small commission (at no additional cost to you) that helps offset the costs of maintaining this blog.  Thanks for your support!

Nuts for Fall Acorn Door Hanger

Directions:

  • Lightly sand the acorn shape using a sanding block*.
  • Paint the acorn with acrylic paint.
  • Trace around the top of the acorn to create a pattern for the acorn top. Fill in the bottom with a wavy line.  Trace the pattern onto plaid scrapbook paper and cut it out. 
  • There are different ways to adhere to the paper. My favorite way is to use the
  • Xyron Creative Station* to add adhesive to the back of the scrapbook paper.  
  • Add the plaid paper to the top of the acorn. Use an extra fine point black sharpie* to add a border around the acorn top shape.

Nuts for Fall Acorn Door Hanger

  • Using a Silhouette Cameo Electronic Die Cutting Machine* and the Nuts for Fall SVG File, size the design to fit onto the bottom of the acorn shape. Cut the design using several colors of StyleTechCraft Luster Adhesive Vinyl.
  • Once you remove the area inside and around the cut vinyl, use transfer tape* to add the design to the acorn.
  • Decorate the top of the acorn with a big bow, faux leaves, and a small acorn embellishment.
  • Add a small piece of twine for hanging onto a door or add it to the center of a Fall Wreath.

StyletechCraft products brought to you by ATSM Craft*

Quick and Easy Stenciled Card

Quick & Easy Stenciled Card

How to make a Quick and Easy Stenciled Card. 

Just Add Ink!

Quick & Easy Stenciled Card

Materials Used:  (*affiliate links)

*Disclosure:  This blog uses ads and affiliate links.  If you choose to make a purchase using one of the links, I receive a small commission (at no additional cost to you) that helps offset the costs of maintaining this blog.  Thanks for your support!

Directions:

  • Place the stencil over the cardstock.  Place a piece of removable tape on the corners to keep the stencil from moving.
  • Rub the ink blending tool over the ink pad.  Rub on a piece of extra paper to smooth out the ink before using it on the stencil.
  • Gently rub over the stencil with the ink blending tool.  I started in the middle and worked my way out towards the edges.

Quick & Easy Stenciled Card

  • Remove the stencil to reveal the design.
  • I forgot to remove the removable tape used to hold the stencil down.   So, I have tape lines.  Mistakes lead to opportunities.  Making the most of it, I cut the stenciled design down to size.

Quick & Easy Stenciled Card

  • I adhered the stenciled design onto a 4 1/2″ x 4 1/2″ piece of light gray cardstock and onto a 5″ x      5″ card.
  • I added a small greeting on the bottom right of the card.
  • To finish the card, I tied a sheer cream ribbon on the top of the card.

Maker's Movement

Disclosure:  This is a sponsored post for The Maker’s Movement*.  I have been provided product and compensation in exchange for my creative ideas.  The view and opinions are my own. 

Three Projects with Eileen Hull’s New Chapter 3 Release

Projects using Eileen Hull's New Chapter 3 Dies from Sizzix

Eileen Hull’s New Chapter 3 Dies from Sizzix.

I am excited to share three projects I created using Eileen Hull’s New Chapter 3 Sizzix

die collection!

They are a fun group of dies.

Each piece in the set stands alone but also coordinates with the others

to make a truly versatile and valuable addition to your collection.

Back to School Gift Box

Back to School Teacher Gift Box

If you’re looking for to “butter up” the new teacher, this BTS gift box is a fun project to make.

The Back-to-School Teacher Gift Box uses Eileen’s New XL Card Box Die*.

I LOVE this Die* and I can’t wait to share all the ideas I have for this die for the Holidays.

*Disclosure:  This blog uses ads and affiliate links.  If you choose to make a purchase using one of the links, I receive a small commission (at no additional cost to you) that helps offset the costs of maintaining this blog.  Thanks for your support!

Puppy Love Skinny Mini Album-Sue's Creative Workshop www.sueeldred.com 4902

Puppy Love Skinny Mini Album

Eileen’s Skinny Mini Book Box Die* makes the perfect sized album for pictures

of my pup Dexter.

The die also comes with the side parts to make it into a box.  (genius!)

Puppy Love Skinny Mini Album

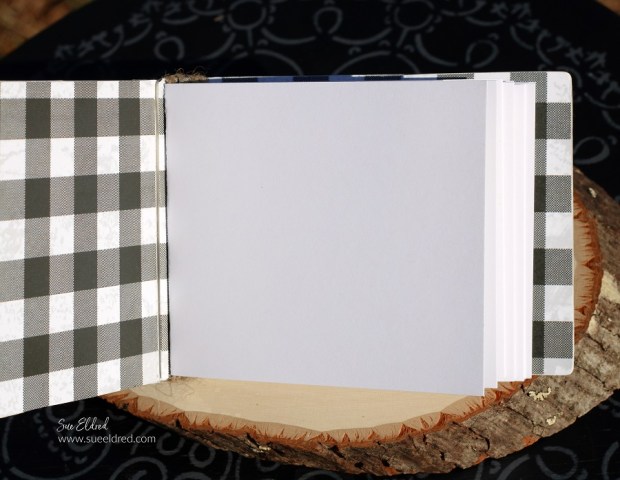
I created accordion pages for the inside of the album by scoring and attaching 6″ x 12″ cardstock.

Skinny Mini Elements Christmas Poinsettia Card.

Skinny Mini Elements Christmas Poinsettia Card

While the Skinny Mini Elements Die* is not a Christmas Die,

it sure makes one cute Christmas card.

It coordinates perfectly with the Skinny Mini Book Box Die*.

Sizzix Skinny Mini Elements Christmas Poinsettia Card-Sue's Creative Workshop www.sueeldred.com 4940

This card comes with a little back story.

After I made this card, I sent Eileen a picture of the finished project.

She messaged me back that I was brilliant for making the poinsettias using the cut-outs

from the die.  I agreed that “would have” been brilliant, but (darn it) I had used premade

paper poinsettias for the card.

Up for the challenge, I remade the red poinsettia using the cut-outs from the die.

I left the white poinsettias for comparison.  (and laziness)

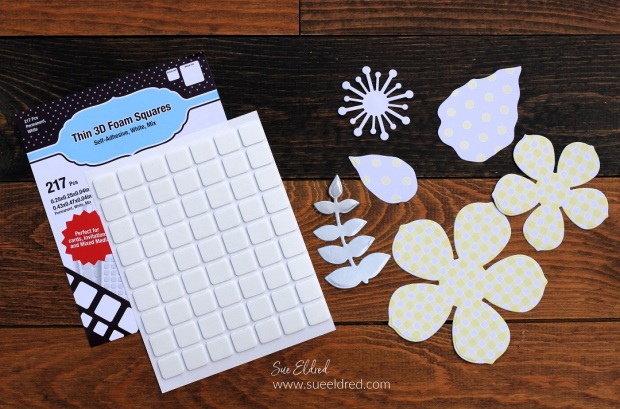
I cut the points off the side and arranged the petals on foam mounting squares.

Voila, a poinsettia!

Eileen Hull Chapter 3 Release Party

Check out the Eileen Hull’s Blog below for even more ideas. 

Here’s the list of Chapter #3 Blog Hop Stops:

Eileen Hull Educator Logo

Disclosure:  This is a sponsored post.  As a member of the Eileen Hull Educator Team, I have been provided product in exchange for my creative ideas.  The view and opinions are my own. 

Sending Sunshine on a Cloudy Day

Sending Sunshine on a Cloudy Day

Everyone can use a little Sunshine on a cloudy day.

This simple card is made with stamps and dies from The Maker’s Movement.

The card uses a little subtle play with different patterns.

Maker's Movement

Disclosure:  This is a sponsored post for The Maker’s Movement.  I have been provided product and compensation in exchange for my creative ideas.  The view and opinions are my own. 

Sending Sunshine on a Cloudy Day

Materials Used:       (*affiliate links)

*Disclosure:  This blog uses ads and affiliate links.  If you choose to make a purchase using one of the links, I receive a small commission (at no additional cost to you) that helps offset the costs of maintaining this blog.  Thanks for your support!

Sending Sunshine on a Cloudy Day

  • I die-cut pieces using the Stacking Flowers Die out of yellow patterned paper from the Cloudy Day paper pad.
  • The flower was assembled using 3D Thin Foam Squares*.

Sending Sunshine on a Cloudy Day

  • I used the “Hello Sunshine Stamp & Die Set” for the sunshine layers on the bottom of the card.
  • I also used the “Hello Sunshine Stamp & Die Set for the small banner with the stamped words “sending you”.
  • My favorite tip for die-cutting small or thin pieces is to add a layer of adhesive using a Xyron Creative Station®* before die-cutting.

Sending Sunshine on a Cloudy Day.

This card was fast and easy to assemble and is sure to brighten up anyone’s day.

Rainbow Keychain with StyleTechCraft Sun Changing Vinyl

DIY Rainbow Keychain with StyleTechCraft Sun Changing Vinyl

My 11-year-old grandson has been after me for quite a while to make more “How To” videos.

The other night, we sat up the camera and I had him create the Rainbow Acrylic Keychain

that I made for the Namta Show in Orlando.

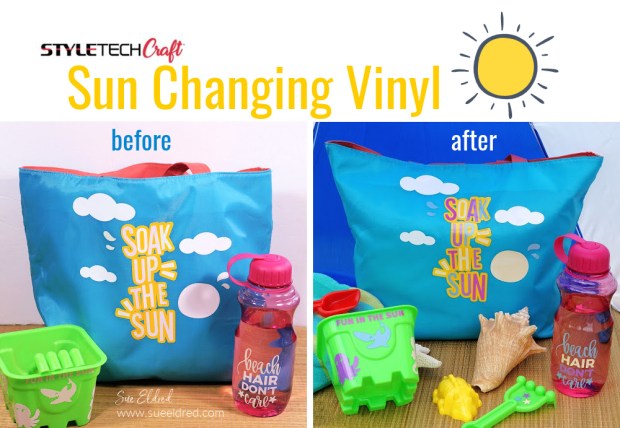
The keychain uses StyleTechCraft Sun Changing Vinyl*.  (which is a very fun vinyl to use)

He not only created the project in the video, but he edited the whole video himself.

I think he did a great job.

“This is a sponsored post.  As a member of the StyleTechCraft Design Team I have been provided product and compensation in exchange for my creative ideas.  The views and opinions are my own.

Here’s the link to the video:

To make the Rainbow Keychain we used:

StyletechCraft products brought to you by ATSM Craft*

*Disclosure:  This blog uses ads and affiliate links.  If you choose to make a purchase using one of the links, I receive a small commission (at no additional cost to you) that helps offset the costs of maintaining this blog.  Thanks for your support!

Ready for the Beach with Sun Changing Vinyl

For another fun project using Sun Changing Vinyl click here.

Rae Dunn Inspired Thrift Store Makeover

Rae Dunn Inspired Thrift Store Makeover

Rae Dunn Inspired Utensil Holder

I’ve been looking for the perfect utensil holder ever since we did our kitchen makeover in 2018.

I was looking for just the right one.  None of the ones I found were what I was looking for.

Rae Dunn Inspired Thrift Store Makeover

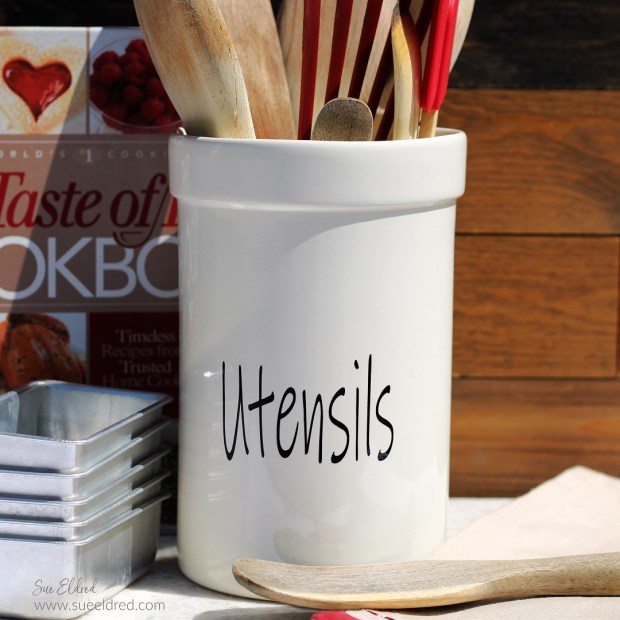
I found this canister sitting on a thrift store shelf in Wisconsin for only $1.50.

I thought, what the heck.  Not much of a gamble if it doesn’t work.

All I needed was a little bit of StyleTechCraft Black Glossy Vinyl* to make it complete.

Rae Dunn Inspired Thrift Store Makeover

I used the “ink-free” font on my Silhouette and stretched the word to make it longer,

giving it the classic Rae Dunn-inspired tall skinny handwritten font.

The word “utensils” is approx. 2″ x 3.

Materials Used:  (*affiliate links)

StyletechCraft products brought to you by ATSM Craft*

*Disclosure:  This blog uses ads and affiliate links.  If you choose to make a purchase using one of the links, I receive a small commission (at no additional cost to you) that helps offset the costs of maintaining this blog.  Thanks for your support!

Rae Dunn Inspired Thrift Store Makeover

Directions:

Rae Dunn Inspired Thrift Store Makeover

  • Remove vinyl from the white backing.
  • Use StyleTechCraft Vinyl Transfer Tape* to adhere the vinyl onto the front of the canister.
  • Gently rub the transfer paper and remove it from the canister.

Rae Dunn Inspired Thrift Store Makeover

Quick and Easy to do. (and it looks great on my counter)

Rae Dunn Inspired Thrift Store Makeover

Some of the simplest projects are the most satisfying.

“This is a sponsored post.  As a member of the StyleTechCraft Design Team I have been provided product and compensation in exchange for my creative ideas.  The views and opinions are my own.

How to make an Embossed Metal Envelope Pocket

How to make an Embossed Metal Envelope Pocket with K & S Precision Metals

How to make an Embossed Metal Envelope Pocket with K & S Precision Metals

If you like the look of old embossed tin, the Embossed Metal Envelope Pocket

is a simple project to create.  (easy to follow instructions below)

How to make an Embossed Metal Envelope Pocket

I’m always up for a new crafty challenge,

so, when asked if I wanted to try the colored aluminum foils

from K & S Precision Metals, of course, I said yes.

These thick colored aluminum foils are not like your mother’s aluminum foil.

They are thick enough to bend and manipulate but thin enough to be able to cut with scissors.

And you don’t have to worry about cuts like from thicker metals. (this is fun stuff)

How to make an Embossed Metal Envelope Pocket with K & S Precision Metals    lHow to make an Embossed Metal Envelope Pocket with K & S Precision Metals

Disclosure:  This is a sponsored post for K & S Precision Metals.  I have been provided product in exchange for my creative ideas.  The view and opinions are my own. 

How to make an Embossed Metal Envelope Pocket with K & S Precision Metals

Materials Used:     (*affiliate links)

*Disclosure:  This blog uses ads and affiliate links.  If you choose to make a purchase using one of the links, I receive a small commission (at no additional cost to you) that helps offset the costs of maintaining this blog.  Thanks for your support!

How to make an Embossed Metal Envelope Pocket with K & S Precision Metals

I could have used the metal as it comes, but I wanted it to be slightly thicker, so I double it up with cardstock in the middle.  It also helped it hold the embossed shape.

Directions:  

  • I used an unfolded small white envelope as my pattern.
  • Measure and cut a piece of colored foil slightly larger than the unfolded envelope.
  • To add adhesive on the back of the foil, place the foil colored-side up on the Xyron Creative Station®*Turn the handle of the Creative Station to run the foil through.  As it runs through, it adds complete adhesive covering on the underneath side of the foil.
  • Place the foil onto a piece of white cardstock the same size.

How to make an Embossed Metal Envelope Pocket with K & S Precision Metals

  • If you’re not artistically inclined, you can easily find a swirly scroll pattern to print and use as a pattern.
  • Place the foil with the cardstock side up onto a soft surface.  Tape the swirly scroll pattern onto the back of the cardstock.

How to make an Embossed Metal Envelope Pocket with K & S Precision Metals

  • Using medium to firm pressure, use a small ball stylus* to trace around the design to transfer it to the foil.

How to make an Embossed Metal Envelope Pocket with K & S Precision Metals

  • Remove the pattern from the back of the cardstock.
  • Trace around the opened envelope onto the back of the cardstock.
  • Cut the envelope shape using scissors.
  • Cut a second piece of foil the same size as the first and repeat the adhesive and embossing process, except do not add the foil to the cardstock. Place this piece of foil onto the back of the cardstock and retrim the envelope shape.

How to make an Embossed Metal Envelope Pocket with K & S Precision Metals

  • Use a ruler and bone folder to mark your envelope fold lines.

How to make an Embossed Metal Envelope Pocket with K & S Precision Metals

  • Paint over the foil with white multi-surface acrylic paint to give the pocket a brushed denim look.
  • Make sure to paint in one direction only.
  • Once the paint has dried, lightly sand over the embossed areas with a sanding block.
  • The sanding makes the embossed areas stand out.

How to make an Embossed Metal Envelope Pocket with K & S Precision Metals

  • Glue the edges of the pocket using rapid fuse all purpose adhesive*.
  • Tie a 1″ piece of ribbon around the envelope pocket.  I added a little bling using a broken silver barrette.
  • Cut a thin slice of floral foam* and place it inside the pocket.  Stick small flower stems into the floral foam.  (Both the floral foam and the flower stems were from Dollar Tree*.)
  • Punch two small holes in the envelope and add a piece of twine for hanging.
  • Add the embossed pocket to the middle of a boxwood wreath for a simple and elegant wreath decoration.

More great designer projects using K & S Precision Metal on the DCC Blog.

Designer Craft Connections Pic

Let’s Eat Cake Birthday Card

Eat Cake Birthday Card

Nothing like getting a sweet 3-tiered layered cake for your Birthday.

Thanks to the Eat Cake Stamp and Die Set from The Maker’s Movement,

you can send everyone a special cake on their birthday.

Maker's Movement

Disclosure:  This is a sponsored post for The Maker’s Movement.  I have been provided product and compensation in exchange for my creative ideas.  The view and opinions are my own. 

Eat Cake Birthday Card

Materials Used: (*affiliate links)

Shop Tombow

*Disclosure:  This blog uses ads and affiliate links.  If you choose to make a purchase using one of the links, I receive a small commission (at no additional cost to you) that helps offset the costs of maintaining this blog.  Thanks for your support!

Eat Cake Birthday Card

Directions:

Eat Cake Birthday Card

  • Stamp portions of the cake on patterned paper from the Rainbow Sprinkles Paper Pad.
  • For extra dimension, place the stamped paper onto white cardstock.
  • Cut the “icing layer” using a fine-detailed scissor and adhere the layer on top of the cut-out cake layer.
  • My secret ingredient for this “fussy cut” 3-tiered cake is my Xyron Create a Sticker Mini*. It makes applying the layers extremely easy.  Just place the paper into the machine and crank the handle, as it runs through the sticker-maker it adds a layer of adhesive onto the back of the paper.

Eat Cake Birthday Card

  • Cut a frame using the Crafty Chica Nested Frame Die Set and white cardstock.
  • Use paper from the Simply Spring Slimline Paper Pad to create a layer for the inside of the frame.

Eat Cake Birthday Card

  • Here’s a closeup of the cake all layered up.  Each layer is slightly thicker than the first.
  • Color the top of the candle using Tombow ART Markers*.
  • Add 3D Foam Mounting Squares* to the back of the cake and place it onto the bottom of the frame.

Eat Cake Birthday Card

  • Cut a small “Happy Birthday” banner from the Rainbow Sprinkles Paper Pad and add to the top of the card.
  • A fun birthday card for any age.

A Mother’s Day Plate for Mom.

A Mother's Day Plate for Mom

A quick and easy Mother’s Day project with StyleTechCraft Adhesive Vinyl.

Remember when we were in grade school, and we painted clay pots for Mother’s Day?

Mom always said the best gifts were from the heart.

So, this year, show Mom just how much you love her with an upgraded handmade gift.

Quick and Easy Mother's Day Plate for Mom-Sue's Creative Workshop www.sueeldred.com 3181

This project can be made by anyone with an electronic die-cutting machine.  

I picked up the red plate at Dollar Tree* to match my kitchen.  (This one’s for me.)

With the vinyl supplies that I already had on hand, I’ve invested $1.25 so far.

Here’s what I used: 

*Disclosure:  This blog uses ads and affiliate links.  If you choose to make a purchase using one of the links, I receive a small commission (at no additional cost to you) that helps offset the costs of maintaining this blog.  Thanks for your support!

Mother's Day Plate for Mom

  • To begin, wipe the surface of the plate with the alcohol to remove any oils.

Mother's Day Plate for Mom

StyletechCraft products brought to you by ATSM Craft*

Mother's Day Plate for Mom

Check out this New Weeding Tool From StyleTechCraft*.

It looks like a retractable pencil, but with a nice pointy end.

It is so easy to use.  A real game changer when it comes to weeding vinyl.

Mother's Day Plate for Mom

  • Lay the transfer paper over the vinyl image.
  • Rub over the transfer paper with a vinyl scraper tool.
  • Remove vinyl from the white backing.

Mother's Day Plate for Mom

  • Use StyleTechCraft Vinyl Transfer Tape* to adhere the vinyl onto the front of the plate.
  • Gently rub the transfer paper and remove it from the plate.
  • It is best to Hand Wash Plate Only.

Mother's Day Plate for Mom

A last minute, quick and easy Mother’s Day Plate for Mom.

If you’re that overachiever kid, you can add a plate hanger or stand.

“This is a sponsored post.  As a member of the StyleTechCraft Design Team I have been provided product and compensation in exchange for my creative ideas.  The views and opinions are my own.