My Nutty Valentine

My Nutty Valentine

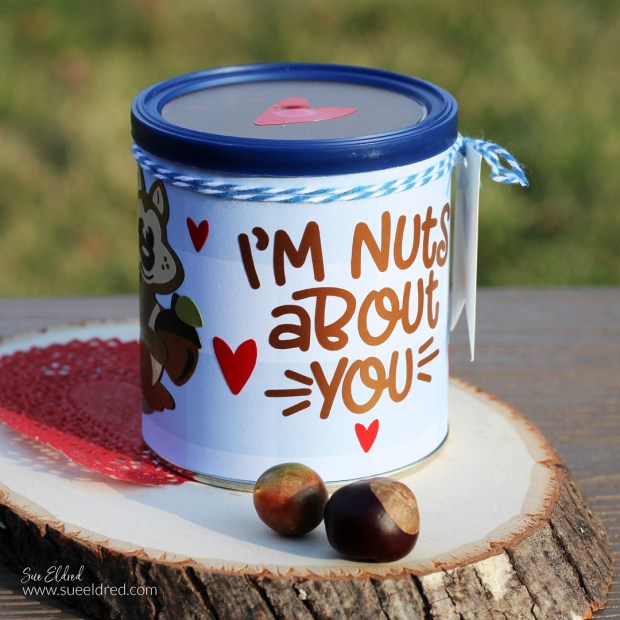
My Nutty Valentine is fun spin on the traditional Valentine’s Day gift. 

It’s for people like me that are not mushy Valentine’s Day gift-givers.

My Nutty Valentine

My inspiration came from a small can of peanuts* that I found at Dollar Tree*.

My husband is a peanut-loving guy who I’m nuts about.

So, I thought I would make something fun with a can of peanuts*.

*Disclosure:  This blog uses ads and affiliate links.  If you choose to make a purchase using one of the links, I receive a small commission (at no additional cost to you) that helps offset the costs of maintaining this blog.  Thanks for your support!

My Nutty Valentine

Materials Used:  (*affiliate links)

StyletechCraft products brought to you by ATSM Craft*

My Nutty Valentine

Directions:

My Nutty Valentine-Sue's Creative Workshop www.sueeldred.com 3764

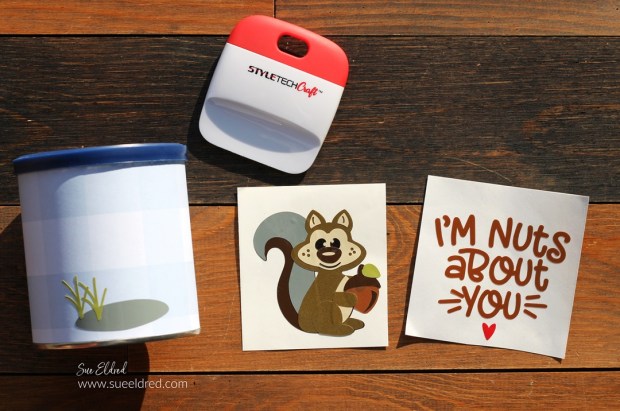
  • Cut a strip of decorative scrapbook paper to fit around the peanut can.
  • Adhere the paper to the can using a double-stick tape roller*.

My Nutty Valentine-Sue's Creative Workshop www.sueeldred.com 3765

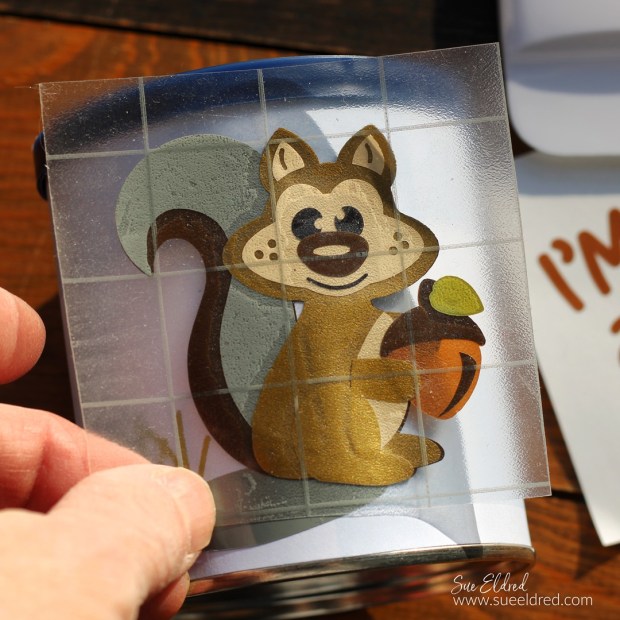
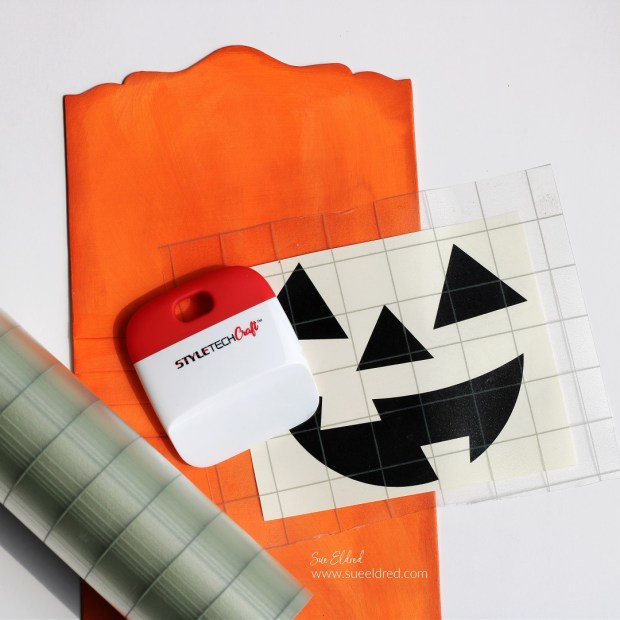
  • Lay the Transfer paper over the vinyl and gently rub with a vinyl scraper tool.

My Nutty Valentine-Sue's Creative Workshop www.sueeldred.com 3778

My Nutty Valentine-Sue's Creative Workshop www.sueeldred.com 3782

My Nutty Valentine

  • Don’t forget to decorate the top of the can.
  • I cut a 3″ circle from bronze vinyl and adhered it and a small red heart to the top of the can.

My Nutty Valentine

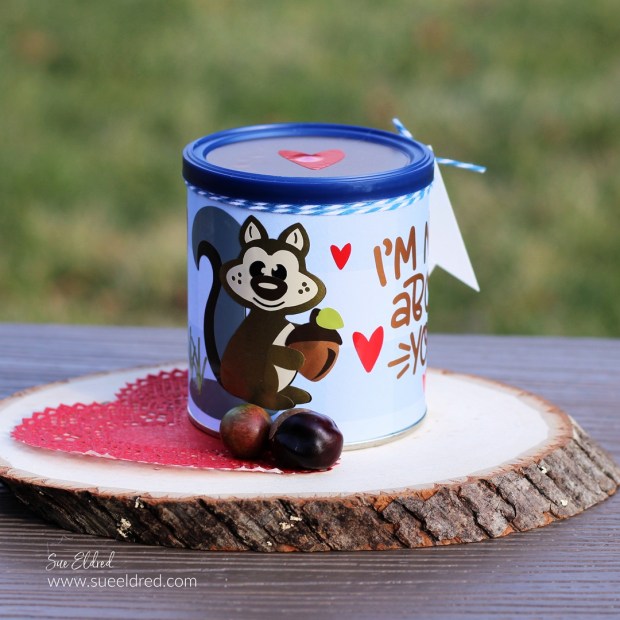
  • Wrap Blue and White Twine* around the top of the can and add a small white tag.
  • And just so my husband knows, I added “I’m Nut’s About You” on the side of the can.

My Nutty Valentine

A Cute Alternative to the Traditional Valentine’s Gift. 

“This is a sponsored post.  As a member of the StyleTechCraft Design Team I have been provided product and compensation in exchange for my creative ideas.  The views and opinions are my own.

A Stitch in Time with Classic Dies

A Stitch in Time with Eileen Hull's Classic Dies

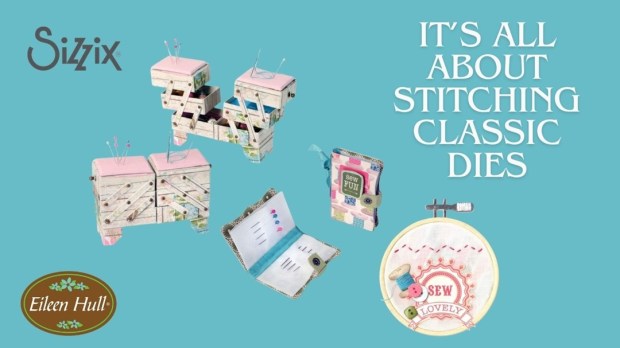
It’s all about Stitching with Classic Dies from Sizzix* and Eileen Hull.  

I’ve had the pleasure to work with Eileen’s Dies for the last few years,

and while these Classic Dies may be old, they’re new to me.  (and maybe you)

Eileen Hull's It's all about Stitching Classic Dies

The Classic Cantilever Sewing Box, Embroidery Hoop* and Needle Book dies have been re-released because Sizzix Customers asked.

These classic dies all relate to stitching. But there are so many other ways to use them. They are all Bigz dies, which are versatile because of the number of materials they can cut through.

A Stitch in Time with Eileen Hull's Classic Dies

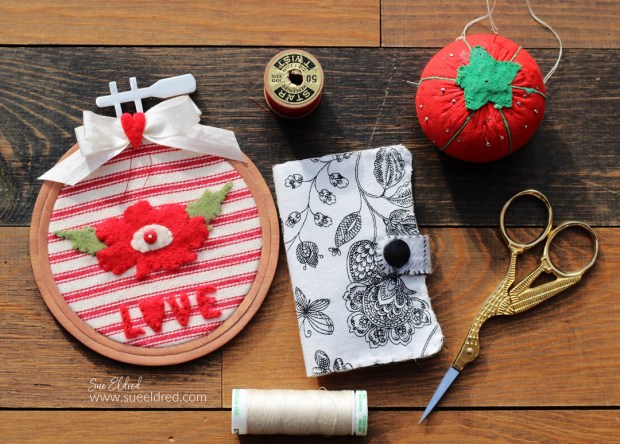
“Stitched with Love” Embroidery Hoop*

Sizzix Embroidery Hoop Die by Eileen Hull

The Embroidery Hoop* measures 4” and is designed to be cut from thick material such as matboard or chipboard. You can actually tuck thin fabrics in the hoop and stitch on them. Or you can die cut from paper and use the hoop on card fronts. Use the pieces separately or all together.

A Stitch in Time with Eileen Hull's Classic Dies

The Needle Book

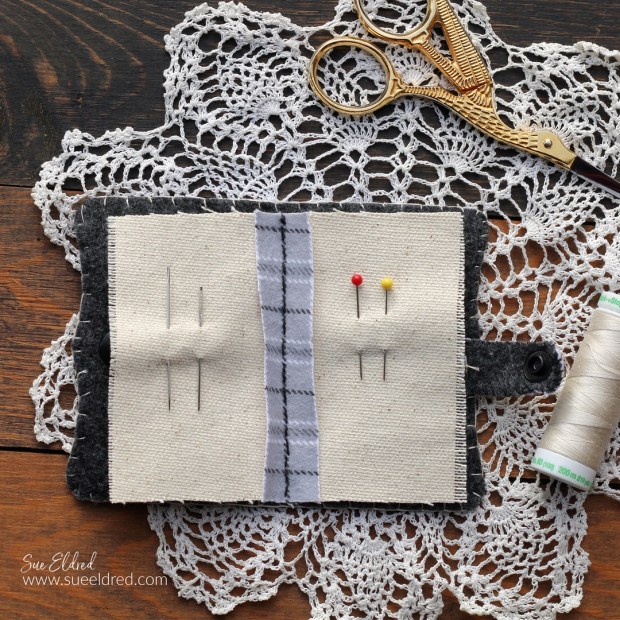
The Needle Book is also a ScoreBoard die and features a pretty scalloped edge to the book. It measures 3 1/2” x 2 1/4″ x 1/2″ and is perfect for storing your stitching needles and pins- works great when made from felt! But it can also be made from matboard, chipboard, leather or fabric- one of the benefits of the Bigz dies.

  • To create my needle book, I die-cut two layers.
  • The top layer is a cotton print, and the inside layer is thick grey felt.
  • The strap has two layers: a grey plaid flannel and grey felt. I hand-stitched the strap layers together and added a black snap closure.

A Stitch in Time with Eileen Hull's Classic Dies

For the inside of the needle book, I cut a small piece of canvas to fit inside.

I sewed it and a small strip of flannel to the center of the gray felt.

I hand stitched all the layers of the needle book together using a simple blanket stitch.

Cantilever Sewing Box Die from Sizzix and Eileen Hull

Cantilever Sewing Box

With all the Holiday Hoopla, I didn’t get a chance to make a sample for the Cantilever Sewing Box.

I promise I will get to it soon and share it later this month.

A Stitch in Time with Eileen Hull's Classic Dies

Please join us for the It’s All about Stitching Release Party that will be held on Tuesday, January 2nd at noon Eastern time on Eileen Hull’s YouTube, Facebook and Instagram pages. The team will be sharing creative ways to use these dies- we can’t wait to share them with you! There will be giveaways so make sure to tune in and see how to enter to win!”

For more inspiration using Eileen’s Stitching Dies:

Eileen Hull Designs 
Pam Bray
Sarah Lizzie
Lisa Hoel
Jenny Marples
Maggi Harding
Susie Bentz
Tonya Trantham
Sue Eldred  (you are here)
Sharon Curtis
Jennie Atkinson
Teresita Arvelo

Eileen Hull Educator Logo

Disclosure:  This is a sponsored post.  As a member of the Eileen Hull Educator Team, I have been provided product in exchange for my creative ideas.  The view and opinions are my own. 

Top 3 Favorite Projects for 2023

Eileen Hull & Sizzix Top 3 Projects of 2023

My top 3 Favorite Sizzix/Eileen project of 2023

Every year the Eileen Hull Teams are asked to pick our three

favorites Sizzix/Eileen Hull projects for the year.

Generally, they’re all my favorites, but these are my top favorites.

(Click on the pictures or links below ↓ to go to the original post with all the details.)

New Chapter 3 Dies from Sizzix and Eileen Hull

The Treasure Box

The Treasure Box is made with Eileen’s Slotted Treat Box Die* from the New Chapter 3 Dies that were released earlier this year.  I reached into my hoarded stash of paper to make this vintage style box.

It’s a great size for holding special treasures.

You can read more about this project here.

*Disclosure:  This blog uses ads and affiliate links.  If you choose to make a purchase using one of the links, I receive a small commission (at no additional cost to you) that helps offset the costs of maintaining this blog.  Thanks for your support!

Mini Pocket of Cheer Christmas Ornament

Mini Christmas Envelope

Holiday Projects are always my favorite projects.

This one uses Eileens Envelope, Folder & Flowers Thinlet Die Set* from Sizzix.

You can see the project tutorial here.

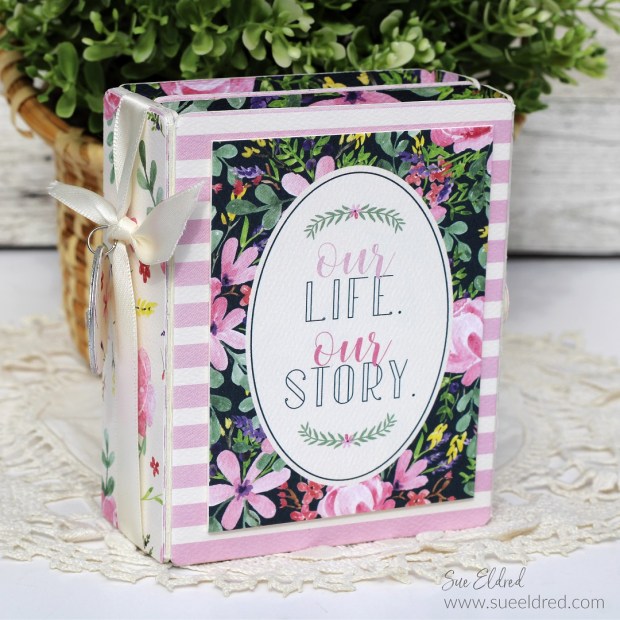
Our Life Our Story Folio Album

Our Life Our Story Mini Album

This little album uses Eileen’s Card Case Die by Sizzix*.  

It is a fun little album with sturdy chipboard pockets perfect

for inserting small notebooks or cards.

You can read more about this project here.

Make sure to “Follow Me” for fun Eileen Hull/Sizzix projects in 2024.

Eileen Hull Educator Logo

Disclosure:  This is a sponsored post.  As a member of the Eileen Hull Educator Team, I have been provided product in exchange for my creative ideas.  The view and opinions are my own. 

Christmas Quilt Card

Christmas Quilt Card

Christmas Quilt Card

Have you finished sending out your Christmas Cards yet?

I’m close to being done, but if you’re not, here’s a last-minute

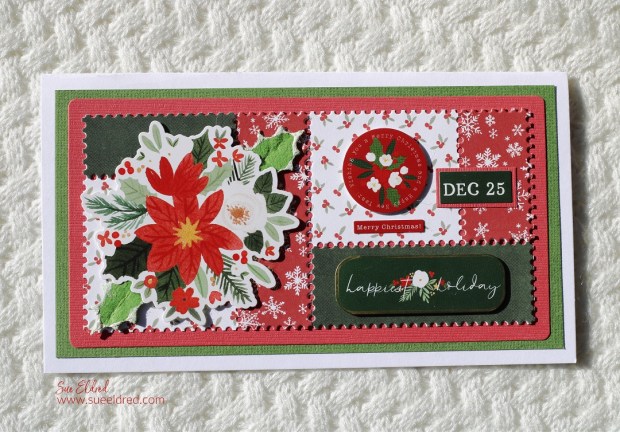
card using Eileen Hull’s Mini Slimline & Tickets Die Set by Sizzix*

Christmas Quilt Card

Materials Used:  (*affiliate links)

*Disclosure:  This blog uses ads and affiliate links.  If you choose to make a purchase using one of the links, I receive a small commission (at no additional cost to you) that helps offset the costs of maintaining this blog.  Thanks for your support!

Christmas Quilt Card

  • I know the pieces of the die are technically tickets.  I think when it’s all assembled, it looks like a quilt.  (so there you have it!)
  • I used paper from the “Happy Christmas” Paper Pad* to cut three bases. 

Christmas Quilt Card

  • I adhered one base to the die-cut layer.  The others, I cut apart. I used those to create a patchwork base.

Christmas Quilt Card

  • I used stickers from the Happy Christmas Sticker Book* to embellish the front of the card.  
  • Here’s a simple tip I learned from a class I took from Mrs Grossman (of Mrs. Grossman Sticker Company) many years ago. To make stickers die-cuts, brush baby powder on the back to remove the stickiness.

Christmas Quilt Card

The Slimline Ticket die would make a great card for any occasion.

Eileen Hull Educator Logo

Disclosure:  This is a sponsored post.  As a member of the Eileen Hull Educator Team, I have been provided product in exchange for my creative ideas.  The view and opinions are my own. 

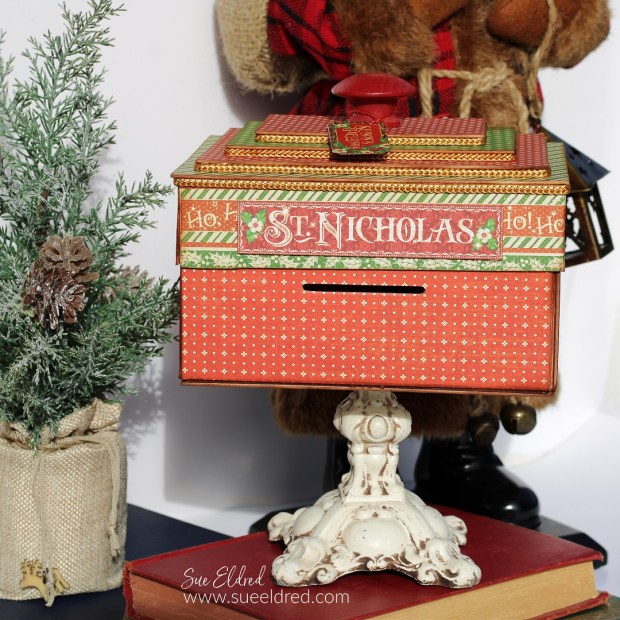
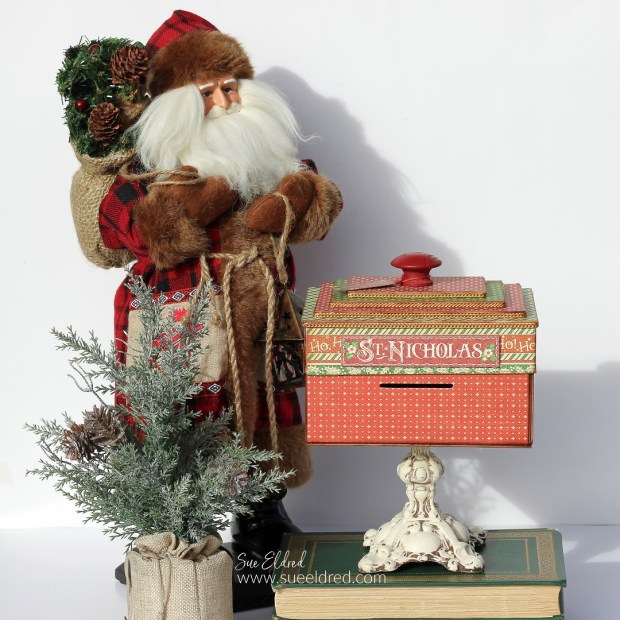
Santa’s Letter Box

Santa's Letter Box using Sizzix Slotted Box die

Create a Holiday Mailbox for letters to Santa using the Sizzix Slotted Treat Box Die by Eileen Hull*.

A fun project to make for Christmas!

Santa's Letter Box using Sizzix Slotted Box die by Eileen Hull.

To say I have a lot of Holiday Scrapbook paper would be a understatement!

Paper crafters have a tendency to “save” their special scrapbook paper

for just the right project.

We also have a tendency to hoard said special paper.

Santa's Letter Box using Sizzix Slotted Box die by Eileen Hull.

Sometimes its fun to use what you have on hand.

I dug deep into my hoarded Graphic 45 Christmas Scrapbook paper

to make the Santa Letter Box.

One of my favorite tips…

  • Before I die-cut the mat board, I like to use the Xyron Creative Station* to add adhesive to the back of the paper.  It gives the paper a complete layer of adhesive with no bubbles.  It really is easy to use.

*Disclosure:  This blog uses ads and affiliate links.  If you choose to make a purchase using one of the links, I receive a small commission (at no additional cost to you) that helps offset the costs of maintaining this blog.  Thanks for your support!

Santa's Letter Box

When making the Santa Letter Box…

  • I adapted the box by adding 1″ strips of matboard* around the existing box lid. The extra strips allowed the box to have a lip that fits over the edge of the box.

Santa's Letter Box

  • I added three additional layers of graduated sized matboard to the lid for dimension using foam tape.
  • I glued thrifted gold cording around each layer to cover the Foam Tape*.
  • A wood knob painted red completes the lid.

Santa's Letter Box

For the base of the letter box, I used an old metal lamp base. 

(At least, that’s what I think it is.)

We found it in my Dad’s garage while cleaning it out a few years ago.

It’s fun to use old things in unusual ways.

Santa's Letter Box

The Santa Letter Box adds a little Christmas Magic to your Holiday Decorating.  

Materials Used:  (*affiliate links)

Eileen Hull Educator Logo

Disclosure:  This is a sponsored post.  As a member of the Eileen Hull Educator Team, I have been provided product in exchange for my creative ideas.  The view and opinions are my own. 

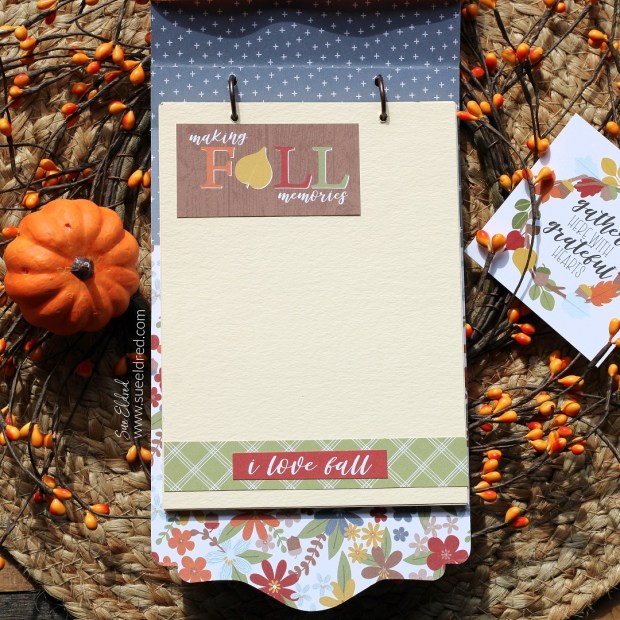
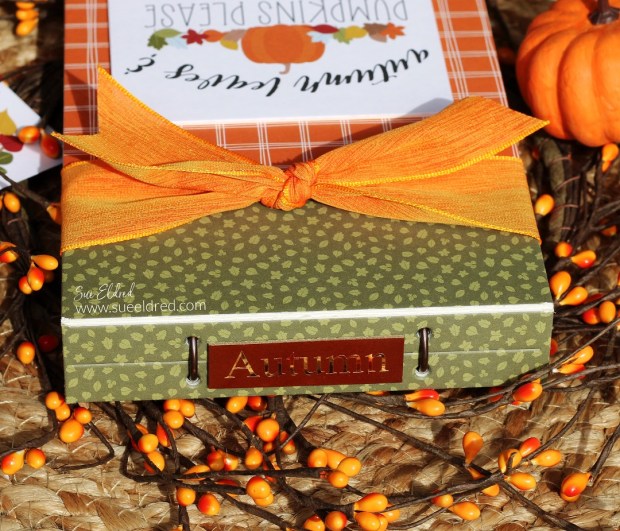
“Autumn Leaves & Pumpkin Please” Album

Autumn Leaves & Pumpkins Please Album

Autumn Leaves & Pumpkins Please

I love all the beautiful colors of Fall.

As the saying goes, Fall is my favorite color.

They make such a bright and cheery Fall album.

This simple album is the perfect place to add all your apple picking,

leaf peeping, trick-or-treating pictures this Fall.

The “Autumn Leaves & Pumpkins Please” album was made using

Eileen Hull’s Field Notes Journal Die by Sizzix*.

I used paper from Echo Parks “Fall Fever” Collection*.

Eileen Hull Educator Logo

Disclosure:  This is a sponsored post.  As a member of the Eileen Hull Educator Team, I have been provided product in exchange for my creative ideas.  The view and opinions are my own. 
Autumn Leaves & Pumpkins Please Album

Materials Used:  (*affiliate links)

*Disclosure:  This blog uses ads and affiliate links.  If you choose to make a purchase using one of the links, I receive a small commission (at no additional cost to you) that helps offset the costs of maintaining this blog.  Thanks for your support!

Autumn Leaves & Pumpkins Please Album

A few tidbits of information:

  • Before I die-cut the mat board, I like to use the Xyron Creative Station* to add adhesive to the back of the paper.  It gives the paper a complete layer of adhesive with no bubbles.  It really is easy to use.
  • The spine of the album comes with three sections.  I cut the first section off to make the album thinner.  It leaves two holes to add binding.
  • I wanted to try something different with how I added the pages to my album.  I inserted two mini book rings through the holes to hold my pages.
  • The mini book rings are approx. ¾” and with a little maneuvering they fit in the two side holes.
  • I used the cut off section to mark where I would need to punch the holes on my pages.

Autumn Leaves & Pumpkins Please Album

I wanted to make my album vertical instead of horizontal.

I love how versatile the Field Notes Die* is.

Autumn Leaves & Pumpkins Please Album

I created the word “autumn” using a Silhouette Cameo Electronic Die Cutting Machine*.

I cut it the letters out using StyleTechCraft Gold Chrome Vinyl*.

StyletechCraft products brought to you by ATSM Craft*


Make a Pumpkin Treat Box for your Favorite Trick or Treaters

How to make a Pumpkin Treat Box

How to make a Pumpkin Gift Box

using the XL Card Caddy Die* from Sizzix and Eileen Hull.

It’s a fun little Halloween Treat Box for your favorite Trick or Treaters.

Eileen Hull Educator Logo

Disclosure:  This is a sponsored post.  As a member of the Eileen Hull Educator Team, I have been provided product in exchange for my creative ideas.  The view and opinions are my own. 

How to make a Pumpkin Gift Box

Materials Used:       (*affiliate links)

*Disclosure:  This blog uses ads and affiliate links.  If you choose to make a purchase using one of the links, I receive a small commission (at no additional cost to you) that helps offset the costs of maintaining this blog.  Thanks for your support!

How to make a Pumpkin Gift Box using the XL Card Caddy Die from Sizzix and Eileen Hull.

Directions:

How to make a Pumpkin Gift Box using the XL Card Caddy Die from Sizzix and Eileen Hull.

StyletechCraft products brought to you by ATSM Craft*

How to make a Pumpkin Gift Box using the XL Card Caddy Die from Sizzix and Eileen Hull.

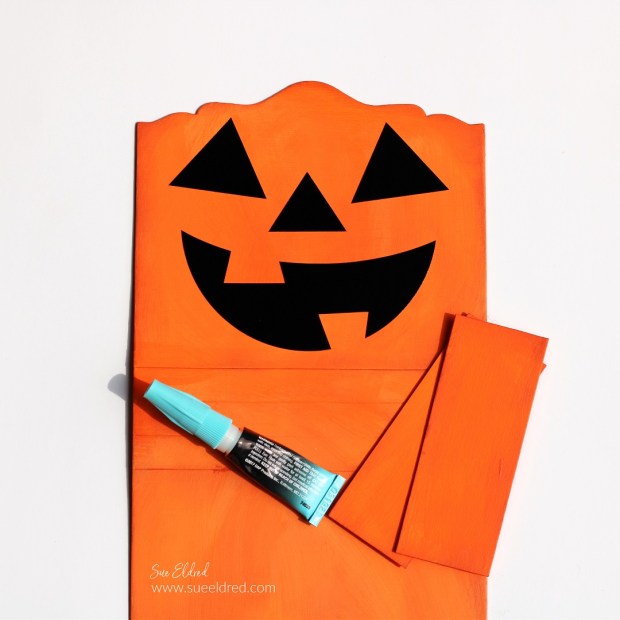
  • Adhere the sides to the card caddy base using Rapid Fuse Adhesive*.  The Die comes with scored side pieces that are perfect for putting the box together.  I wasn’t thinking and cut two pieces of matboard for my sides.  Both will work.  (the one that comes with the die would have been a lot easier)

How to make a Pumpkin Treat Box-Sue's Creative Workshop www.sueeldred.com 2459

  • Create a handle for the pumpkin treat box using wire and small wood beads.
  • Punch a hole on both sides of the box and attach the handle.

How to make a Shaker Tag

How to make a Shaker Tag

Make a Shaker Tag using the Specimen Card

from the Eileen Hull New Field Notes Die from Sizzix.

Last month, we shared projects using Eileen’s New Chapter 3 release dies.

Today I thought I’d share a simple tutorial on how to make a Shaker Tag

using the Field Notes & Specimen Card Die*.

Eileen Hull Educator Logo

Disclosure:  This is a sponsored post.  As a member of the Eileen Hull Educator Team, I have been provided product in exchange for my creative ideas.  The view and opinions are my own. 

How to make a Shaker Tag

Materials Used to make the Shaker Tag:  (*affiliate links)

*Disclosure:  This blog uses ads and affiliate links.  If you choose to make a purchase using one of the links, I receive a small commission (at no additional cost to you) that helps offset the costs of maintaining this blog.  Thanks for your support!

How to make a Shaker Tag

Directions:

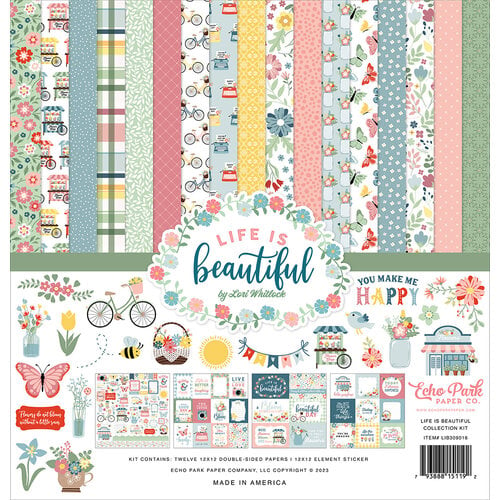
  • I used the Life is Beautiful Collection Kit*.  It comes with beautiful papers, greetings, and stickers perfect for my tag.
  • Cut a 4″ x 5″ piece of scrapbook paper for the front of the tag.
  • For ease of assembly, I used the Xyron Creative Station* to add adhesive onto the back of the paper.  Place the paper in the machine, crank the handle to run the paper through.  As it goes through the machine it adds a complete layer of adhesive to the back of the paper.

How to make a Shaker Tag

  • Place the paper onto the Specimen Card* section of the die.  Sandwich the die between the cutting plates.  Crank the handle of the Big Shot Plus* to run it through to cut out the shape.

How to make a Shaker Tag

How to make a Shaker Tag

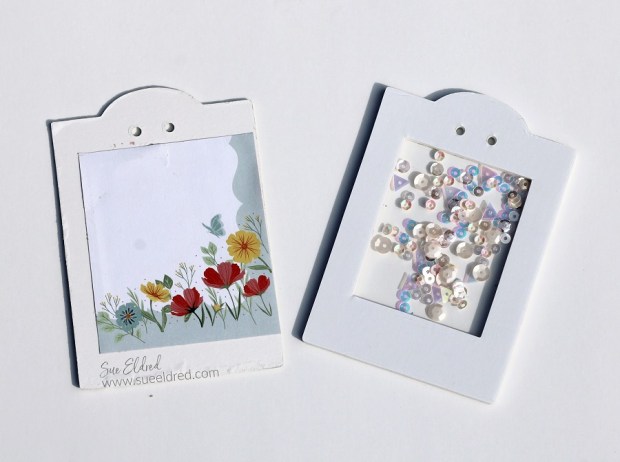
  • Place the paper for the inside of the tag onto the chipboard tag. Add adhesive to the small rectangle and place into the opening on the back.
  • Remove the protective coating from both sides of the small piece of acetate.
  • Remove the adhesive coating from the tag front. Place the acetate over the inside opening of the tag.
  • Remove the first protective coating from foam tag. Line up and place onto the tag front.
  • Place sequins in the small well the foam has created. Remove the second protective coating from the foam and place the back of the tag onto the foam.

How to make a Shaker Tag

  • Decorate the front of the tag using stickers from the collection kit.  Add 3D adhesive foam squares* to the back of the butterfly and watering can.
  • Tie a simple ribbon on the top of the tag.
  • Add the tag to a gift or bag for the perfect addition.

a little Pocket Full of Holiday Cheer

Mini Pocket of Cheer Christmas Ornament

How to make a Pocket Full of Holiday Cheer Christmas Ornament.

I’m Enveloping the Christmas in July Holiday Season with a Pocket Full of Holiday Cheer.

Mini Pocket of Cheer Christmas Ornament

Materials Used: (*affiliate links)

*Disclosure:  This blog uses ads and affiliate links.  If you choose to make a purchase using one of the links, I receive a small commission (at no additional cost to you) that helps offset the costs of maintaining this blog.  Thanks for your support!

Mini Pocket of Cheer Christmas Ornament

To make the Ornament:

  • Die cut two small envelopes using the Eileen Hull Envelope, Folder & Flowers Die Set* from Sizzix using red and green faux leather paper.  (you could also use scrapbook paper)
  • Cut the sides off the green envelope and glue it to the inside of the red envelope.  
  • Fold the envelope on the score lines and glue the bottom sides together.

Mini Pocket of Cheer Christmas Ornament

  • Punch two small holes on each side of the envelope flap.  Add a small piece of twine for hanging.
  • Hot glue small pieces of faux greenery and berries to the inside of the envelope. 
  • Place a small holiday greeting on the bottom of the envelope.  
  • Adhere a small holiday sticker to the greenery.  

Mini Pocket of Cheer Christmas Ornament

  • Add another Holiday Greeting Sticker to the back of the envelope.  I added 3D foam squares to the back of the sticker for added dimension.

Mini Pocket of Cheer Christmas Ornament

It is a quick and easy Holiday Ornament to add to the front of a package.

Or you could make several to hang on your Christmas Tree.  (you’ve got time)

Eileen Hull Educator Logo

Disclosure:  This is a sponsored post.  As a member of the Eileen Hull Educator Team, I have been provided product in exchange for my creative ideas.  The view and opinions are my own. 

Shimmer & Shake Birthday Card

Shimmer & Shake Birthday Card

How to make a Sparkly, Shimmery Shaker Birthday Card.

Shimmer & Shake Birthday Card

One of the great things about being a cardmaker is making fun cards

for special people. I made a quick and easy card for my cousin’s birthday

over the weekend and forgot to take any process shots.

So, I decided to make another one, slightly different.

Making Sparkly Shimmery Cards are fun to make.

Taking photographs of those kind of cards are not.

To give the cards the extra sparkle and shine, I used StyletechCraft’s Chrome Vinyls.

Shimmer & Shake Birthday Card

Materials Used:  (*affiliate links)

StyletechCraft products brought to you by ATSM Craft*

*Disclosure:  This blog uses ads and affiliate links.  If you choose to make a purchase using one of the links, I receive a small commission (at no additional cost to you) that helps offset the costs of maintaining this blog.  Thanks for your support!

Shimmer & Shake Birthday Card

Directions:

  • Usually, when I’m working with vinyl, I use it as a sticker. This time I wanted to use the vinyl to make a dimensional piece. Before die-cutting, I placed the vinyl onto the cardstock.  
  • Die-cut the words Happy Birthday using Pink Chrome Adhesive Vinyl*.
  • Die-cut the birthday background using Silver Chrome Adhesive Vinyl*.  
  • Cut the Small 3D Foam Squares* in half and place them onto the back of the letters. Use tweezers to add each of the letters to the background.

Shimmer & Shake Birthday Card

  • Die-cut a frame using white cardstock.
  • Cut a piece of clear acetate slightly smaller than the frame.
  • Use a double tape roller to add adhesive around the frame.
  • Remove the protective film from the acetate and place it inside the frame.
  • Place double-sided adhesive strips over the acetate.
  • Cut a piece of Holographic Mist Chrome Adhesive Vinyl* slightly smaller than the frame.

Shimmer & Shake Birthday Card

Shimmer & Shake Birthday Card

  • Add 3D foam squares to the back of the die-cut background.
  • Place “Happy Birthday” onto the front of the frame.
  • Adhere the frame layers on a white card.
  • Add a simple white sheer bow to finish the card.

Shimmer & Shake Birthday Card

I love how the Holographic Vinyl sparkles and changes color in the sun.

Shimmer & Shake Birthday Card-Sue's Creative Workshop www.sueeldred.com 1457

The perfect card for anyone who loves a little sparkle and shine.