How to make a Simple DIY Patio Side Table from Scraps.
I love a simple, easy, and inexpensive DIY project.
Add in a little recycling, and that makes me super happy.

We recently had a new deck built using composite decking materials.
When I saw the leftover scraps, I asked them to save a few larger pieces
of the thick wood and composite fascia boards.
(FYI…Fascia boards are the large boards that go around the outside of the deck.)
I knew they would be perfect for a small bench or side table.

The fascia board was the same width as the wood board.
So, I used the wood board scrap as it came.
I asked my husband to cut the fascia board the same length as the wood board.
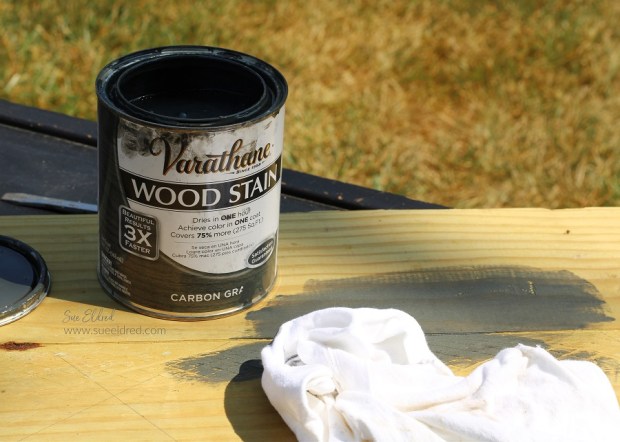
I stained the wood board using Varathane’s Carbon Grey Stain*
that I had left over from a previous project.
The wood is pretreated. So, I didn’t use a sealer on the wood.
I can always go back and do that later.
We screwed the composite fascia board onto the wood board using decking screws.
*Disclosure: This blog uses ads and affiliate links. If you choose to make a purchase using one of the links, I receive a small commission (at no additional cost to you) that helps offset the costs of maintaining this blog. Thanks for your support!

I went to a couple of yard sales searching for table legs that I could use,
I wanted it to be a complete recycling project.
After no luck, I purchased these black hairpin legs from Amazon*.
I love how they look, and they go perfectly with the black railing on my new deck.

After marking and measuring the placement of the legs,
we predrilled the screw holes before screwing them onto the wood.
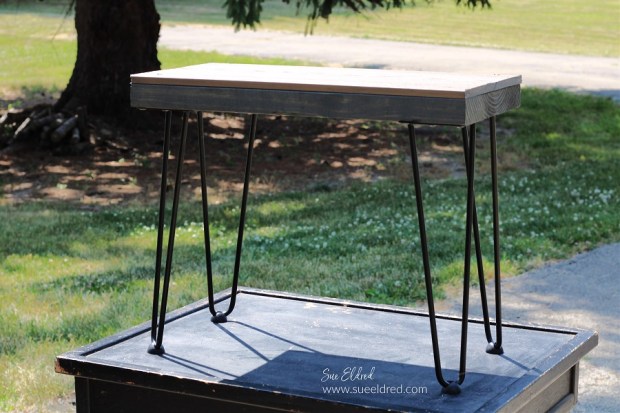
The table went together in a few minutes.
I love using scraps to make something useful.
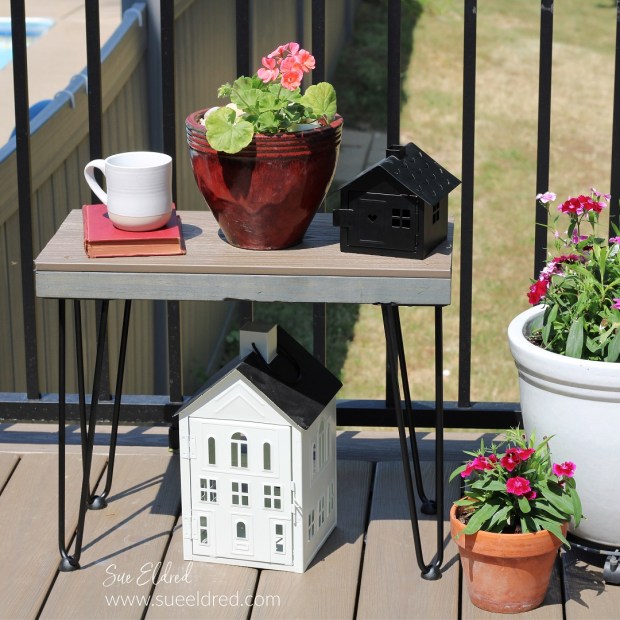
This table is the perfect side table between a couple of chairs.
A great place to set a drink down.
It’s also sturdy enough to be used as a small bench for one.

Even after spending $20 on the legs,
I still have a very inexpensive custom table.
As my daughter-in-law reminded me,
“you can easily spend $20 or more for a small patio table”.

FYI…I found my Solar Lantern at Homegoods, but you can
easily find other great Solar Lanterns on Amazon*.

Amazon Prime Days are July 11-12th.