DIY yourself A Happy Little Mason Jar Shelf Sitter.
As Spring turns into Summer, I get inspired to change my decor to happy colors.
I like to open the windows and let in the fresh air.
And…I love to bring in fresh blooms whenever I can.
Flowers make me HAPPY!

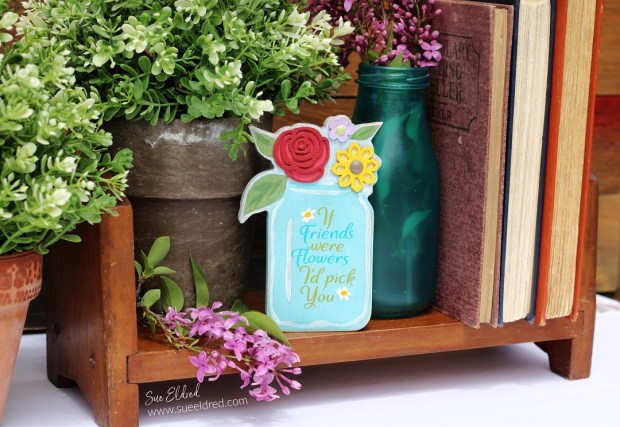
The Wood Mason Jar Cut-Out…
Sometimes when I see an item at the store, I have a vision of what I want to do.
Sometimes it works out, and other times it does not.
This particular time was the latter.
When I first saw the wood mason jar with flowers cut out,
I saw it stained with only the flowers painted.
So, I stained the wood.
It might have been the stain I used, but I wasn’t pleased with the result.

After letting it sit overnight, I decided a little acrylic paint might help.
So, I watered down my paints so they didn’t look too heavy and painted away.
While it isn’t what I originally had planned, it’s not too bad.
It’s bright and cheery.

Doesn’t vinyl make everything just a little better?
For extra personality, I added vinyl lettering using my favorite StyletechCraft* adhesive vinyl.

Materials Used: (*affiliate links)
- Wood Mason Jar Cut-Out (Michael’s Craft Store)
- StyleTechCraft Glossy Craft Vinyl: Tiff Blue, Olive, and White*
- StyleTechCraft Vinyl Transfer Tape*
- StyleTechCraft Vinyl Tool Kit*
- Silhouette Cameo Electronic Die Cutting Machine*
- “Monsoon” font from The Silhouette Store
StyletechCraft products brought to you by ATSM Craft*
*Disclosure: This blog uses ads and affiliate links. If you choose to make a purchase using one of the links, I receive a small commission (at no additional cost to you) that helps offset the costs of maintaining this blog. Thanks for your support!

- I used a Silhouette Cameo Electronic Die Cutting Machine* with the “Monsoon Font” from The Silhouette Store to create the words.
- Cut the words using StyleTech Craft Glossy Vinyl.
- After cutting, remove the excess vinyl using a Vinyl Weeding Tool*.
- Lay the transfer paper over the words.
- Rub over the transfer paper with a vinyl scraper tool and lift the design from the white paper backing.
- Lay the transfer paper onto the sign and rub over the design. Remove the transfer paper.

- To make it a shelf sitter, I glued a small block, “borrowed” from the kid’s block basket, onto the back.
- I painted the block with matching acrylic paint.


Now that it’s finished, I think the shelf sitter would also make a cute Mother’s Day or Teacher’s gift.
So many possibilities.


