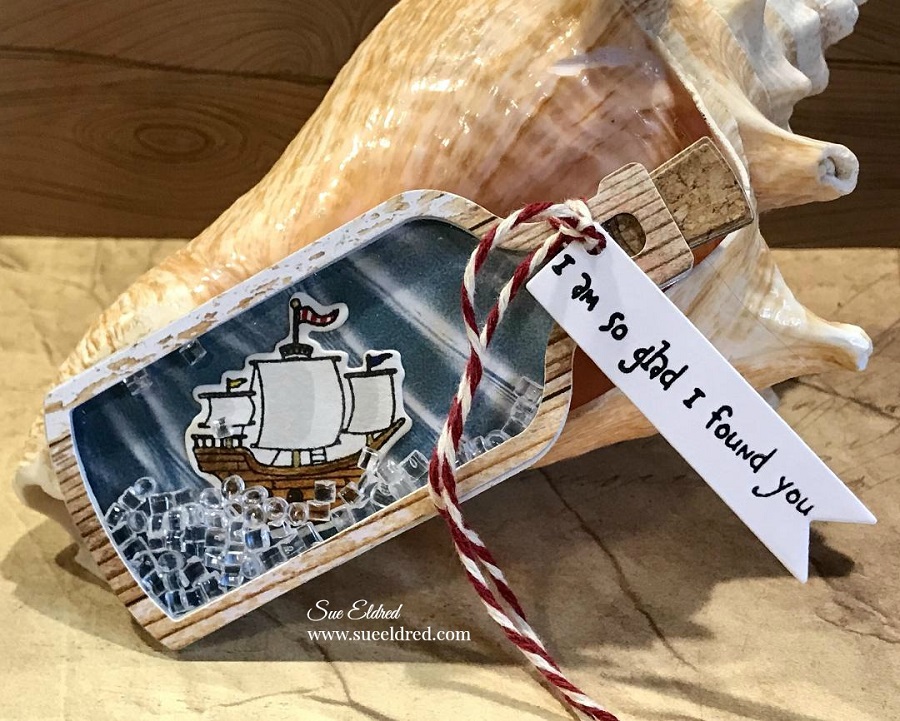
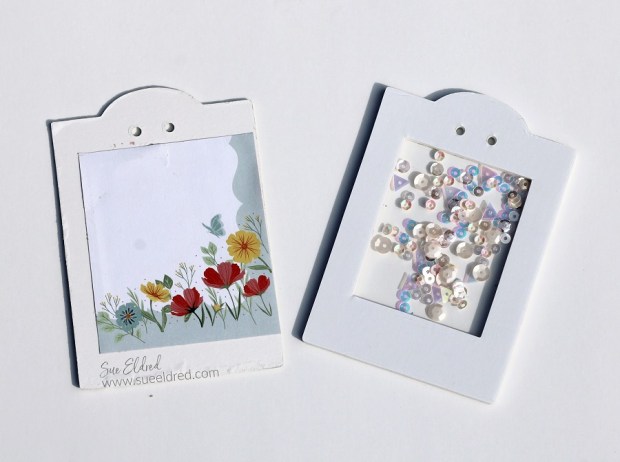
Make a Shaker Tag using the Specimen Card
from the Eileen Hull New Field Notes Die from Sizzix.
Last month, we shared projects using Eileen’s New Chapter 3 release dies.
Today I thought I’d share a simple tutorial on how to make a Shaker Tag
using the Field Notes & Specimen Card Die*.
![]()
Disclosure: This is a sponsored post. As a member of the Eileen Hull Educator Team, I have been provided product in exchange for my creative ideas. The view and opinions are my own.

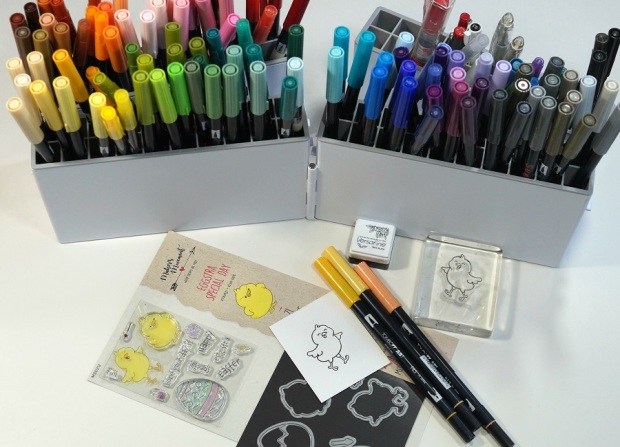
Materials Used to make the Shaker Tag: (*affiliate links)
- Sizzix-Field Notes & Specimen Card Die by Eileen Hull*
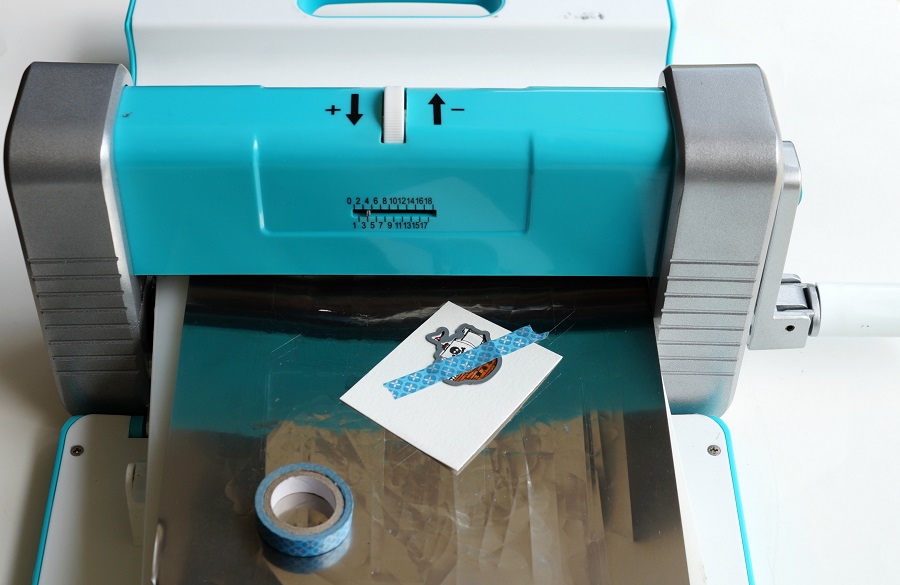
- Sizzix Big Shot Plus Die-Cutting Machine*
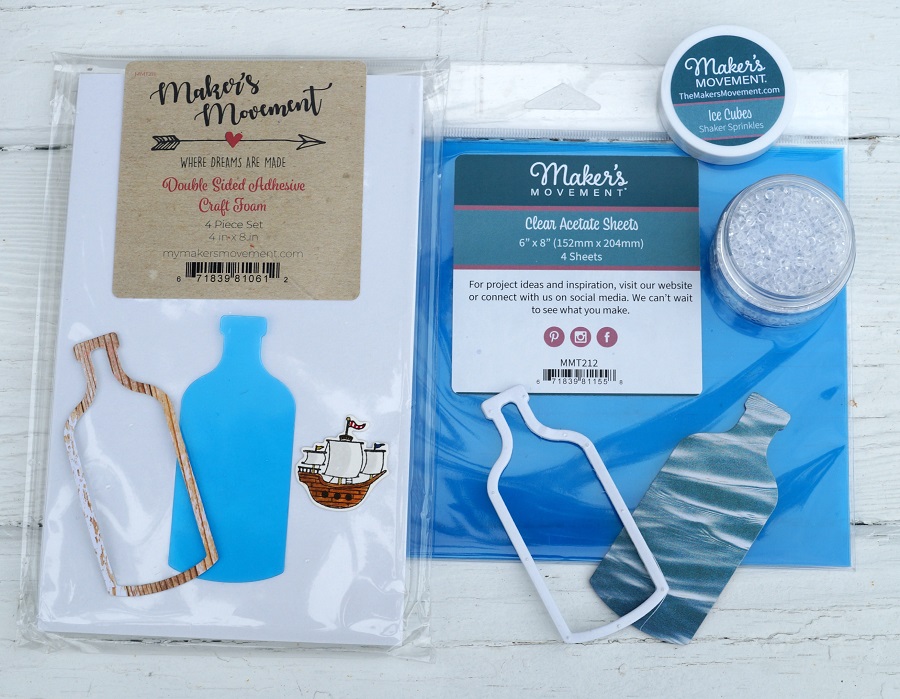
- Sizzix Mat Board*
- Xyron Creative Station*
- Echo Park Life is Beautiful Collection Kit*
- Double-sided Adhesive Foam Sheets*
- Dress My Crafts Sequins*
- Clear Acetate Sheets*

*Disclosure: This blog uses ads and affiliate links. If you choose to make a purchase using one of the links, I receive a small commission (at no additional cost to you) that helps offset the costs of maintaining this blog. Thanks for your support!

Directions:
- I used the Life is Beautiful Collection Kit*. It comes with beautiful papers, greetings, and stickers perfect for my tag.
- Cut a 4″ x 5″ piece of scrapbook paper for the front of the tag.
- For ease of assembly, I used the Xyron Creative Station* to add adhesive onto the back of the paper. Place the paper in the machine, crank the handle to run the paper through. As it goes through the machine it adds a complete layer of adhesive to the back of the paper.


- Place the paper onto the Specimen Card* section of the die. Sandwich the die between the cutting plates. Crank the handle of the Big Shot Plus* to run it through to cut out the shape.

- Use the Field Notes & Specimen Card Die* to cut a specimen card using the adhesive foam sheet.
- Cover a 4″ x 5″ piece of Sizzix Mat Board* with a 4″ x 5″ piece of scrapbook paper that has been ran through the Xyron Creative Station*. Cut the Mat Board* using the Field Notes & Specimen Card Die*. (Make sure to save the small cut out from the center.)
- Cut a small piece of Clear Acetate* 2 ¼” x 2 ¾”.
- Cut a small piece of paper for the inside of the tag.
- Place the paper for the inside of the tag onto the chipboard tag. Add adhesive to the small rectangle and place into the opening on the back.
- Remove the protective coating from both sides of the small piece of acetate.
- Remove the adhesive coating from the tag front. Place the acetate over the inside opening of the tag.
- Remove the first protective coating from foam tag. Line up and place onto the tag front.
- Place sequins in the small well the foam has created. Remove the second protective coating from the foam and place the back of the tag onto the foam.

- Decorate the front of the tag using stickers from the collection kit. Add 3D adhesive foam squares* to the back of the butterfly and watering can.
- Tie a simple ribbon on the top of the tag.
- Add the tag to a gift or bag for the perfect addition.