Three Projects with Eileen Hull’s New Chapter 3 Release

Projects using Eileen Hull's New Chapter 3 Dies from Sizzix

Eileen Hull’s New Chapter 3 Dies from Sizzix.

I am excited to share three projects I created using Eileen Hull’s New Chapter 3 Sizzix

die collection!

They are a fun group of dies.

Each piece in the set stands alone but also coordinates with the others

to make a truly versatile and valuable addition to your collection.

Back to School Gift Box

Back to School Teacher Gift Box

If you’re looking for to “butter up” the new teacher, this BTS gift box is a fun project to make.

The Back-to-School Teacher Gift Box uses Eileen’s New XL Card Box Die*.

I LOVE this Die* and I can’t wait to share all the ideas I have for this die for the Holidays.

*Disclosure:  This blog uses ads and affiliate links.  If you choose to make a purchase using one of the links, I receive a small commission (at no additional cost to you) that helps offset the costs of maintaining this blog.  Thanks for your support!

Puppy Love Skinny Mini Album-Sue's Creative Workshop www.sueeldred.com 4902

Puppy Love Skinny Mini Album

Eileen’s Skinny Mini Book Box Die* makes the perfect sized album for pictures

of my pup Dexter.

The die also comes with the side parts to make it into a box.  (genius!)

Puppy Love Skinny Mini Album

I created accordion pages for the inside of the album by scoring and attaching 6″ x 12″ cardstock.

Skinny Mini Elements Christmas Poinsettia Card.

Skinny Mini Elements Christmas Poinsettia Card

While the Skinny Mini Elements Die* is not a Christmas Die,

it sure makes one cute Christmas card.

It coordinates perfectly with the Skinny Mini Book Box Die*.

Sizzix Skinny Mini Elements Christmas Poinsettia Card-Sue's Creative Workshop www.sueeldred.com 4940

This card comes with a little back story.

After I made this card, I sent Eileen a picture of the finished project.

She messaged me back that I was brilliant for making the poinsettias using the cut-outs

from the die.  I agreed that “would have” been brilliant, but (darn it) I had used premade

paper poinsettias for the card.

Up for the challenge, I remade the red poinsettia using the cut-outs from the die.

I left the white poinsettias for comparison.  (and laziness)

I cut the points off the side and arranged the petals on foam mounting squares.

Voila, a poinsettia!

Eileen Hull Chapter 3 Release Party

Check out the Eileen Hull’s Blog below for even more ideas. 

Here’s the list of Chapter #3 Blog Hop Stops:

Eileen Hull Educator Logo

Disclosure:  This is a sponsored post.  As a member of the Eileen Hull Educator Team, I have been provided product in exchange for my creative ideas.  The view and opinions are my own. 

Sweet Summer Sentiments Scrapbook Page

Sweet Summer Sentiments Scrapbook Page-Sue's Creative Workshop www.sueeldred.com 4730

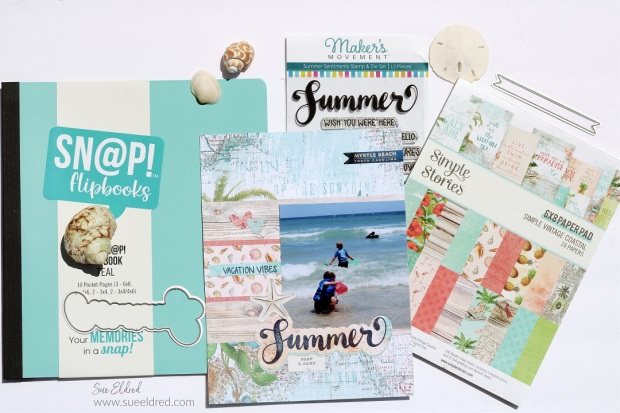
A Sweet Summer Sentiments Scrapbook Page using the Simple Stories Simple Vintage

Coastal Scrapbook Collection and Maker’s Movement Summer Sentiments Stamp and Die Set.

It’s been a while since I’ve done any scrapbooking. 

I thought last year’s pictures from our vacation to Myrtle Beach might be a great

place to start.  (I’ve been meaning to work on them for a while.)

Maker's Movement

Disclosure:  This is a sponsored post for The Maker’s Movement*.  I have been provided product and compensation in exchange for my creative ideas.  The view and opinions are my own. 
Sweet Summer Sentiments Scrapbook Page

Materials Used:   (*affiliate links)

Simple Stories-Simple Vintage Coastal

*Disclosure:  This blog uses ads and affiliate links.  If you choose to make a purchase using one of the links, I receive a small commission (at no additional cost to you) that helps offset the costs of maintaining this blog.  Thanks for your support!

Sweet Summer Sentiments Scrapbook Page-Sue's Creative Workshop www.sueeldred.com 4703

Last year after our trip, I bought a 6″ x 8″ SN@P Flipbook* from Simple Stories to put my pictures in.

I thought the smaller size would be perfect for my vacation album.

Inspired by the Summer Sentiments Stamp & Die Set from The Maker’s Movement

I decided to get out my supplies and start working on the album again.

I used Stazon Midnight Blue Ink* to stamp the words “Summer” and “Vacation Vibes.”

Sweet Summer Sentiments Scrapbook Page-Sue's Creative Workshop www.sueeldred.com 4719

I like to bring home the vacation book with maps and ads to use as ephemera in my album.

I found an ad with the words “Myrtle Beach, South Carolina” in the perfect shade of blue.

I cut the words out using the “banner die” from the Summer Sentiments Stamp & Die Set.

Sweet Summer Sentiments Scrapbook Page

One page done and several more to go.  

Let’s Eat Cake Birthday Card

Eat Cake Birthday Card

Nothing like getting a sweet 3-tiered layered cake for your Birthday.

Thanks to the Eat Cake Stamp and Die Set from The Maker’s Movement,

you can send everyone a special cake on their birthday.

Maker's Movement

Disclosure:  This is a sponsored post for The Maker’s Movement.  I have been provided product and compensation in exchange for my creative ideas.  The view and opinions are my own. 

Eat Cake Birthday Card

Materials Used: (*affiliate links)

Shop Tombow

*Disclosure:  This blog uses ads and affiliate links.  If you choose to make a purchase using one of the links, I receive a small commission (at no additional cost to you) that helps offset the costs of maintaining this blog.  Thanks for your support!

Eat Cake Birthday Card

Directions:

Eat Cake Birthday Card

  • Stamp portions of the cake on patterned paper from the Rainbow Sprinkles Paper Pad.
  • For extra dimension, place the stamped paper onto white cardstock.
  • Cut the “icing layer” using a fine-detailed scissor and adhere the layer on top of the cut-out cake layer.
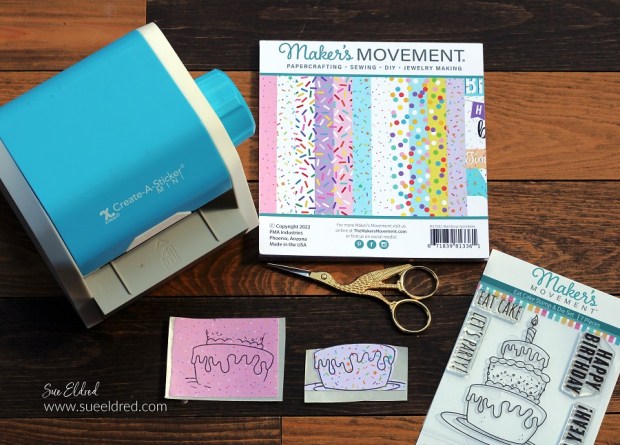
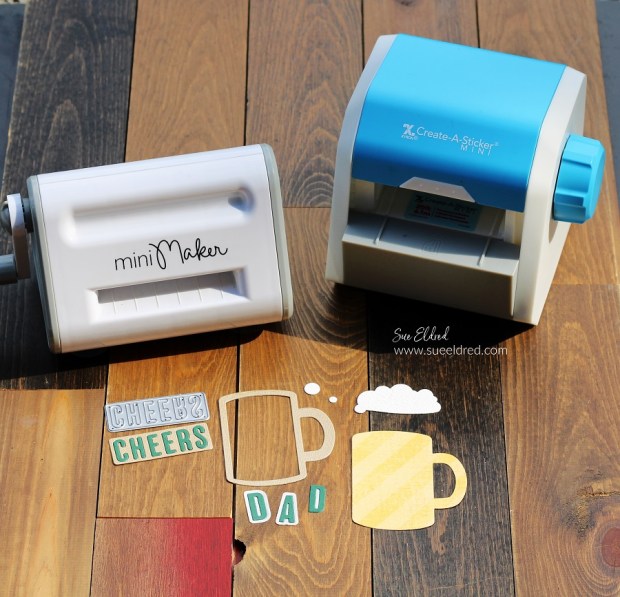
  • My secret ingredient for this “fussy cut” 3-tiered cake is my Xyron Create a Sticker Mini*. It makes applying the layers extremely easy.  Just place the paper into the machine and crank the handle, as it runs through the sticker-maker it adds a layer of adhesive onto the back of the paper.

Eat Cake Birthday Card

  • Cut a frame using the Crafty Chica Nested Frame Die Set and white cardstock.
  • Use paper from the Simply Spring Slimline Paper Pad to create a layer for the inside of the frame.

Eat Cake Birthday Card

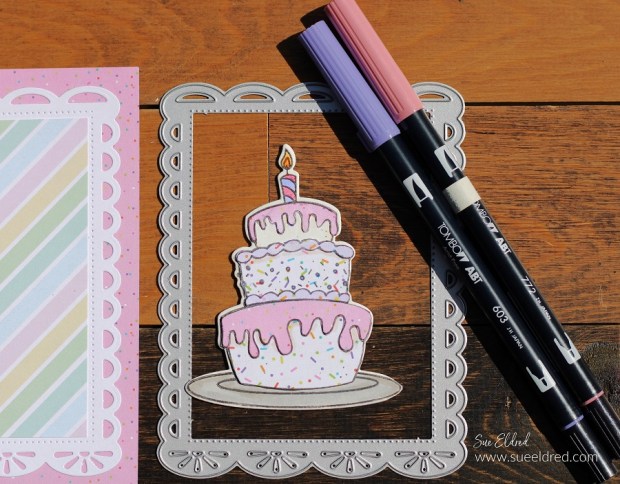
  • Here’s a closeup of the cake all layered up.  Each layer is slightly thicker than the first.
  • Color the top of the candle using Tombow ART Markers*.
  • Add 3D Foam Mounting Squares* to the back of the cake and place it onto the bottom of the frame.

Eat Cake Birthday Card

  • Cut a small “Happy Birthday” banner from the Rainbow Sprinkles Paper Pad and add to the top of the card.
  • A fun birthday card for any age.

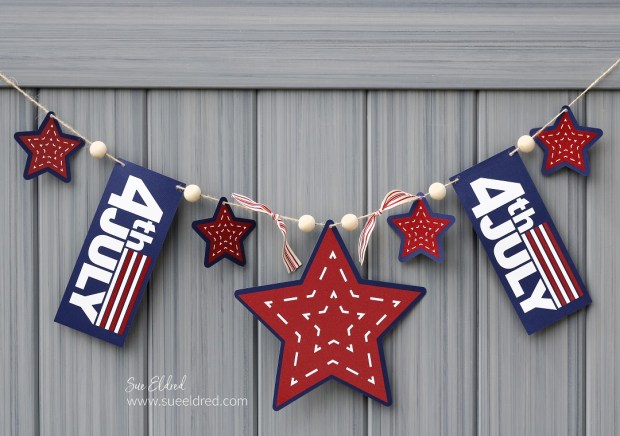
Patriotic Banner for the 4th of July

Patriotic Banner for the 4th of July

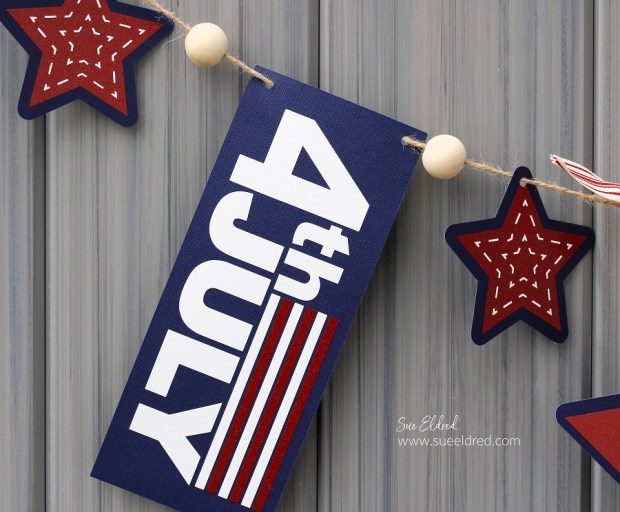
A Patriotic Red White and Blue Banner for your next 4th of July Get Together.

Is the Family getting together for the 4th?

Get the party started with a simple 4th of July Banner using StyleTechCraft Red and White

Glitter Vinyl, Navy Cardstock, and a Silhouette Cameo Electronic Die Cutting Machine*.

“This is a sponsored post.  As a member of the StyleTechCraft Design Team I have been provided product and compensation in exchange for my creative ideas.  The views and opinions are my own.

Patriotic Banner for the 4th of July

Materials Used:

StyletechCraft products brought to you by ATSM Craft*

*Disclosure:  This blog uses ads and affiliate links.  If you choose to make a purchase using one of the links, I receive a small commission (at no additional cost to you) that helps offset the costs of maintaining this blog.  Thanks for your support!

Patriotic Banner for the 4th of July

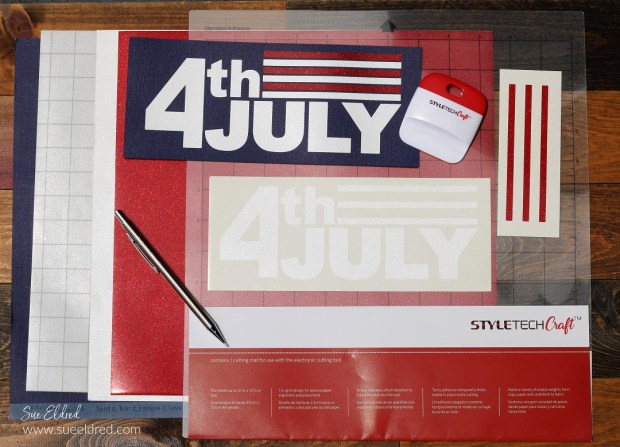
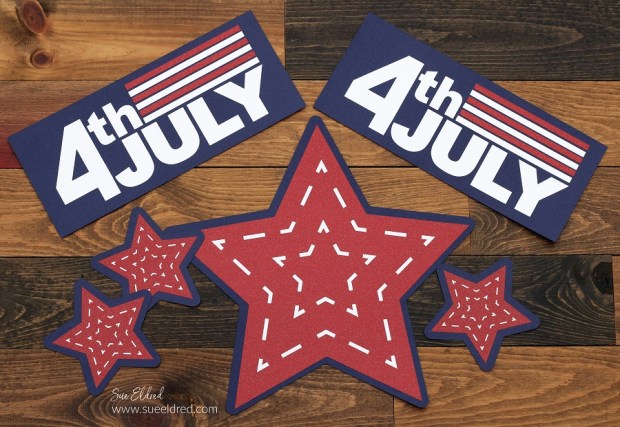
  • To make the banner pieces, I used 4th of July SVG files (from the Silhouette Store) and a Silhouette Cameo Electronic Die Cutting Machine*.
  • Cut the base of your banner pieces using Navy Cardstock.
  • For extra Sparkle and Shine, cut the inside banner layers using Red and White Ultra Metallic Adhesive Vinyl from StyleTechCraft.

Patriotic Banner for the 4th of July

  • Use a hole punch to add holes in the top of the banner pieces.
  • Thread the banner pieces and plain wood beads* onto a piece of twine.

Patriotic Banner for the 4th of July

Patriotic Banner for the 4th of July

Set out the chairs and fire up the grill, and you’re on your way to a great 4th of July Celebration.

Cheers to Dad on Father’s Day

Cheers to Dad Father's Day Card

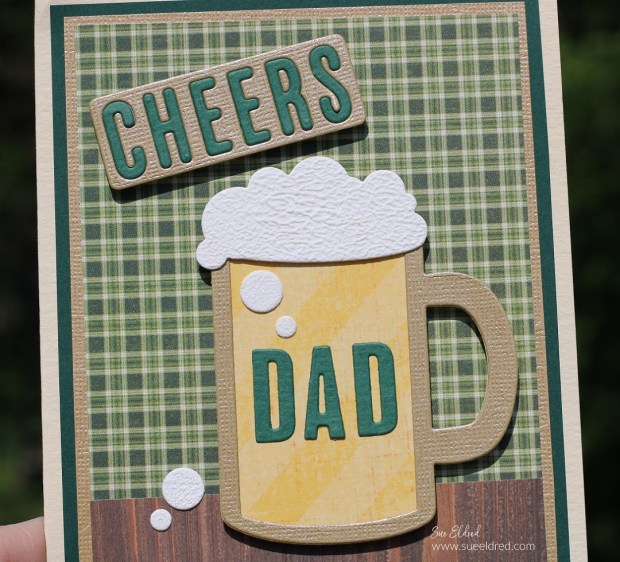
A Father’s Day Card for my Husband.

My husband loves golf.  (I mean, he LOVES GOLF!)

So, once a year, on Father’s Day weekend, I give my husband the gift

of a guilt-free weekend.  Don’t get me wrong; he has many other

guilt-free weekends throughout the year.

It’s just that this one is “guaranteed” to be guilt-free.

Cheers to Dad Father's Day Card

Materials Used:   (*affiliate links)

*Disclosure:  This blog uses ads and affiliate links.  If you choose to make a purchase using one of the links, I receive a small commission (at no additional cost to you) that helps offset the costs of maintaining this blog.  Thanks for your support!

Cheers to Dad Father's Day Card

To make a more realistic-looking foam, I used White Liquid Applique*.

  • Squirt the liquid applique onto a piece of white cardstock.
  • Use a Brayer* to spread out the liquid applique.
  • Allow the liquid applique to dry.
  • To raise the liquid applique, heat with a heat tool.
  • Using the Cheers Die Set, die-cut the paper with the foam die.

Cheers to Dad Father's Day Card

For easy assembly, run the paper through the Xyron Create a Sticker Mini*.

It adds a thin layer of adhesive to the back of the paper and makes adding small letters a breeze.

Cheers to Dad Father's Day Card

For added dimension, use adhesive craft foam under the beer mug and the word “Cheers”.

Cheers to Dad Father's Day Card

It’s the perfect card for my husband.

This is his perfect weekend.

After golfing, he grabs a cold one while he sits and watches golf on the television.

Maker's Movement

Disclosure:  This is a sponsored post for The Maker’s Movement*.  I have been provided product and compensation in exchange for my creative ideas.  The view and opinions are my own. 

Sue’s “Dress My Crafts” Giveaway!!!

Dress My Crafts Giveaway

Calling All Paper Crafters…

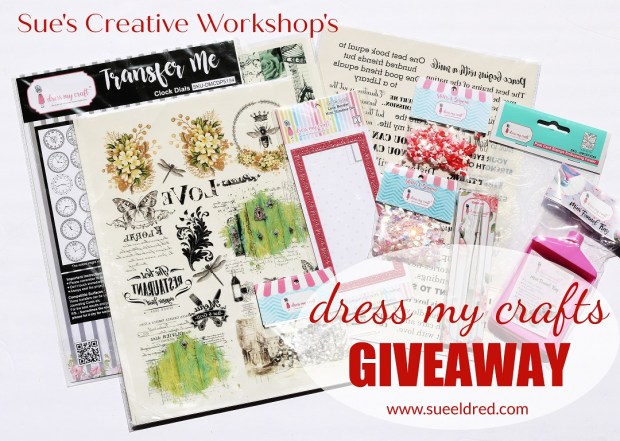
How would you like to WIN a fun selection of Crafty Swag?

The great people at Dress My Crafts have generously given me a

fantastic assortment of Crafty Goodness to give away to one lucky person.

Rub-On Transfers, Embossing Folder, Border Die, Tweezers, Funnel Tray,

and a great selection of embellishments. (A Retail value of over $50)

Dress My Craft Logo

There are several ways to enter:

  • Leave a comment on this post telling me you’d like to win.
  • Follow, Like and Comment on my Facebook Page
  • Follow, Like and Comment on my Instagram Page
  • US Entries Only
  • Enter by Midnight Wednesday CT, May 4, 2022

*Disclosure:  This blog uses ads and affiliate links.  If you choose to make a purchase using one of the links, I receive a small commission (at no additional cost to you) that helps offset the costs of maintaining this blog.  Thanks for your support!

Mae’s Treasure Box

Mae's Treasure Box made using Eileen Hull Sizzix XL Scoreboard Book Box Die

I wanted to share a little more about how I made Mae’s Treasure Box.

I am getting my first granddaughter, Mae, sometime in May.

(To say I’m excited is a bit of an understatement.)

Mae’s Treasure Box is a little box that her mom can slip into the top drawer

of her dresser and add all the little snippets of babyhood that she wants to save.

Mae's Treasure Box made using Eileen Hull Sizzix XL Scoreboard Book Box Die

As some of you may know…

I currently have three adorable, sweet, and loving grandsons in my life.

I wouldn’t trade them for the world.  But after all the trucks and blue stuff,

I’m excited that I’m finally getting a little “pink” in my life.

Mae's Treasure Box made using Eileen Hull Sizzix XL Scoreboard Book Box Die

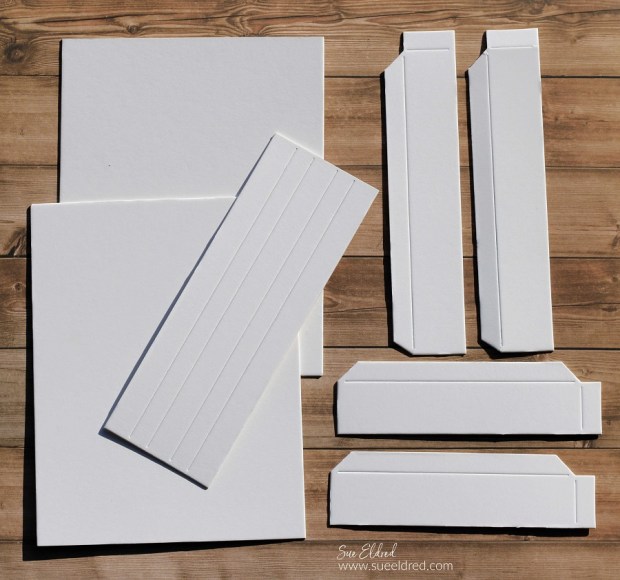
The “treasure box” was made using Eileen Hull’s New Book Box Die*.

I dug deep into my hoard of paper and found this sweet blue and pink floral paper.

It reminds me of Vintage Florals from the ’40s or ’50s.

Mae's Treasure Box made using Eileen Hull Sizzix XL Scoreboard Book Box Die

To make the treasure box:  

Mae's Treasure Box made using Eileen Hull Sizzix XL Scoreboard Book Box Die

  • I used the Xyron Creative Station* to add adhesive to the back of my paper before sticking it to the matboard.  (Usually, I adhere the paper to the matboard before die-cutting.)

*Disclosure:  This blog uses ads and affiliate links.  If you choose to make a purchase using one of the links, I receive a small commission (at no additional cost to you) that helps offset the costs of maintaining this blog.  Thanks for your support!

Mae's Treasure Box made using Eileen Hull Sizzix XL Scoreboard Book Box Die

Mae's Treasure Box made using Eileen Hull Sizzix XL Scoreboard Book Box Die

Mae's Treasure Box made using Eileen Hull Sizzix XL Scoreboard Book Box Die

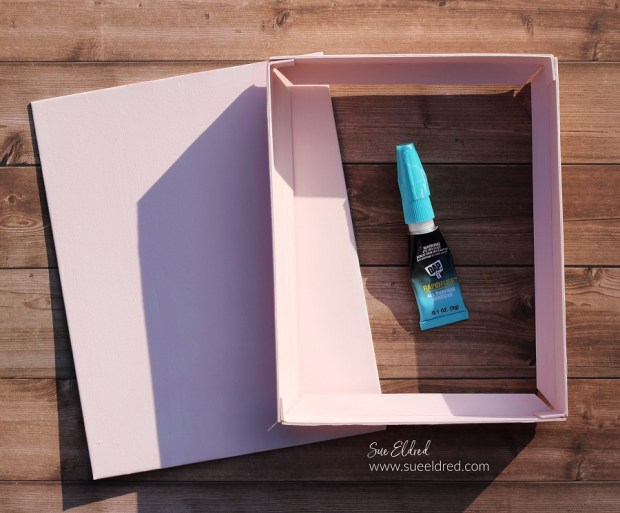
  • Apply adhesive to the bottom tabs.

Mae's Treasure Box-Sue's Creative Workshop www.sueeldred.com 2039

  • Glue the sides to the bottom rectangle.

Mae's Treasure Box made using Eileen Hull Sizzix XL Scoreboard Book Box Die

  • I added an extra piece of Mat Board* covered with matching paper to fit inside the box to cover up the side tabs.
  • I glued a pink glittery chipboard letter M on the inside corner of the box.

Mae's Treasure Box made using Eileen Hull Sizzix XL Scoreboard Book Box Die

Eileen Hull Educator Logo

Disclosure:  This is a sponsored post for Eileen Hull and Sizzix.  As an Eileen Hull Educator, I have been provided product in exchange for my creative ideas.  The view and opinions are my own. 

Heart Cards for All Occasions

Heart Cards for All Occasions

If you like making cards with hearts…

there’s no reason to stop just because Valentine’s Day’s over.

You can make heart cards any time of the year.

Maker's Movement Striped Heart Die

I used the New Striped Heart Die* from The Maker’s Movement with several of

their older dies to create several Heart Cards for use with several of life’s celebrations.

Hearts and Love are great anytime.

Maker's Movement

Disclosure:  This is a sponsored post for The Maker’s Movement.  I have been provided product and compensation in exchange for my creative ideas.  The view and opinions are my own. 

Heart Cards for All Occasions

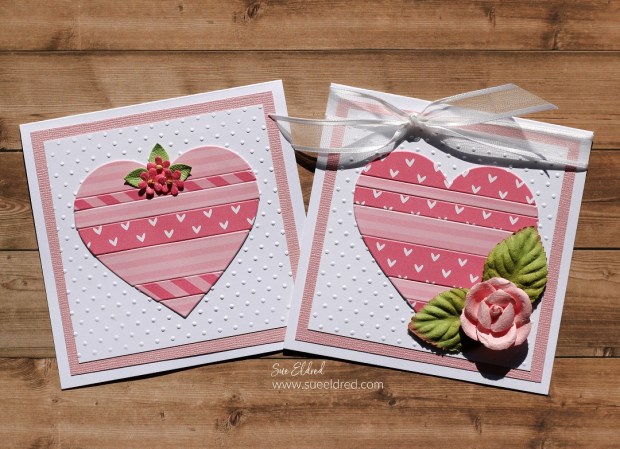
Pink Heart Card

  • I played with different patterns in the same pink hues to make these simple heart cards.
  • I adhered the paper onto white cardstock using my Xyron Creative Station* to make a double layer before die-cutting the heart.  It gives the “heart” a little dimension without being too much.

*Disclosure:  This blog uses ads and affiliate links.  If you choose to make a purchase using one of the links, I receive a small commission (at no additional cost to you) that helps offset the costs of maintaining this blog.  Thanks for your support!

Heart Cards for All Occasions

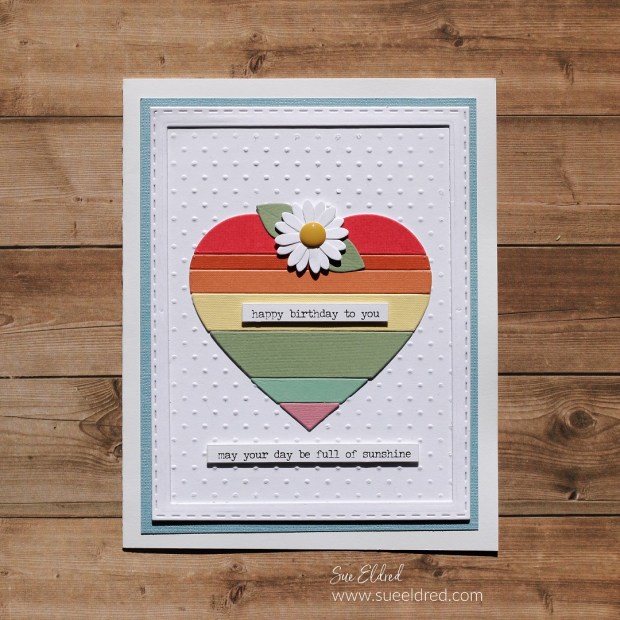
Rainbow Heart Card

  • I used cardstock in several muted colors of the rainbow to create this card. Instead of spacing the stripes apart, I butted them close to each other.
  • I used the daisy and leaf dies from the You’re my Jam Stamp & Die Set* to make the flower on the top of the heart.
  • I made the Frame using the Nested Stitched Rectangles Die Set*.

Heart Cards for All Occasions

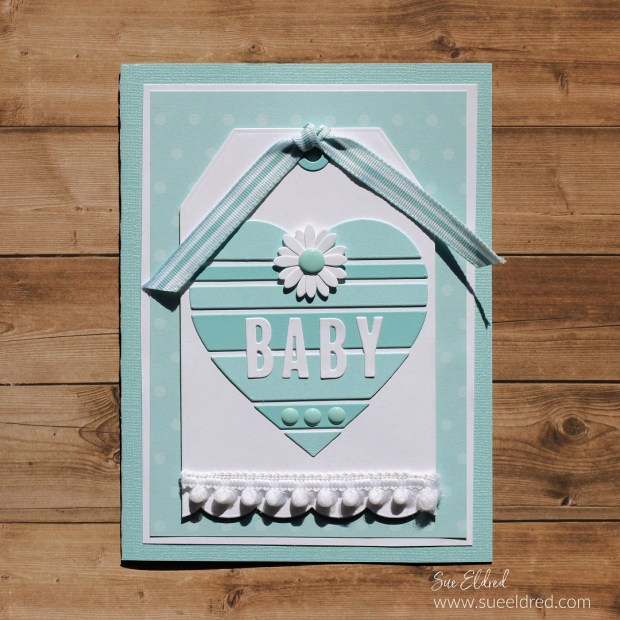
Baby Heart Tag Card

  • Monochromatic shades of pale blue make this sweet baby heart.
  • I used the Large Nested Tag Die Set* to create the tag.
  • I trimmed down the bottom edge using the Borders 1 Die Set*.
  • I cut the word B-A-B-Y out of white cardstock using the Alphabet Die Set*.

Heart Cards for All Occasions

Gold Heart Card

  • Perfect to use as a Birthday, Anniversary, or Wedding Card.
  • I used a shimmery gold cardstock to create an elegant-looking heart.
  • The red rose on the top of the heart was made using the spiral flower die from the In Full Bloom Stamp & Die Set.
  • After I die-cut the spiral flower, I gently molded the cardstock using a molding mat* and a large ball stylus*. I used pointed-reverse tweezers* to wind the flower and curl the leaves.
  • Stamp the word “Congratulations” from the Welcome Home Stamp & Die Set onto white cardstock and die-cut a banner using the banner die from the Message in a Bottle Stamp & Die Set.

Eileen Hull & Sizzix New Dies

Chapter 1 Eileen Hull Sizzix Release

It’s that time of year when Sizzix releases its new designs.

And being part of the Eileen Hull Teams, I wanted to share a few projects

that I made with Eileen’s New Dies.

Watercolor Floral Postal Collage Card

The “Watercolor Floral Postal Card” is made using the Snail Mail Thinlets Die Set*.

*Disclosure:  This blog uses ads and affiliate links.  If you choose to make a purchase using one of the links, I receive a small commission (at no additional cost to you) that helps offset the costs of maintaining this blog.  Thanks for your support!

Watercolor Floral Postal Collage Card

The snail mail die* is a faux postage stamp pane that fits on the front of an A-2 card.

It’s easy to create postage stamps by tearing them apart with a ruler

and the perforation marks.

Mae's Treasure Box made using Eileen Hull Sizzix XL Scoreboard Book Box Die

My favorite project hands-down is this sweet little treasure box

that I made for my new granddaughter that is coming in May.

I’m very excited to have a little more “pink” in my life.

I will be sharing more on how I put this box together later in the month.

It uses the New Eileen Hull XL Score-Board Book Box*.

This die is very versatile because you use it to create a book or a box.

Eileen Hull Sizzix Phone Stand

The New Phone Stand Die* is a quick and easy project to put together.

So easy to personalize with your favorite patterned paper.

And it looks good sitting on my desk.

These phone stands would make a fun gift.

Eileen Hull Sizzix 2022 Chapter One Release Party

Check out the Designers Links below for even more ideas. 

There’s a giveaway too! If you leave a comment for each of the designers in the Release Party Hop, or during the Facebook Live or YouTube video, you will be eligible to win one of the newly released products! Tell us what your favorite new product is and what you plan to do with it! Thanks for hopping with us

Sue Eldred (you are here!)


Creating Backgrounds with Gel Press

Creating Backgrounds with Gel Press

I was recently reintroduced to the Gel Press, a reusable gel printing plate.

I’d seen the Gel Press in action a few years ago and even briefly tried my hand at it.

The Gel Press is a fun and creative way to make backgrounds.

This month, the Eileen Hull Teams collaborated with Gel Press

to create some awesome samples.  Check out Eileen’s Blog Here.

gel-press-logo

Disclosure:  This is a sponsored post for Gel Press.  I have been provided product in exchange for my creative ideas.  The view and opinions are my own. 

Creating Backgrounds with Gel Press

Materials Used:  (*affiliate links)

*Disclosure:  This blog uses ads and affiliate links.  If you choose to make a purchase using one of the links, I receive a small commission (at no additional cost to you) that helps offset the costs of maintaining this blog.  Thanks for your support!

Creating Backgrounds with Gel Press

I watched several Gel Press videos online before jumping right in.

I was impressed with the idea of using die-cuts to make backgrounds

and used a few of Eileen’s Dies to make mine.

Creating Backgrounds with Gel Press

Here’s how I made the Snowflake Background:

  • Start with several colors of acrylic paint and use a Brayer* to blend the paint onto the gel press.
  • Place the Snowflake die-cuts (cut using the Wreath & Snowflake Thinlet Die Set*) directly onto the paint.
  • Place a white piece of paper onto the gel press and press over the cardstock to remove the excess paint.
  • Remove the snowflake die-cuts.  Place another piece of cardstock over the Gel Press to pick up the remaining paint and patterns.

Creating Backgrounds with Gel Press

I die-cut another snowflake in blue and adhered it to the background to create this card.

I used the Eileen Hull Sweater Embossing Folder* to create the background layer.

Creating Backgrounds with Gel Press

I also tried the same technique using dye inkpads instead of paint.  

I used small inkpads and dabbed them all over the gel press.

Use a Brayer* to blend the inks before adding the snowflake die-cuts.

Creating Backgrounds with Gel Press

Use the Xyron Creative Station* to adhere the snowflake background paper

to Mat Board*. Die-cut the mat board using the Tiny Book Die to create

this sweet little album.  (This tiny album measures 2 1/4″ x 3″.)

Creating Backgrounds with Gel Press

The perfect mini-album to add those snowy day pictures.

Creating Backgrounds with Gel Press

Create a simple accordion out cardstock for the inside pages of the album.

Interested in learning more about using the Gel Press?  Check out this video.