Revamped Sunglass Case

revamped-sunglass-case-sues-creative-workshop-4565

I picked up a “free” sunglass case at the Thrift Store the other day.

I was looking for something to paint using  the  New Patent Leather Paint

that I received from DecoArts.

I love the look of shiny patent leather.  And… in red?  Oh my!

monogramed-sunglass-case-before-sues-creative-workshop-4314

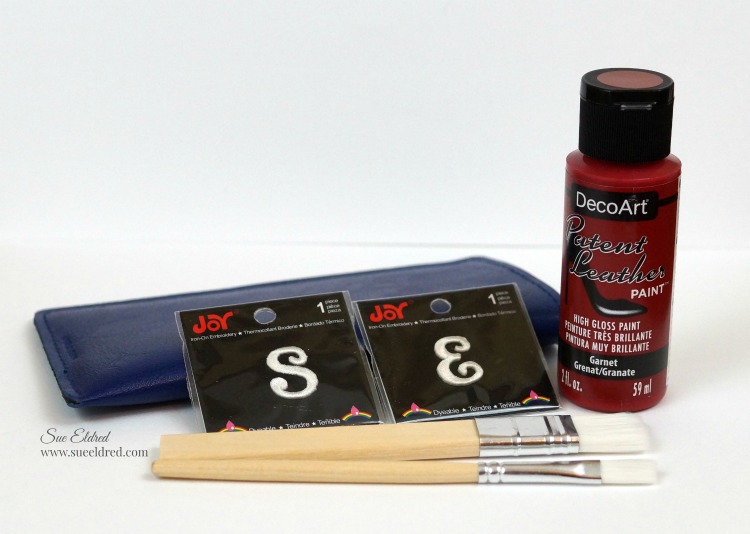
Combine them all with embroidered letters from Joy*

and you have a personalized custom monogrammed sunglass case.

Here’s what I did to my case…

  • If your case is old, wipe it down with rubbing alcohol to remove any dirt or grime.
  • Apply a even coat of patent leather paint onto the sunglass case with a soft bristle brush.
  • The paint will have a tacky feel as it dries.  Allow to dry between coats.  You may want to give the case a second coat of paint.
  • To give the case a custom monogram.  Using a good craft glue, glue Iron-on Embroidered letters from “Joy” on to the case.

*As a member of the Creating with Joy Design Team, this post was sponsored by JOY® SA.

Save on Paper Crafting Supplies at CreateForLess!

*Disclaimer:  This blog uses ads and affiliate links.  If you choose to make a purchase using one of the links, I receive a small commission (at no additional cost to you) that helps offset the costs of maintaining this blog.  Thanks for your support!

Christmas Ornaments from Old Kitchen Hardware

Old Kitchen Hardware

I picked up a bag of old kitchen hardware for 50¢ at a Garage Sale.

I can’t resist a good bargain and knew I might even use them someday.

After disassembling and using them on a couple of projects,

I put the rest in a container high on the shelf for another day.


I ran across them again the other day and had an idea…

How would they look with cream spray paint?

I knew I was onto something and let the idea marinate in my head for a day or two.

This is what I came up with and I’m pretty happy with the results.

Shabby Chic Orn 86

For my Ornament:

  • Paint the base plate from old kitchen hardware with cream spray paint.
  • I added silver around the edge using my finger tip and paint from a  Chisel Point Pen Tip Calligraphy Paint Marker, Silver*    (affiliate link)
  • Remove the small wooden base from a small bottle brush tree.  With small pliers bend the remaining wire tip up into the tree.
  • Cut the back of the bottle brush tree to make it flat.
  • Glue tree in place with Beacon Adhesives Zip Dry.*
  • For a little extra sparkle, I rubbed clear glitter glue into the bristles of the tree.  Glue pearl beads and place directly into tree.
  • On the top of the ornament I used a piece cream twill ribbon with an inexpensive plastic star ornament on a silver jump ring.  Tied it in place with a piece of burlap twine and small cream button.
  • I added a silver jingle bell that I painted and distressed with sandpaper and tied on with a satin ribbon.
  • Place the word sticker onto a thin piece of chipboard, trim around sticker, lightly sand the edges for a distressed look and glue into place.

Berry Ornament 91

Here’s a simpler idea.  I love this one too.

I bet your going to start rummaging through that junk drawer in the garage and see what you can find.

Shop Amazon Scrapbooking Supplies*

*Disclaimer:  This post uses ads and affiliate links.  If you choose to make a purchase using one of the links, I receive a small commission (at no additional cost to you) that helps offset the costs of maintaining this blog.  Thanks for your support!