How to Stencil a Beautiful and Simple Floral Card
using the Sizzix Watercolour Flowers & Lattice 4 pc Stencil Set by Eileen Hull*.
Did you know that Sizzix has created several layered Stencil Sets to use
with their New Stencil & Stamp Tool*?
The NEW dual-purpose Stencil & Stamp Tool from Sizzix*
makes both stenciling and stamping easier than ever before!

*Disclosure: This blog uses ads and affiliate links. If you choose to make a purchase using one of the links, I receive a small commission (at no additional cost to you) that helps offset the costs of maintaining this blog. Thanks for your support!

Materials Used: (*affiliate links)
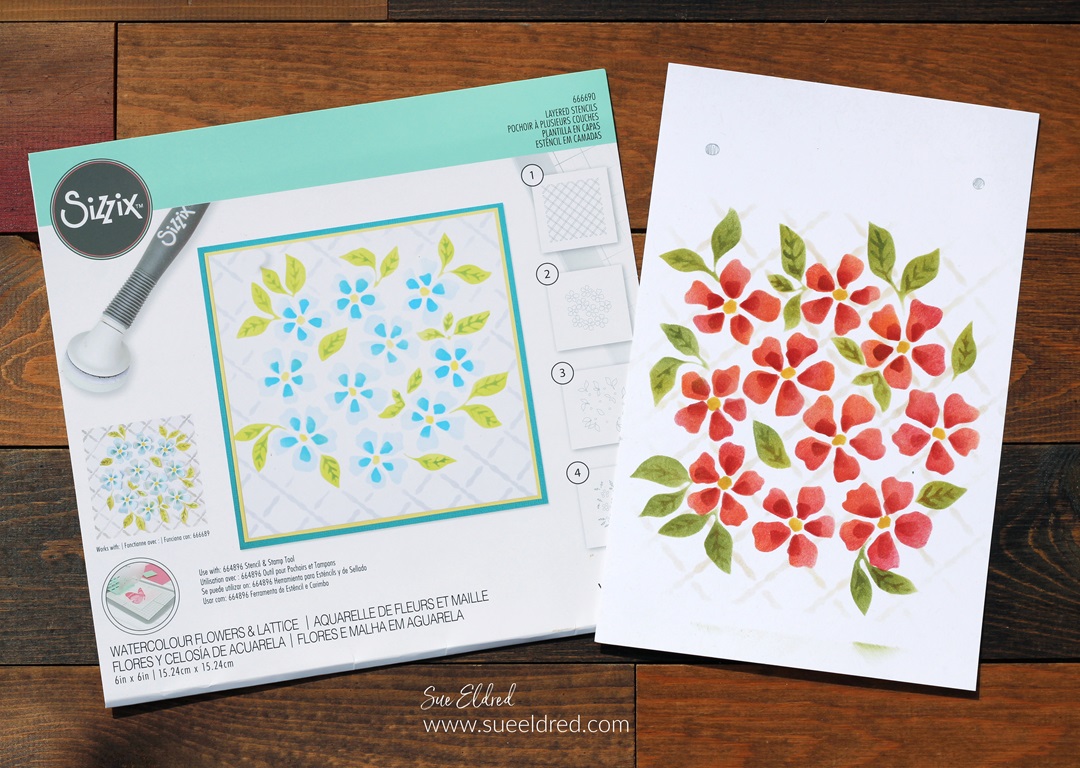
- #666690 Sizzix Watercolour Flowers & Lattice 4 pc Stencil Set by Eileen Hull*
- Tim Holtz Distress Inks from Ranger*: Barn Door*, Spiced Marmalade*, Fired Brick*, Peeled Paint*, Crushed Olive*, Gathered Twigs*, Scattered Straw*,
- Olive Green Dye Inkpad*
- Ranger Ink Applicator*
- Watercolor Paper*

Since I don’t have the New Tool* yet, I thought I would show you how I used the stencils without the tool.
How to use the Watercolor Flowers & Lattice Stencil:
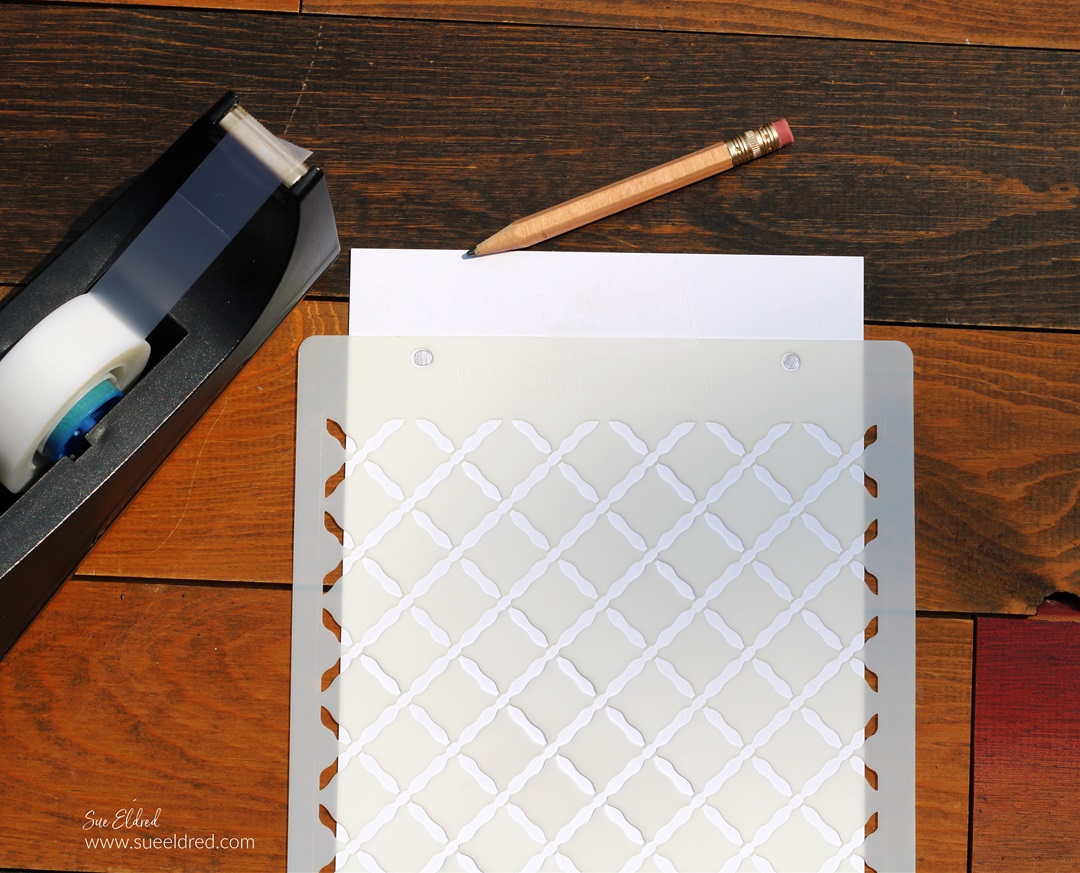
- I started with a Watercolor Paper* base for my card front.
- Cut the paper longer than the stencil.
- Center and tape the stencil onto the paper.
- Using a pencil, fill in the holes to create a guide to line up the remaining stencils.
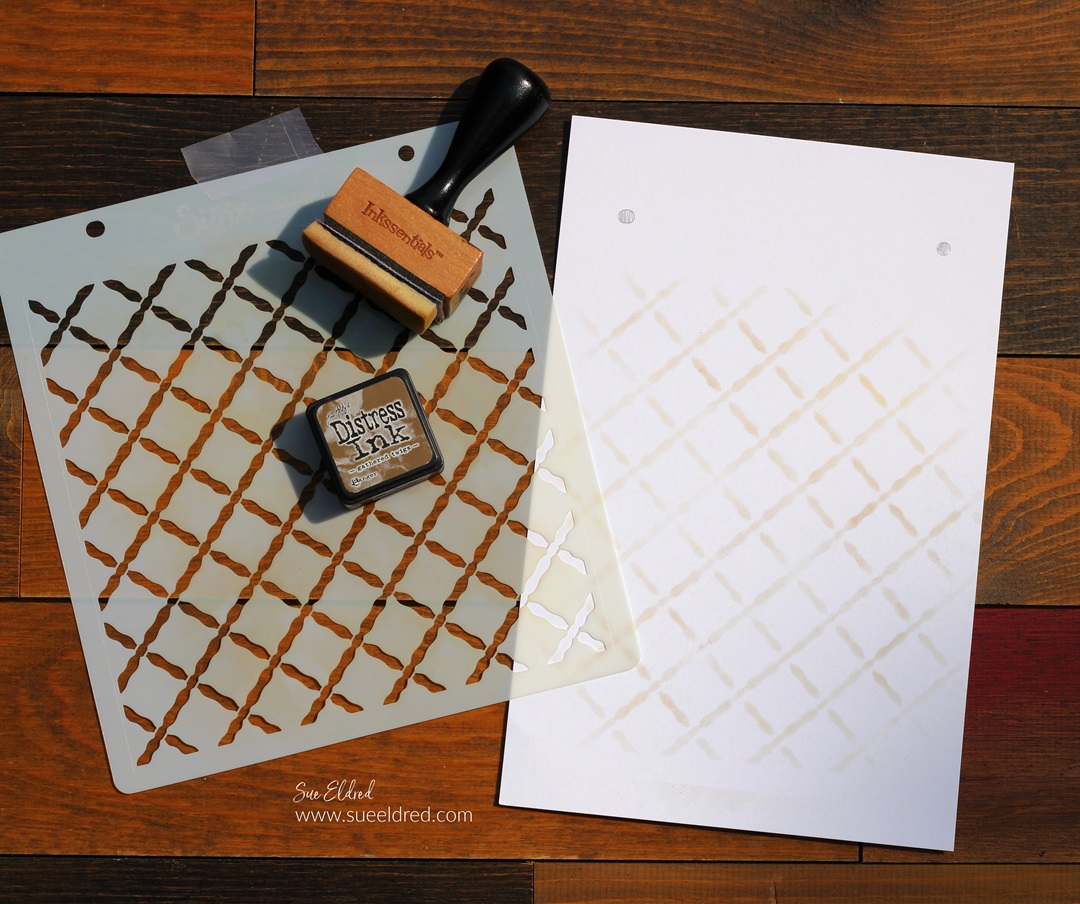
Stencil #1 Lattice Background
- Line up the holes of the lattice stencil with the pencil guide marks.
- Put a piece of tape to hold the stencil in place.
- Rub an Ink Applicator* over the Gathered Twigs Distress Inkpad*. I wanted a subtle background, so I rubbed some of the ink onto scrap paper before using it on the stencil.
- Remove stencil.

Stencil #2 Flowers
- Line up Stencil #2 using the pencil guide marks. Use tape to hold the stencil in place.
- Using an Ink Applicator*, rub Barn Door Distress Ink* onto the flower stencil.
- To add dimension to the flower, add a second complementary color.
- I rubbed Spiced Marmalade Distress Ink* over the flower stencil for contrast.
- Remove Stencil.

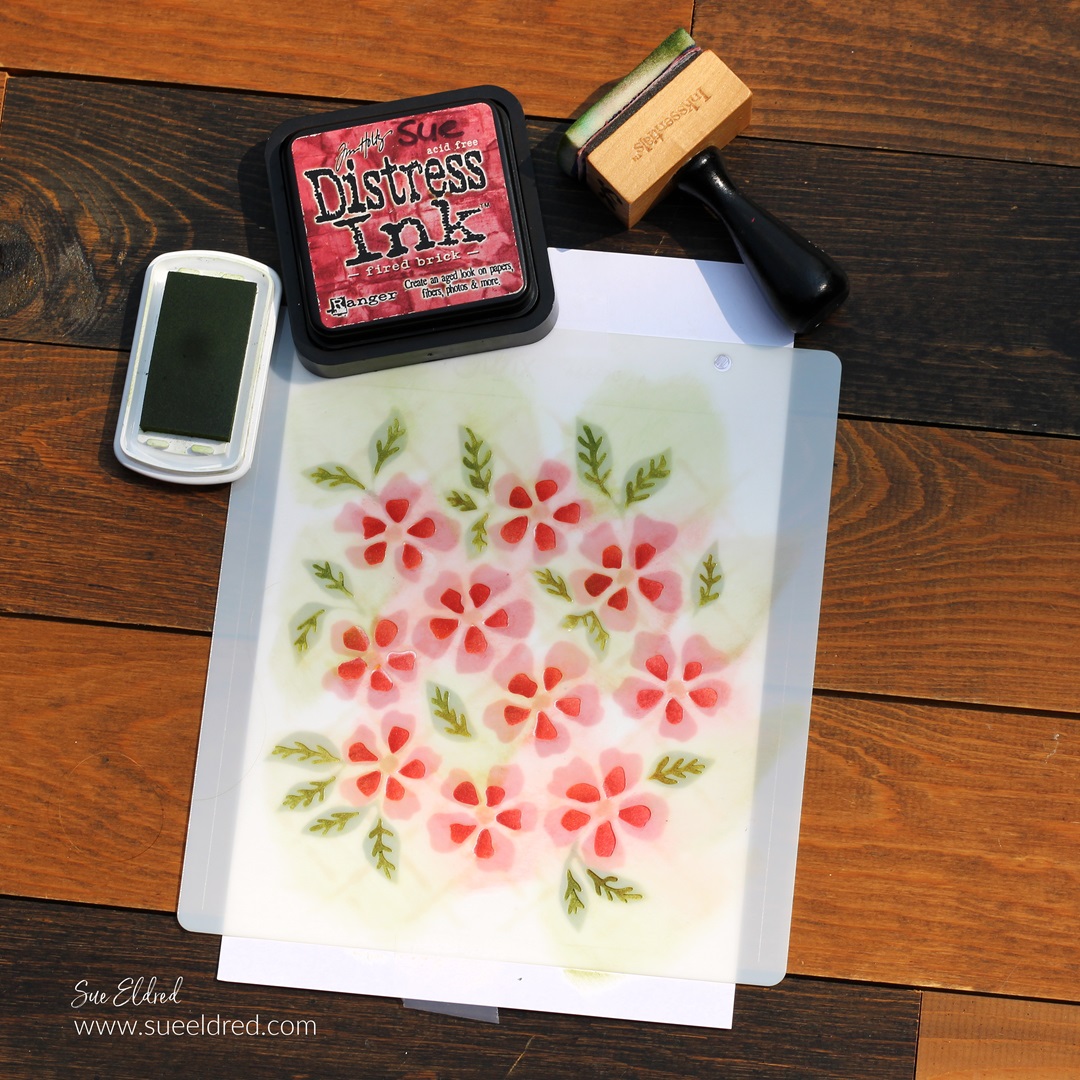
Stencil #3 Leaves
- Line up Stencil #3 using the pencil guide marks. Use tape to hold the stencil in place.
- I rubbed Peeled Paint Distress Ink* over the leaves using the Ink Applicator*. To add dimension, I also used Crushed Olive Distress Ink* on the leaves.
- Rub Scattered Straw Distress Ink* in the center of each flower.
- Remove stencil.

I could have stopped right here after removing the third stencil.
It looks beautiful. But as we all know it’s all about the details.
So, onto Stencil #4 to add the details.
Stencil #4 Details
- Line up Stencil #4 using the pencil guide marks. Use tape to hold the stencil in place.
- Using the Ink Applicator*, I rubbed Fired Brick Distress Ink* onto the center flowers.
- I rubbed Olive Green Dye Ink* over the leaves to create veining.
- Remove stencil.
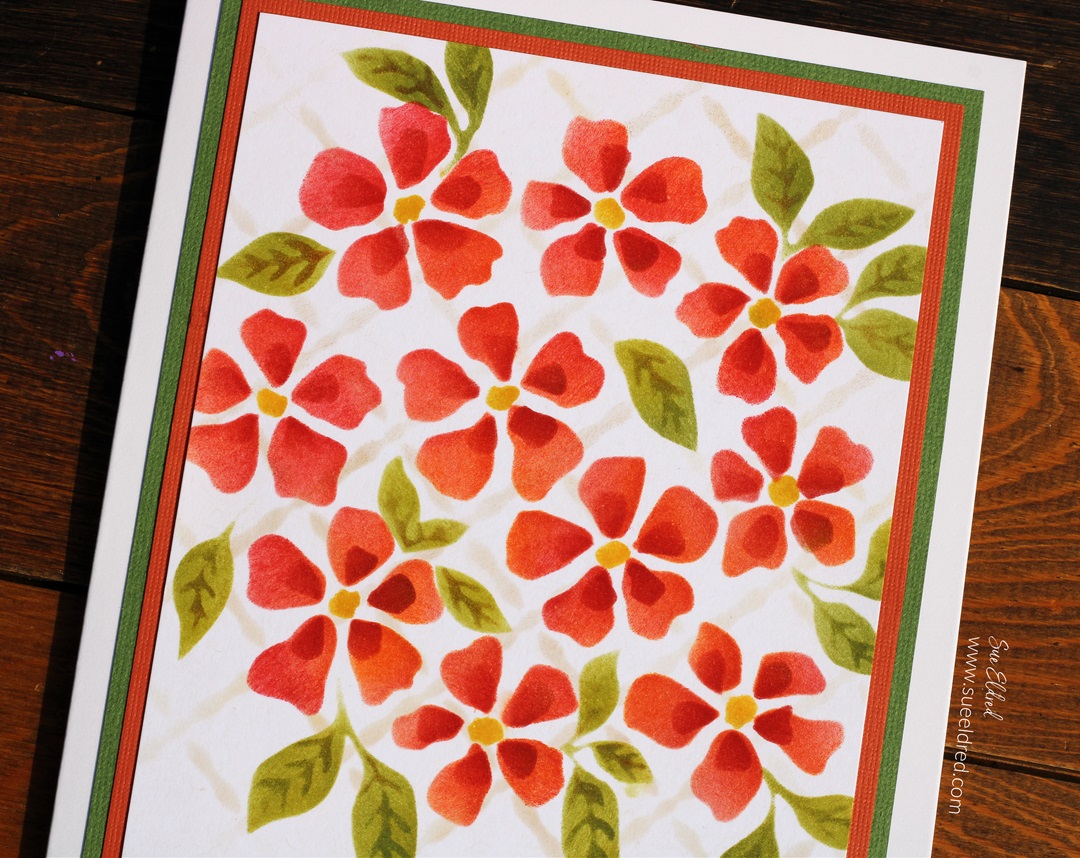
The finished stenciled flowers.
- Cut the stenciled flowers to size and layer onto coordinating cardstock for a beautiful floral card.
You can use the Sizzix Watercolour Flowers & Lattice 4 pc Stencil Set by Eileen Hull* to make cards, scrapbook layouts, mini albums, and so much more.
![]()
Disclosure: This is a sponsored post. As a member of the Eileen Hull Educator Team, I have been provided product in exchange for my creative ideas. The view and opinions are my own.