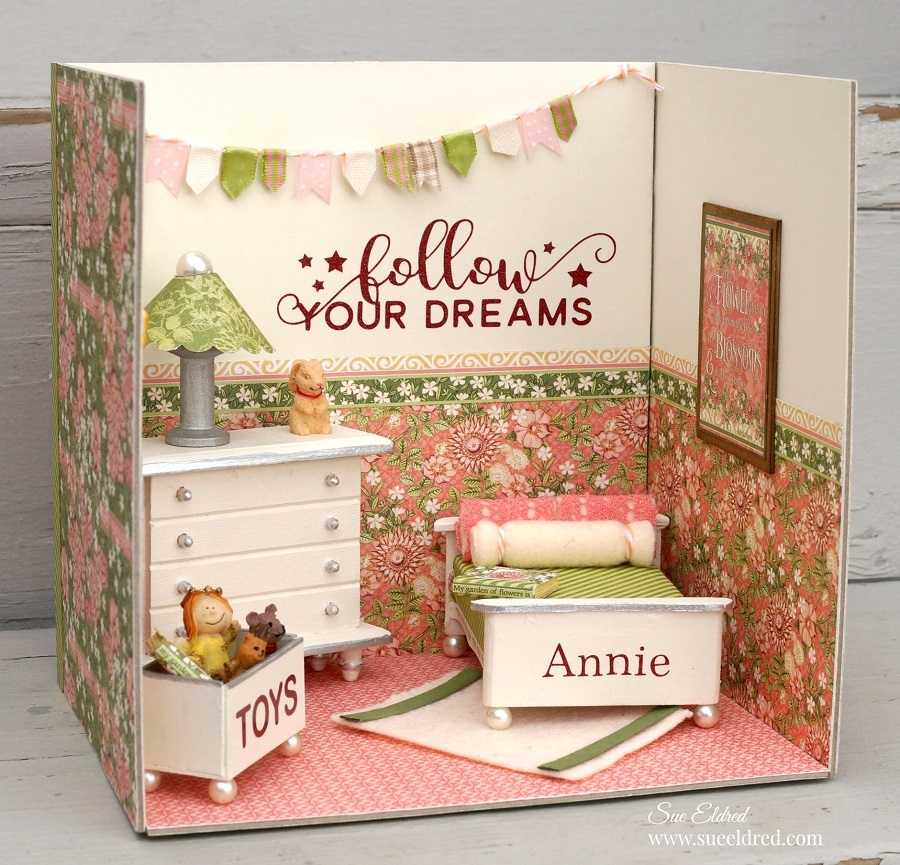
Annie’s Sweet Dream Bedroom
I love working with miniatures and creating little rooms.
I guess…I’m creating the doll house I always imagined as a kid.
For this room, I wanted to create a “mini makeover” for Annie’s Bedroom.
This little room won me third place in the 2019 Fave Crafts Best Blogger Contest.

And now, I can finally share it all with you.
“This is a sponsored post. I have been provided product and compensation in exchange for my creative ideas. The views and opinions are my own.”

Annie’s Sweet Dreams Bedroom Products Used: (*Affiliate Links)
- Graphic 45 Garden Goddess 8×8 Paper Pad*
- Chipboard
- Cream Cardstock
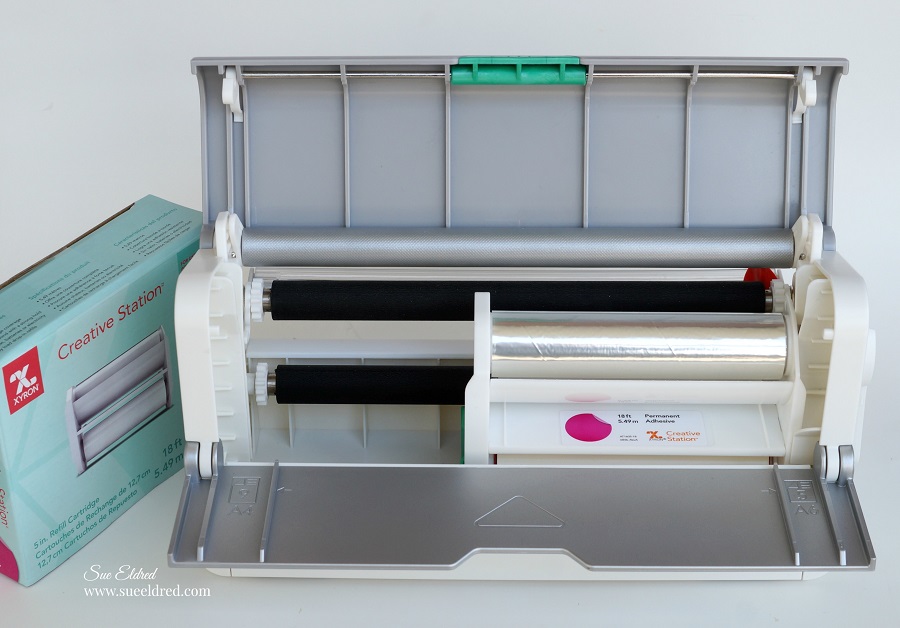
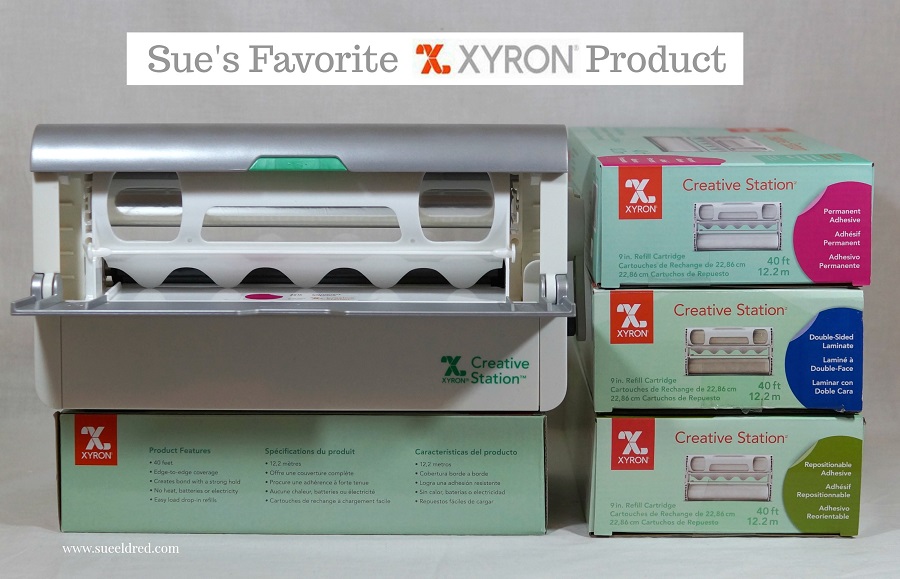
- Xyron Creative Station*
- Xyron Adhesive Eraser*
- Marvy/Uchida Cutting Mat*
and Craft Knife*
- Paper Cutter
- Scissors
- Extra Fine Sanding Block*
- Beacon 3 in 1 Glue*
- StyleTechCraft Dark Red Ultra Metallic Glitter Vinyl*
- StyleTechCraft Chrome Metallic Vinyl*
- StyleTechCraft Gridded Vinyl Transfer Tape*
- StyleTechCraft Vinyl Tools*
- Silhouette Cameo Electronic Die Cutting Machine*
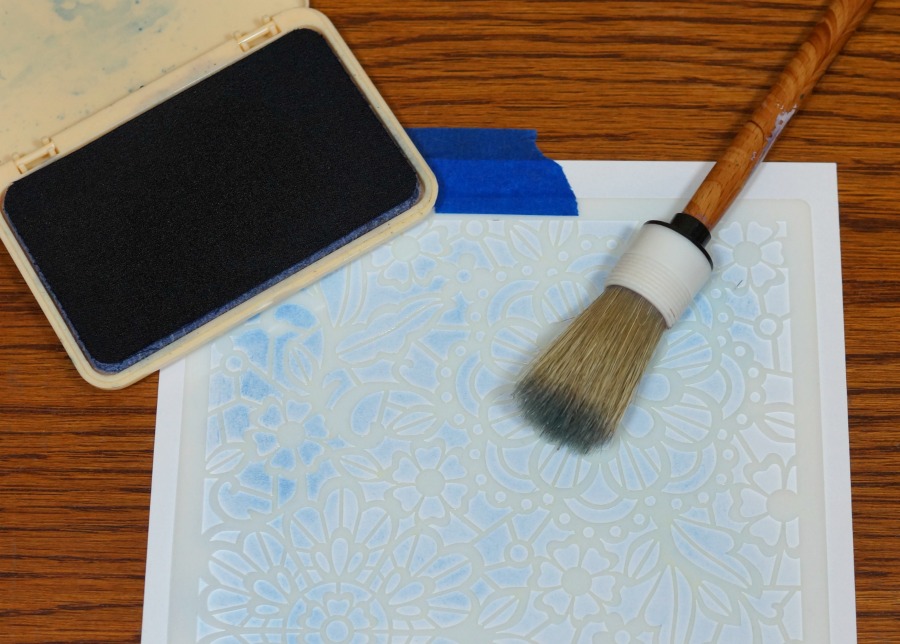
- Distress Ink Pad, Vintage Photo*
- Ink Blending Tool*
- Wood Bed and Dresser from Dollar Tree*
- DecoArt Americana Multi-Surface Satin Acrylic Paint, White Birch*
- Paintbrush
- Marvy UCHIDA 3″ Scalloped Circle Punch*
- DecoColor Premium Silver Leafing Marker*
- Small Wood Spool
- Miniature Christmas Ornaments
- Cream Felt
- Button, lace, ribbon, twine, pearl beads
- Deflecto Ribbon Dispenser*

*Disclosure: This blog uses affiliate links. If you choose to make a purchase using one of the links, I receive a small commission (at no additional cost to you) that helps offset the costs of maintaining this blog. Thanks for your support!

How to make Annie’s Sweet Dreams Bedroom…
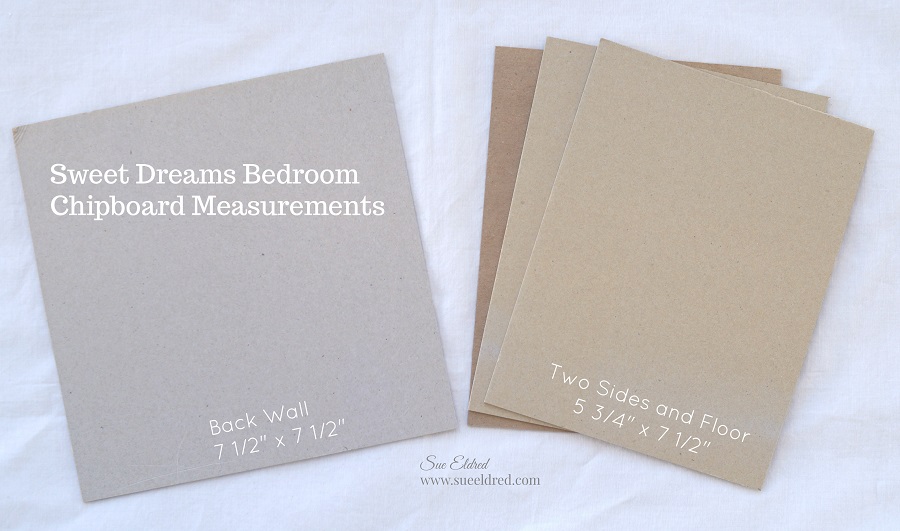
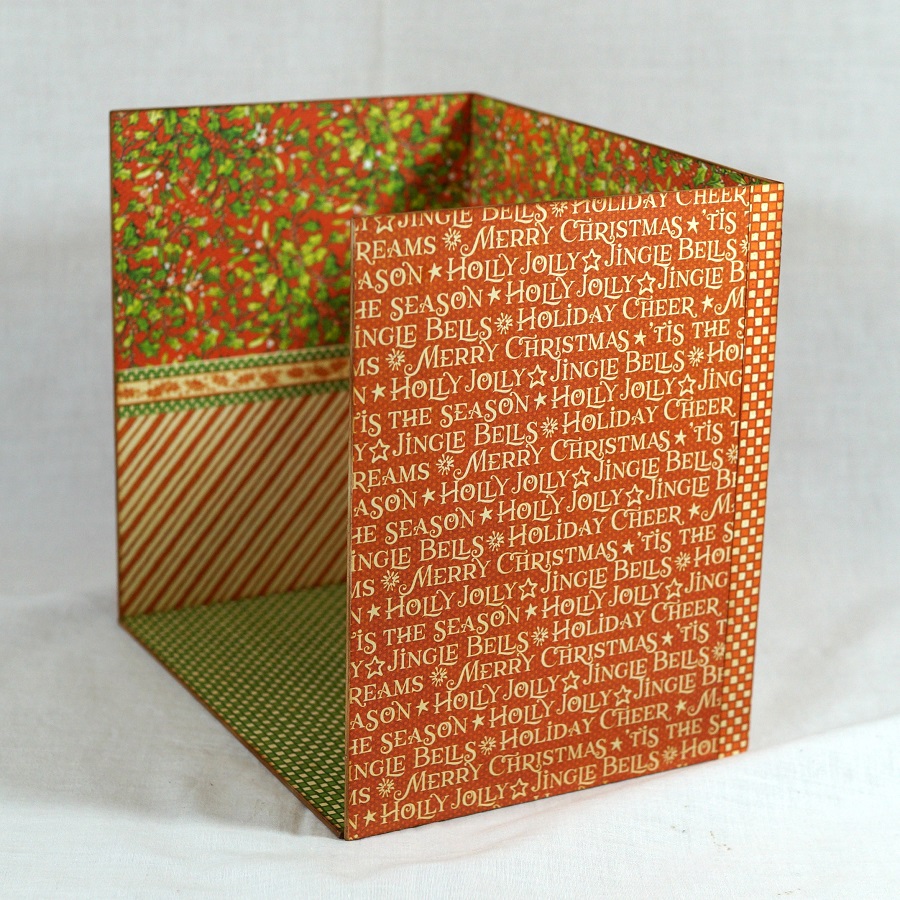
The Bedroom measures 7 1/2″ wide, 7 1/2″ tall and 5 1/2″ deep.
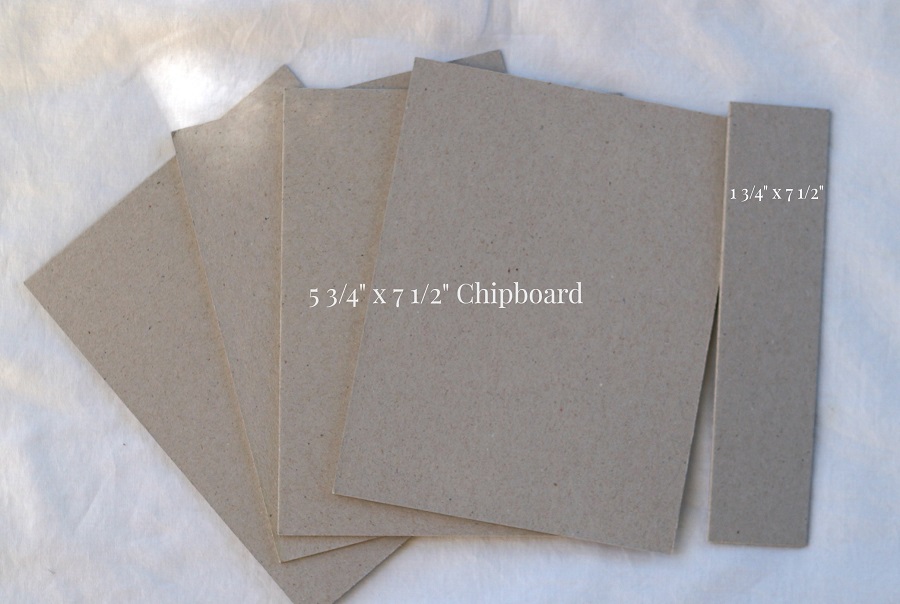
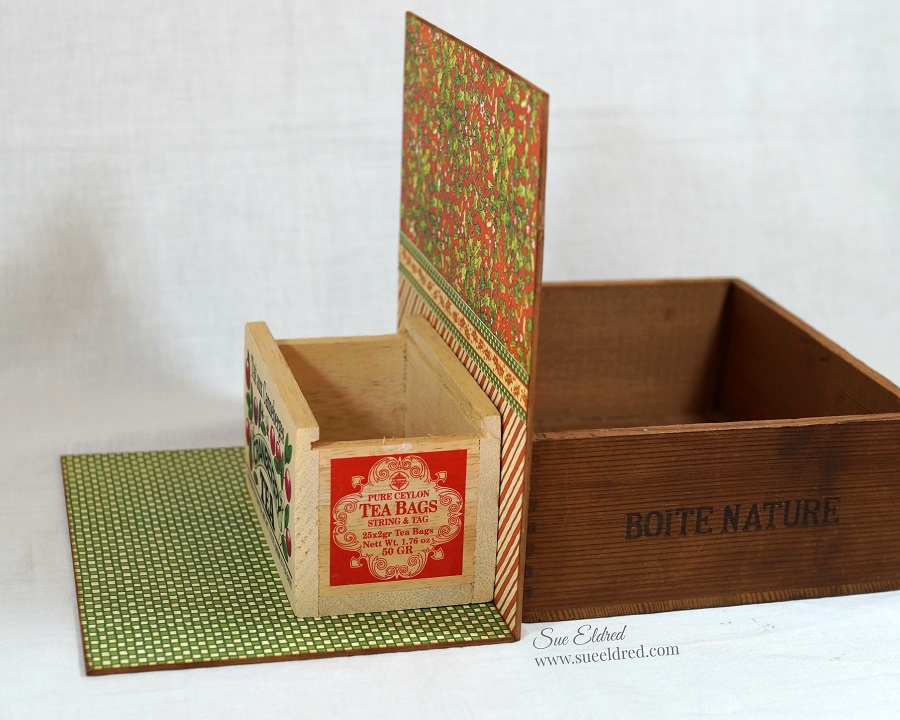
- Cut 3 pieces of chipboard 5 3/4″ x 7 1/2″.
- Cut 1 piece of chipboard 7 1/2″ x 7 1/2″ to use as the back wall.

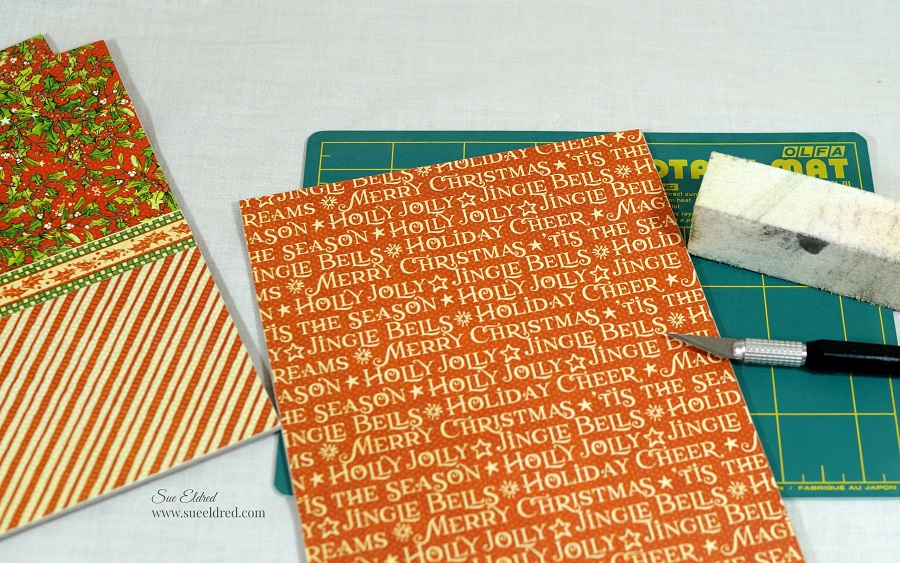
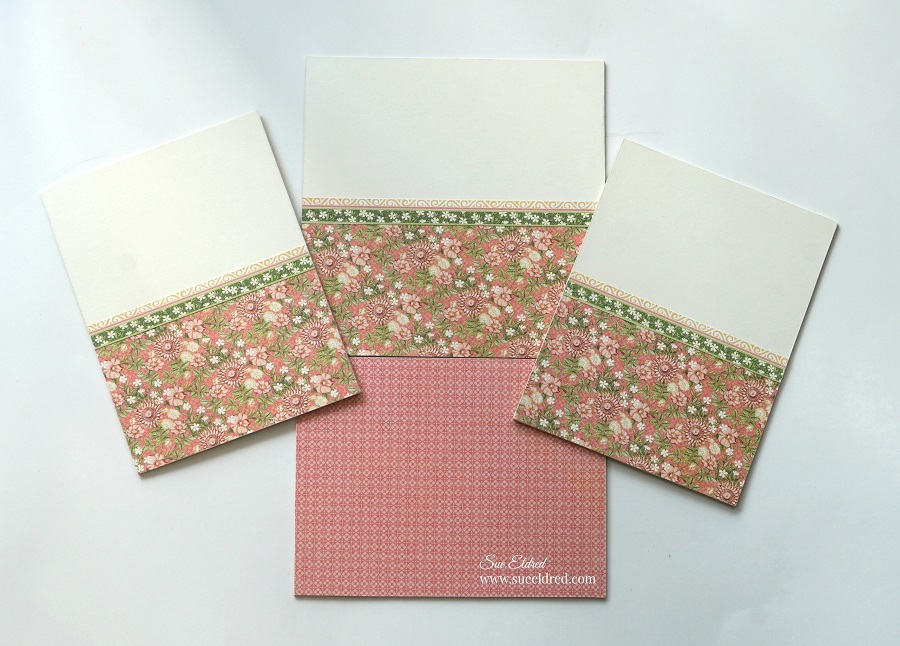
- Cut decorative scrapbook paper from the Graphic 45 Garden Goddess 8×8 Paper Pad*
to use on the floor, walls and outside walls of the room. I like to cut my paper slightly wider than I need so I can trim the edges with a craft knife.
- I used both cardstock and scrapbook paper to cover my walls. For my walls…cut both papers into 3 3/4″ strips.
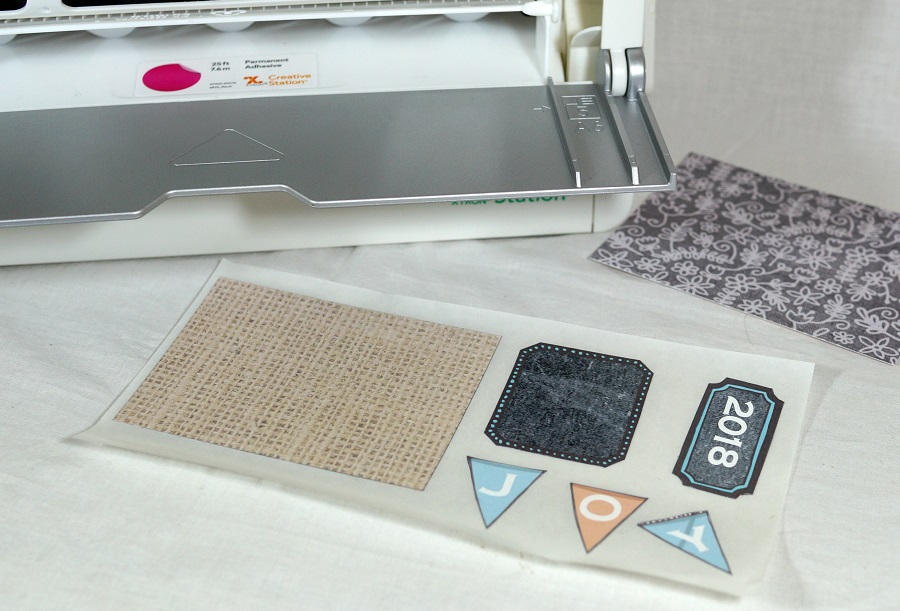
- I cut a small strip of paper from the paper pad for a decorative border.
- I ran each of my strips through the Xyron Creative Station*
.
- Adhere paper to the chipboard.
- Cover back of the chipboard with coordinating scrapbook paper.
The Xyron Creative Station* is perfect for projects like this. I wanted complete adhesive coverage on every corner and edge of the paper. (No wrinkles, no bubbles, easy to use.)
Finished Inside Walls
- Gently sand edges with an extra fine sanding block*
for the perfect edge.

For the Mural on the Wall…
- I used an SVG file and my Silhouette Cameo Wireless Cutting Machine*
to cut and create the words “follow your dreams” using StyleTechCraft Dark Red Ultra Metallic Glitter Vinyl.
- Using the weeding tool, I carefully removed the negative spaces in and around the letters.
- Place a piece of Vinyl Transfer Tape* over the letters.
- Apply words onto the back wall.
- Remove transfer tape.

- Glue the walls together using a good craft glue. I like to use Beacon 3 in 1 Glue*
. I used wood boxes to hold my wall up while the glue dried.

- I added small strips of paper on the back corners for added support.
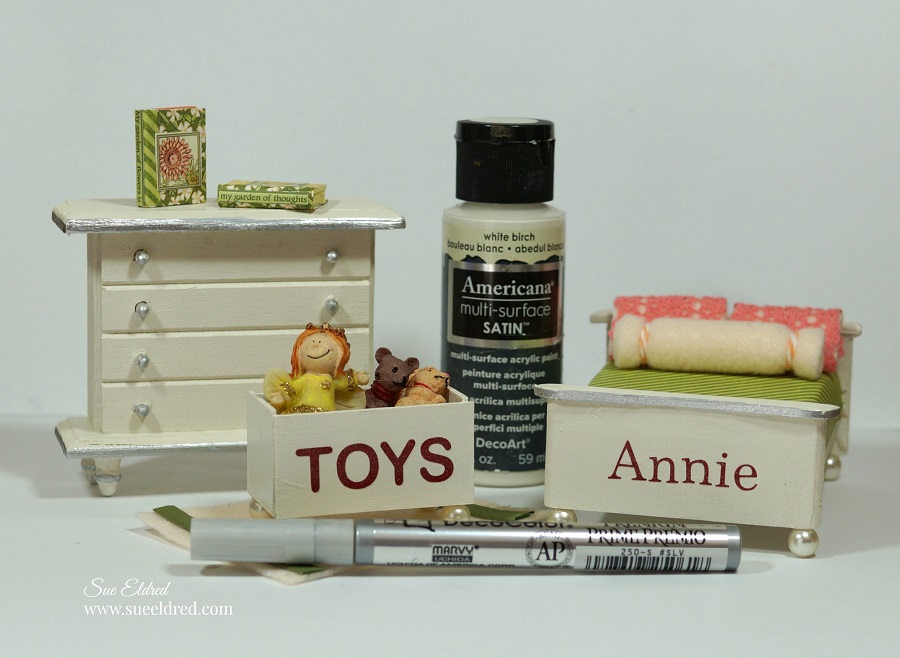
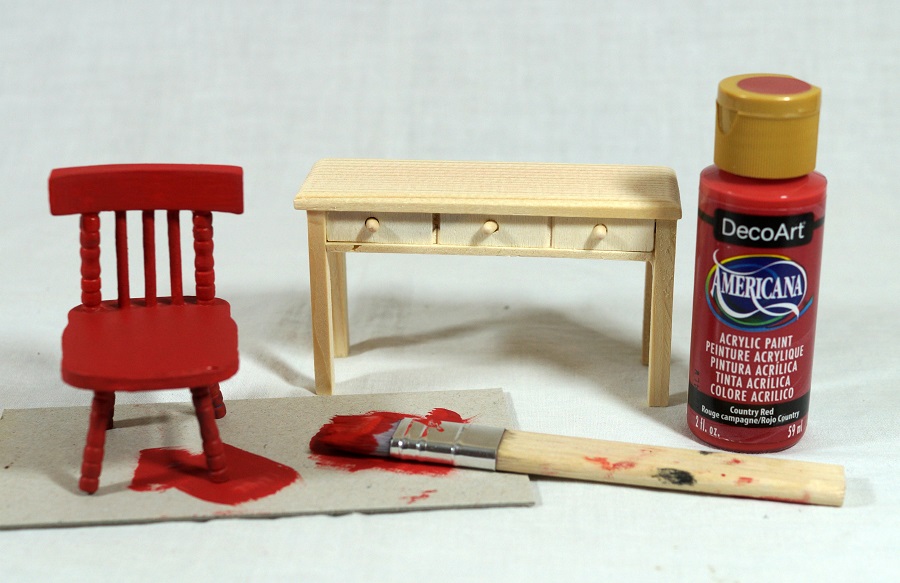
- I purchased inexpensive unfinished doll furniture at Dollar Tree and painted it with White Birch Acrylic Paint*
.
- Accent the edges of the furniture and knobs on the dresser with the Silver Leafing Marker.
- I made a small little toybox out of chipboard and painted it. I added pearl beads to the bottom of the toybox and bed.
- Using StyleTechCraft Dark Red Ultra Metallic Glitter Vinyl* and my Silhouette Cameo* I cut the words “toys” and the name “Annie”. Apply the vinyl onto the toybox and bed the same as the wall.


- To make a mini lamp shade…punch a 3″ scallop circle.
- Trace around a button in the center of the circle.
- Cut out the small circle as shown in the above picture.
- Glue ends of the circle together to form shade.
- Glue shade onto a small painted wood spool.

- Cut small pieces of ribbon and glue them onto a piece of twine to create a small ribbon banner to hang onto the wall.
- Glue Banner onto back wall.
- The Deflecto Ribbon Dispenser*
is great for organizing my ribbon spools.
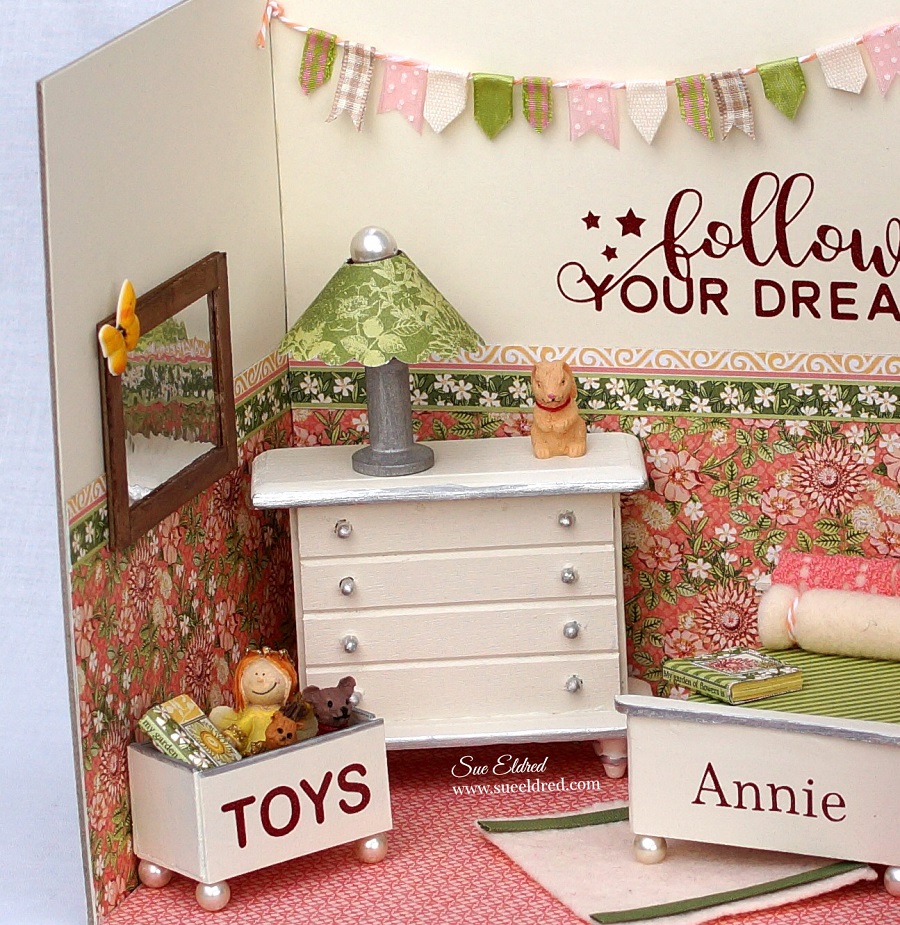
- The mirror was made using a small piece of StyleTechCraft Chrome Metallic Vinyl* I placed onto a small piece of chipboard.
- Cut 1/4″ strips of chipboard and paint brown.
- To create a wood look, ink to the edges of the chipboard with vintage photo distress ink.
- Glue strip onto the front of the Chrome Metallic Vinyl* to create the frame.
- I used small Christmas ornaments for the toys.
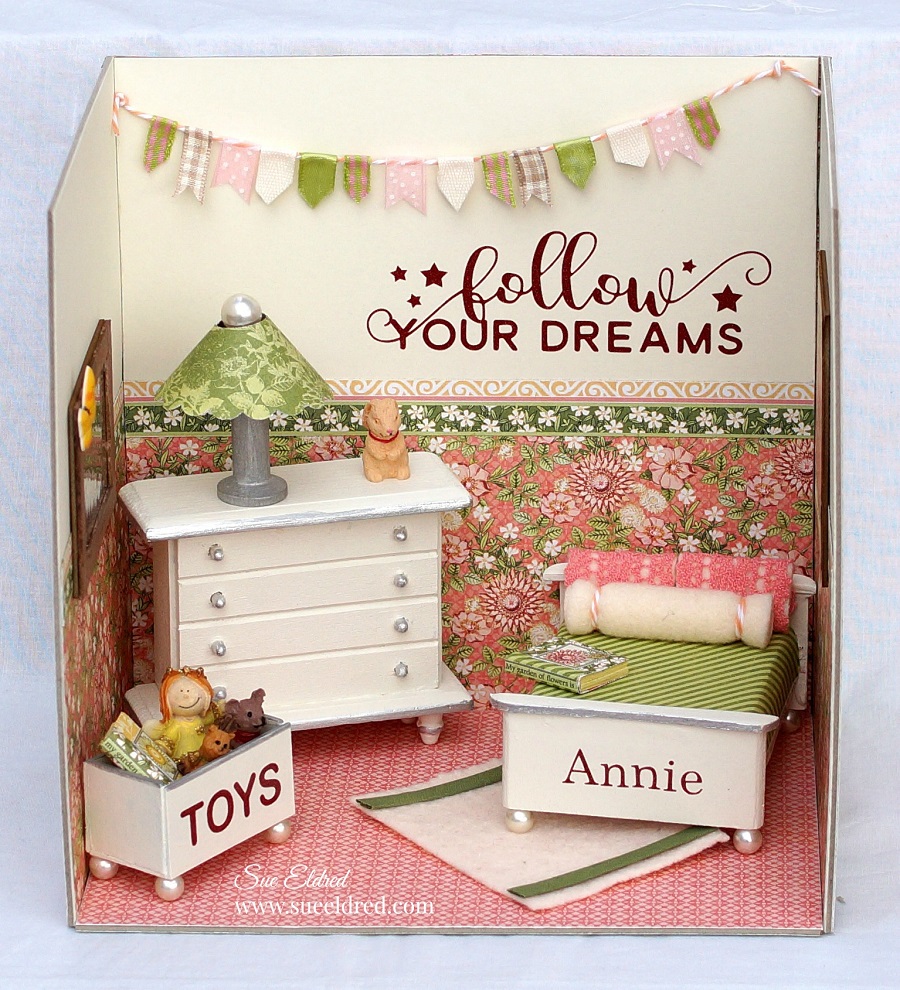
Creating Annie’s Sweet Dreams Bedroom was a labor of love.
With a little imagination and some basic construction, it’s really not hard to do.