
How to Create A Miniature Christmas Room…
Graphic 45 Christmas Magic…Decorating the tree.
I knew as soon as I started working with Xyron that one day I would make a miniature room.
When I got the opportunity to work with Graphic 45’s “Christmas Magic” Collection,
I knew the time had come. (Graphic 45 and Xyron are the perfect combination.)

Here’s What I used to make my Miniature Christmas Magic Room: (*affiliate link)
- Graphic 45 Christmas Magic Paper Pad*
- Xyron Creative Station*
- Xyron Acid-Free Permanent Adhesive Refill Cartridge for the 9-Inch Creative Station*
- Chipboard
- Craft Glue*
- Bottle Brush Trees*
- Mini Plain Wood Dollhouse Furniture*
- Red, White and Brown Craft Paint and paintbrush
- “Vintage Photo” Distress Ink Pad*
- Ink Blending Tool*
- Miniature Frames, Christmas Ornaments and pewter miniatures.
- Cream Baubles Beads*
- Evergreen Craft Stems*
- Craft Knife
- Cutting Mat
- Sanding Block
*Disclosure: This blog uses affiliate links. If you choose to make a purchase using one of the links, I receive a small commission (at no additional cost to you) that helps offset the costs of maintaining this blog. Thanks for your support!
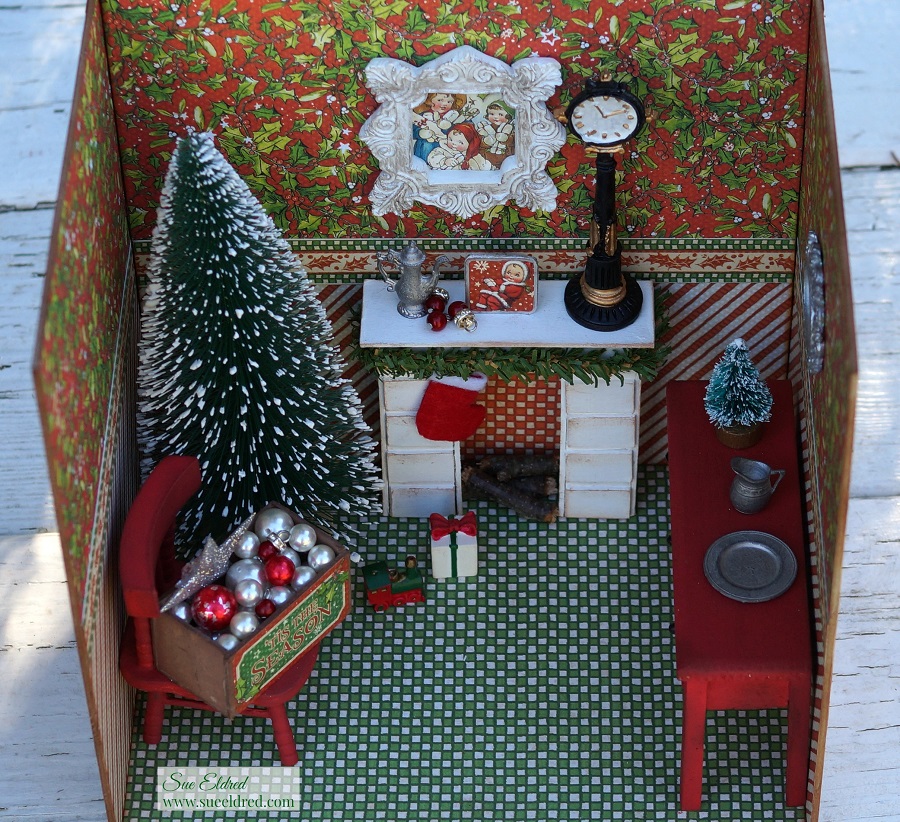
How to make a miniature Christmas Magic Room…
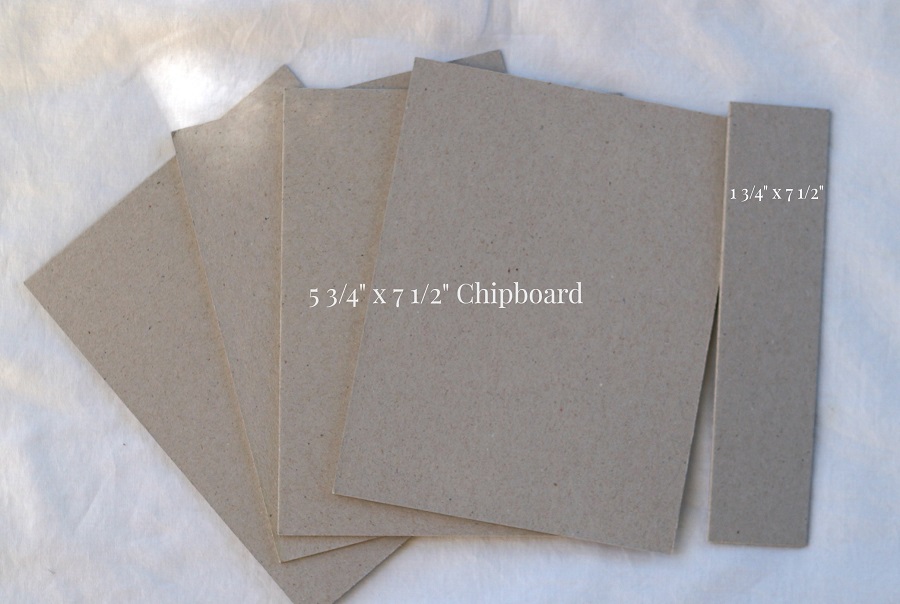
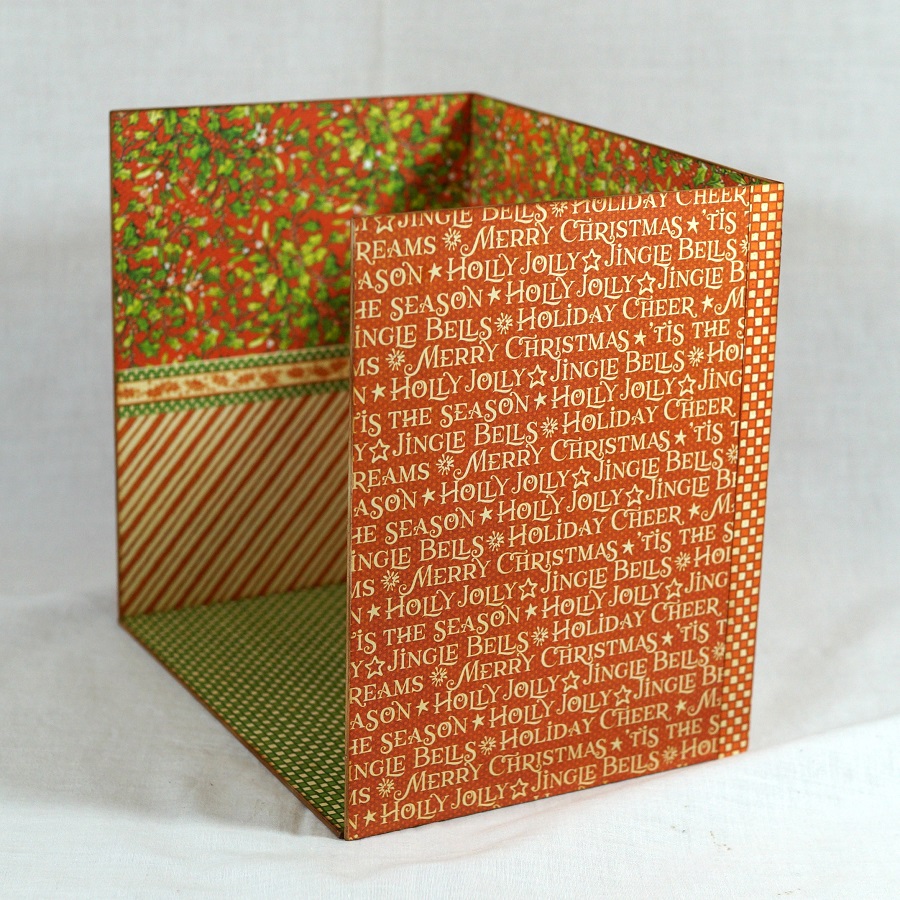
- My Christmas Room is 7 1/2″ wide, 7 1/2″ tall and 5 1/2″ deep. I used 5 3/4″ x 7 1/2″ chipboard pieces. (that’s what I had on hand) You could use a 7 1/2″ x 7 1/2″ piece of chipboard for the back wall instead of piecing it together like I did.

- I cut paper for my walls into 3 3/4″ strips.
- I cut a small strip of paper for my decorative border.
- I ran each of my strips through the Xyron Creative Station*
.
- Adhere paper to the chipboard.
The Creative Station is perfect for projects like this. I wanted complete adhesive coverage on every corner and edge of the paper. (No wrinkles, no bubbles, easy to use.)
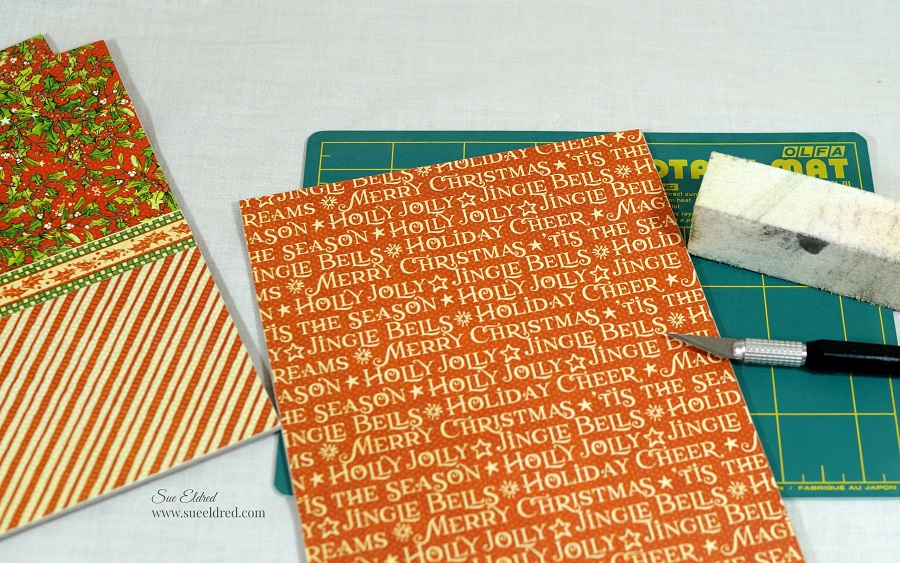
- I cut my paper slightly wider than I need so I can trim the edges with a craft knife.
- Gently sand edges with a extra fine sanding block for the perfect edge.

- Ink the edges of the chipboard with “Vintage Photo” Distress Ink Pad* using a Ink Blending Tool*
.
- Glue the walls together using a good craft glue. I used wood boxes to hold my wall up while the glue dried. (If you have a better idea I’d love to hear it.)
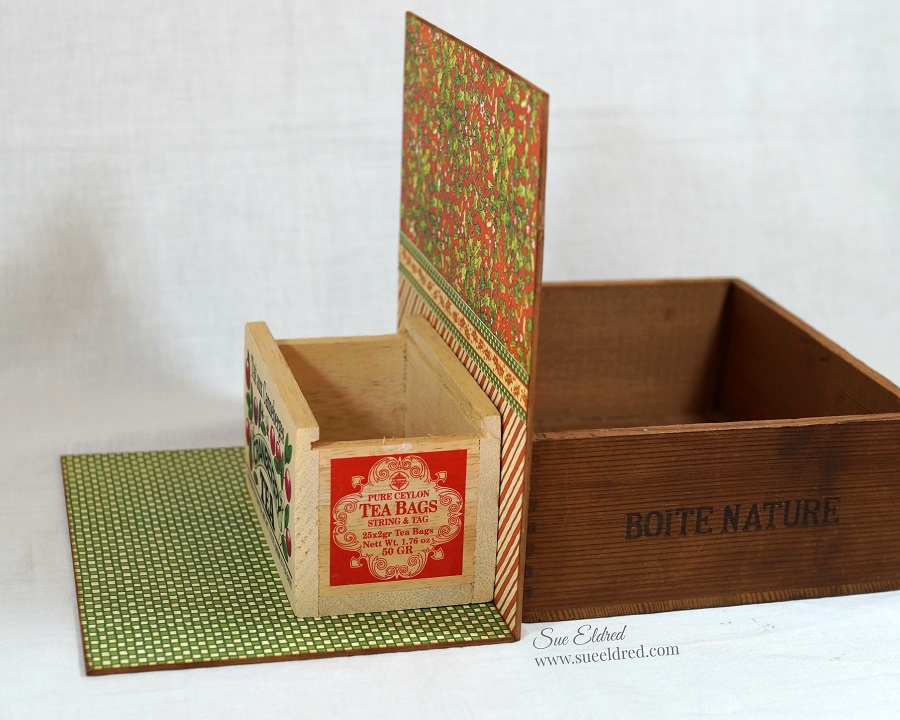
- I covered the back of my room with coordinating paper and added small strips of paper on the back corners for added support.

- I made a small fireplace out of chipboard. (I needed a place to hang my stocking)
- Paint the fireplace with white paint. Give it a vintage feel by rubbing a little ink on the edges.
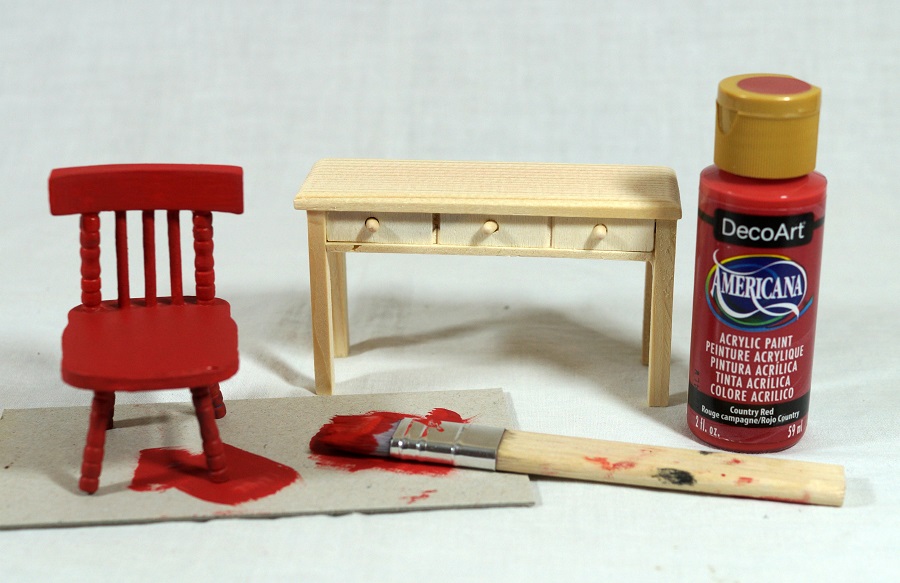
- I purchased inexpensive unfinished doll furniture at the Dollar Tree* and painted it red.
- For a vintage look add ink to the edges of the furniture.


- I used stickers from the collection kit to make little framed art.
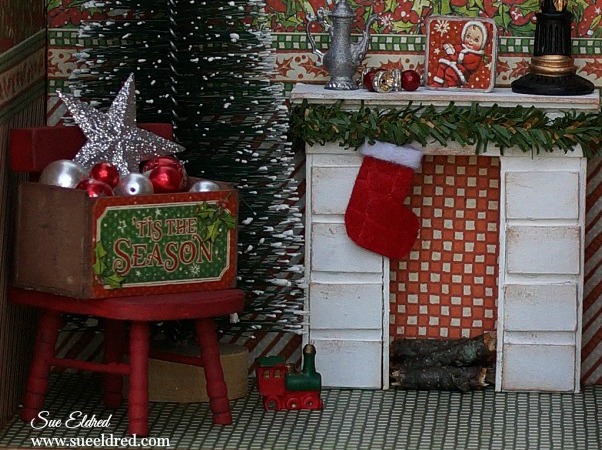
- I made a small little crate to hold my “ornaments” out of chipboard and painted it brown. I added a small “tis the season” sticker on the front.

- I created a small picture using a sticker and chipboard and a small felt stocking to add to the mantel.
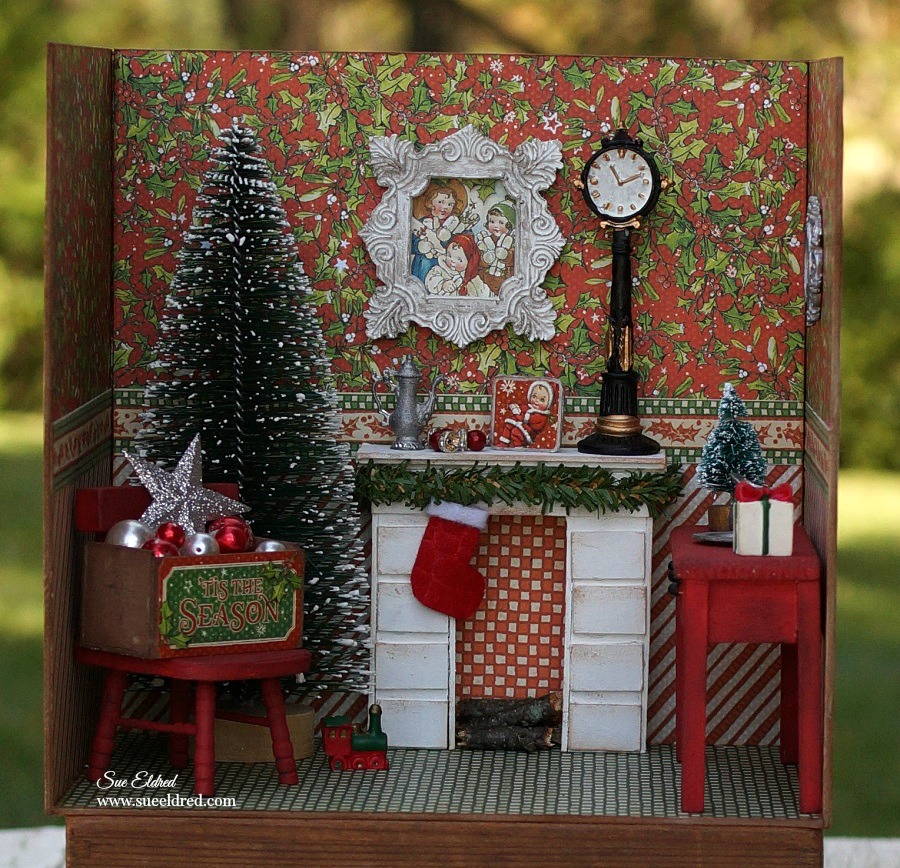
I have spent way to much time rearranging the furniture and playing with it.
It was a real labor of love. (and I loved every minute of it)

“This is a sponsored post. As a member of the Xyron Design Team I have been provided product and compensation in exchange for my creative ideas. The views and opinions are my own.


Oh my gosh,Sue. That’s adorable!! You come up with some of the most creative ideas!!!!!
Thank you Mary. It was a fun project to make.
this is darling. My mother gave my husband directions
on building the North Pole. it has the barn for the
reindeer, different workshops, the toy rooom, etc.
It is unbelievable what the two of them came up
with. It’s a wonderful project that I have as a
memory of both of them. thanks for sharing.
Such a sweet memory. I’m sure you enjoy it every Christmas.
Omg….i would love making this. You did a great job
This is so cute
Love this
Thank You Linda.