Welcome Spring with a Cute Bunny Inspired Wreath.
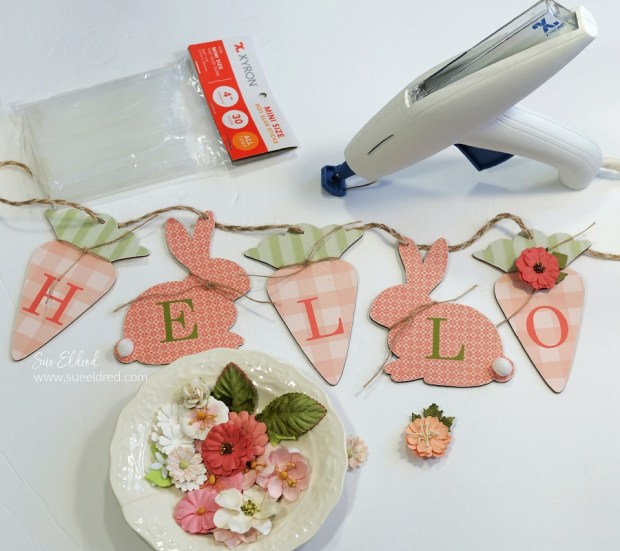
Using a few inexpensive wood cut-outs from Dollar Tree I created a fun Spring Banner to hang
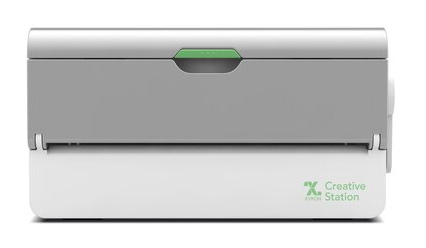
on my wreath. With the help of my Xyron Creative Station*, it was quick and easy to make.

Materials Used: (*affiliate links)
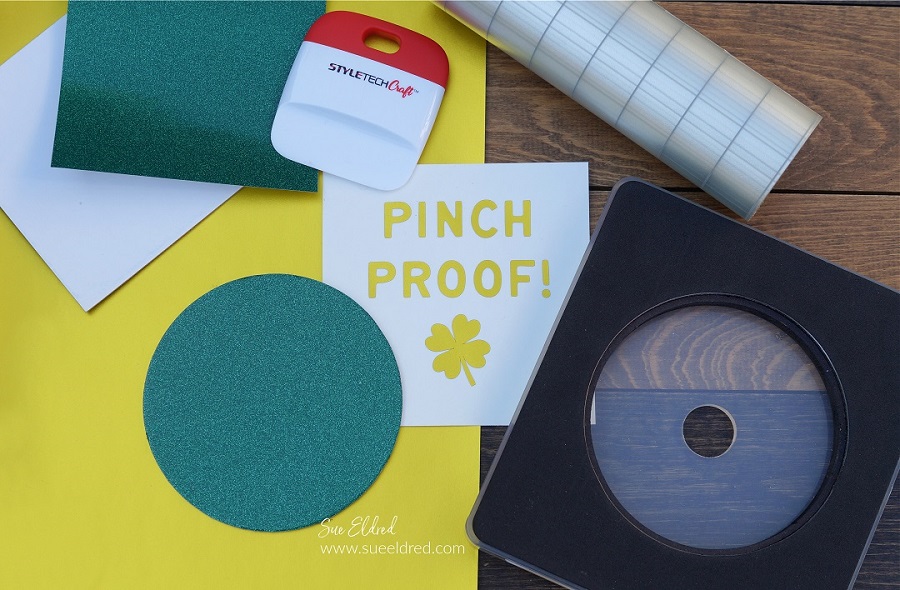
- Xyron Creative Station*
- Xyron Mini Multi-Stick Glue Gun
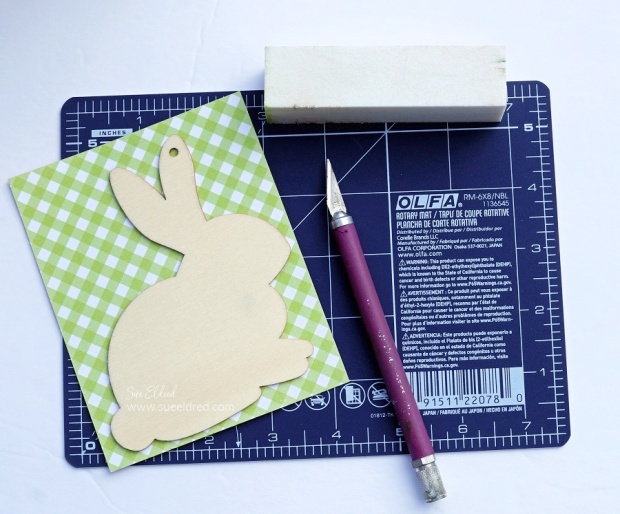
- Bunny and Carrot Wood Cut-out from Dollar Tree
- CF230010 Echo Park Coffee & Friends 4″ x 6″ Journaling Cards (green stripe)*
- CR230002 Echo Park Coffee & Friends 3″ x 4″ Journaling Cards (peach gingham)*
- Orange Patterned Paper from Graphic 45’s Garden Goddess Collection
- Twine
- Small Flower Embellishments
- Small White Pom Poms
- Olfa Blue 6″ x 8″ Cutting Mat*
- Craft Knife*
- Sanding Block* or Emery Board
- Vinyl Letters


*Disclosure: This blog uses affiliate links. If you choose to make a purchase using one of the links, I receive a small commission (at no additional cost to you) that helps offset the costs of maintaining this blog. Thanks for your support!

Directions:
- Put the paper design side up on the Xyron Creative Station* crank the handle to run the paper through the machine. As it moves through the Xyron Creative Station it adds adhesive to the back side of the paper. Easy to use and it doesn’t need any electricity.


- Lay wood cut-outs onto the adhesive side of the paper.
- Cut around the shape with a craft knife.
- Sand the rough cut edges of the shape with a sanding block*. You can use an Emory board to get into small places to sand.
- String the finished wood pieces onto a piece of ribbon or twine.
- I used the New Xyron Multi-Stick Glue Gun to add the flowers and leaves embellishments.
- One of my favorite features of the New Xyron Multi-Stick Glue Gun is that you can add up to three glue sticks so that you don’t have to keep reloading while you work.
- FYI…I also added a bit of hot glue strategically under the wood pieces to help keep them from twisting on the twine.
- I used letters cut from StyleTechCraft adhesive vinyl to spell the word “Hello”. You could also use chipboard letters or letter stickers.


“This is a sponsored post for Xyron. I have been provided product and compensation in exchange for my creative ideas. The views and opinions are my own.