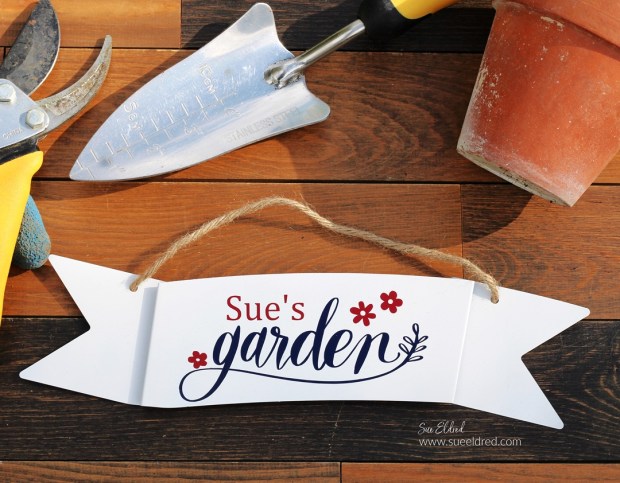
How to make a Personalized Farmhouse Garden Sign.
The “Garden sign” is a quick and easy Dollar Tree project.
Now that garden season is upon us, my mind is distracted with all things gardening.
I will start planting next week, and I can’t wait.
In anticipation of this year’s garden, I created a garden sign
using an inexpensive galvanized banner purchased at Dollar Tree*.
I made it with a traditional red, white, and blue color scheme.
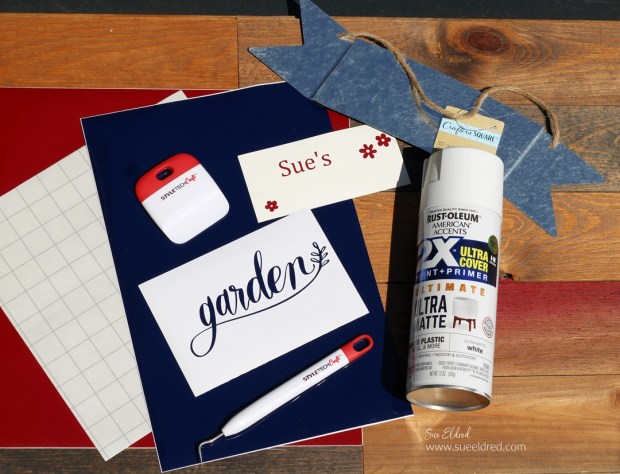
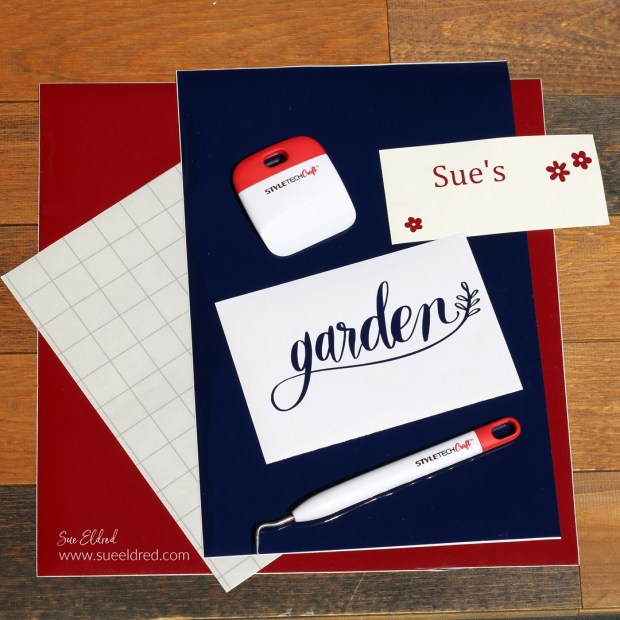
Materials Used: (*affiliate links)
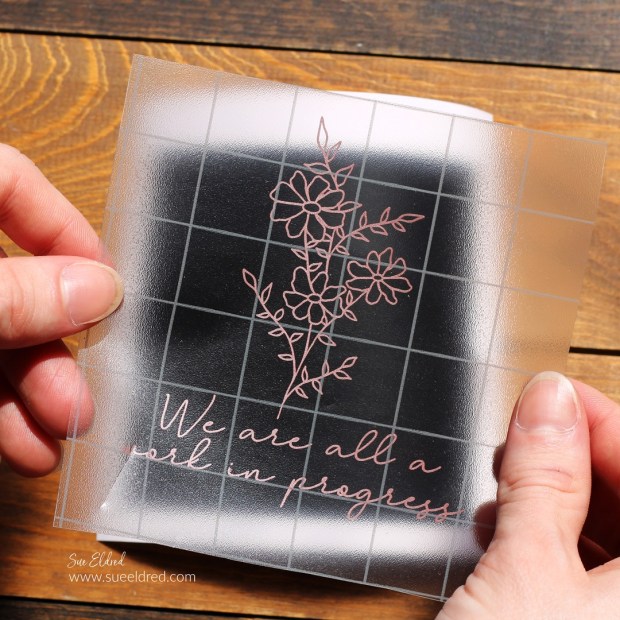
- StyleTechCraft Dark Blue and Dark Red Glossy Craft Vinyl*
- StyleTechCraft Wedding Pen*
- StyleTechCraft Vinyl Transfer Tape*
- galvanized metal sign from Dollar Tree*
- White Rustoleum American Accents 2x ultra cover*
- Silhouette Cameo 4 Electronic Die Cutting Machine*
- “Garden” SVG cut files from The Silhouette Store

StyletechCraft products brought to you by ATSM Craft*
*Disclosure: This blog uses ads and affiliate links. If you choose to make a purchase using one of the links, I receive a small commission (at no additional cost to you) that helps offset the costs of maintaining this blog. Thanks for your support!

Directions:
- I picked up an inexpensive galvanized banner at Dollar Tree to use as the base of my sign.
- Paint both sides of the banner with White Rustoleum American Accents 2x ultra cover*.
- One coat of paint was all that I needed.

Buy Your Crafting Supplies Now at Dollar Tree starting at $1.25!
- Using the Silhouette Cameo Electronic Die-Cutting Machine* and the “garden” SVG file from The Silhouette Store, I created a design for the banner.
- I cut the word garden using StyleTechCraft Dark Blue Glossy Craft Vinyl*.
- To make the banner personalized, I chose a font that complimented the “garden cut file” and cut my name using StyleTechCraft Dark Red Glossy Craft Vinyl*.
There are so many great colors of StyleTechCraft Glossy Craft Vinyl to choose from.

- I removed the extra vinyl in and around the image words using a Vinyl Weeding Pen*.
- Lay the StyleTechCraft Vinyl Transfer Tape* over the vinyl words and gently rub with a vinyl scraper tool.
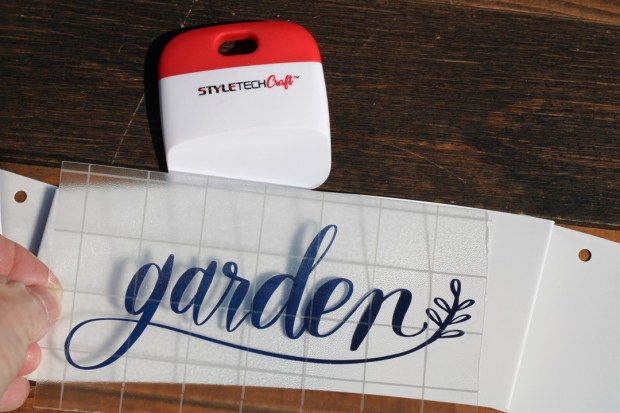
- Remove the vinyl from its white protective layer and place onto the banner.
- Rub over the vinyl with the scraper tool to transfer the vinyl onto the banner.
- Gently lift the transfer paper from the vinyl.
FYI…the transfer paper is reusable.
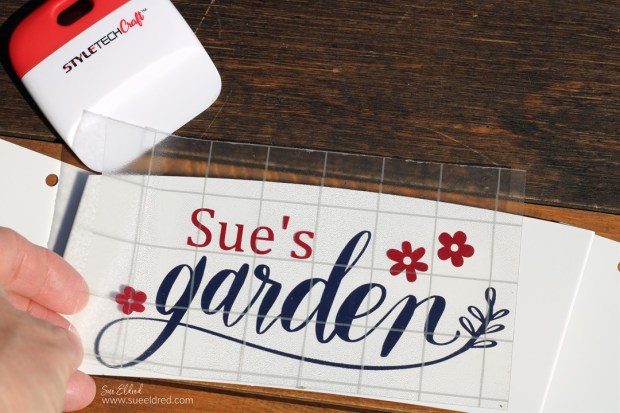
- Line up the second layer over the first.

- Gently remove transfer paper from the banner.
- Allow the vinyl to cure for 72 hours before using.
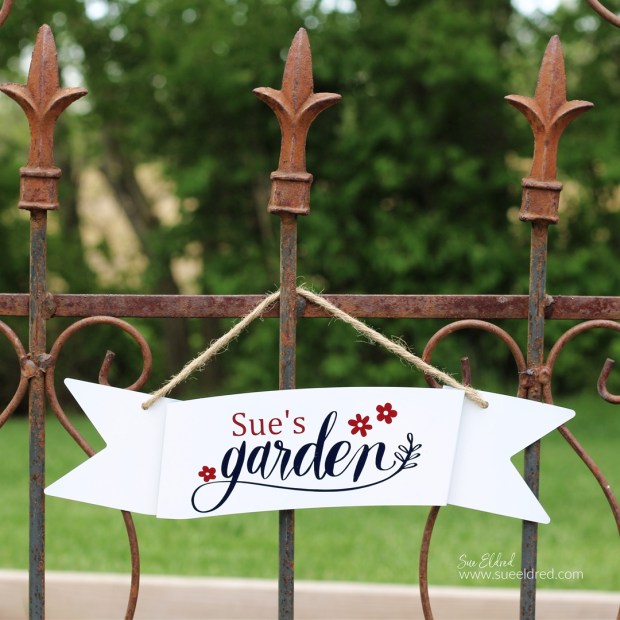
The vinyl on the sign will hold up to the weather and looks great in my garden.
![]()
“This is a sponsored post. As a member of the StyleTechCraft Design Team I have been provided product and compensation in exchange for my creative ideas. The views and opinions are my own.