
Add a little glam this Spring with this cute Gold Bunny Silhouette Pillow.
It’s an easy project to make. Even if you’re a simple sewer, like me.
The Bunny reminds me of a Lindt Gold Foiled Chocolate Easter Bunny*,
and who doesn’t like that?
Materials Used to Make the Gold Bunny Pillow: (*affiliate links)
- Gold Flex Turbo Heat Transfer Vinyl* (from StyleTechCraft)
- StyleTechCraft Vinyl Weeding Tool*
- Silhouette Cameo 4 Electronic Die Cutting Machine*
- SVG Files from The Silhouette Store
- Fabric
- Sewing Machine*
- Poly-Fil®*
- ¼” Gold Ribbon*
- Iron*

StyletechCraft products brought to you by ATSM Craft*
*Disclosure: This blog uses ads and affiliate links. If you choose to make a purchase using one of the links, I receive a small commission (at no additional cost to you) that helps offset the costs of maintaining this blog. Thanks for your support!

How to make the Gold Silhouette Bunny Pillow:
- Choose your fabric. Cut the fabric into two squares or rectangles of equal size. (I cut my cream fabric to 14″ x 14″ to make a 12″ pillow.)
- Place the two fabric pieces together right-side in.
- Sew the edges together, leaving a 2-inch opening along one side.
- Turn the pillow right-side out.
- Fold the raw edges in and press them flat.
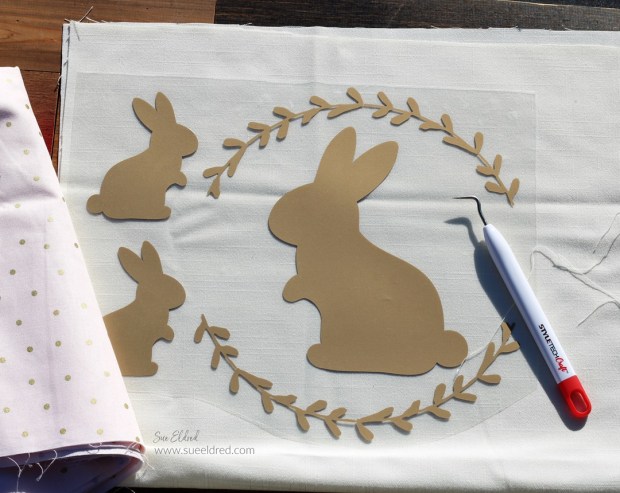
- Using the Silhouette Cameo Electronic Die-Cutting Machine* and an SVG file from The Silhouette Store, I created a design for the pillow.
- Cut the design using Gold Heat Transfer Vinyl* making sure to mirror the image.
- Place the shiny side down on the cutting mat.
- After you’ve cut the design, weed the excess material away from the design, leaving only the parts you want to transfer.
- Position the design on your fabric. Use an iron or a heat press to apply heat and pressure to the design, following the manufacturer’s instructions.
- Peel off the transfer tape.
- Stuff the pillow with Poly-Fil®* and sew the opening closed.
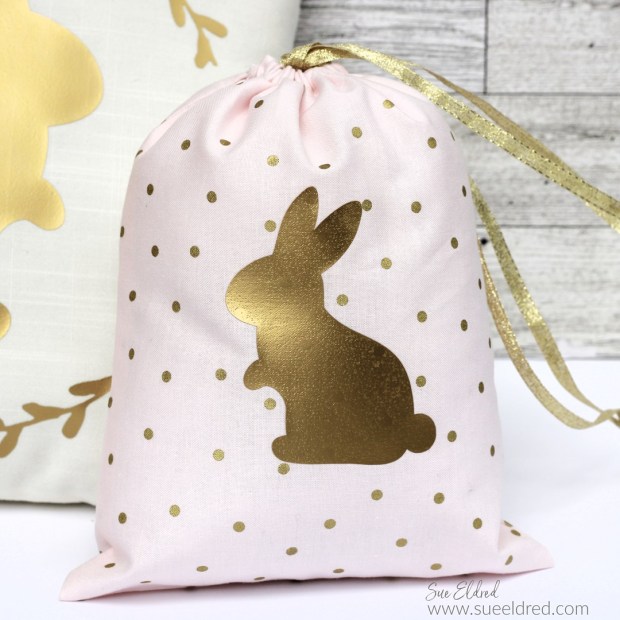
I knew a head of time that I wanted to make a couple of small treat bags. I decreased the size of the bunny and cut it at the same time as the pillow design.
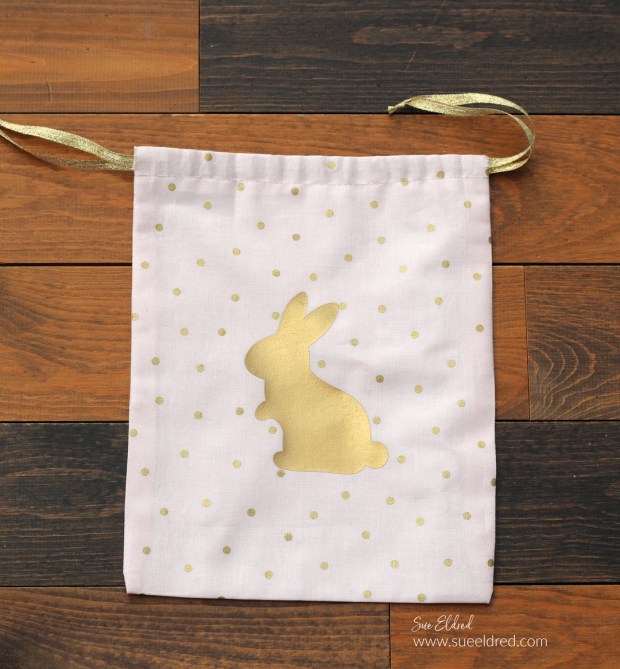
How to make the Bunny Treat Bag:
- Cut a piece of gold polka dot fabric approx. 10″ x 14″.
- On both ends of the fabric, fold down approx. 1″ and sew a seam across the top. That should leave you with a 3/4″ pocket.
- Fold the material in half and sew the remaining sides closed.
- Trim excess material on the seams and turn the fabric inside out to reveal the bag.
- Iron the gold HTV bunny on the front of the bag. (see above directions)
- Cut two small slits on the top pocket of the bag on each end.
- Cut two 24″ pieces of gold ribbon.
- Attach a small safety pin to the end of a piece of ribbon. Thread the ribbon through the top of the bag, remove the safety pin, and knot the ribbon.
- On the opposite end of the bag, thread the second piece of ribbon through.
- Pull both ends of the ribbon to gather and close the bag.
With all the warm weather we’ve had lately, Spring Fever has hit me pretty hard.
I’ve completely rid my decor of anything resembling Winter.
I’m ready for Spring, Bunnies, and Flowers!

![]()
“This is a sponsored post. As a member of the StyleTechCraft Design Team I have been provided product and compensation in exchange for my creative ideas. The views and opinions are my own.
