Gift Giving with Joy

A Blanket for Peyton…

Make a simple gift personal by adding a little “Joy” to your gift with iron-on embroidered letters.

You will need:

Directions:

  1. Set iron to cotton setting, approx. 350° or follow blanket care label.
  2. Remove letters from sheet.  Position letters with shiny side down on blanket.
  3. Cover letters with a fine cloth.  With firm pressure iron cloth over the letters for 25 seconds.
  4. Turn blanket over and iron the back of the letters for 25 seconds.  Allow to cool for 1 minute before handling.
Look for Joy® iron-on embroidered letters and floral appliqués at your local craft store.

“This is a sponsored post.  As a member of the Joy® Design Team I have been provided product and compensation in exchange for my creative ideas.  The views and opinions are my own.

Shop Your Fav Brands at Scrapbook.com

*Disclosure:  This blog uses ads and affiliate links.  If you choose to make a purchase using one of the links, I receive a small commission (at no additional cost to you) that helps offset the costs of maintaining this blog.  Thanks for your support!

Storing Guy Stuff with Style

Getting to the nuts and bolts of Guy Storage.

Just because it’s in the Garage doesn’t meant it can’t have a little style.

After watching every episode of Tidying Up and a few episodes of Hoarders,

I’ve got the urge to organize everything.

I’ve been going through the house bit by bit (not quite the Marie Kondo way).

It’s going to take some time.

There are so many storage options out there.

When it comes to organizing all the bits and pieces out in the garage,

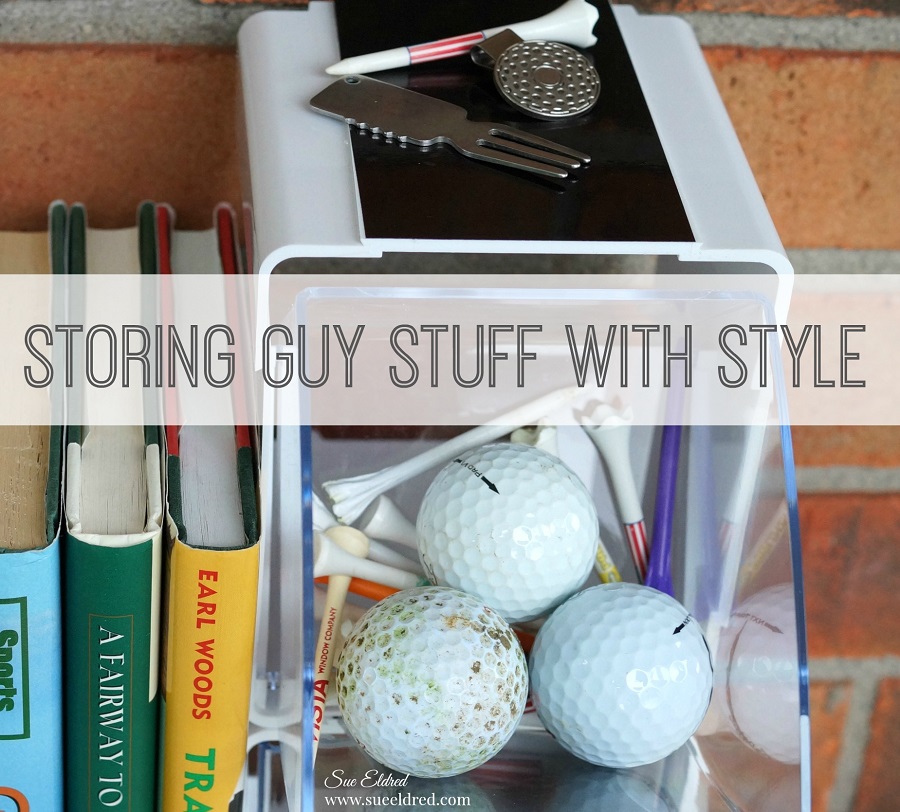
I’m a fan of Deflecto’s Tilt Bin Storage.

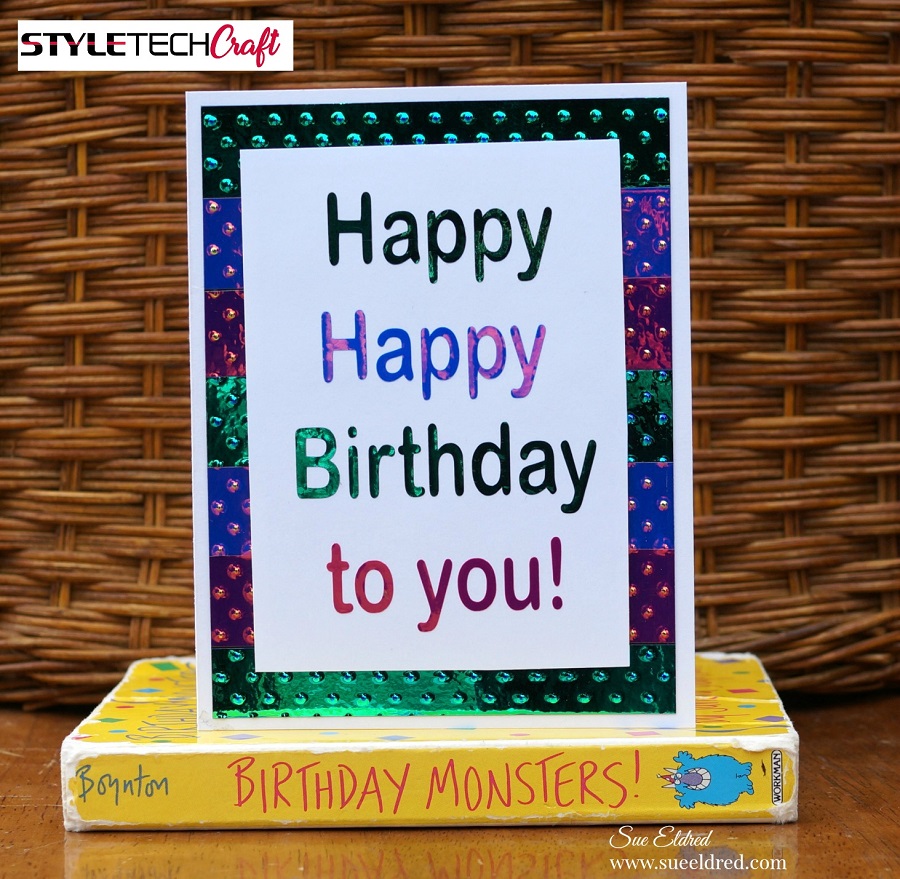
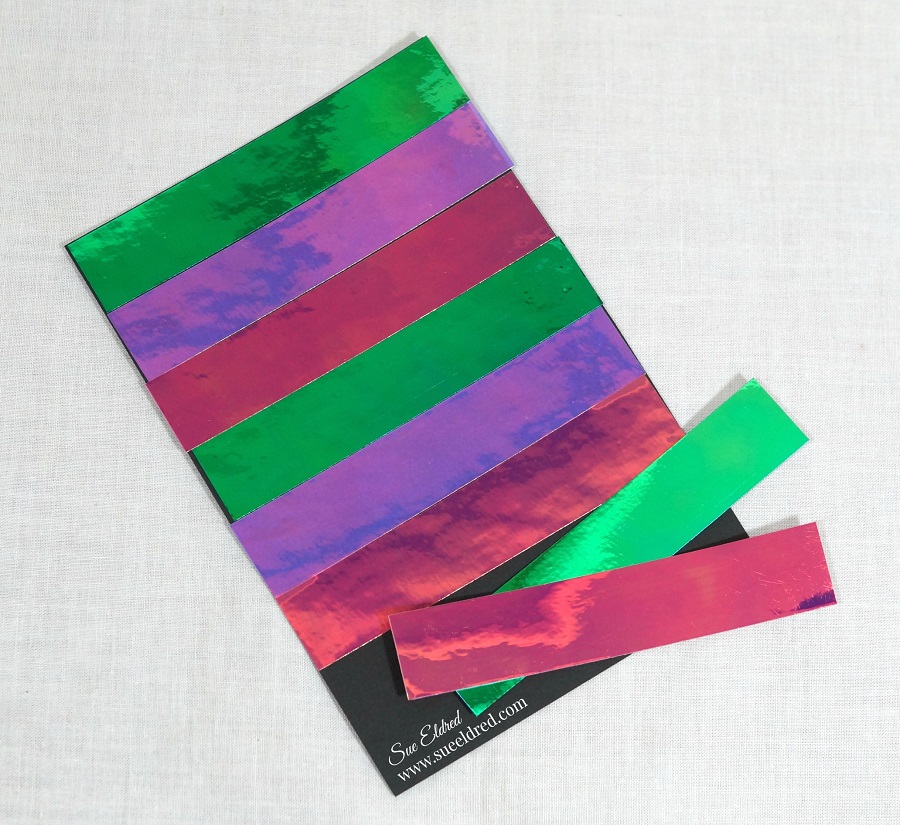
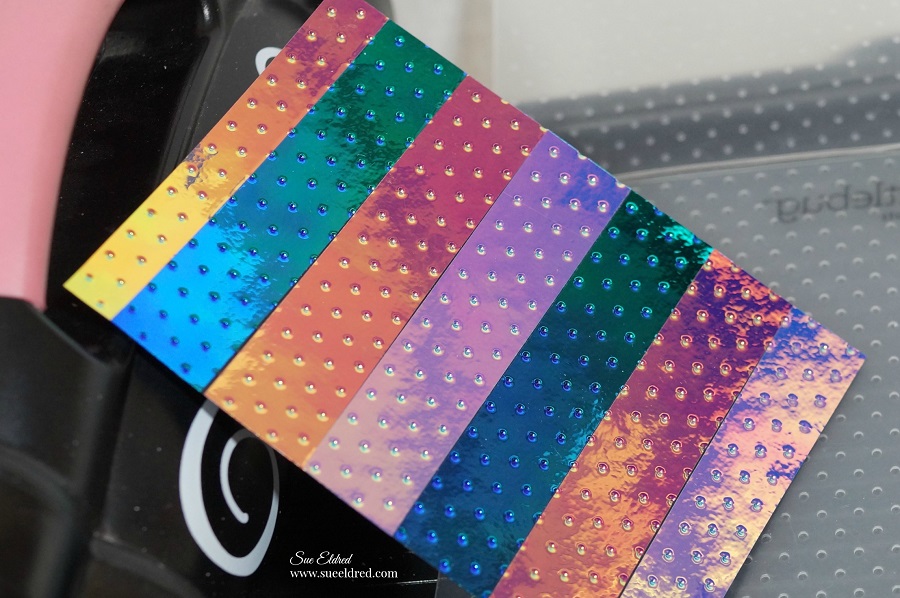
For this project I decided to add a little personalization using StyletechCrafts polished metal

adhesive vinyl and Interlocking Tilt Bins* from Deflecto.

Disclaimer:  This blog uses ads and affiliate links.  If you choose to make a purchase using one of the links, I receive a small commission (at no additional cost to you) that helps offset the costs of maintaining this blog.  Thanks for your support!

For a little masculine style…

I measured and cut the black polished metal vinyl* to add to the top of the bins.

I did the same with silver polished metal vinyl* to the sides of the bins.

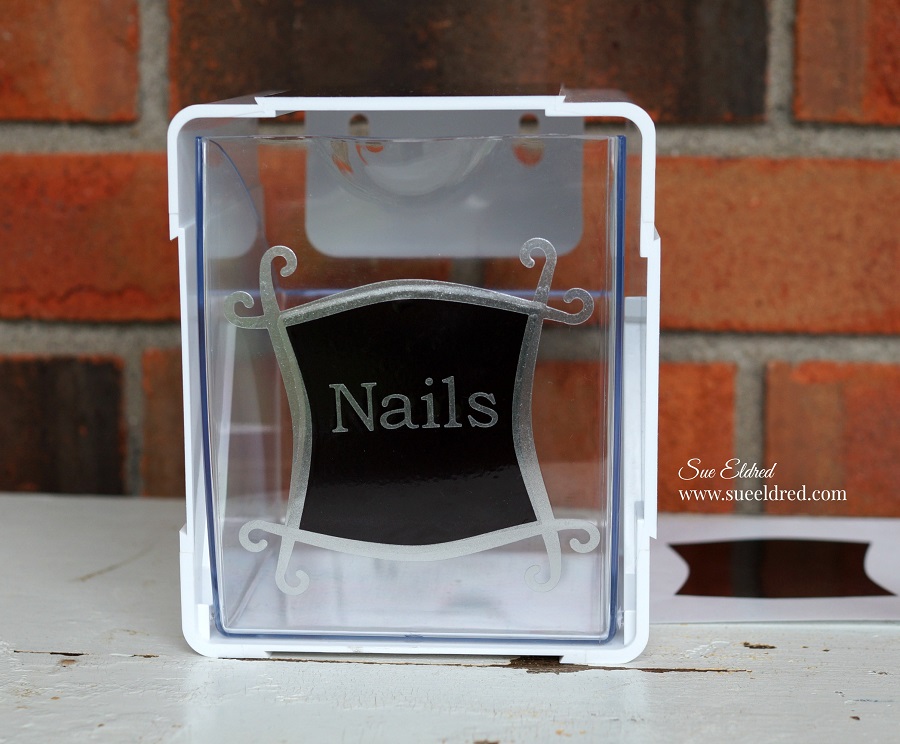
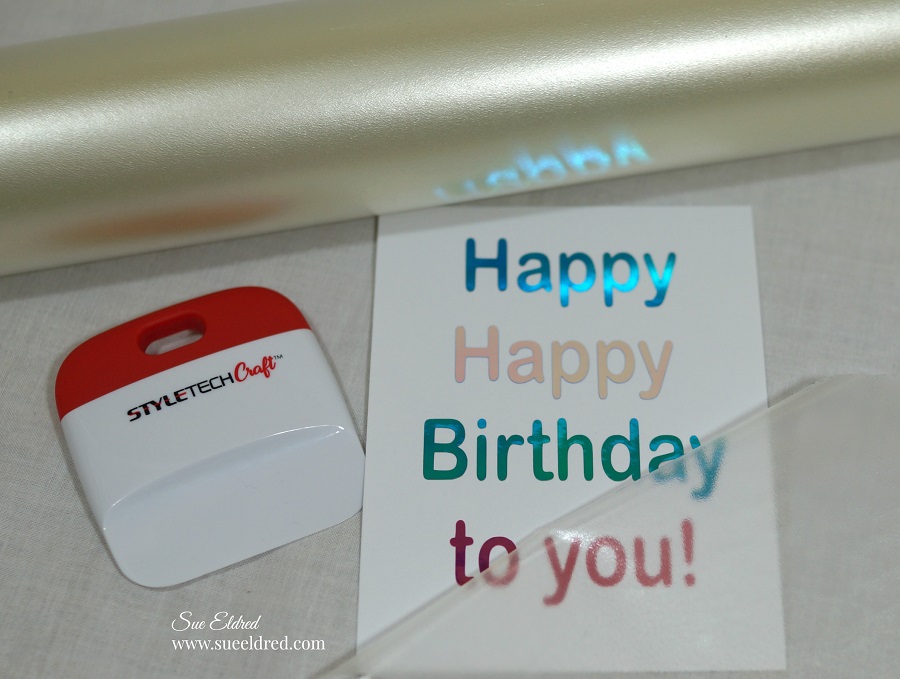
Using my Silhouette Cameo Wireless Cutting Machine* and a SVG cut file

I cut the frames, words and background.

Using Vinyl Transfer Tape* I applied the silver frames onto the black background.

(I created the black background by cutting a slightly bigger frame and using the inside.)

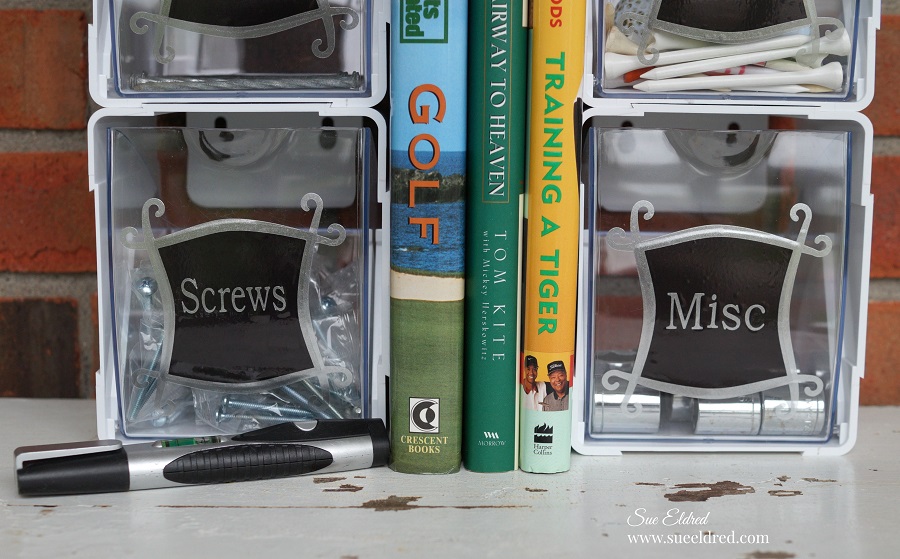
The bins are interlocking and stackable.

Great for little storage needs in the garage, craft room, nursery, kitchen and even the kid’s room.

Wherever you need a little extra storage.

The nice thing about the interlocking tilt bins* is that you can use just one or use several.

You can also hang them on the wall or use them with a mounting bar*.

Storing Guy Stuff with Style.

I love adding a little personalization to everyday items.

Storing Guy Stuff with Style-Sue's Creative Workshop www.sueeldred.com 2609

“This is a sponsored post.  As a member of the StyleTechCraft Design Team I have been provided product and compensation in exchange for my creative ideas.  The views and opinions are my own.

You can now find the full line of StyletechCraft online at ATSM.


You can purchase the Deflecto Interlocking Tilt Bins* by themselves or as a set of four from Amazon*.  Use on table, mount direct to wall or hang using the Deflecto Mounting Bar* (sold separately).

Easter Tags with Xyron and Photoplay Paper

Even when the kids are all grown up you’re never too old to have fun.

This year I’m trying something new.

After the Easter Egg Hunt with the little ones,

I plan on having another Easter Egg Hunt for the Big Kids and Grown Ups.

(We’re all just big kids at heart.)

For the Easter Egg Hunt…

I decided to whip up a few quick tags to go along with some of the prizes using my

Xyron Creative Station* and Xyron Mega Runner*, a few sheets of paper from

Photoplay Paper’s Easter Blessings Collection along with a few simple embellishments.

*Disclosure:  This blog uses ads and affiliate links.  If you choose to make a purchase using one of the links, I receive a small commission (at no additional cost to you) that helps offset the costs of maintaining this blog.  Thanks for your support!

When I want to make quick work of any project, I grab my Xyron Creative Station*.

Did you know that you can interchange the Xyron 9” Creative Station Permanent Adhesive

Refill* with the Xyron 5” Creative Station Permanent Adhesive Refill*?

Being able to use both sizes of cartridges with the Xyron Creative Station* is super convenient

when working on both big and medium sized projects.

Just lay your paper design side up onto the  Xyron Creative Station* crank the handle to run

the paper through the machine.  As it moves through the Xyron Creative Station* it adds

adhesive to the back side of the paper.  Easy to use and it doesn’t need electricity.

To make the tag…

I layered and trimmed the 3″ x 4″ element cards from the scrapbook paper and embellished it

with a thin strip of paper and prima flower*Tie tag with a simple sheer ribbon onto the bag.

I added a few enamel dots from Waffleflower on the tag and a little “small talk” sticker from

Tim Holtz idea-ology.

With a little more candy for the plastic eggs and I’ll be ready for fun.

“This is a sponsored post.  As a member of the Xyron Makers Program I have been provided product in exchange for my creative ideas.  The views and opinions are my own.

Help…I’m a Finalist!

My Sweet Dream Bedroom was selected as a Finalist

in FaveCrafts 2019 Top Blogger Contest.

At Creativation, in January,  I attended the FaveCrafts Blogger Event.

For attending the event we were eligible to enter a contest using products from the sponsors.

My project is one of 20 finalists.

For the next 10 days you can vote on your favorite project.

This is where I need your help… I need all the votes I can get!

You can also see the complete instructions on how I created my project.

Please  go to the Fave Craft Blogger Contest Link and Vote.

You can vote everyday (for the next 10 days if you want) on all your devices.

THANKS for Your Support!!!

Upcycled Vintage Paint Palette

Upcycled Vintage Paint Palette

Last year, going through my parents house, we found my mom’s old boards, brushes

and paints.   We also found both of my grandmother’s paints and supplies as well.

In all those treasures my brother found this paint palette.

Old and Cool.  Just my style.

This month the StyletechCraft Design Team was challenged to create an upcycled project

using vinyl.  Because my paint palette is vintage (and special) and I like to change my mind,

I decided to use Matte Removable Vinyl*.   (I’ll have the option to change it out.)

*Disclosure:  This blog uses ads and affiliate links.  If you choose to make a purchase using one of the links, I receive a small commission (at no additional cost to you) that helps offset the costs of maintaining this blog.  Thanks for your support!

  • For my Vintage Paint Palette Upcycled Project…I used an SVG file and my Silhouette Cameo Wireless Cutting Machine* to cut and create the words “Be Creative”.
  • Using the weeding tool, I carefully removed the negative spaces in and around the letters.

  • Place a piece of Vinyl Transfer Tape* over the letters.  Rub over the letters using a vinyl scraper tool to help the vinyl cling.
  • Apply words onto the paint palette.
  • Remove transfer tape.

With Grandma’s paint supplies, I found this calendar page from 1939

that she used for inspiration.  (80 years ago, WOW!)

I’m currently in the process of turning my son’s old bedroom into a larger craft workshop.

I want to incorporate a little past into that space as well.

I want it to be a warm, inviting, eclectic space.  (Kind of like me)

I think this palette will fit in just fine.

“This is a sponsored post.  As a member of the StyleTechCraft Design Team I have been provided product and compensation in exchange for my creative ideas.  The views and opinions are my own.

You can now find the full line of StyletechCraft online at ATSM.

Let’s Go Fly a Kite

Let’s Go Fly a Kite…

I’m so happy that Spring is finally here.

I’m ready to celebrate Spring with beautiful sunny skies and just enough breeze to fly a kite.

If you’re not into flying kites, you could always make a fabric one to hang up on the wall.

Kite Wall Hanging                                   (*affiliate link)

*Disclosure:  This blog uses ads and affiliate links.  If you choose to make a purchase using one of the links, I receive a small commission (at no additional cost to you) that helps offset the costs of maintaining this blog.  Thanks for your support!

How to make a Kite Wall Hanging:

  • Creating a kite pattern… Cut the white cardstock to 9″ x 12″.  Fold the cardstock in 1/2 lengthways.  On the two long sides make a mark at 4″.
  • For the top of the kite, draw a line from the top middle fold to the 4″ mark on each side.  For the bottom of the kite, draw a line from the 4″ mark to the bottom middle folds.
  • Cut out Kite pattern.
  • Trace and cut out the kite pattern on the backsides of both of the printed fabrics and the white felt.

  • Sandwich the white felt between the two patterned pieces.  Pin into place and top stitch around the kite.
  • Arrange the words “Let’s go fly a kite” onto the front of the kite with the shiny side down.
  • Cover with soft, clean cloth and iron on cotton settings for 30 seconds.  Turn kite over and repeat for an additional 30 seconds.

  • Cut the top flower and leaves off the floral applique.
  • Arrange the flowers on the kite and iron onto the kite the same way as the letters.
  • Glue rick rack around the edge of the kite.

  • Cut strips of fabric and tie onto a 14″ piece of twine.  Glue one end of the twine to the backside of the kite.
  • Make a small loop with a second piece of twine and glue to the top of the kite.

“This is a sponsored post.  As a member of the Joy® Design Team I have been provided product and compensation in exchange for my creative ideas.  The views and opinions are my own.


Don’t Miss a Thing…Make Sure to Follow me

Shine from Within Mini Tag Album

Shine from within Mini Tag Album…

I love the sweet pastels of Graphic 45’s Garden Goddess Collection*, it just screams Spring.

So…after using the Garden Goddess paper pad on a special project (coming soon),

I decided to make a Mini Tag Album with the remaining paper.

When it comes to making Mini Albums I like using the Xyron Creative Station* 

because you get complete coverage, no wrinkling, no bubbles!

And…your album stays together!!!

Products Used on the Shine Within Mini Tag Album:         (*Amazon Affiliate Link)

Shop Your Fav Brands at Scrapbook.com

*Disclosure:  This blog uses ads and affiliate links.  If you choose to make a purchase using one of the links, I receive a small commission (at no additional cost to you) that helps offset the costs of maintaining this blog.  Thanks for your support!

How to make the Mini Tag Album                                 (*amazon affiliate link)

  • Lay decorative scrapbook paper (design side up) on the  *Xyron Creative Station* crank the handle to run the paper through the machine.  As it moves through the Xyron Creative Station it adds adhesive to the back side of the paper.  Easy to use and it doesn’t need electricity.
  •  Cut two pieces of chipboard to use as the front and back of the mini album.  Cover the front and back of both pieces of chipboard with the decorative scrapbook paper.
  • Cut covered chipboard using a Tag die-cut or cut into a simple rectangle tag shape.
  • Because the chipboard is tan and the core of the paper is white, I inked the edges of the pages with  Vintage Photo Distress Ink*and a ink blending tool*.  

  • Adhere the smaller graphic in the center of the tag front to a piece of chipboard for added dimension.
  • Cut two small circles and adhere to the metal rim tag.  Cut a new hole on the top of the tag.
  • Embellish the front of the tag album using bits and pieces from the Garden Goddess Paper Pad.
  • Glue flower embellishment to front of mini tag album cover using craft glue.

  • Cut extra tag pages and small tags for the inside of the mini tag album.
  • Assemble the mini tag album using a small book ring.

“This is a sponsored post.  As a member of the Xyron Makers Program I have been provided product in exchange for my creative ideas.  The views and opinions are my own.

Eileen Hull Educator Team

Every now and again an opportunity comes along that you just have to seize…

Being part of the Eileen Hull Educator Team was one of those opportunities.

Personally, I have known Eileen for several years and have always admired her

innovative design talents and can do spirit

And…she’s not afraid of driving cross country alone pulling a trailer to share

her awesome talents with everyone.  (The Paper Trail)

Eileen has been an inspiration to me for quite some time.

Eileen Hull Educator Team

What an amazing opportunity to work with all these amazing designers.

Eileen Hull products…

I love all her products and can’t wait to share them all with you.

*Disclosure:  This blog uses ads and affiliate links.  If you choose to make a purchase using one of the links, I receive a small commission (at no additional cost to you) that helps offset the costs of maintaining this blog.  Thanks for your support!

Create a Iridescent Birthday Card using StyletechCraft Opal Vinyl

Create a Quick and Easy Iridescent Birthday Card with StyleTechCraft Opal Vinyl.

When making a card using StyleTechCrafts Opal Vinyl, a regular picture just won’t do.

You need to see the shimmery iridescent fun.

StyleTechCraft’s Opal Vinyl is one of the coolest vinyl they have.

The colors shift dramatically based on light and their surroundings and adds a little

razzle dazzle to this simple birthday card.

To make the Birthday Card I used…                                        (*amazon affiliate links)

Shop Your Fav Brands at Scrapbook.com

*Disclosure:  This blog uses ads and affiliate links.  If you choose to make a purchase using one of the links, I receive a small commission (at no additional cost to you) that helps offset the costs of maintaining this blog.  Thanks for your support!

Directions:                                

  • Cut several 3/4″ strips of Opal Vinyl and stick it onto a 4 1/2″ X 6″ piece of black cardstock.  For my card I used Pink, Blue and Green Opal Vinyl.
  • Trim the excess vinyl strips from the sides of the cardstock.
  • Cut the cardstock 4″ x 5 1/4″.

  • The embossing folder creates a wonderful raised background.

  • Using a weeding tool carefully remove the negative spaces in and around the letters.
  • Place a piece of Vinyl Transfer Tape* over the letters.  Rub over the letters using a vinyl scraper tool to help the vinyl cling
  • Apply words onto a piece of 3 1/4″ x 4 1/2″ white cardstock.
  • Remove transfer tape.

  • To give the card additional dimension…I added a piece of thin foam onto the back of the white cardstock.

  • Adhere the layers onto a 4 1/4″ x 5 1/2″ white card.

“This is a sponsored post.  As a member of the StyleTechCraft Design Team I have been provided product and compensation in exchange for my creative ideas.  The views and opinions are my own.

You can now find the full line of StyletechCraft online at ATSM.

When your favorite cashmere sweater has a hole…

When your favorite Cashmere Sweater has a hole, you make it into something new.

I was pretty bummed when I found out my favorite sweater had a hole in it.

My first instinct was to throw it in the garbage.

After retrieving my sweater from the throw-away pile…

I decided to make it into a super soft pillow instead.

To make the DIY Sweater Pillow I used:                                  (*affiliate link)

*Disclosure:  This blog uses ads and affiliate links.  If you choose to make a purchase using one of the links, I receive a small commission (at no additional cost to you) that helps offset the costs of maintaining this blog.  Thanks for your support.

DIY Upcycled Sweater Pillow

Directions:

  • Turn the sweater inside out. Line up the pillow form with the sweater to determine the best placement to hide the holes.
  • For my sweater, since the holes were on one side…I decided to sew the bottom of the sweater together first and insert the pillow to determine how much I needed to cut off the other side.
  • Cut the sweater slightly larger than the pillow form.
  • Remove pillow form and sew the second side together.

  • To Personalize my pillow, Turn the sweater back to the right sides and iron the Joy Iron-On Embroidered Letters. Cover letters with a clean, soft cloth and iron the letters for 30 seconds. Turn sweater pillow cover inside out, cover with cloth and iron for an additional 30 seconds. Allow the letters to cool before finishing the pillow.  

  • Because there is a lot of give with the sweater material.  I was able to sew the 4th side halfway and stuff the pillow form inside.  I hand stitched the pillow closed.

  • To dress up the pillow…I created a sash to go around the pillow by sewing together flannel scraps.

  • Secure the sash around the pillow using a couple of big black buttons.

The pillow is perfect for marking my spot on my favorite comfy chair.