
Let’s Go Fly a Kite…
I’m so happy that Spring is finally here.
I’m ready to celebrate Spring with beautiful sunny skies and just enough breeze to fly a kite.
If you’re not into flying kites, you could always make a fabric one to hang up on the wall.

Kite Wall Hanging (*affiliate link)
- Two pieces 9″ x 12″ cotton fabric (my fabric was from Adornit)
- 9″ x 12″ White Felt*
- Joy Iron On Embroidered Letters*
- Joy Floral Applique
- 12″ x 12″ White Cardstock
- Scissors
- Rick Rack
- Jute Twine*
- Beacon Fabri-Tac Permanent Adhesive*
- Sewing Machine
- Iron

*Disclosure: This blog uses ads and affiliate links. If you choose to make a purchase using one of the links, I receive a small commission (at no additional cost to you) that helps offset the costs of maintaining this blog. Thanks for your support!

How to make a Kite Wall Hanging:
- Creating a kite pattern… Cut the white cardstock to 9″ x 12″. Fold the cardstock in 1/2 lengthways. On the two long sides make a mark at 4″.
- For the top of the kite, draw a line from the top middle fold to the 4″ mark on each side. For the bottom of the kite, draw a line from the 4″ mark to the bottom middle folds.
- Cut out Kite pattern.
- Trace and cut out the kite pattern on the backsides of both of the printed fabrics and the white felt.

- Sandwich the white felt between the two patterned pieces. Pin into place and top stitch around the kite.
- Arrange the words “Let’s go fly a kite” onto the front of the kite with the shiny side down.
- Cover with soft, clean cloth and iron on cotton settings for 30 seconds. Turn kite over and repeat for an additional 30 seconds.
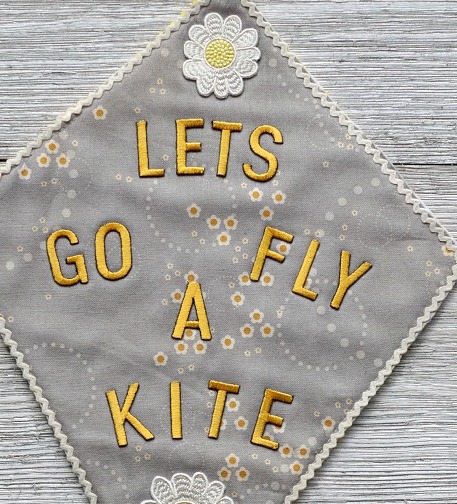
- Cut the top flower and leaves off the floral applique.
- Arrange the flowers on the kite and iron onto the kite the same way as the letters.
- Glue rick rack around the edge of the kite.
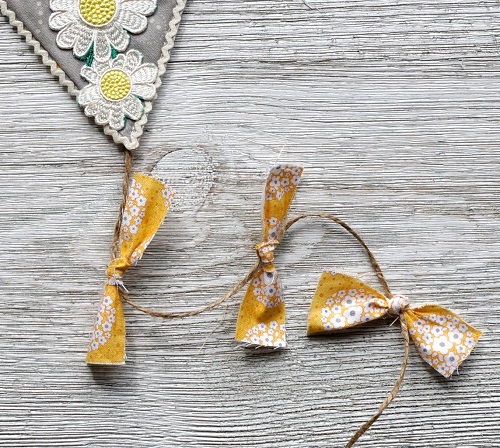
- Cut strips of fabric and tie onto a 14″ piece of twine. Glue one end of the twine to the backside of the kite.
- Make a small loop with a second piece of twine and glue to the top of the kite.

“This is a sponsored post. As a member of the Joy® Design Team I have been provided product and compensation in exchange for my creative ideas. The views and opinions are my own.


Don’t Miss a Thing…Make Sure to Follow me

