Revamped Sunglass Case

revamped-sunglass-case-sues-creative-workshop-4565

I picked up a “free” sunglass case at the Thrift Store the other day.

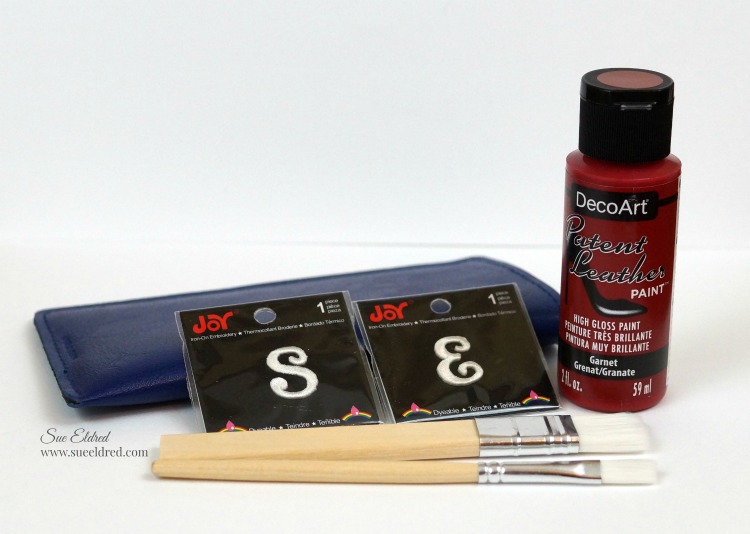
I was looking for something to paint using  the  New Patent Leather Paint

that I received from DecoArts.

I love the look of shiny patent leather.  And… in red?  Oh my!
monogramed-sunglass-case-before-sues-creative-workshop-4314

Combine them all with embroidered letters from Joy*

and you have a personalized custom monogrammed sunglass case.

Here’s what I did to my case…

  • If your case is old, wipe it down with rubbing alcohol to remove any dirt or grime.
  • Apply a even coat of patent leather paint onto the sunglass case with a soft bristle brush.
  • The paint will have a tacky feel as it dries.  Allow to dry between coats.  You may want to give the case a second coat of paint.
  • To give the case a custom monogram.  Using a good craft glue, glue Iron-on Embroidered letters from “Joy” on to the case.

*As a member of the Creating with Joy Design Team, this post was sponsored by JOY® SA.

Save on Paper Crafting Supplies at CreateForLess!

*Disclaimer:  This blog uses ads and affiliate links.  If you choose to make a purchase using one of the links, I receive a small commission (at no additional cost to you) that helps offset the costs of maintaining this blog.  Thanks for your support!

Easter Egg Hunt Sign

Any Easter egg hunts in your near future?

I whipped up this cute little sign for our Easter Egg Hunt using a DEFLECT-O Chalkboard Easel*

Simply embellish the easel with stickers and scrapbook paper for a quick DIY project.

Add your message with the chalk marker that comes with the easel.

For more fun, let the kiddo’s decorate the sign.

It also makes a cute sign to label your Easter Buffet.

(Easter stickers and paper from Paper House Productions.)

Join Amazon Kindle Unlimited 30-Day Free Trial

*Disclaimer:  This post uses ads and affiliate links.  If you choose to make a purchase using one of the links, I receive a small commission (at no additional cost to you) that helps offset the costs of maintaining this blog.  Thanks for your support!

 “This is a sponsored post. As a member of the Deflecto Design Team I have been provided product in exchange for my creative ideas, views and opinions.”

for little storage needs…

for-little-storage-needs-4892

Sometimes the smallest things take up the most room in your heart.                      (A. A. Milne)

Now that my new grandson has finally arrived in all his adorable sweetness…

It’s hard to believe that someone so small can need so many things.

for-little-storage-needs-sues-creative-workshop-4842

(*Amazon Affiliate Link)

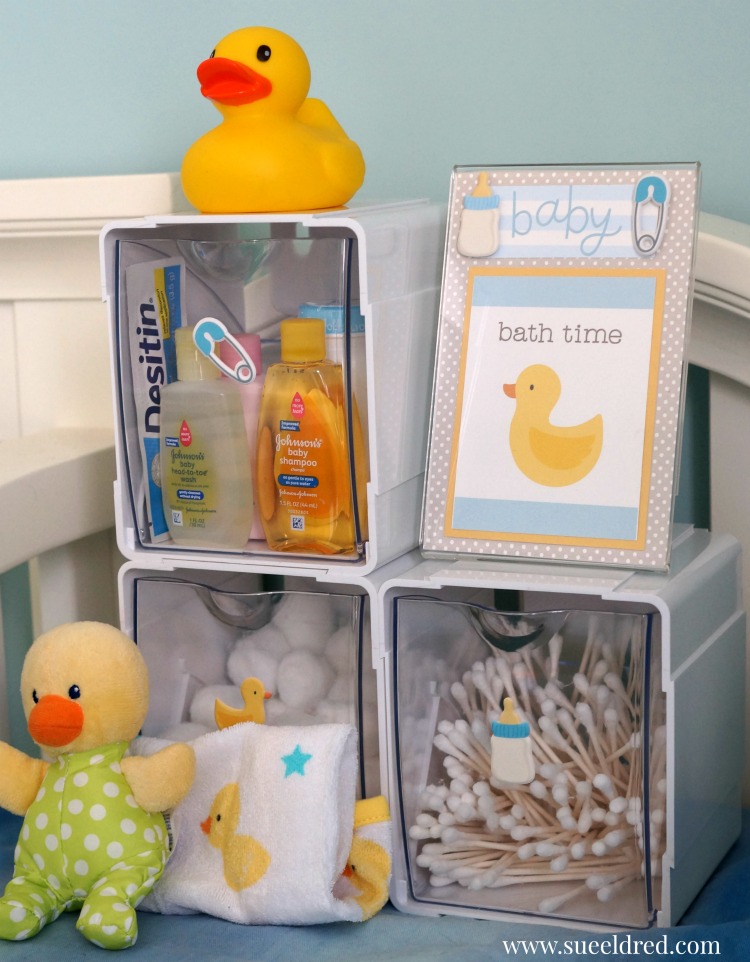
 I created the Bath Time Organizer, for my Daughter in Law, to make bath time a little easier.

For the organizer, (and bath time sign) I used puffy  stickers from the “lullaby” collection

from Pebbles Inc. and Deflecto Tilt Bins*

little-storage-close-up-4851

*Shop Amazon – Create an Amazon Baby Registry

The bins are interlocking and stackable.

Great for little storage needs in the nursery, craft room, garage, kitchen and even the kid’s room.

Wherever you need a little extra storage.


You can purchase these bins by themselves or as a set of four from Amazon*.

Use on table, mount direct to wall or hang using the Deflecto Mounting Bar* (sold separately).

*AD amazon-baby

*Disclaimer:  This post uses ads and affiliate links.  If you choose to make a purchase using one of the links, I receive a small commission (at no additional cost to you) that helps offset the costs of maintaining this blog.  Thanks for your support!

 “This is a sponsored post. As a member of the Deflecto Design Team I have been provided product in exchange for my creative ideas, views and opinions.”

 Adorable Baby Sweaters

Quick and Easy Make Up Bag Make-Over

It’s the little things in life that make me happy…

I was packing and getting ready for my last trip when I noticed how dingy my make up bag

was.  Yuck!   It was time for a change.  (My make up needed a make-over.)

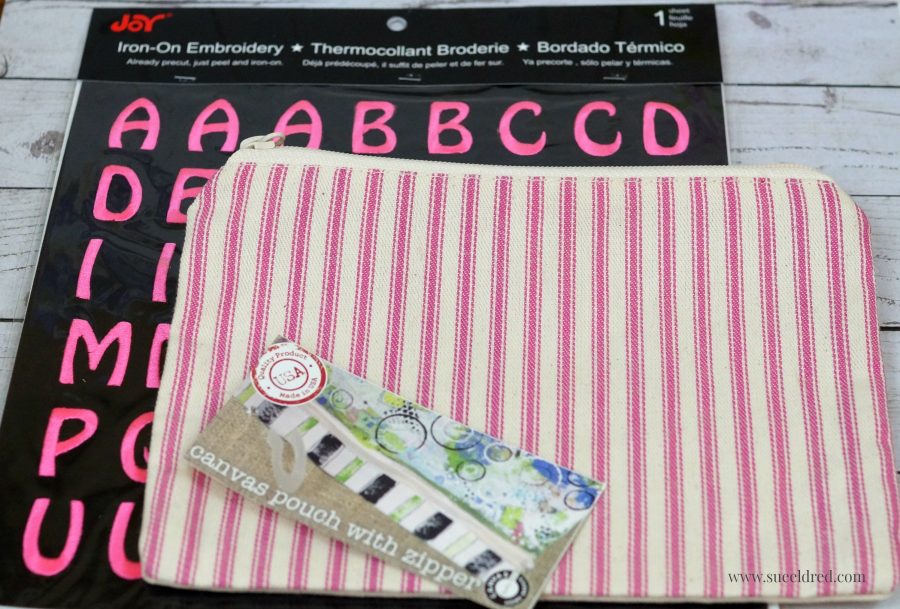
Looking around, I found this cute little pink ticking canvas bag from Canvas Corp Brands.

The bag was the perfect size, but kind of simple.  It needed a little make-over, too.

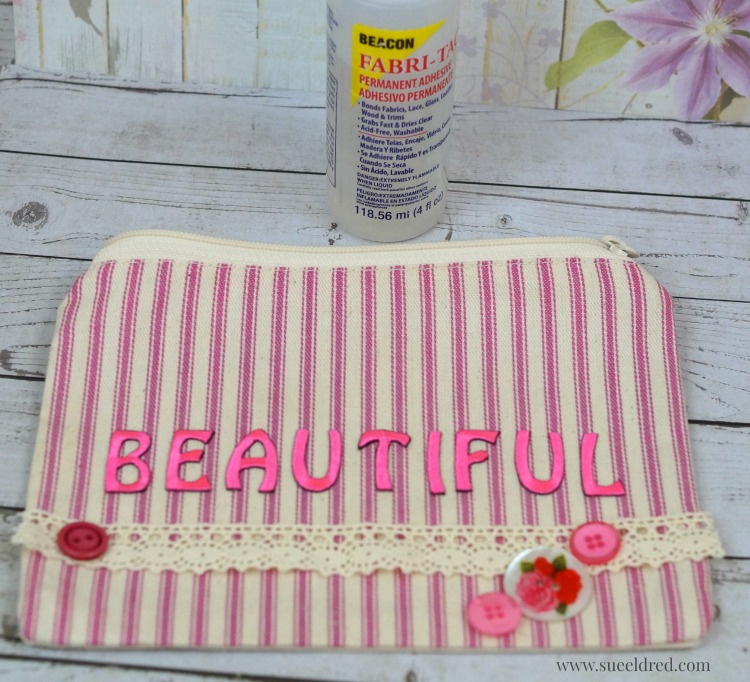
To add a little extra personality, I used iron-on letters from Joy with lace and buttons.

I glued the lace trim and buttons on my bag using Beacon Fabri-Tac Adhesive*.

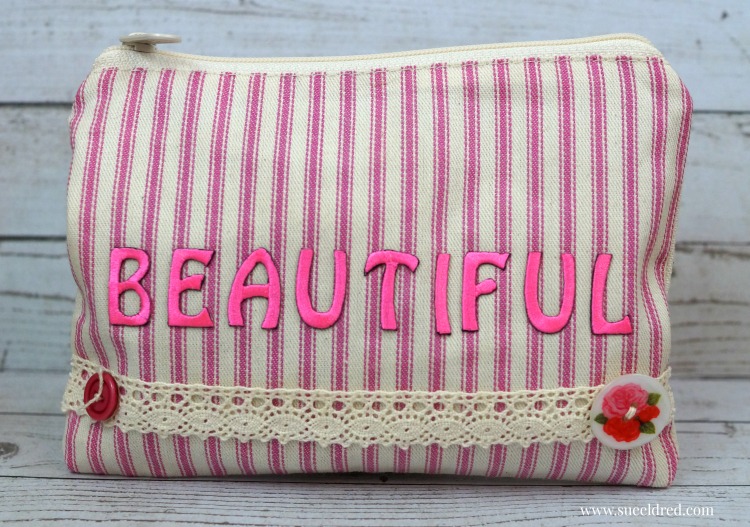
A very quick and easy project to do and now my makeup bag is “BEAUTIFUL”.

Shop Your Fav Brands at Scrapbook.com

*Disclosure:  This blog uses ads and affiliate links.  If you choose to make a purchase using one of the links, I receive a small commission (at no additional cost to you) that helps offset the costs of maintaining this blog.  Thanks for your support!

beautiful-make-up-bag-3951

A cute and easy make-over done in minutes.   (If only getting ready was that easy!)

JOY Embroidered letters can be found at your local craft stores in a variety of sizes, colors, simple and decorative fonts.

“This is a sponsored post.  As a member of the Joy® Design Team I have been provided product and compensation in exchange for my creative ideas.  The views and opinions are my own.

a little Valentine Love

valentines-frame-sues-creative-workshop-4136

When I flipped over the calendar this morning it hit me.

Less than 2 weeks until Valentine’s Day.

After all these years…

it’s still fun to throw a few hearts around to make sure he doesn’t forget.

I created this cute little Valentine’s decoration using a clear 4″ x 6″

acrylic craft frame from Deflecto Craft Solutions, scrapbook paper and stickers.

The sticker in the middle says “I belong with you & you belong with me”.

I think he’ll get the hint.


“This is a sponsored post. As a member of the Deflecto Design Team I have been provided product in exchange for my creative ideas, views and opinions.”


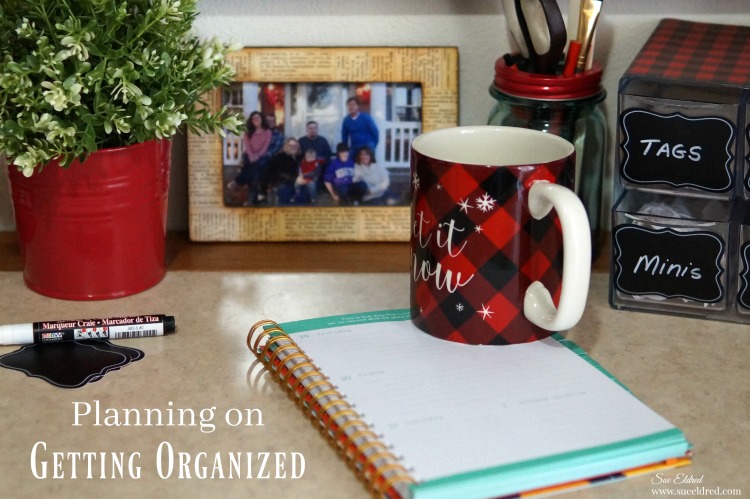
Planning on Getting Organized

planning-on-getting-organized-3609

If I were the type to make New Years Resolutions…

One of my goals would be to GET ORGANIZED.

Now that he house is a bit calmer and my to-do list quite a bit shorter,

I’ve been able to work in my office again.

It feels good sitting down, organizing my thoughts, throwing away old notes…

Planning for the New Year.

I’m a planner, a list maker.

I love the clean slate that a new calendar gives.

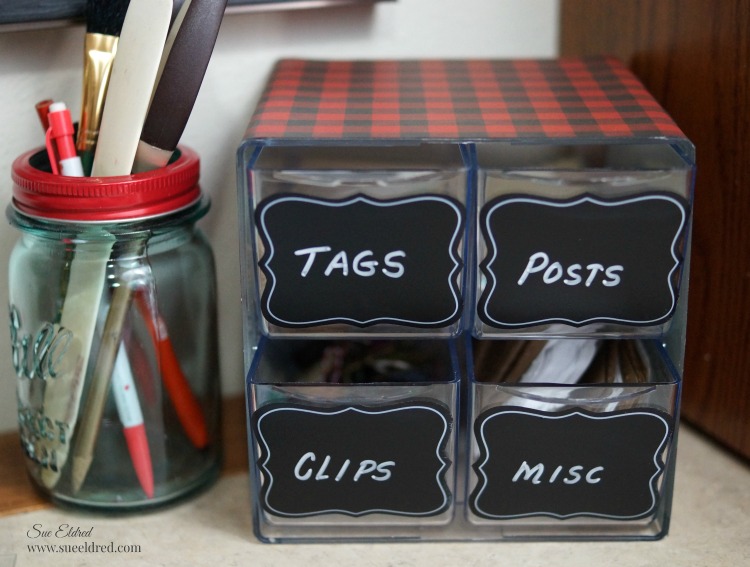
buffalo-plaid-organizer-close-up-3500(*amazon affiliate link)

One of the ways I like to organize is by giving items a “home”.

By putting “like” items together everything starts making sense.

This 4 Drawer Stackable Cube Organizer*  works great for small items on my desk or anywhere

I might need a little organization.  Great in the kitchen, bathroom and even the garage.

buffalo-plaid-organizer-close-up-3520

For fun, I personalized my organizer by adding buffalo plaid scrapbook paper around the outside

and labeling each drawer with chalkboard stickers.

buffalo-plaid-mini-calendar-close-up-3518

I even made myself a mini desk calendar using a 3″ x 4″ clear acrylic stand, leftover scrapbook

and a cute little calendar from Taylored Expressions.

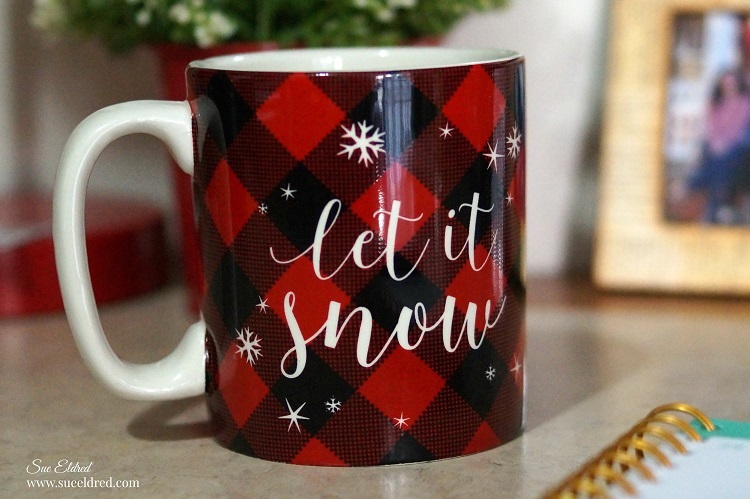
plaid-let-it-snow-mug-3818

Even my coffee mug matches.

Did I mention I love Buffalo Plaid?

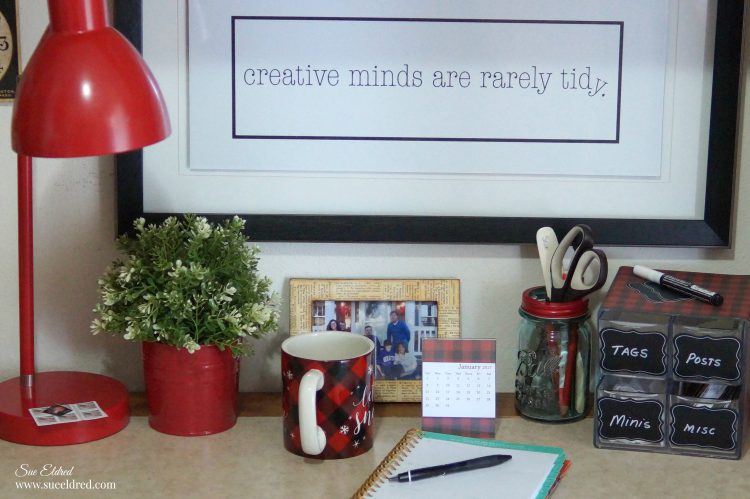
desk-3690

I’m happy when everything is neatly organized.  (not that it always is)

Next up is the closet in my guest room where I keep the extra design team product that

won’t fit in my tiny little office/workspace.

Big job, Big plans.  I’ll keep you posted!


“This is a sponsored post. As a member of the Deflecto Design Team I have been provided product in exchange for my creative ideas, views and opinions.”

*I am a Amazon Affiliate.  If you choose to purchase from Amazon from the above link, I receive a small commission that helps offset the costs of running this blog.  Thanks!

Christmas Photo Shoot

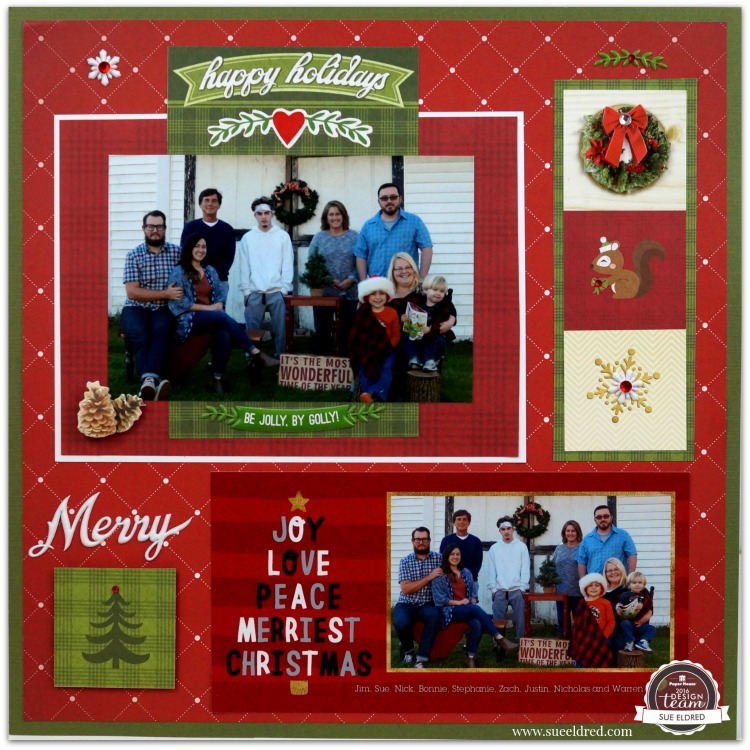
christmas-card-photo-layout-3140

On a unseasonably warm day in early November…

when my daughter was home visiting,

I made the family sit down for our first ever Christmas Card Photo Shoot.

I had all the props and seating planned out.  It was going to be fun.

With some being less than enthusiastic, this is what I had to deal with…

because of the warmth, my husband would not change into long pants,

my oldest forgot that we were going to be doing this, so he too had on shorts.

Once captured, my youngest grandson would not be in the picture without the

Target Toy Ad and my youngest son insisted on wearing his bandana.

Maybe next year, I’ll go back to making homemade cards. (sounds easier)

Merry Christmas from my family to yours.

christmas-card-photo-layout-close-up-3157


My “Christmas Card Photo Shoot” layout was created with papers and stickers

from Paper House Productions.

The Christmas Card Photo Shoot Layout was created for and sponsored by Paper House Productions.

A Joyful Village

As the Christmas Season gets closer…

I wanted to share this simple little wood project that I made for the “Creating with Joy” blog.

Being Joyful, is my goal not only at Christmas but throughout the entire year.

For my “Joyful Village”…

I  started with some wood trim scrap pieces cut into simple whimsical house shapes.

My pieces measure 4″ x 2″, 3″ x 2 3/4″ and 3 1/2″ x 2 1/4″.

I painted the house with a couple coats of Americana Decor Satin Enamels 8oz-Grey Taupe*.     (*Amazon affiliate link)

After painting the houses…                                                                             (*Amazon Affiliate Links)

      • I created a roof using Black Corrugated Paper*.
      • I added color to my white iron-on embroidered letters by dampening them and rubbing color directly onto the letters using my Distress Mini Ink Pad-Fired Brick*.
      • After the letters are dry, glue the letters onto the houses using a craft glue.
      • I created a mini wreath and mini pine swags using Pine Craft Stems*.
      • I created small number charms by printing the numbers onto white cardstock and punching with a small circle punch.  I added the numbers inside Metal Type Charms by Tim Holtz Idea-ology*.
      • I tied the charms onto the wreath and swags with thin twine and glued them onto the front of the houses along with a little tiny bow.

The village wouldn’t be complete without a cute little red truck.

I picked up the tiny red truck at the Elkhorn Flea Market in Wisconsin and I glued three little

bottle brush trees to the back of the truck.  I rubbed the trees with clear glitter glue

for added sparkle.

This project was sponsored by Joy SA and DecoArts.

Shop Amazon Scrapbooking Supplies*

*Disclaimer:  This post uses ads and affiliate links.  If you choose to make a purchase using one of the links, I receive a small commission (at no additional cost to you) that helps offset the costs of maintaining this blog.  Thanks for your support!

Two of my Favorite Snowman Projects

Snowball Fight 2

Sharing two of my all time favorite Snowman Projects…

This little guy is perfect for those times when it’s too cold to go outside and play.

Snowball Fight 3249

If you’re not loving the cold…

Here’s a snowball fight you can have while snuggling up inside.

Snowball Fight Supplies

Here’s what’s you’ll need:                                                 (*affiliate link)

Directions:

  1. Cut the 2″ Smoothfoam ball in half.  Cut the top off the rounded side of one of the balls.
  2. Poke two holes into the bottom of the Snowman body using the craft pick.  Break a toothpick in half, dip ends into craft glue and insert in holes.  Attach the sliced ball onto the Snowman body.
  3. Apply Snow-tex with palette knife over the newly formed Snowman and the 6″ disc.  Allow both to dry fully.
  4. To Create a Snowball Wall… Poke holes into the 1″ balls with the craft pick.  Insert toothpick halves with craft glue on the ends into balls.   Build wall by sticking the balls together.
  5. Apply Snow-tex onto wall using the palette knife.  (Allow to dry.)
  6. Create scene by attaching snowman and wall onto the disc.  Reinforce the pieces with toothpicks and craft glue.
  7. For a shimmery snowy glow…paint all the pieces with Crystal Craft Twinkles paint.  (Allow to fully dry.)
  8. Add shadows to the snowman and snowballs by gently applying vintage photo ink using a stipple brush.
  9. To Create the Snowman Hat… Measure and cut fabric to fit around snowman head.  Fold over and glue one of the long edges of the fabric to create a brim.  Glue fabric ends together to create a tube.  Tie top of the tube with a piece of string, cut excess fabric off top of the tube and fray the ends by making small cuts with the scissors.  Glue to the top of the Snowman head.
  10. Add arms to the Snowman using small twigs.  Warm him up with a fabric scarf and mittens cut from the fabric scraps.
  11. For the Snowman’s Face… Use two small black micro brads inserted into the snowman face for the eyes.  Paint the tip of a bamboo skewer with orange paint, cut and insert into the face for the nose.  Add a smile to the snowman’s face using a extra fine black paint marker.
  12. Make a small snowball using a small pieced of paper wadded up and covered with Snow-tex.  Glue finished and dried snowball onto mitten.

Snowball Fight Close Up 3194

Another one of my Favorite Snowman Projects was titled “How to make a Snowman”.

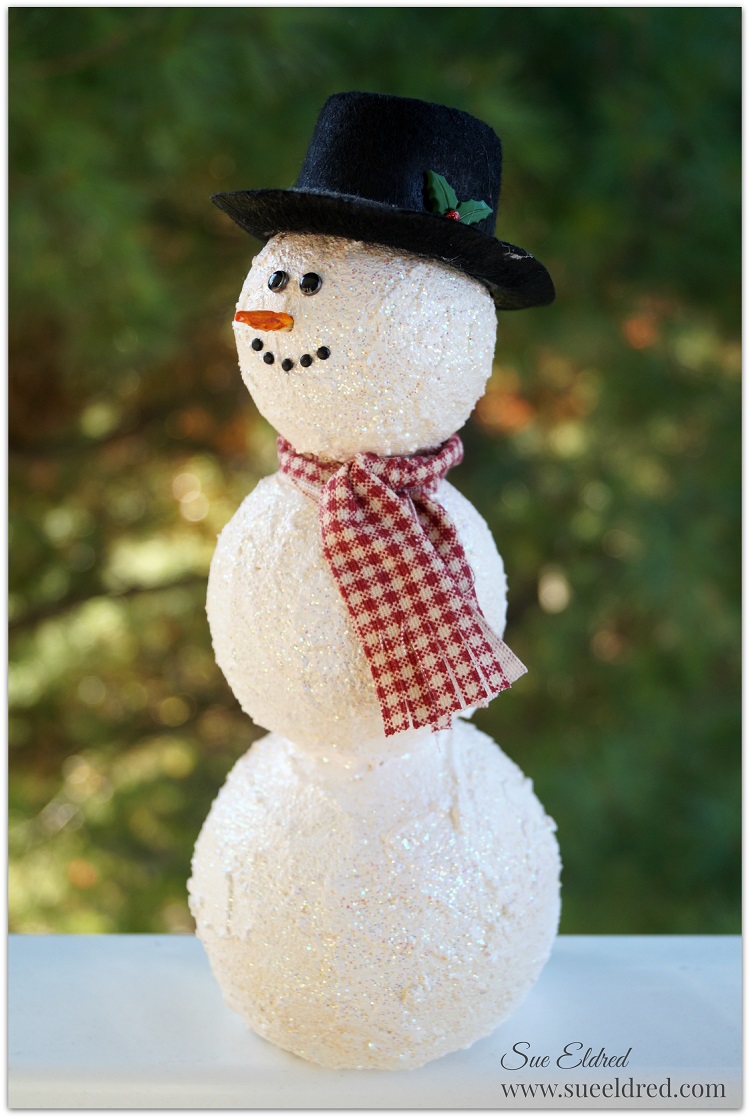
Smoothfoam Snowman 887

Making a Snowman is pretty easy.  All it takes is a little patience and time.

(and a few ingredients) ↓

snowman parts

Here’s what you’ll need to make a Snowman:                               (*affiliate link)

Directions:

  1. Cut a small section off the bottom of the 4″ Smoothfoam ball so that it sits flat.
  2. Cut a couple of 3″ sections from the bamboo skewer.  Stick the skewer into the center of the 2″ and 3″ Smoothfoam balls.
  3. Add craft glue to the ends of the skewers before sticking the three balls together to form the snowman base.  (Allow glue to fully dry before continuing to the next step)
  4. Using a palette knife, smooth Snow-tex over Snowman base.  Here’s where the patience comes in… Allow a couple of hours for the Snow-tex to completely dry.
  5. Paint the entire Snowman base with white acrylic paint.  This fills in and helps cover any area missed by the Snow-tex.
  6. For a Frosty Look…paint the Snowman base with Craft Twinkles Glitter Paint.
  7. Cut a thin strip of grey felt and glue around the base of the hat to create a band.  Glue holly embellishment onto band to cover seam.  Glue to the top of the Snowman head.
  8. Cut a strip of gingham fabric and tie around neck.  Cut small slits into the ends of fabric for fringe.
  9. Use two small black brads inserted into the head for the eyes.  Use five micro black brads insert as the mouth.
  10. Cut the pointed end from a bamboo skewer and paint with orange paint.  Stick into head for the nose.

put a stick in it

Here’s a Close up of Mr. Snowman.  Isn’t he Handsome?

Snoman Face

These projects was created for and sponsored by Smoothfoam and also sponsored by DecoArt.

Smoothfoam Snowman Side view

*Disclaimer:  This post uses ads and affiliate links.  If you choose to make a purchase using one of the links, I receive a small commission (at no additional cost to you) that helps offset the costs of maintaining this blog.  Thanks for your support!

Try Amazon Prime 30-Day Free Trial