Christmas Tree Card

christmas-tree-card-sues-creative-workshop-2755

Although I don’t always send a ton of handmade Christmas cards out, I do enjoy making them.

The Christmas Tree card was made using paper and stickers from Paper House Productions.

I love how the playful plaids blend perfectly together to form a Traditional Christmas feel

in this layered card.  Enjoy!  (makes me feel like singing “O’ Christmas Tree…”)


To make the card you’ll need:         (*affiliate links)

christmas-tree-card-assembling-the-layers-sues-creative-workshop

Directions:

  1. Cut a 4 1/2″ x 6″ piece of “red flannel” paper.  Hold the edge of the paper against the nib of the gold calligraphy marker to add a thin gold border on the edge of the paper.  Adhere the red flannel layer onto a 4 3/4″ x 6 1/4″ piece of black cardstock.
  2. Adhere the red flannel and black layers onto a 5″ x 6 1/2″ green card base.
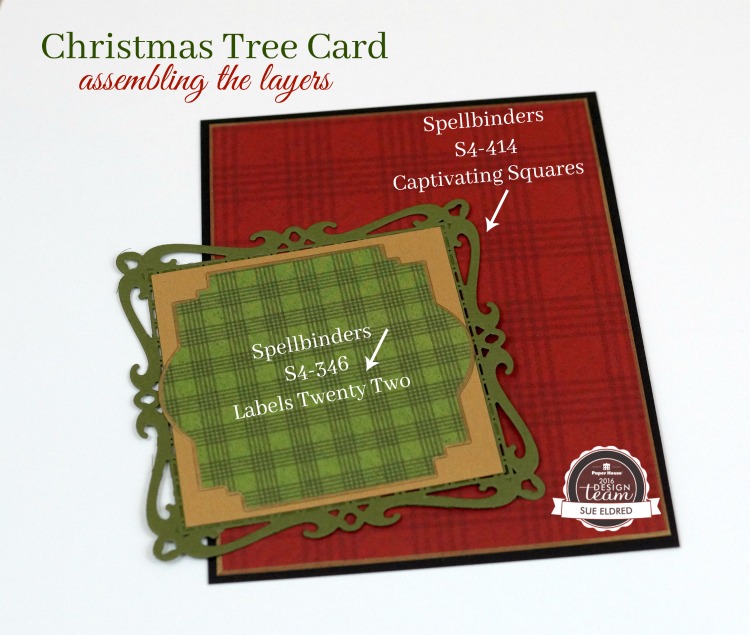
  3. Cut the “deck the halls” paper (green plaid) using the “labels twenty two” die.  Add a thin gold border around the edge of the label like in step #1.  Adhere the green plaid label onto a 3 1/4″ x 3 1/4″ gold metallic cardstock layer.
  4. Cut a decorative square using the “captivating square” die and a piece of green cardstock.  Adhere the green plaid label and gold metallic square onto the top of the decorative square.
  5. Adhere the green and gold layers onto the bottom portion on the red flannel layer, leaving even spacing on the bottom three sides.
  6. Assemble the pine swag  using the 3D stickers and glue onto the top of the card.  (picture below)
  7. Finish embellishing the front of the card with the 3D Christmas Tree sticker and a couple of red adhesive rhinestones.

assembling-the-wreath-4974

This card was created for and sponsored by Paper House Productions.


*I am an Amazon Affiliate.  If you choose to make a purchase from Amazon using these links, I receive a small commission that helps offset the cost of running this blog.  Thank You!

DIY…”Merry” Canvas

Make the holidays “Merry” with this mini decorated canvas.

Create frosty, glittery goodness with this fun mini canvas project.

To make the Merry Canvas you’ll need:                                      *affiliate link

*Disclosure… This blog uses ads and affiliate links.  If you choose to make a purchase using one of the links, I receive a small commission (at no additional cost to you) that helps offset the costs of maintaining this blog.  Thanks for your support!

Directions:

  • Wrap twine around canvas and embellish with jingle bells, greenery and bow.

“This is a sponsored post.  As a member of the Joy® Design Team I have been provided product and compensation in exchange for my creative ideas.  The views and opinions are my own.

Holiday Diamond Art

Christmas Carol Set - 25 Favorite Songs, Delicious Holiday Recipes, Party Ideas & More!

Holiday Centerpiece or Party Serving Stand

holiday-centerpiece-sues-creative-workshop-2839

Tis the season for Holiday Parties and decorating…

around my house, it’s starting to kick in full steam.

Instead of stressing out, I try to create items with more than one purpose.

My Holiday Centerpiece also works wonderful as a Party Serving Stand.

holiday-stand-before-sues-creative-workshop-2810

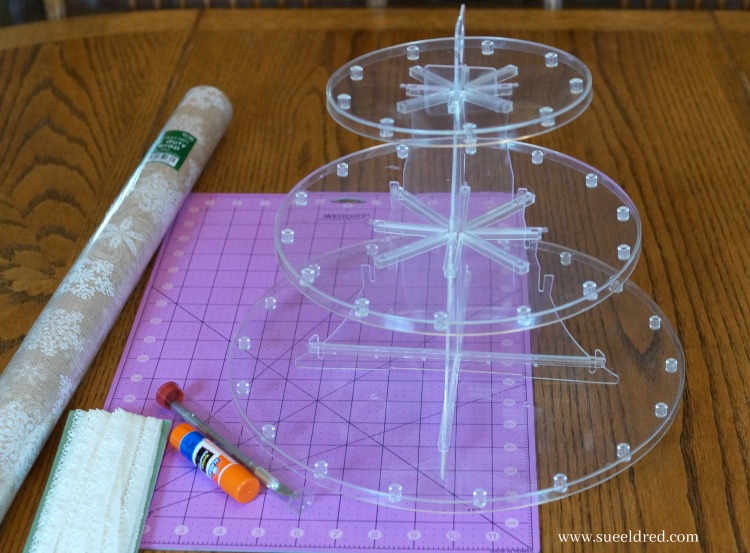
I started with a Deflecto 3 Tier Dessert Stand* (affiliate link),
wrapping paper, glue stick and cutting mat.

holiday-centerpiece-cutting-the-circles-sues-creative-workshop-2812

  • I traced around all three of my circles onto the back of the wrapping paper.
  • Apply the glue stick generously around and inside the circle.  Lay circle onto wrapping paper and smooth out any air bubbles.  (The nice thing about using wrapping paper and a glue stick is that you can easily remove the paper and glue by soaking stand in warm water.)
  • Trim around circle and inside channels using a craft knife and cutting mat.

holiday-stand-close-up-sues-creative-workshop-2822

  • Glue lace around the outside of each circle and assemble stand.

holiday-adjustable-3-tier-stand-sues-creative-workshop-2826

Add ribbon and holly berries and you’re ready for a party.

holiday-centerpiece-sues-creative-workshop2841

Or add small ornaments and decorations for a fun Holiday Centerpiece.

“This is a sponsored post. As a member of the Deflecto Design Team I have been provided product in exchange for my creative ideas, views and opinions.”

Disclaimer:  This blog uses ads and affiliate links.  If you choose to make a purchase using one of the links, I receive a small commission (at no additional cost to you) that helps offset the costs of maintaining this blog.  Thanks for your support!

Try Amazon Prime 30-Day Free Trial

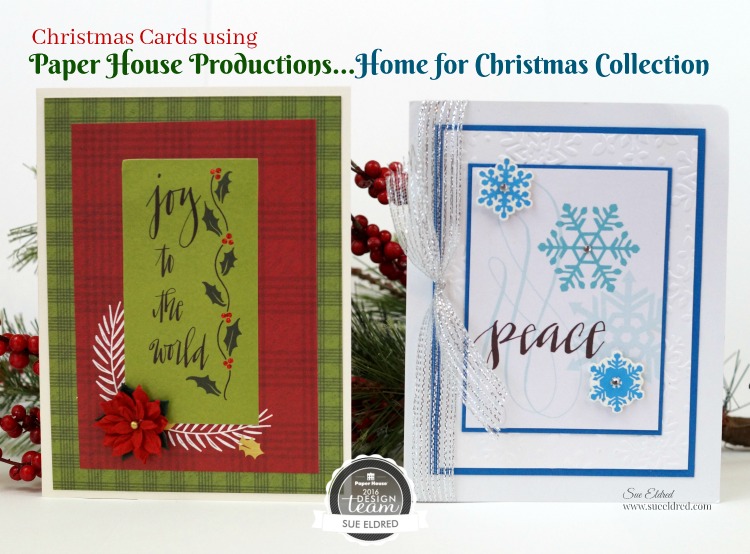
Christmas Cards using Paper House’s “Home for Christmas” Collection

christmas-cards-using-paper-house-productions-home-for-christmas-collection-sues-creative-workshop

Planning on making Christmas Cards this year?

I thought I’d share a couple of the quick and easy layered cards that we made in my Holiday Workshop.

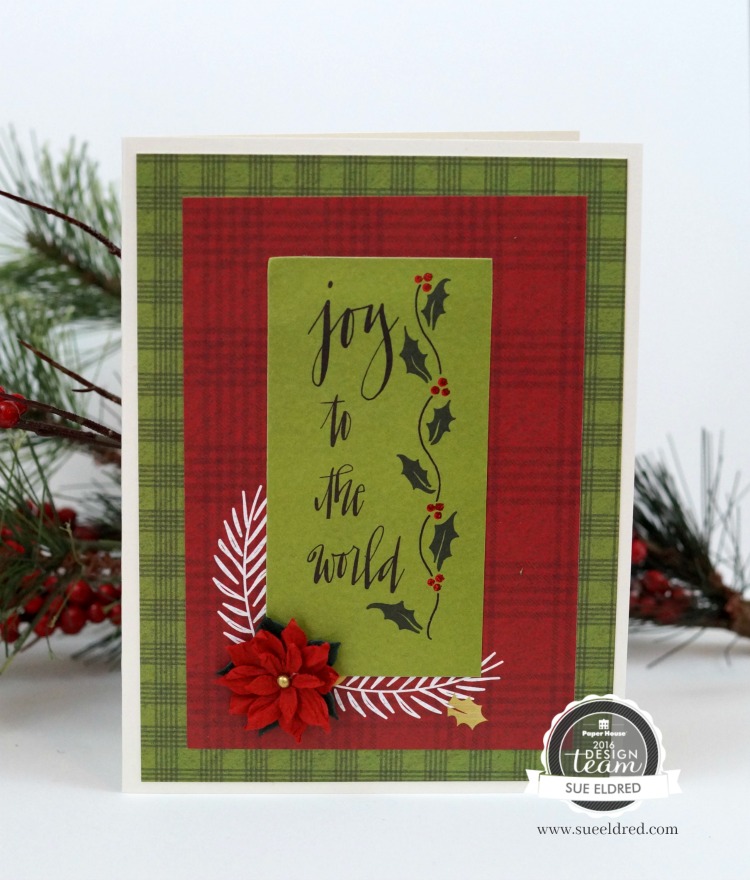
joy-to-the-world-2577

The Joy to the World card uses:

joy-to-the-world-inside-sues-creative-workshop

I used the Merry Christmas Tag from the Glitter sheet on the inside of the card.

peace-card-sues-creative-workshop

For the Peace Card I used:

peace-card-inside

On the inside of the card I used:

  • Winter Snowflakes Washi Tape from Little B LLC
  • the Snowman from the Home for Christmas Cardstock Stickers


*I am an Amazon Affiliate.  If you choose to make a purchase from Amazon, I will receive a small commission that helps offset the cost of running this blog.

Sue’s Family Flip Album Video

As soon as I received this new flip book from Paper House I fell in love.

This interactive album has plenty of room for photos, and lots of places to write

down memories, plus it has special pockets for keepsakes.

Since mere pictures wouldn’t show you how fun this album is…

I decided to make a short video.

I actually spent more time editing and uploading the pictures to be printed than it took me to put this

album together.  I decided to keep my album simple with just a few stickers.

I’ll go back later and add some journaling.

But…with the extra large spine, you’ll be able to get carried away embellishing. (if you’d like)


The album I used in the video is…

Paper House Productions FB-0004E Flipbook Interactive Album, Wedding Day*

Since the pages of the album are neutral they worked perfect for my family pictures.

To embellish my album I used the Wedding Day 12″ Cardstock stickers.


*This project was created for and sponsored by Paper House Productions.

This post uses Amazon Affiliate links.  If you would choose to purchase an item from Amazon

using this link I will receive a small commission that helps offsets the costs of running this blog.


Sometimes all you need to do is IMPROVISE

playing-in-the-pine-needles-layout-sues-creative-workshop-2266

When the boys came over to visit the other day, Nick had it in his mind that he was going to

rake a huge pile of leaves to play in.  Since the maple tree in the front yard had yet to drop it’s leaves

I suggested he rake up the Pine Needles.  (I figured a win-win for both of us)

playing-in-the-pine-needles-sues-creative-workshop1872

They raked, they threw, they had a really good time.  They IMPROVISED!

and…there were pine needles everywhere.

I love this picture of the boys.  So much fun.

paper-house-fall-blog-hop

This week the Paper House Design Team is having a Fall Blog Hop with a chance to win a fun prize.

Make sure to stop by the Paper House Blog to join in the fun.

fall-blog-hop-banner

My “Playing in the Pine Needles” layout was created for and sponsored by Paper House Productions.

The paper and stickers used in the layout were from the Autumn Woods Collection.

Framed Magnetic Family Memo Board

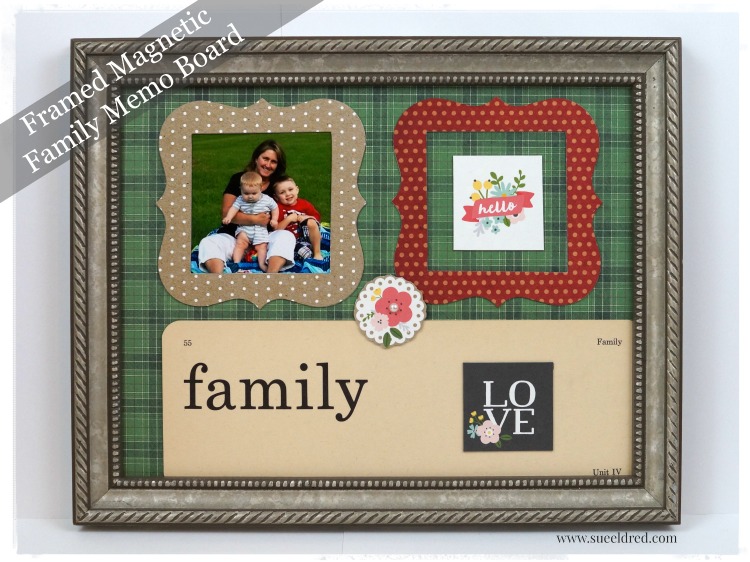
framed-magnetic-family-memo-board-2001

A decorative alternative to the family refrigerator.

This picture of me with my grandsons is one of my favorite photos.

It’s been hanging around on the fridge for a couple of years now.

I decided to make a Framed Magnetic Memo Board that I can hang on the wall and swap out photo’s

in the magnetic frames when ever I feel like it.

framed-magnetic-family-memo-board-2005

  • I started with an old picture frame with the glass removed.
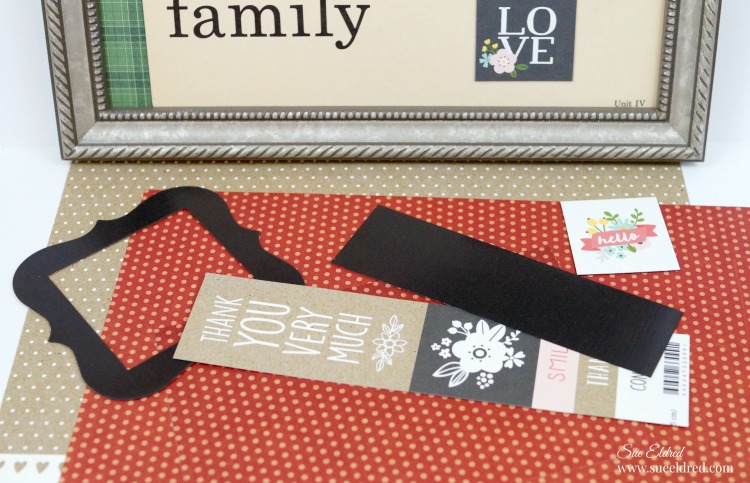
  • I adhered the Magnetic Craft Sheet from Deflecto using double sided adhesive on the frame backing with the black magnetic side up.
  • Next, I covered the black magnetic sheet with a “thin” piece of plaid scrapbook paper and inserted it back into the frame.  (TIP:  using thin paper is the key to the magnetic sheets sticking together)
  • To make the frames:  Cover magnetic sheets with scrapbook paper. Cut magnetic sheet with craft knife and mat or use a wood die cut frame to cut out the frames.
  • You can also create small word magnets using scrapbook paper and the magnetic craft sheets.

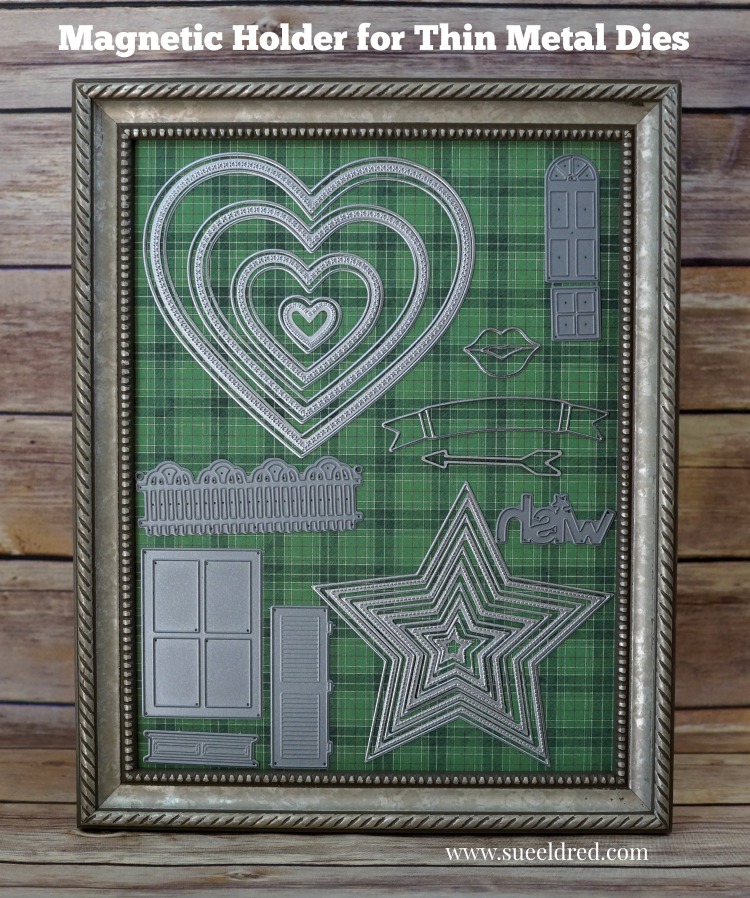
magnetic-holder-for-thin-metal-dies-sues-creative-workshop

Thin metal dies will not work to cut the magnetic sheets, but it would be a great way to store them!

Deflecto Magnetic Craft Sheets, 8″ x 15″, 3-Pack, White (5901)


“This is a sponsored post. As a member of the Deflecto Design Team I have been provided product in exchange for my creative ideas, views and opinions.”

*This post uses Amazon Affiliate links.  I am an Amazon Affiliate.

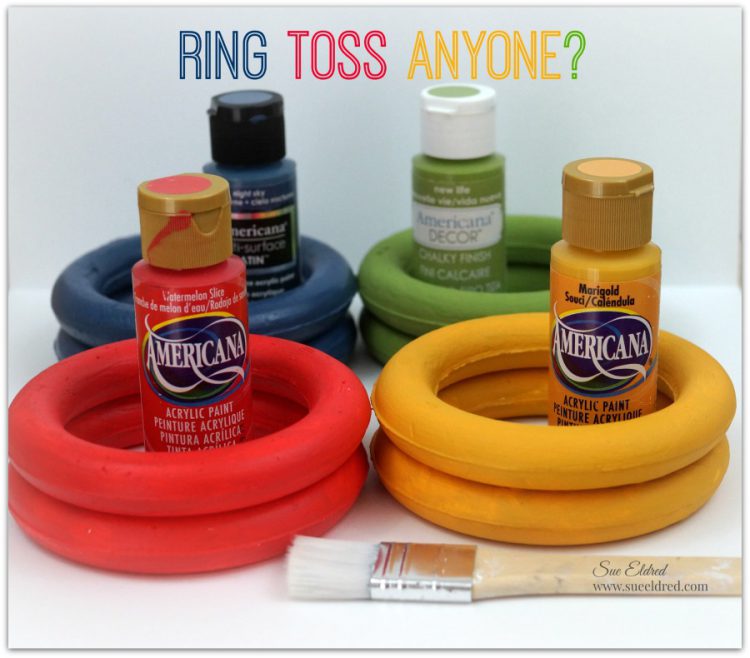
Ring Toss Anyone?

For Nick’s Carnival themed birthday party, earlier this month…

I was given the task to create the Ring Toss Game.

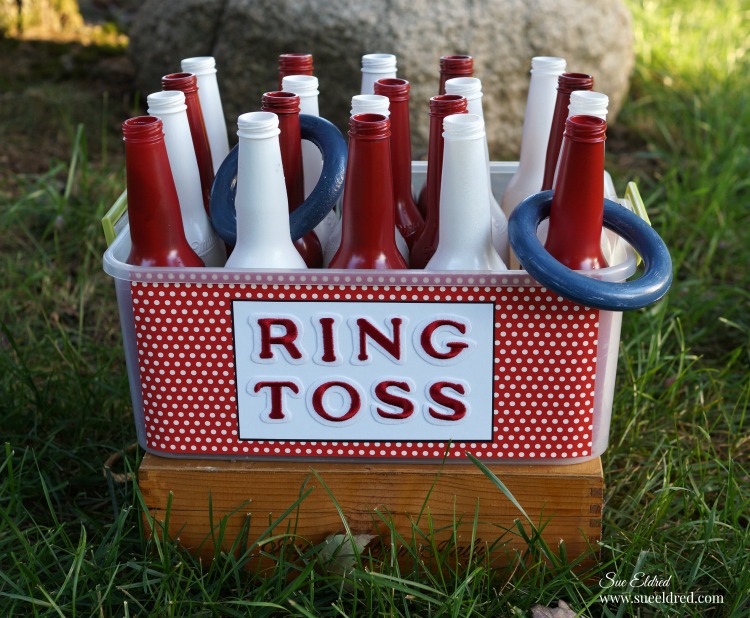
 After washing and spray-painting all the bottles, I needed a cute sign for the game.

Joy letters to the rescue – I just adhered them to scrapbook paper I added to the outside

of the plastic bin that holds the bottles.

I used lightweight Smoothfoam rings painted with acrylic paint for the kids to toss.

ring-toss-game-sues-creative-workshop

Besides the Ring Toss Game there was a Hit the Can, Frisbee Toss, Fishing Game, Shoot Em Up, Tattoo Parlor, Fortune Teller.

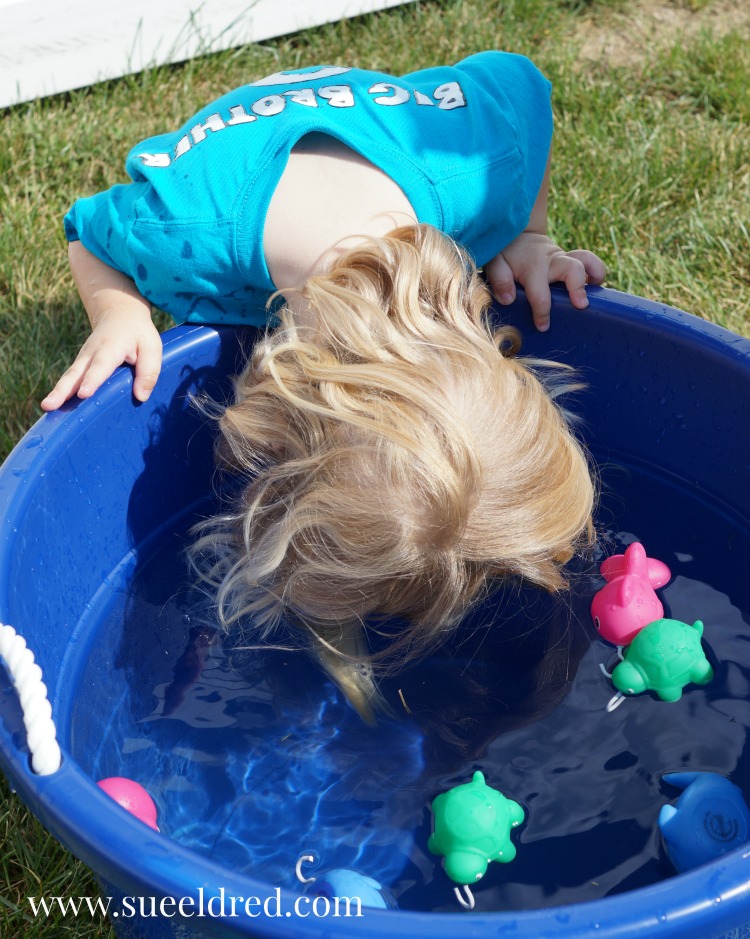
fishing-game

Warren especially love the Fishing Game.

So much, he stuck his head in the tub.  (it was unseasonably HOT that day)

nicks-6th-birthday-party

There was Ice Cream Cone Cupcakes, Corn Dogs, Popcorn, Nacho’s and a ton of prizes.

The kids and adults had a really good time at the party.

This post was sponsored by Joy Sa and DecoArt.

Disclosure:  This blog uses ads and affiliate links.  If you choose to make a purchase using one of the links, I receive a small commission (at no additional cost to you) that helps offset the costs of maintaining this blog.  Thanks for your support!

Join Amazon Kindle Unlimited 30-Day Free Trial

Sue and Nick’s First Video together on 3D Shimmerz from Paper House Productions

I asked my grandson, Nick to help me make a video.

If you’ve followed my blog any at all you’ve most likely seen a picture or two of my grandsons.

To be totally honest…some of my most popular posts are projects that I did with my grandson Nick.

So…when I decided to make a video showing how fun the new 3D Shimmerz from Paper House

Productions are I thought who better than Nick to help me.  He’s a natural and really did a great job.

He probably didn’t even need me.  Prepare yourself for extreme cuteness.

(oh…and please excuse the crickets in the background)

Nick asked me tonight when we’re going to make another video.  You just never know.


*This video was sponsored by Paper House Productions.

Boo Door Hanger and Autumn Wreath

autum-wreath-and-boo-door-hanger-sues-creative-workshop-1256

The plan was to make the “Boo Door Hanger” and the “Autumn Wreath”

as two separate projects with two separate blog posts.

But… while I was working on decorating my front porch for Fall,

I tried them together and decided I liked it.

The “Boo Door Hanger” is a separate piece that I can remove after Halloween.

fall-wreath-supplies-sues-creative-workshop

I assembled the wreath using a grapevine wreath, a couple of fall silk floral bouquets, ribbon and my

hot melt glue gun.  After cutting the stems apart from the bouquet, I played around with the

arrangement of the flowers and glued them in place.

A simple bow glued into place finished off the Autumn Wreath.

The entire project took less than a half hour.

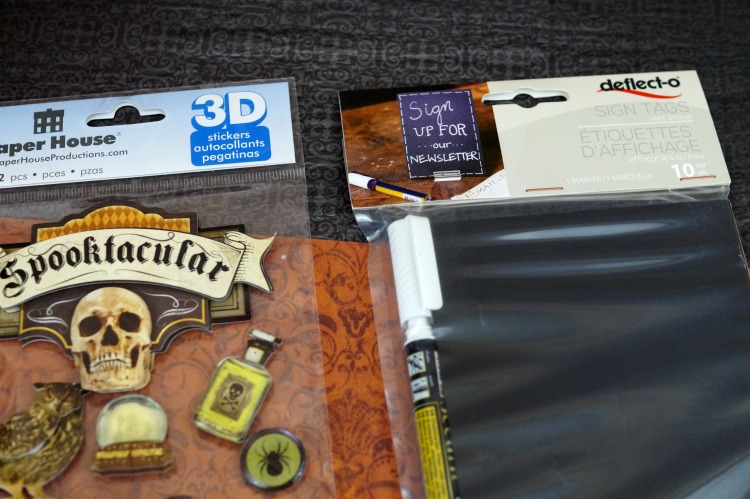
sign-tags-stickers-and-paper-1119

The Boo Door Hanger was a little more involved…

I used Black Sign Tags that come with a White Wet Erase Marker from Deflecto Craft Solutions

and Halloween paper and stickers from Paper House Productions.

die-cut-frames-1124

I applied the Halloween paper onto thin chipboard and cut out three die-cut frames.

I cut the sign tags just slightly bigger than the opening of the frame and adhered it to the back.

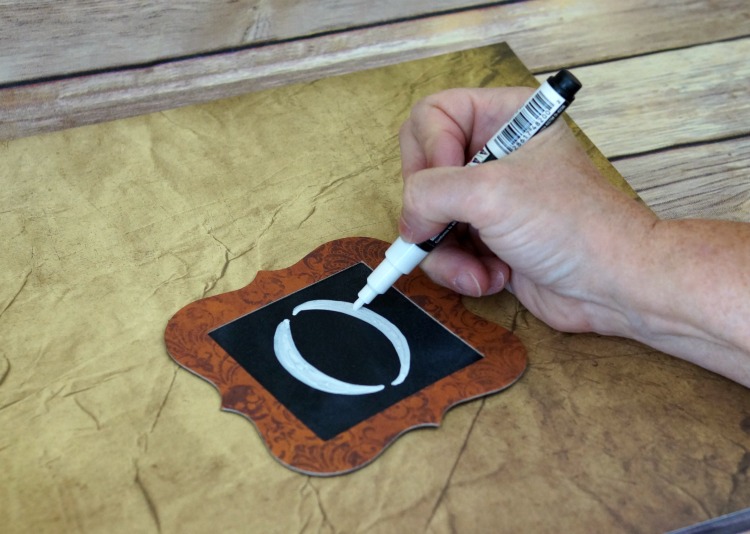
drawing-the-letters-with-the-chalk-marker-1125

I drew in my letters using the white dry erase pen.

Make a mistake?  Just wipe the sign tag with a damp paper towel and start over.

boo-door-hanger-close-up-1127

I punched two holes in the top and bottom of the first two frames and the top only of the last frame.

I added a black eyelet to each hole and connected the frames with small garment pins.

boo-door-hanger-1129

I embellished each frame with Spooktacular 3D Stickers from Paper House Productions.


“This is a sponsored post. As a member of the Paper House Productions and Deflecto Design Team I have been provided product in exchange for my creative ideas, views and opinions.”