Quick & Easy Washi Tape Make-Over

Quick & Easy Washi Tape Make Over 7015

Quick and Easy, Keep It Simple.  Sounds like a great DIY plan. 

With a little creativity you can transform plain into something fun and personal.

Deflecto Black Pencil Cup 6944

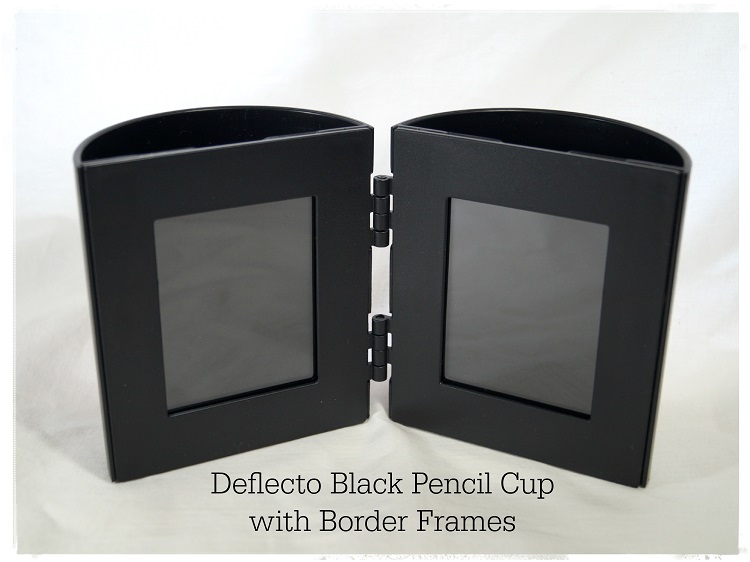
I started with a plain pencil cup from Deflecto.

With a little Washi Tape wrapped around the top and bottom of the cup, a couple of stickers and

accessories…  I now have a cute pencil cup to set on my desk.

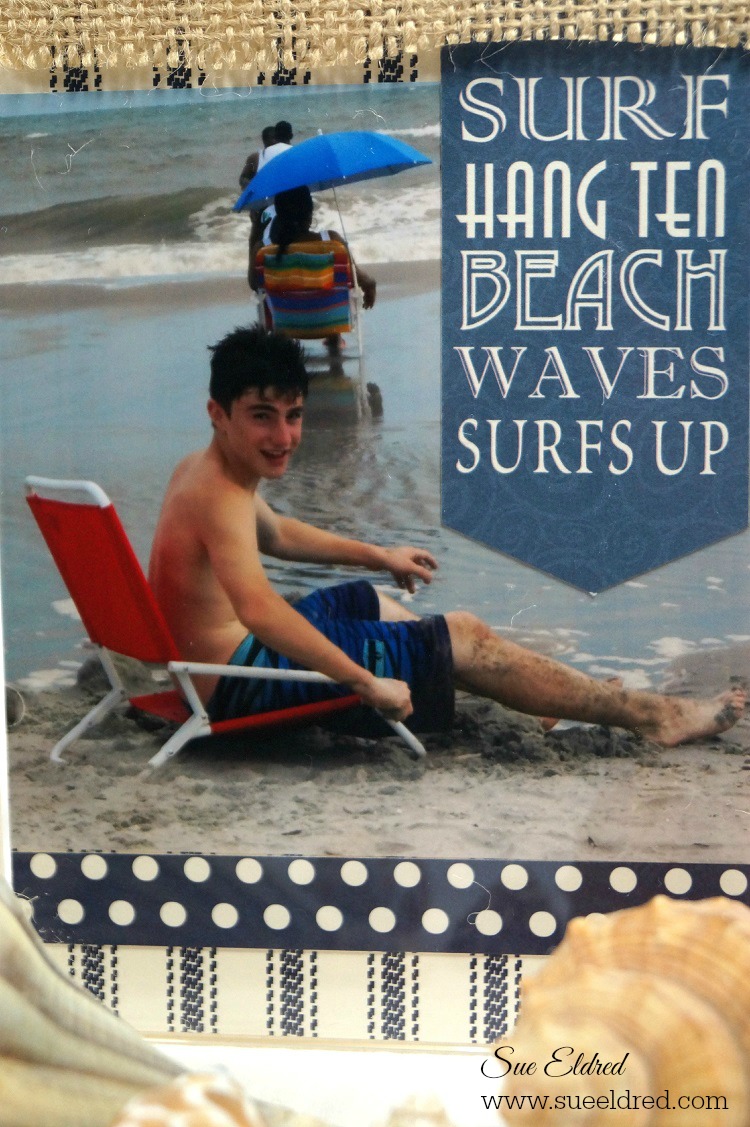
I added a couple of my favorite pictures of my special guys from last year.  (boy have they grown)

Quick & Easy Washi Tape Make Over 7014

Need a couple “brownie points” for the upcoming back to school?

This would make a great teacher gift.

Just add the Teacher’s Name, Grade or “Welcome Back to School” along with a apple sticker or two.

Great for Dorm Rooms too.

“This is a sponsored post. As a member of the Deflecto Design Team I have been provided product in exchange for my creative ideas, views and opinions.”

 Featured on Hometalk.com

American Vintage Travel Dungaree Album

American Vintage Travel Dungaree Album 06693

With Summertime comes the Road Trips.

Whether you’re hitting the beach or hiking up trails, you’ll want to savor these memories forever.

My Travel Album made using Canvas Corp Brands  “American Vintage Collection” and Dungaree

Album is a great place to save all the pictures and memorabilia you’ll be collecting along the way.

American Vintage Dungaree Journal Open 6705

Instructions to make the American Vintage Dungaree Travel Album…

Canvas Corp Brands Products Used:

Additional Products Used:

(Disclosure:  I will get a small commission if you click and purchase through my product links.)

American Vintage Album 6178

  1. For the Travel Album, start with the Dungaree Journal.  (available in three sizes.)
  2. Glue a piece of plain canvas around the spine with Fabri Tac glue and cover the edges of the canvas with a piece vintage lace.
  3. Tear a strip of gingham fabric and tie it around the album for a bow.

American Vintage ALbum Close Up 6244

4.  Take a photo from the American Vintage Photo’s and punch it into a 1″ circle.  Apply glue with a gluestick to the front of the picture and place inside the optical lens.

5.  Stick the vintage pin into the knot of the bow and hang the optical lens and key.

6.  Cut the letters “travel” from one of the pieces of paper from the 8″ x 8″ paper pad and glue onto a piece of chipboard for added dimension.  Edge around each of the letters using Vintage Photo Distress Ink and a ink applicator.  Glue the letters on the front of the album with Fabri Tac glue.  Wrap a length of twine around the album.

7.  Add pictures and memorabilia into the album.

American Vintage Dungaree Album Inside Front Cover 6700

The Dungaree Journal includes two chrome rings for binding as well as 10 page protectors. 

American Vintage Dungaree Album Inside Pages 6683

American Vintage Dungaree Album Page #1 6673

American Vintage Dungaree Journal Inside Pages 6675

Have a Great Summer.

Happy Little Camper


Happy GlampingI always tell people, my idea of roughing it is a bad hotel room. But who knows, if I had a happy little camper like this, I might try my luck with camping.

Supplies:

6″ Smoothfoam Disc
2″ Smoothfoam Ball
Window & Door Die by Impression Obsession
Diecutting machine
Scrapbook paper
Acrylic paints – Antique White, White, Light Blue, Black
Paintbrush, Q-tip
Silver metallic paint marker
Ribbon & twine
Craft glue
Assorted brads
Corsage pins
Craft knife or Hotwire Foam Cutter

1.  To create the body of the camper, cut 2″ off the edge of the Smoothfoam disc.  Paint the top antique white and the bottom light blue.  Add white polka dots on top of the blue with a small Q-tip.

2.  Cut two slices out of the middle of the Smoothfoam ball for the wheels and paint them black.

3.  Cut a small block from the leftover Smoothfoam to prop up the camper’s front end and color it with the silver paint pen.

4.  Glue all the pieces together as shown.

5.  Die-cut two windows from white paper and glue them onto patterned paper, then trim to create the window background. Cut a 1″ x 2″ piece of red cardstock to use as the door.
Glue one windows to the camper and the other to the door, then glue the door to the camper.

6.  Make a banner with ribbon and twine.  Tie twine ends around corsage pins and stick into top of the camper.

Happy Glamper 2

Three Sided Vacation Memory Frame

Make the memories last this summer with a three sided Vacation Memory Frame.

Travel Frame close up3984

One of my favorite things to do with my family is spending time at the beach.

Lazy Days, Soaking Up the Sun, Playing in the Water…

It’s a special time and I want to remember those times forever.

Deflecto Three Sided Travel Frame 4000

Deflecto Vacation Tri Frame 3954

Relax and Enjoy

Deflecto Three Sided Travel Frame 04003

For my frame I used a Marketing Holders Classic 3 Sided Plastic Sign Holder, 4 x 6 Clear

from Deflecto and paper from Canvas Corp Brands.

Canvas Corp Brands:

Deflecto Three Sided Travel Frame 3999

“This is a sponsored post. As a member of the Deflecto Design Team I have been provided product in exchange for my creative ideas, views and opinions.”

DIY Graduation Frame with Tassel

DIY Graduation Frame 5398

Some years I don’t have any Graduations to celebrate. 

This year there are three.  One from High School, Two from Junior High.  (not mine!)

I decided to make a Graduation Frame to use as one of the gifts.

After the ceremony the Graduate can take out the greeting and add a picture.

DIY Graduation Frame Collage

For my frame I used:                                                                                    (*affiliate link)

  1. To make the tassel:  Wrap the red twine around a piece of chipboard several times.  The size of the chipboard determines the length of the tassel.
  2. Cut a piece of twine to gather and tie tightly around the twine at the top of the wrapped chipboard.
  3. Cut open the bottom loops from the chipboard.
  4. Wrap thin gold wire around the top of the tassel to imitate the look of a gold band.
  5. Trim the bottom of the tassel to even the length.
  6. Create computer generated greeting and insert inside the frame.
  7. Ink white chipboard numbers gray using the ink applicator.  Stick on front of the frame.
  8. Make a small garland from small 1/2″ strips of paper adhered to a piece of red twine.
  9. Adhere the tassel to the back of the frame with a small piece of tape.  That way the Graduate can reposition the tassel if needed after adding photo.

FYI:  When my oldest graduated from High school his younger sister also graduated from Junior High.  Four years later when it was time for her to graduate High School he was graduating from College.

SO….for all you young people thinking of starting a family. 

Don’t space your kids 4 years apart.  (The magic number is three.)  Just saying!

“This is a sponsored post. As a member of the Deflecto Design Team I have been provided product in exchange for my creative ideas, views and opinions.”

Shop Your Fav Brands at Scrapbook.com

*Disclosure:  This post uses ads and affiliate links.  If you choose to make a purchase using one of the links, I receive a small commission (at no additional cost to you) that helps offset the costs of maintaining this blog.  Thanks for your support!

How to Make a Garden Butterfly Sign

Welcome to My Garden Butterfly Sign 4758

How to make a Garden Butterfly Sign.

A fun technique using Black Sign Tags from Deflecto Craft Solutions.

According you my you tube account it’s been 4 years since I made my first video.

I guess it was finally time for my second one.  (let me know what you think)

“This is a sponsored post. As a member of the Deflecto Design Team I have been provided product in exchange for my creative ideas, views and opinions.”

Tattered Tangles: Happy Birthday Tag

Tattered Tangles Birthday Tag 3368

Do you ever need a really large Birthday Tag to make your present “POP”?

Tattered Tangles Birthday Tag Close Up 3370

This tag uses Tattered Tangles a fun doodle art from Canvas Corp. Brands.

Tattered Tangles Collection is printed on a paper called Leather Paper making it

perfect for coloring and different paint techniques.

Supplies Used on the Tattered Tangles Happy Birthday Tag:

  1. Cut Tattered Tangles Birthday image down to 3-3/4″ to 6″.  Color image with colored markers.
  2. Add clear glitter glue to flame on the birthday candle.
  3. Adhere birthday image onto black cardstock.
  4. Adhere small scraps of teal and green burlap onto the corners of a 4-1/2 x 7-1/2″ piece of white cardstock.  Glue rick rack onto the top and bottom.  Layer onto another piece of black cardstock.
  5. Mount birthday image with foam mounting squares onto the burlap and white cardstock.
  6. Curl white curling ribbon and attach to the top of the tag with a small green clothespin.

Happiness Tangled Pack

Disclosure:  This project was created for and sponsored by Canvas Corp Brands and uses affiliate links.

Little Black Dress Mixable Medley Album

Clear Scraps LBD new album

When it comes to scrapbooking, I have a lot of stuff.

I have so much stuff… I should never buy another sheet of scrapbook paper.  (but I will )

I love paper.  I love pretty patterns.  I love mini albums.  (so much to love)

Lately, I’ve been on a quest to use more of the stuff I have on hand.

So, when it came to making this Mixable Medley Album for Clear Scraps, I pulled

from one of my favorite collections, the “Little Black Dress” collection from Basic Grey.

The album also uses Clear Scraps New Oval Fancy Mirror Frame.

To make the mirror stand out and give the album a vintage feel, I sponged “Spiced Chai”

Stazon Ink onto the back of the acrylic cover leaving the center of the mirror clear.

LBD Album 2457   LBD Album 2458

This project was created for and sponsored by Clear Scraps.

Home Sweet Home

House Mixable 1580

A quick share today to show you the Mini Album I made using Clear Scraps New Mixable Home Album.

My “Home Sweet Home” album is a 8″ x 9″ Acrylic & Chipboard mixed Album.

I used chipboard stickers from My Mind’s Eye “Sweetest Thing” collection and various scrapbook papers

to decorate my album.

House Mixable Close Up 1582

My favorite part of the album is the fence.

I love the look of a white picket fence so I sprayed the clear acrylic with white spray

paint.  Now I have a white picket fence.

(This project was created for and sponsored by Clear Scraps.)

Valentine’s Challenge

CCB Valentine's Challenge 1862

I’m taking part in a special Valentine’s Challenge to make a Valentine and send it

to someone as an unexpected surprise.  (Hmmm… Who should I send it too?)

My Valentine is a simple card that uses product from Canvas Corps Brands and Spellbinders.

Have a great day!   I’m off to make more Valentine’s.

Disclosure:  This project was created for and sponsored by Canvas Corp Brands.