Creative Ideas using Craft Frames by deflecto

Deflecto Craft Badge (1) team badge

I recently started working with a new company called Deflecto.  Some of you may recognize the name Deflecto from dryer vents or bicycle reflectors. (among many other things)   Deflecto now has Craft Storage Solutions.  Providing solutions to stay organized so you can concentrate on your projects not your clutter.  (and that’s always a good thing)

Deflecto Craft Frames 2

Each month Deflect-o will send me something new to play with.  This month, I’m getting creative using their Craft Frames.

September Calendar

Call me silly, but, this has to be my favorite frame so far.
This frame is not just a clear 8 1/2″ x 11″ acrylic frame.  It is flat backed and comes with heavy-duty magnets, velcro and a push pins attachment so that it can go on a fridge, wall or even a bulletin board.  They’ve thought of everything.

For my frame, I went with the velcro and have it attached inside my office cabinet.  I’m always losing my Editorial/ Blog calendar on my desk among piles.  Now I can find it, take it down and update it anytime I want.

Look Listen Create Enjoy

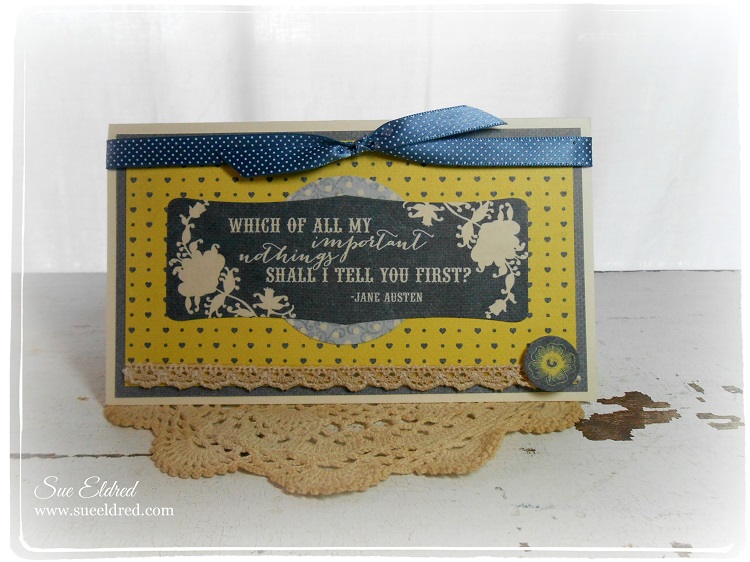
I like that this frame comes with a black edge.  I added some personal inspiration with scrapbook paper and stickers.

 Note Holder w scrapbook paper  Note Holder Clear

The purple frame I made into a girly Post It Note Holder.  The second picture shows the frame clear with no paper scrapbook paper added.  I’m not sure which one I like the best.

Holiday Joy

How about this mini 2″ x 3″ frame decked out for the Holidays. (too cute right?)

I think I’m going to really enjoy working with this company and all their Crafty Storage Solutions.

I love being organized and this will work out great.

“This is a sponsored post. As a member of the Deflecto Design Team I have been provided product in exchange for my creative ideas, views and opinions.”

Wedding Day Brag Book

Our Wedding Day Brag Book

Overwhelmed by all the Wedding Pages you need to scrap?

The Wedding Brag book is a perfect way to show off a few of your favorite Wedding photos until you get that larger book finished.

The Wedding Brag Book would also make a perfect gift for your favorite Mother or Mother-in-law.

For my Wedding Brag Book I used the 6″ x 6″ Chipboard 3 Tabbed Album  from Clear Scraps and

The “Story of Us” Collection from Simple Stories.

Wedding Album inside

I love these sturdy chipboard books.  When I use these books, I can easily trim around the edges with a craft knife and smooth any rough paper edges with a sanding block.

To spice up boring silver book rings, I painted each ring with a gold metallic paint pen.

Every Love Story...

Tip:  Being a frugal scrapper, I used the 1/2″ strip at the bottom of most scrapbook paper to cover the tab.  Start with that edge and cut your paper 6″ x 6 1/2″ and include that strip for the perfect tab.

Have a Creative Day!

Make sure to check all the 5 days of the DIY Wedding Projects.

Shop Handmade – The Wedding Store

Disclaimer:  This blog uses ads and affiliate links.  If you choose to make a purchase using one of the links, I receive a small commission (at no additional cost to you) that helps offset the costs of maintaining this blog.  Thanks for your support!

A is for Alex

Sue Eldred's Mini Robot made with Smoothfoam July 2014

I recently got the privilege of attending my sweet nephew Alex’s first birthday.

Since the party was a Robot theme…

I decided to make a Mini Robot out of Smoothfoam to decorate his present.

Supplies Used for make the robot:          (*affiliate link)

  1. Trim out 6 pieces from the Smoothfoam block with the wire cutter as shown for a body, head, arms and feet. Paint all pieces silver and let dry.
  2. Paint a wood skewer silver and cut into two pieces for the legs. Insert between the body and feet with a few drops of glue to secure.
  3. Glue the head and arms to the body.
  4. Adhere the eyes to the head, and a letter sticker for the child’s first name to the body. Place the letter “I” sideways on the head to create the robot’s mouth.
  5. Push two pearl-head pins into the top of the head for antennae, each secured with a drop of glue.

My little Robot stands approx. 4″ tall.

This project was created for and sponsored by Smoothfoam.

Disclaimer:  This blog uses ads and affiliate links.  If you choose to make a purchase using one of the links, I receive a small commission (at no additional cost to you) that helps offset the costs of maintaining this blog.  Thanks for your support!

Join Amazon Kindle Unlimited 30-Day Free Trial

The Twinery & Serendipity Stamps Blog Hop

Twinery Blog Hop Badge - Serendipity Stamps

Are you a Rubber Stamper?  Do you love using Twine on your projects?

Would you like a chance to win some free products?

Serendipity Stamps and The Twinery are joining together in a Blog Hop for the next three days.

Every Day a new group of Designers and New projects.  Start today’s Blog Hop here.

I will be joining them on Day #3 (July 30th)

Here is a few of the Prize Details:

Serendipity Stamps

To win the Serendipity Stamps Prize of $25 to the Serendipity Stamps website leave comments on all Serendipity Stamps posts each day.

To win the Facebook prize of $25 to the Serendipity Stamps website:  like the Serendipity Stamps Facebook page AND leave a comment.

Embossing Clear Scraps Clear Shapes for Layouts and Cards

Vintage Sisters Layout for Clear Scrap by Sue Eldred using Clear Shape Flowers

Did you know that you can emboss Clear Scraps Clear Shapes?   (I didn’t until recently.)

Smile Card for Clear Scraps Sue Eldred July 2014

For my “Vintage Sisters” layout and “Smile” card, I started with a Clear Shape Flower.

To make the Flower:

  • I used my Big Shot and a Swiss Dot Embossing Plate to emboss my flower.
  • I dabbed Antique Linen Distress Paint on the front of the flower  (raised dot)  and Victorian Velvet Distress Paint on the back side of my flower.

This project was created for and sponsored by Clear Scraps.

Make sure to tell your story.

As the Mom and a Scrapbooker I’m the one who’s telling my family’s story.

I’m also usually the one taking all the pictures.  Sometimes I’m even in the pictures.

As a scrapbooker, one of the things I’ve never done before was to do a layout on “ME”.

I know it feels a little vain, but, it’s important.  (Don’t you think?)

Hopefully one day, my kids or grandkids might enjoy reading a little bit about me.

Isn’t that why we do it?  To tell our “story”.

My 10 Things Layout

Last month on my blog I did a post on “10 things you may or may not know about me.”

I used that post as the starting point for this layout.

I like to use things in ways other than how their supposed to be used.

For this layout I used one of the scalloped shapes from the Send it Clear card kit from Clear Scraps.

Once I glued the scrapbook paper to the clear scallop, I edged around it with a gold paint pen.

I love how it’s a subtle enhancement for my page.  I glued a small medallion onto the tip of the scallop.

The paper is from the “Americana” collection from Pebbles Inc.

I also used Tim Holtz’ “Chit Chat” stickers to emphasize certain words in my story.

It’s simple and it’s me!