“If Friends Were Flowers” Shelf Sitter

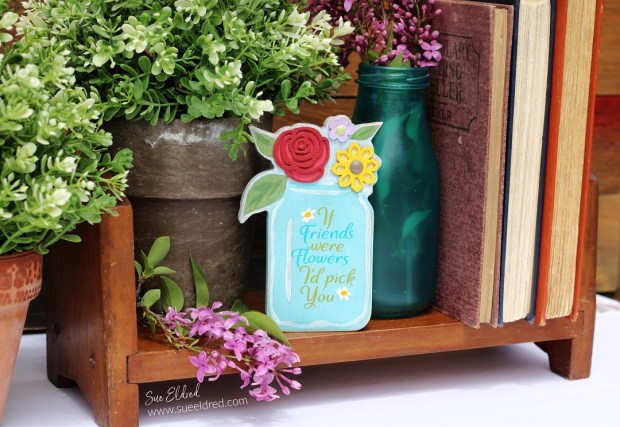
"If Friends were Flowers" DIY Mason Jar Shelf Sitter

DIY yourself A Happy Little Mason Jar Shelf Sitter.

As Spring turns into Summer, I get inspired to change my decor to happy colors.

I like to open the windows and let in the fresh air.

And…I love to bring in fresh blooms whenever I can.

Flowers make me HAPPY!

"If Friends were Flowers" DIY Mason Jar Shelf Sitter

The Wood Mason Jar Cut-Out…

Sometimes when I see an item at the store, I have a vision of what I want to do.

Sometimes it works out, and other times it does not.

This particular time was the latter.

When I first saw the wood mason jar with flowers cut out,

I saw it stained with only the flowers painted.

So, I stained the wood.

It might have been the stain I used, but I wasn’t pleased with the result.

"If Friends were Flowers" DIY Mason Jar Shelf Sitter

After letting it sit overnight, I decided a little acrylic paint might help.

So, I watered down my paints so they didn’t look too heavy and painted away.

While it isn’t what I originally had planned, it’s not too bad.

It’s bright and cheery.

"If Friends were Flowers" DIY Mason Jar Shelf Sitter

Doesn’t vinyl make everything just a little better?

For extra personality, I added vinyl lettering using my favorite StyletechCraft* adhesive vinyl.

Materials Used:    (*affiliate links)

StyletechCraft products brought to you by ATSM Craft*

*Disclosure:  This blog uses ads and affiliate links.  If you choose to make a purchase using one of the links, I receive a small commission (at no additional cost to you) that helps offset the costs of maintaining this blog.  Thanks for your support!

"If Friends were Flowers" DIY Mason Jar Shelf Sitter

  • I used a Silhouette Cameo Electronic Die Cutting Machine* with the “Monsoon Font” from The Silhouette Store to create the words.
  • Cut the words using StyleTech Craft Glossy Vinyl.
  • After cutting, remove the excess vinyl using a Vinyl Weeding Tool*.
  • Lay the transfer paper over the words.
  • Rub over the transfer paper with a vinyl scraper tool and lift the design from the white paper backing.
  • Lay the transfer paper onto the sign and rub over the design.  Remove the transfer paper.

"If Friends were Flowers" DIY Mason Jar Shelf Sitter

  • To make it a shelf sitter, I glued a small block, “borrowed” from the kid’s block basket, onto the back.
  • I painted the block with matching acrylic paint.

"If Friends were Flowers" DIY Mason Jar Shelf Sitter

Now that it’s finished, I think the shelf sitter would also make a cute Mother’s Day or Teacher’s gift.

So many possibilities.

Spring Tabletop Kit  New Products at Scrapbook.com!

Upcycling an Old Painted Canvas

Upcycling an Old Painted Canvas

Upcycling an Old Painted Canvas is a satisfying Trash to Treasure Project.

Turn an unused/unwanted canvas into an easy DIY.

Upcycling an Old Painted Canvas

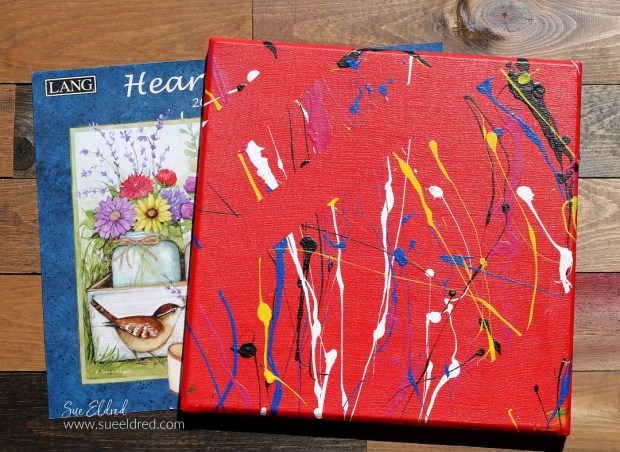
Several years ago, I got the opportunity to try Splatter Painting at a Trade Show.

As fun and exhilarating (and messy) as it was, abstract art is not my style.

While I would never typically do this with a painting,

this just-for-fun painting left me with no guilt.  (splatter painting post here)

I have been using Lang Wall Calendars for years.

And every year, at the end of the year, I have a hard time throwing them away.

I combined the frame under the canvas with the calendar page

for some inexpensive framed art.

Reusing items around the house in new ways is fun for me.

I don’t have to get rid of things I love, and It’s a new way to enjoy them.

And if I change my mind, which I often do, I can always upcycle it again.

It’s super easy to do.

Upcycling an Old Painted Canvas

Here’s what I used:  (*affiliate links)

*Disclosure:  This blog uses ads and affiliate links.  If you choose to make a purchase using one of the links, I receive a small commission (at no additional cost to you) that helps offset the costs of maintaining this blog.  Thanks for your support!

Upcycling an Old Painted Canvas

  • Use a small flat head screwdriver* to remove the staples from the back of the canvas.
  • FYI…Some frames will come with staples in the corner to hold them together instead of glue.
    In that case, you have a decision to make. But because I wasn’t attached to the painting, I had nothing to lose.
  • Give the frame a light sanding with a sanding block*.

Upcycling an Old Painted Canvas

  • Paint or stain the wood to match your decor.
  • Rub the finished frame with a clear wax using a soft, clean rag.

Upcycling an Old Painted Canvas

  • Cut the calendar page a little larger than the inside of the frame.
  • To give the picture more stability and a finished look, I adhered it to a piece of chipboard before gluing it onto the back of the frame.
  • Glue the picture inside the frame using a strong adhesive. I like using Rapid Fuse Adhesive*. It is a quick-setting glue and very strong. It works well with paper.

Upcycling an Old Painted Canvas

I put my “New” framed print on my mantel with a couple of old pots for a fun, fresh Spring look.

Spring Tabletop Kit  New Products at Scrapbook.com!

DIY Spring Bunny Door Hanger

How to make a Spring Bunny Door Hanger

How to Make a Spring Bunny Door Hanger with Acrylic Paint and StyleTechCraft Vinyl.

I love changing out my decorations with the seasons.

For Spring this year, I decided I needed a new bunny.

This cute little bunny door hanger makes me smile every time I see him.

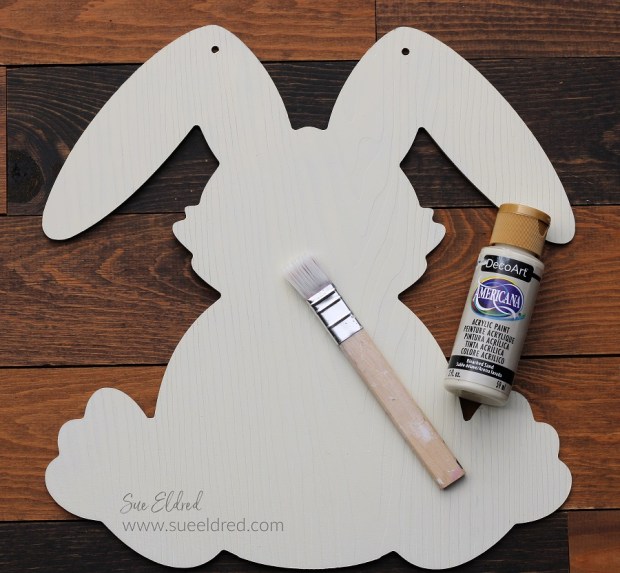
Dollar Tree* always seems to have the perfect wood cut out for me to use.

And when it only costs $1.25, it’s affordable too.

*Disclosure:  This blog uses ads and affiliate links.  If you choose to make a purchase using one of the links, I receive a small commission (at no additional cost to you) that helps offset the costs of maintaining this blog.  Thanks for your support!

How to make a Spring Bunny Door Hanger with a Dollar Tree Bunny, Acrylic Paint, and StyleTechCraft Glossy Craft Vinyl.

Materials Used to Make Bunny Door Hanger:   (*affiliate links)

StyletechCraft products brought to you by ATSM Craft*

How to make a Spring Bunny Door Hanger with a Dollar Tree Bunny, Acrylic Paint, and StyleTechCraft Glossy Craft Vinyl.

How to make The Spring Bunny Door Hanger:

How to Make a Spring Bunny Door Hanger with Acrylic Paint and StyleTechCraft Vinyl-Sue's Creative Workshop www.sueeldred.com 9785

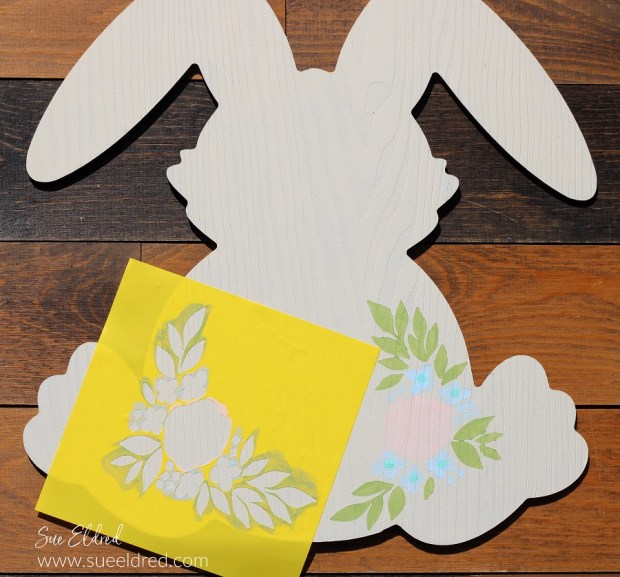
  • My project was inspired by a Large Floral Rabbit Decoration that I saw at Michael’s Craft Store.  I liked the look of the painted flowers on the rabbit.  But since my hand-painting skills are not that good, a floral stencil would have to do.

How to make a Spring Bunny Door Hanger with a Dollar Tree Bunny, Acrylic Paint, and StyleTechCraft Glossy Craft Vinyl.

How to make a Spring Bunny Door Hanger with a Dollar Tree Bunny, Acrylic Paint, and StyleTechCraft Glossy Craft Vinyl.

“This is a sponsored post.  As a member of the StyleTechCraft Design Team I have been provided product and compensation in exchange for my creative ideas.  The views and opinions are my own.

How to make a Spring Bunny Door Hanger with a Dollar Tree Bunny, Acrylic Paint, and StyleTechCraft Glossy Craft Vinyl.

How to make a Spring Bunny Door Hanger with a Dollar Tree Bunny, Acrylic Paint, and StyleTechCraft Glossy Craft Vinyl.

  • For the florals, line up the vinyl over the painted area.
  • Gently rub over the transfer tape with the scraper tool.
  • Remove the transfer tape.

How to make a Spring Bunny Door Hanger with a Dollar Tree Bunny, Acrylic Paint, and StyleTechCraft Glossy Craft Vinyl.

  • To create the handle, paint several wood beads with the same acrylic paint as the flowers.
  • String the beads onto a piece of natural twine*.  
  • An Easy DIY Tip: Dip the end of the twine into craft glue. Twirl the fibers with your fingers tips to make the strands tight. Once the glue dries, it’s easy to add the beads.

How to make a Spring Bunny Door Hanger with a Dollar Tree Bunny, Acrylic Paint, and StyleTechCraft Glossy Craft Vinyl.

  • I rubbed a little pink paint onto the face before adding the whiskers.

How to make a Spring Bunny Door Hanger with a Dollar Tree Bunny, Acrylic Paint, and StyleTechCraft Glossy Craft Vinyl.

  • I added adhesive rhinestones to the inside of the smaller flowers.
  • A Hello Spring Greeting finishes off the door hanger.

How to Make a Spring Bunny Door Hanger with Acrylic Paint and StyleTechCraft Vinyl-Sue's Creative Workshop www.sueeldred.com 9894

I decided to add the Bunny Door Hanger to the inside of my Boxwood Wreath.

I think it looks cute hanging on my front door.

Spring Party Collection

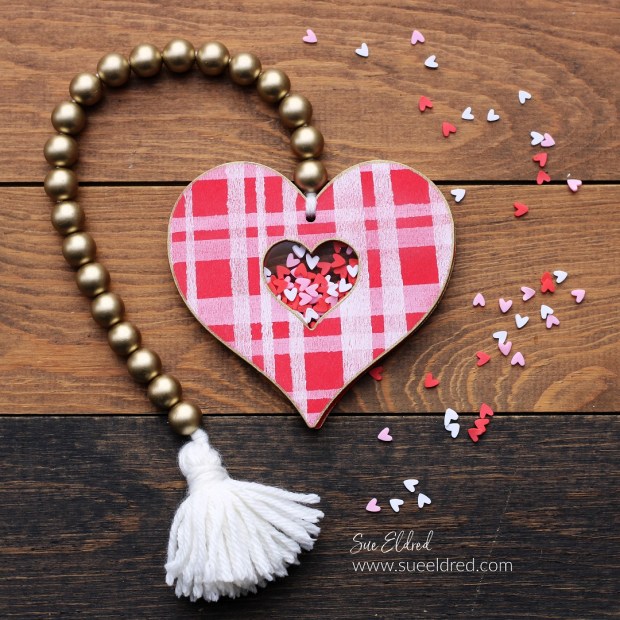
How to make Plaid Shaker Heart Ornaments for Valentine’s Day

DIY Plaid Shaker Hearts

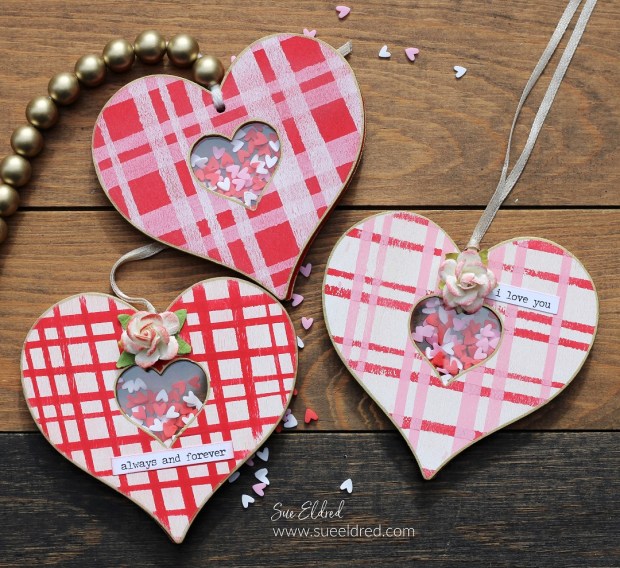
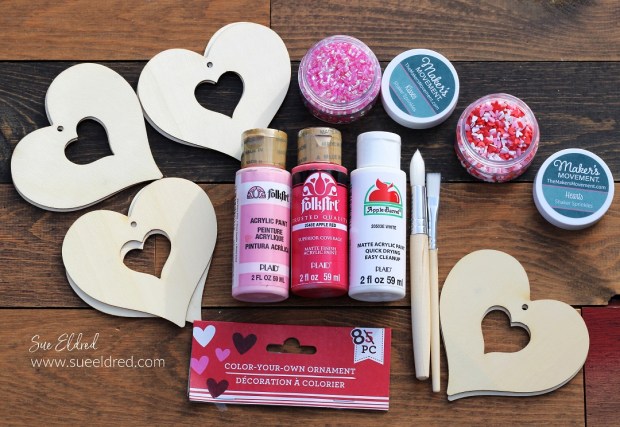
How to make Plaid Shaker hearts using Dollar Tree Heart Ornaments.

I’m always looking for simple Valentine’s Home Decor projects.

This Plaid Shaker Heart Ornament is super easy to make.

How to make Plaid Shaker hearts using Dollar Tree Heart Ornaments.

Who’s Up for a little Valentine’s Day Plaid?

No matter the season, I’m always a little “Mad for Plaid”.

I had fun experimenting with different color combinations for my plaid hearts.

How to make Plaid Shaker hearts using Dollar Tree Heart Ornaments.

Materials Used:  (*affiliate links)

*Disclosure:  This blog uses ads and affiliate links.  If you choose to make a purchase using one of the links, I receive a small commission (at no additional cost to you) that helps offset the costs of maintaining this blog.  Thanks for your support!

How to make Plaid Shaker hearts using Dollar Tree Heart Ornaments.

Directions:

  • My heart ornaments are approximately 4″ x 4″ with a 1¼” x 1¼” heart opening in the center.
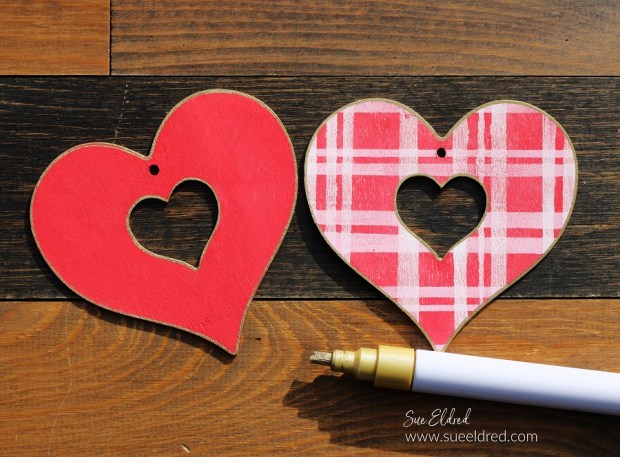
  • Paint both sides of two heart ornaments with red paint.
  • Place thin strips of removable tape* across the heart ornament.  Alternate between thicker and thinner strips.
  • Rub your finger over the tape to make sure that the tape* is securely on the ornament and has no gaps.

How to make Plaid Shaker hearts using Dollar Tree Heart Ornaments.

  • Paint inside the stripes with a thin coat of pink acrylic paint.  Be careful not to apply the paint too thick.   Only one thin coat of paint is needed.
  • Remove painter’s tape.
  • Allow the paint to fully dry before continuing to the next step.

How to make Plaid Shaker hearts using Dollar Tree Heart Ornaments.

Stripes are good too.

If you like stripes better than plaid, you can skip the next step.

How to make Plaid Shaker hearts using Dollar Tree Heart Ornaments.

  • Next, add strips of Removable Tape* vertically over the heart.
  • Make sure the tape is flat with no gaps.

How to make Plaid Shaker hearts using Dollar Tree Heart Ornaments.

  • Paint over the heart with a thin coat of white paint.
  • Carefully remove the tape.  Allow the paint to dry.

How to make Plaid Shaker hearts using Dollar Tree Heart Ornaments.

  • Using a Sanding Block* lightly sand the heart ornament. Sanding smooths the woodgrain and helps to hide any little imperfections.
  • Wipe with a clean cloth.

How to make Plaid Shaker hearts using Dollar Tree Heart Ornaments.

  • For a little extra pop of gold.  
  • Edge the sides of the heart ornament with a Chisel Point Gold Leaf Pen*.
  • Don’t forget to add a little gold to the center heart.

How to make Plaid Shaker hearts using Dollar Tree Heart Ornaments.

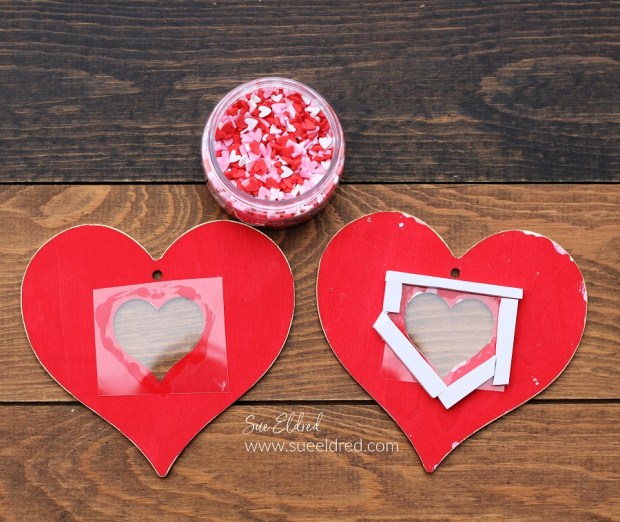
  • On the back of both hearts, add craft glue around the center heart.  Place a small piece of clear acetate* over the heart opening.
  • On the back of the plaid heart, place strips of double-sided adhesive craft foam* around the center heart.

How to make Plaid Shaker hearts using Dollar Tree Heart Ornaments.

  • Place heart sprinkles inside the craft foam over the acetate.
  • Remove the protective coating from the craft foam and carefully line up the second heart to close.

How to make Plaid Shaker hearts using Dollar Tree Heart Ornaments.

  • Loop a long piece of white yarn through the top hole of the ornament.
  • Add craft glue to the ends of the yarn and twist the fibers to make them tight. 
  • That makes it easier to string the beads.
  • I used gold beads left-over from a Christmas project and strung them onto the yarn.
  • Create a yarn tassel and tie it to the end of the beaded yarn.

How to make Plaid Shaker hearts using Dollar Tree Heart Ornaments.

Place the Plaid Shaker Heart with your Winter Decor to add a little Valentine’s Love.

If you happen to see these wood heart ornaments at your local Dollar Tree*

make sure to pick up a package or two.

They would also make adorable Christmas Ornaments.

Celebrating Winter with a Little Paper Crafting

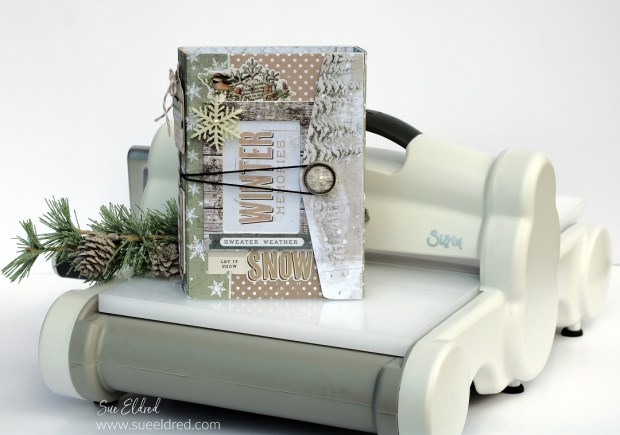
Winter Memories Album

Now that the Holidays are over, I’m embracing the quiet of the Winter Season

by creating a few things with Eileen Hull’s and Sizzix’s New Release Chapt. One Dies

and the Simple Winter Woods Scrapbook Collection Kit from Simple Stories*.

Look at this beautiful New Scrapbook Paper Collection from Simple Stories.

I fell in love with the soft, muted colors of the Simple Winter Woods Collection*

and knew I had to have it.  (It was perfect for these projects.)

Winter Memories Album

Supplies Used to make the Projects:    (*affiliate links)

*Disclosure:  This blog uses ads and affiliate links.  If you choose to make a purchase using one of the links, I receive a small commission (at no additional cost to you) that helps offset the costs of maintaining this blog.  Thanks for your support!

Winter Memories Album

First, I must show you the new toy I got for Christmas this year.

After many years of use and abuse, I finally upgraded my old Big Shot Machine with a Newer, Bigger model.

Behold the Sizzix Big Shot Plus Die-Cutting Machine*.

I needed it to die-cut the larger dies like the NEW Sizzix Frame Pocket Journal Die by Eileen Hull*.

Winter Memories Album

Winter Memories Album

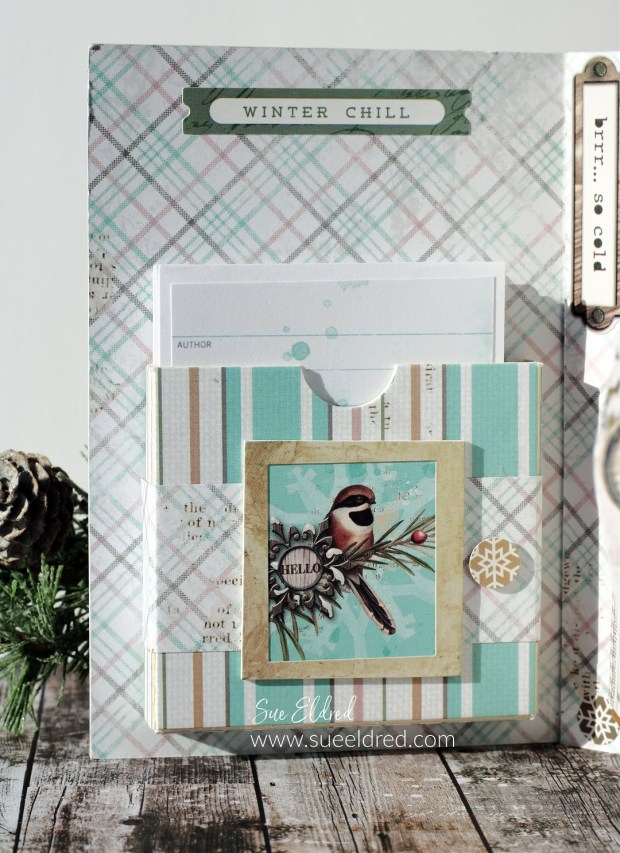
The Journal measures 4 1/2” x 6 1/2” x 1 1/4” with an adjustable spine.

What makes this die special are the additional pieces on the die, a pocket to hold ephemera, a frame and flap!

Winter Memories Album

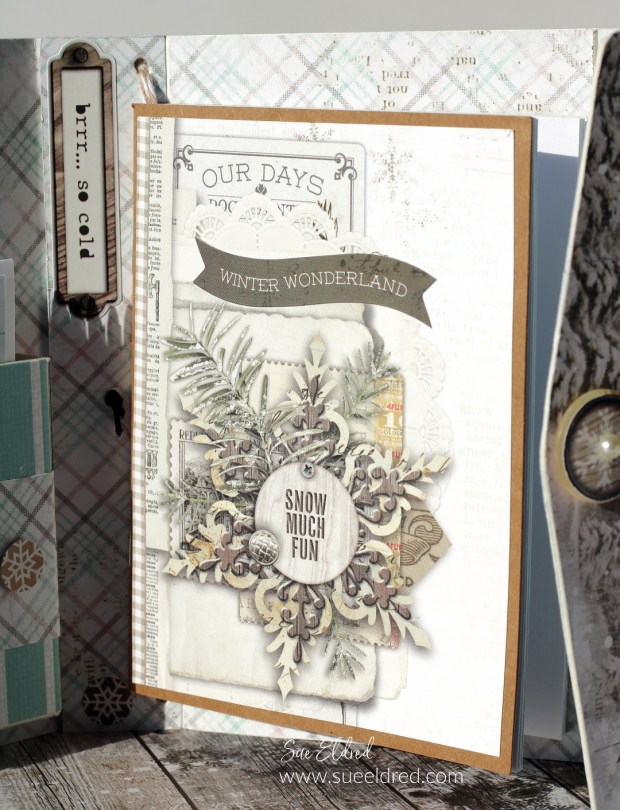
There are several ways to make the inside of your album.  

Winter Memories Album

I created a pocket on the inside of the album using the die and covered matboard.

Winter Memories Album

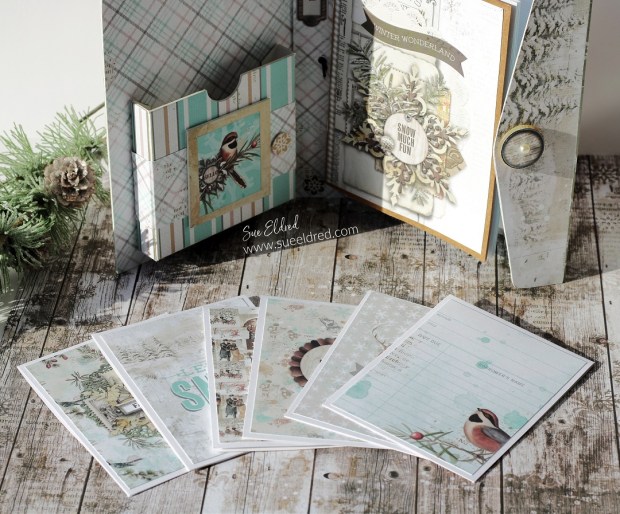
The pocket is great for adding a small skinny notebook or several little notecards.

I used the 3″ x 4″ journal cards from the Winter Woods Paper Collection for the front of the cards.

Winter Memories Album

I used twine and the holes on the spine to hold a small notebook in place.  

I covered the Small Kraft Notebook* using a paper and stickers from the collection.

Hello Winter 2023 Framed Picture

Continuing with the Winter Theme…

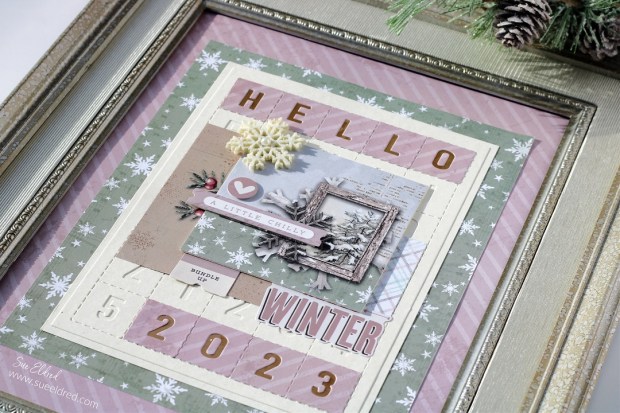
I created a framed picture using the NEW Sizzix Thinlets Tile Alphanumeric Die by Eileen Hull*.

The Tile Alphanumeric is very versatile because you can use both the positive and negative shapes.
Each letter is perforated which makes it easy to create and line up words.

Hello Winter 2023 Frame Picture

It’s so easy to create a little dimensional piece of art using the supplies you have around you.

Simple Vintage Winter Woods Card

And last but not least, I created a 5″ x 7″ card using Eileen’s NEW Sizzix 3D Tablecloth Embossing Folder

as the background for my card.

Eileen Hull 2023 Chapter One New Release Dies

For more projects using the NEW Eileen Hull Chapter One Release Dies…

Please join us for the Ch. 1 2023 Release Party on Tuesday, January 3 at 12:00 ET when Eileen will be joined by team members sharing their projects. We will also have a blog hop that day so we hope you will hop along with the team and be inspired!

LIST OF HOP STOPS:

Eileen Hull Designs  
Pam Bray
Jennie Atkinson
Sarah Lizzie
Lisa Hoel
Susie Bentz
Tonya Trantham
Elizabeth Robinson
Jenny Marples
Maggi Harding
Karen Bearse
Sue Eldred   (you are here!)

Eileen Hull Educator Logo

Disclosure:  This is a sponsored post.  As a member of the Eileen Hull Educator Team, I have been provided product in exchange for my creative ideas.  The view and opinions are my own. 

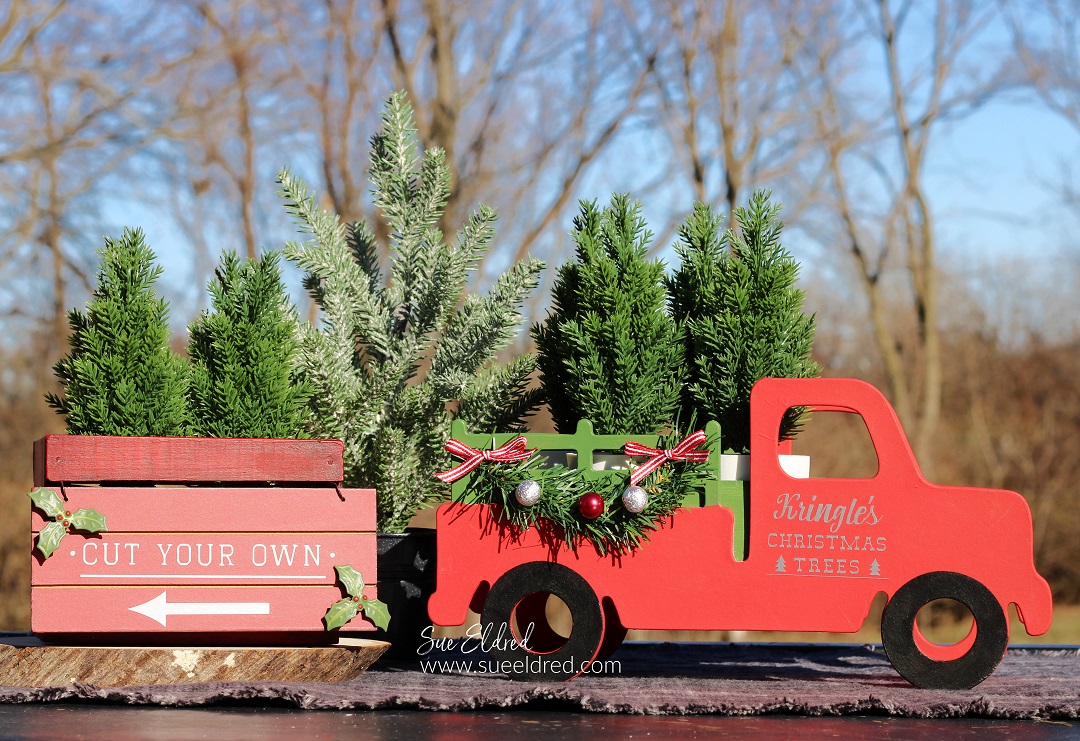
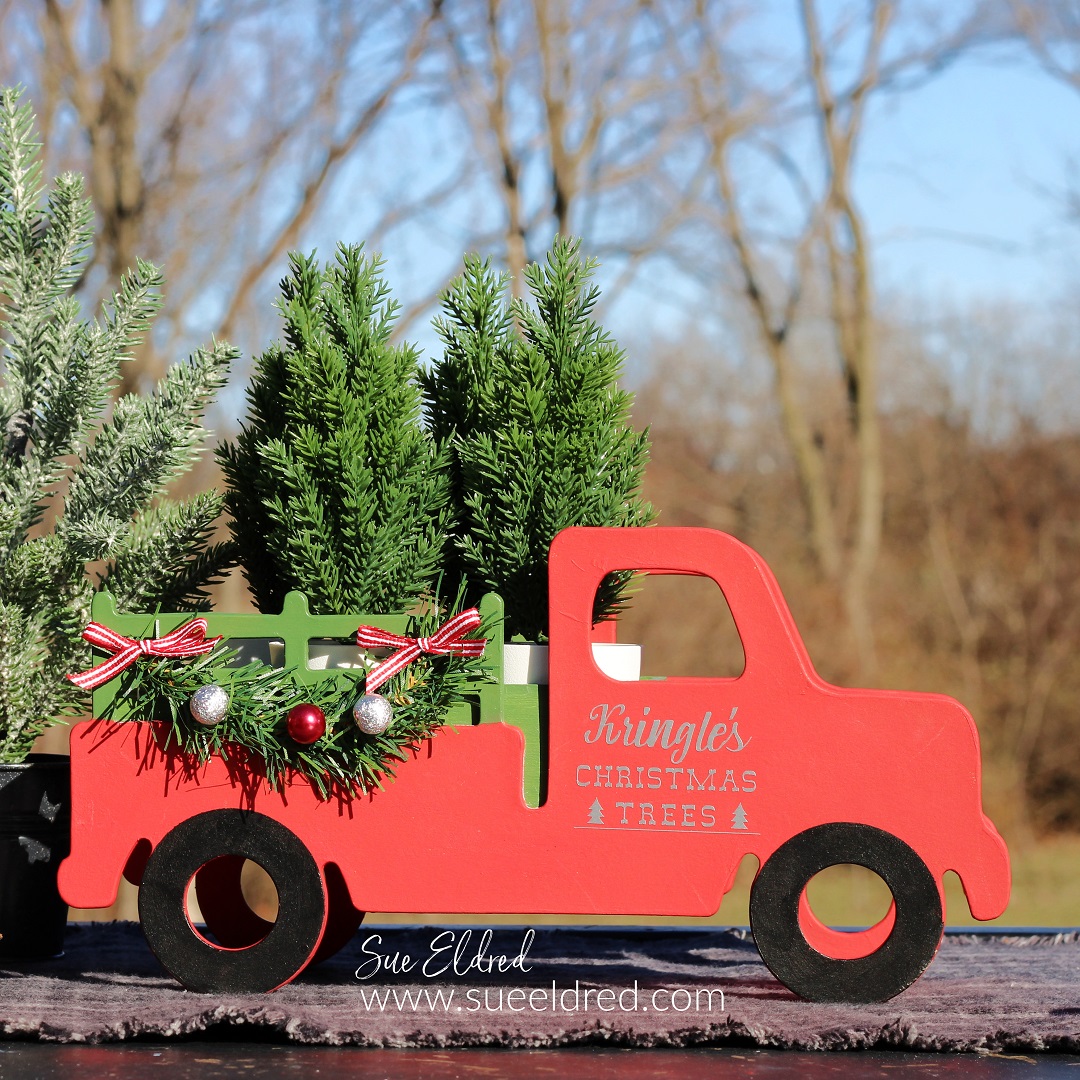
Kringle’s Christmas Tree Truck

Kringle's Christmas Tree Truck-A Dollar Store Holiday DIY

Kringle’s Christmas Tree Truck is an Easy Holiday Dollar Tree Craft.

The Christmas Tree Truck is a fun and inexpensive craft to create with the family.

This project is easily adaptable to fit your color scheme and style. 

So have fun with it.  (I did!)

Kringle's Christmas Tree Truck-A Dollar Store Holiday DIY

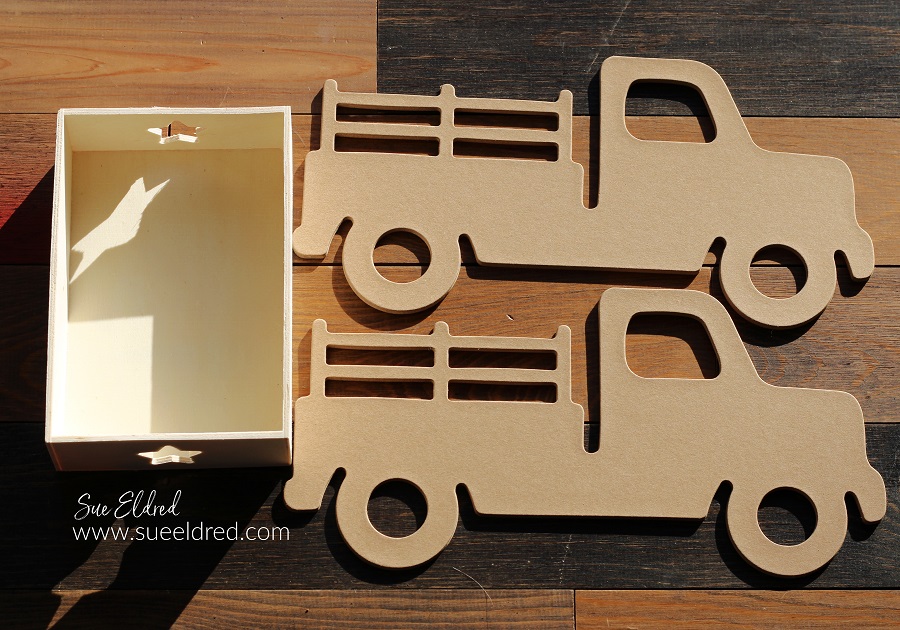
I only spent $3.75 at Dollar Tree and added a few items I had on hand.

(If you have to order them online, Dollar Tree has smaller quantities available for the truck.)

This is what I used:  (*affiliate links)

*Disclosure:  This blog uses ads and affiliate links.  If you choose to make a purchase using one of the links, I receive a small commission (at no additional cost to you) that helps offset the costs of maintaining this blog.  Thanks for your support!

Kringle's Christmas Tree Truck-A Dollar Store Holiday DIY

Directions:

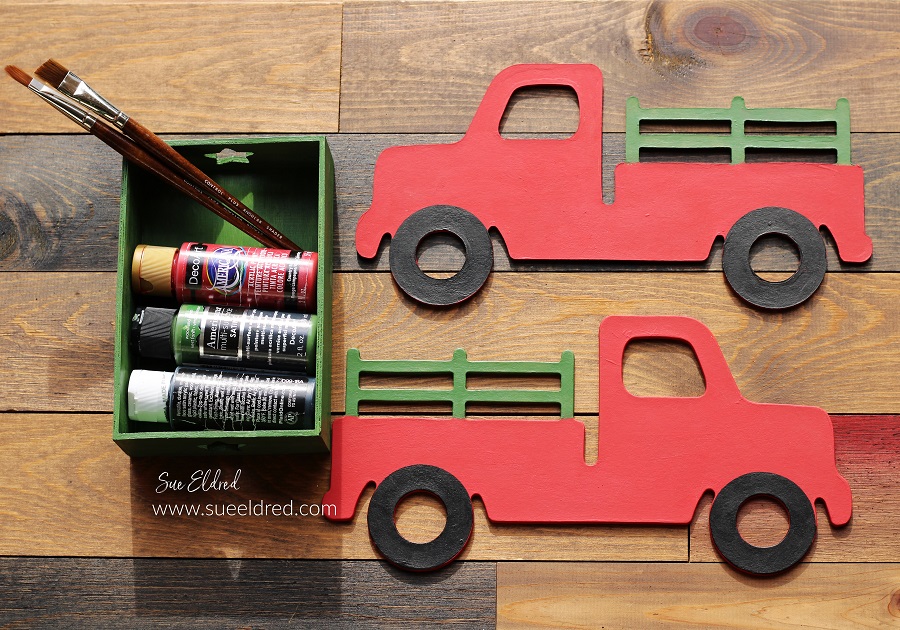
  • Paint both sides of the Wood Trucks with acrylic paint.

Kringle's Christmas Tree Truck-A Dollar Store Holiday DIY

Unless you are steady-handed and can paint a perfect circle, here’s a trick I used.

  • Cut a circle the same size as the truck wheel. Cut the circle in half and use it as a mask to paint the top of the wheel. I used removable vinyl to cut my circle.

Kringle's Christmas Tree Truck-A Dollar Store Holiday DIY

“This is a sponsored post.  As a member of the StyleTechCraft Design Team I have been provided product and compensation in exchange for my creative ideas.  The views and opinions are my own.

Kringle's Christmas Tree Truck-A Dollar Store Holiday DIY

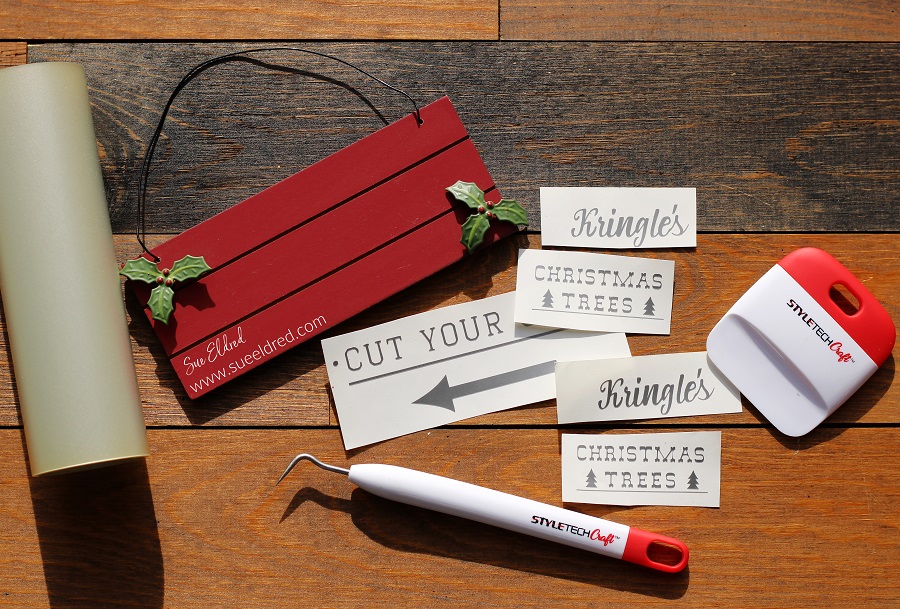
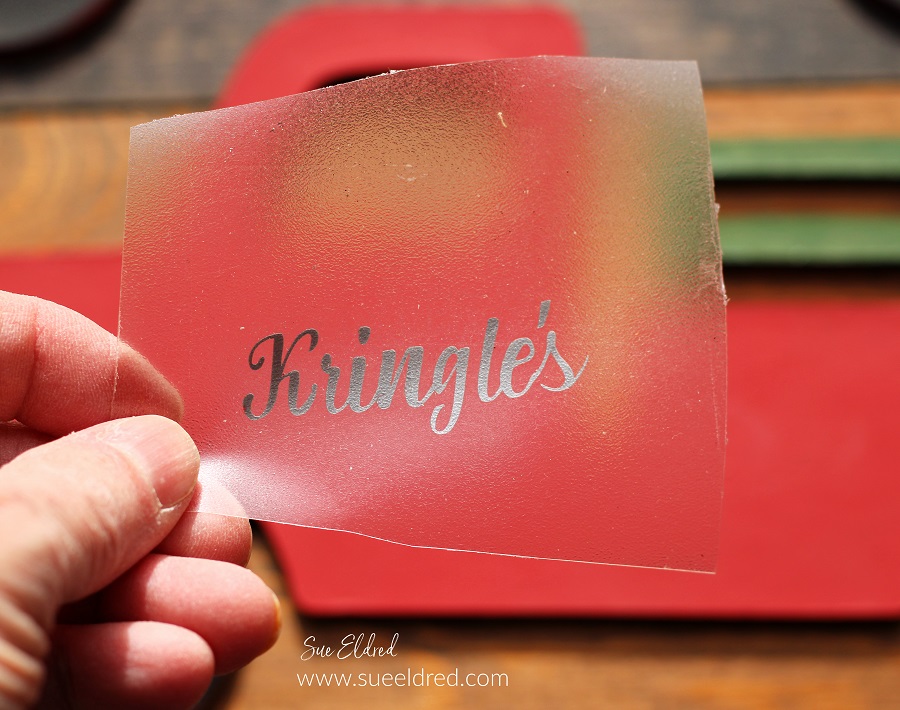
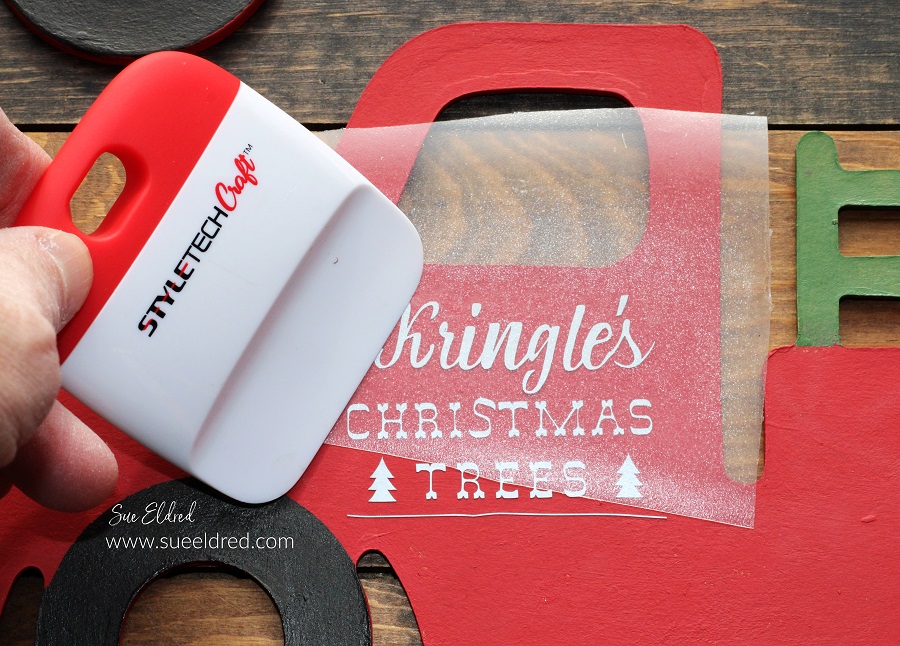
  • Cut a piece of Vinyl Transfer Tape* to fit over the vinyl words.  Gently rub over the transfer paper using the squeegee tool.  Lift the transfer tape to remove the vinyl from the white liner.

Kringle's Christmas Tree Truck-A Dollar Store Holiday DIY

  • Using the vinyl transfer tape, line up the words onto the side of the truck.   
  • Gently rub over the vinyl transfer tape using the squeegee tool to make sure all the image has transferred.  
  • Remove the transfer tape.

StyletechCraft products brought to you by ATSM Craft*

Kringle's Christmas Tree Truck-A Dollar Store Holiday DIY

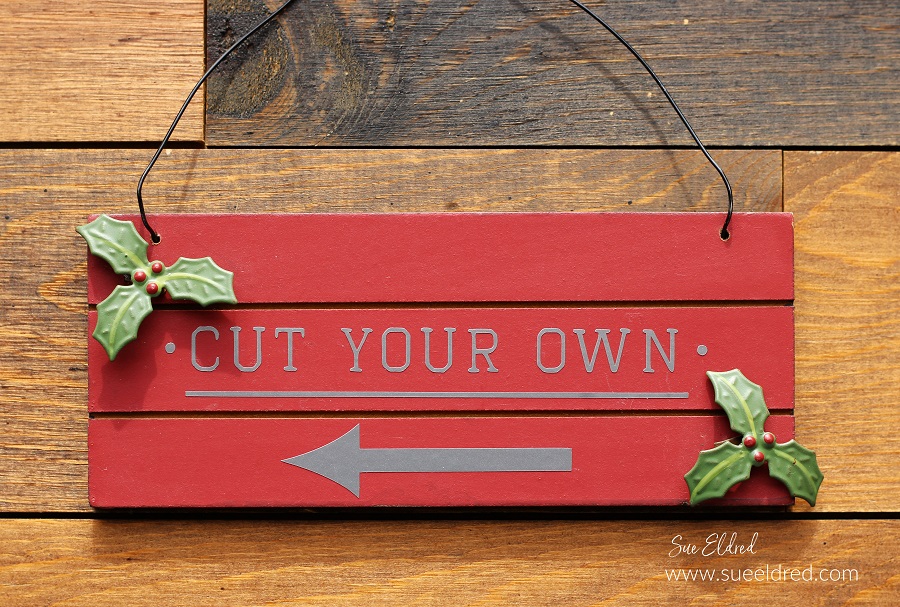
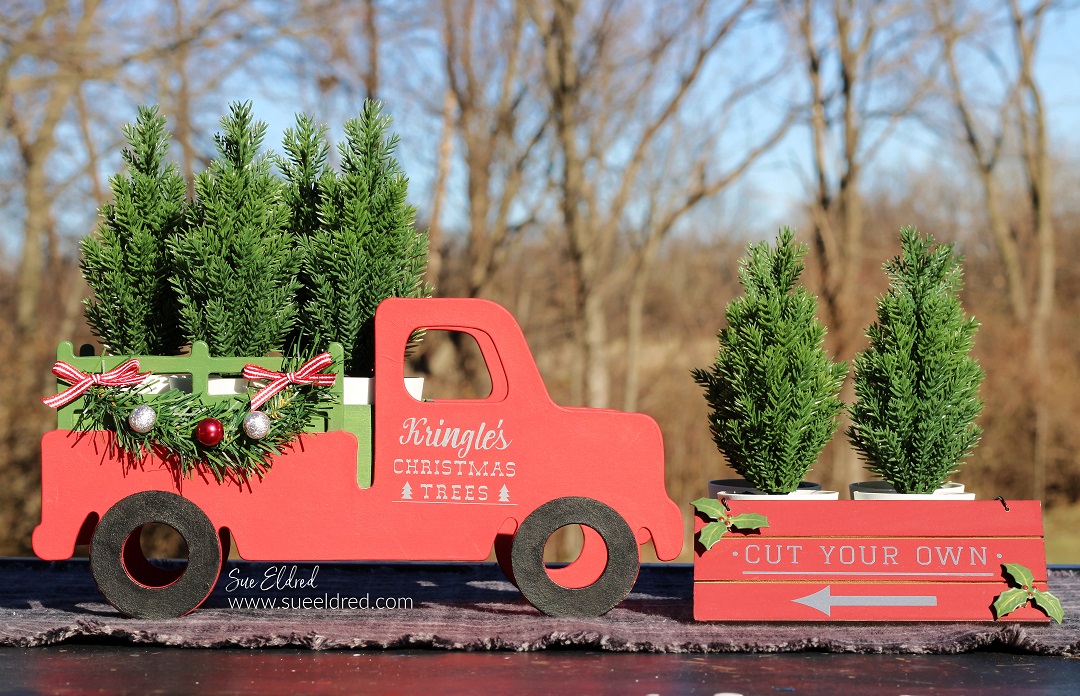
I added words to a plain ornament to create a “cut your own” sign.

Kringle's Christmas Tree Truck-A Dollar Store Holiday DIY

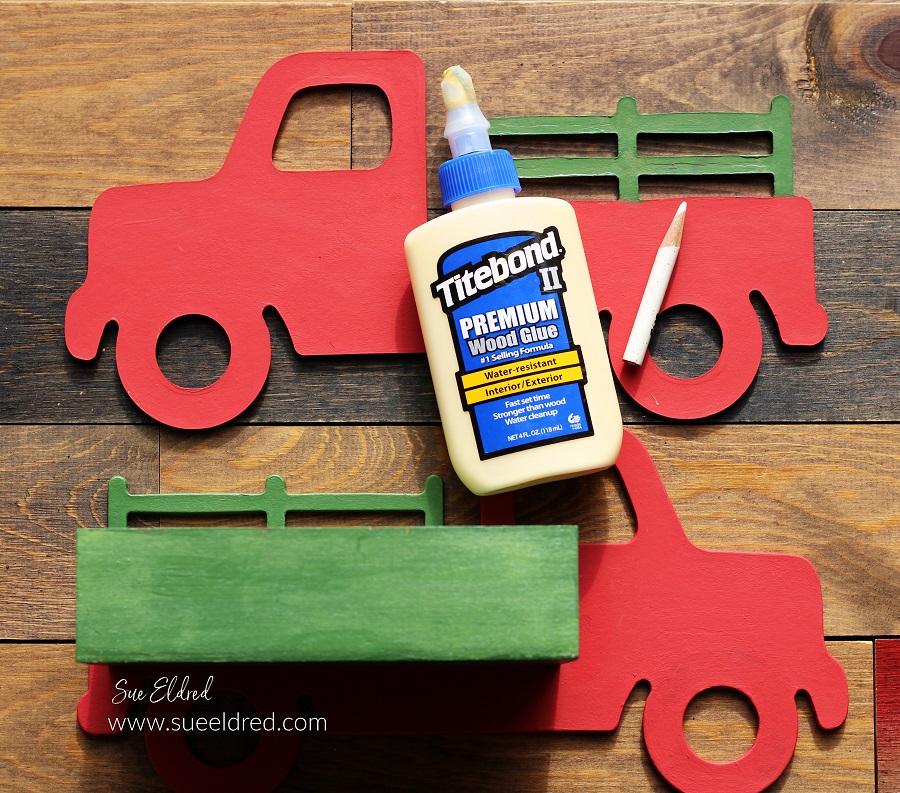
  • I used Wood Glue* to glue the truck.  I needed glue that would give me enough time to line up the box and still be sturdy enough to hold the weight.
  • Allow time for the glue to dry before picking up the finished truck.

Kringle's Christmas Tree Truck-A Dollar Store Holiday DIY

  • Decorate the body of the truck using a craft pine stem as garland. 
  • Glue small bows and beads onto the garland.

Kringle's Christmas Tree Truck-A Dollar Store Holiday DIY

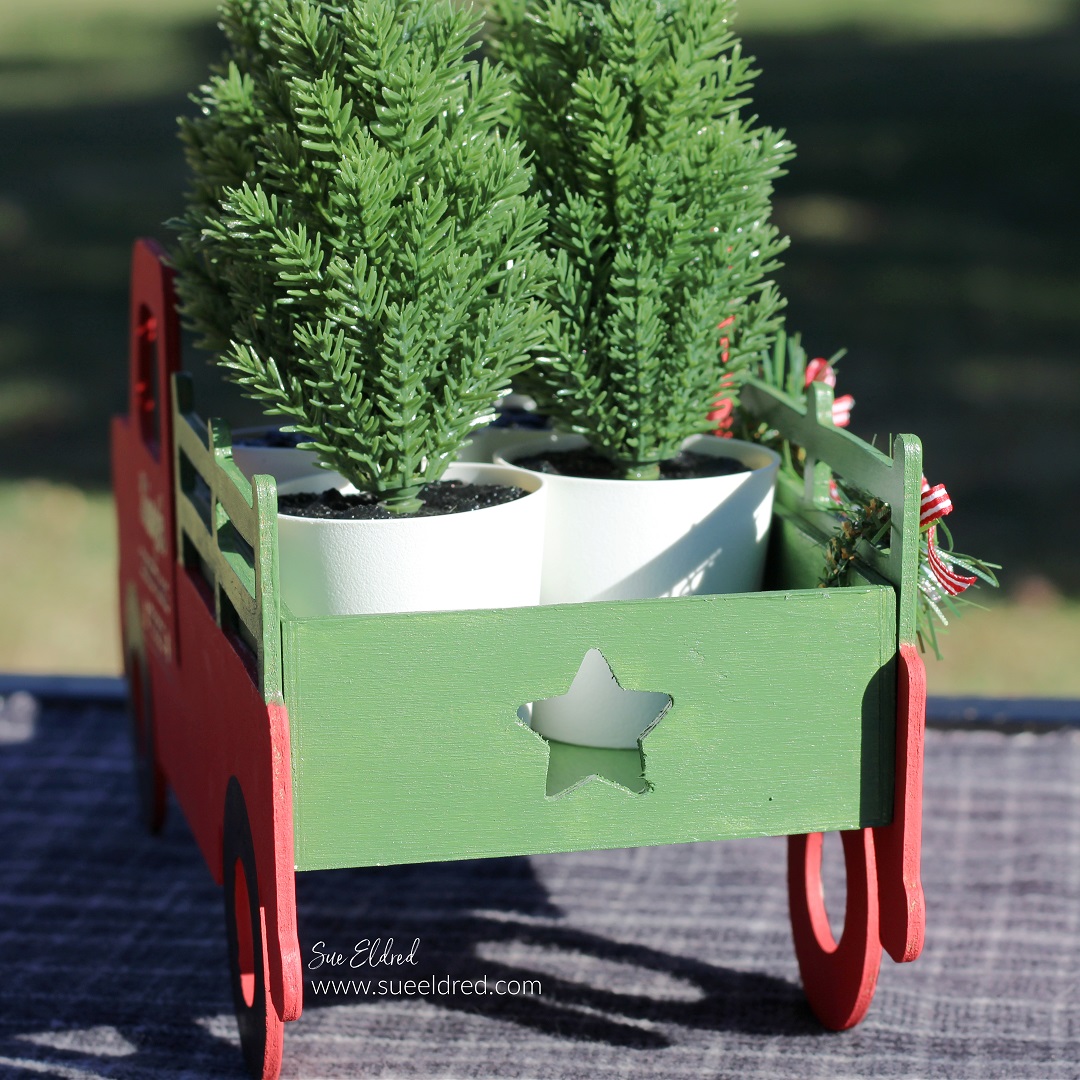
  • When picking out the small rectangle box to use as the bed of the truck, I thought the star was perfect.
  • Fill the bed of the truck with small Christmas Trees.

Kringle's Christmas Tree Truck-A Dollar Store Holiday DIY

Kringle’s Christmas Tree Lot

You’ll need several mini trees to make a Christmas Tree Lot.

When I ordered the little trees at IKEA, I really hoped the trees would fit. 

I couldn’t be happier with the size.


Mini Holiday Lanterns

DIY Mini Holiday Lanterns

Looking for An Easy Holiday Dollar Store Craft?

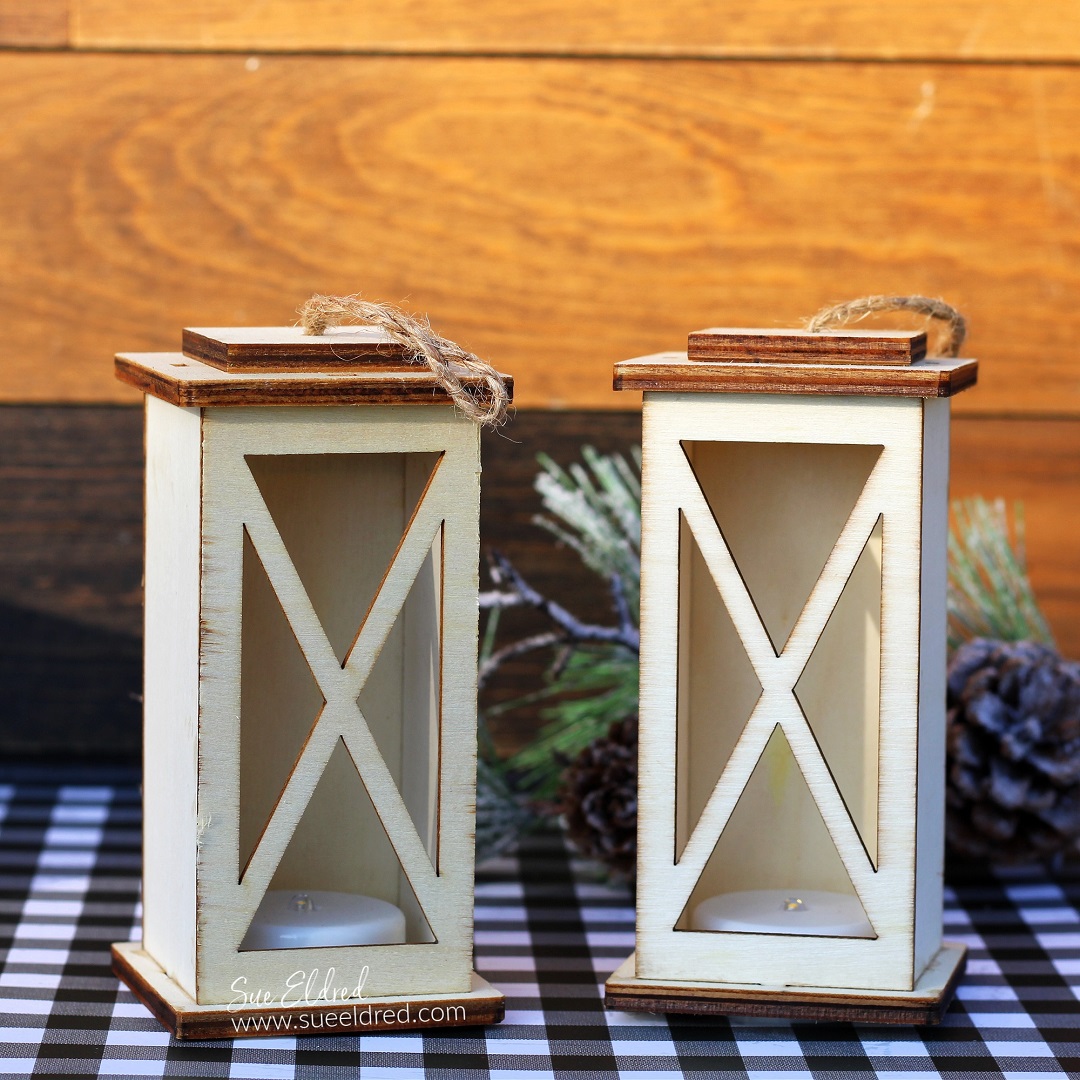
All you’ll need is a couple of Mini Wood Lanterns from Dollar Tree*,

Paint, Scrapbook Paper and an Xyron Create a Sticker Mini*.

Xyron Logo

 This is a sponsored post for Xyron.  I have been provided product and compensation in exchange for my creative ideas.  The views and opinions are my own.

Mini Holiday Lanterns a Dollar Store DIY

Materials Used:  (*affiliate links)

*Disclosure:  This blog uses ads and affiliate links.  If you choose to make a purchase using one of the links, I receive a small commission (at no additional cost to you) that helps offset the costs of maintaining this blog.  Thanks for your support!

Mini Holiday Lanterns a Dollar Store DIY

Directions:
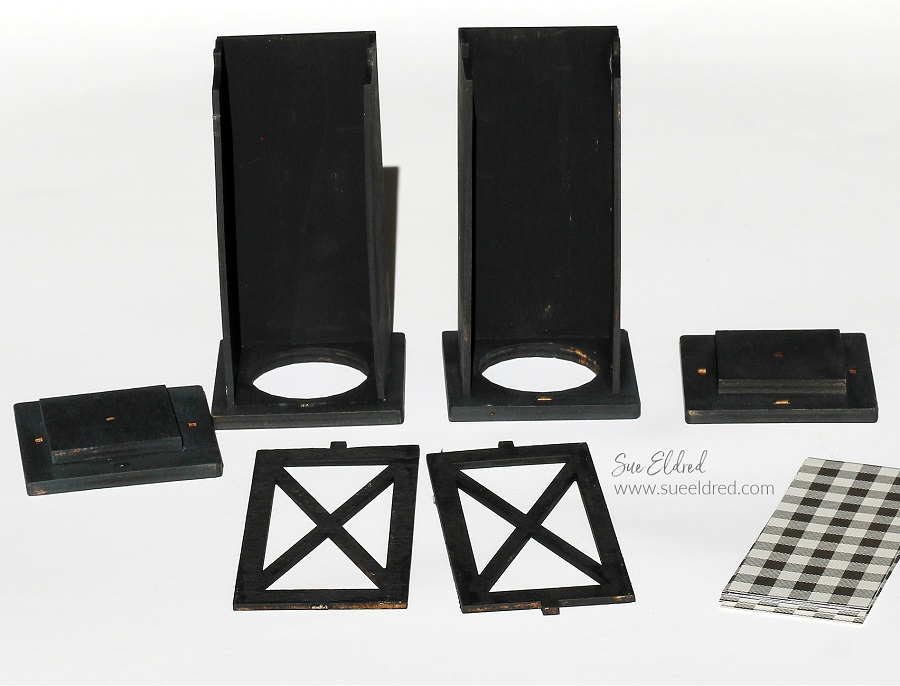
1. Using a Craft Knife* to loosen the glue, gently remove the top and front of the
lantern. Remove the small battery votive from the bottom of the lantern.
2. Paint the lantern with black acrylic paint.
3. Measure and cut strips of black buffalo plaid paper to fit the back and sides of the
lantern.

Mini Holiday Lanterns a Dollar Store DIY

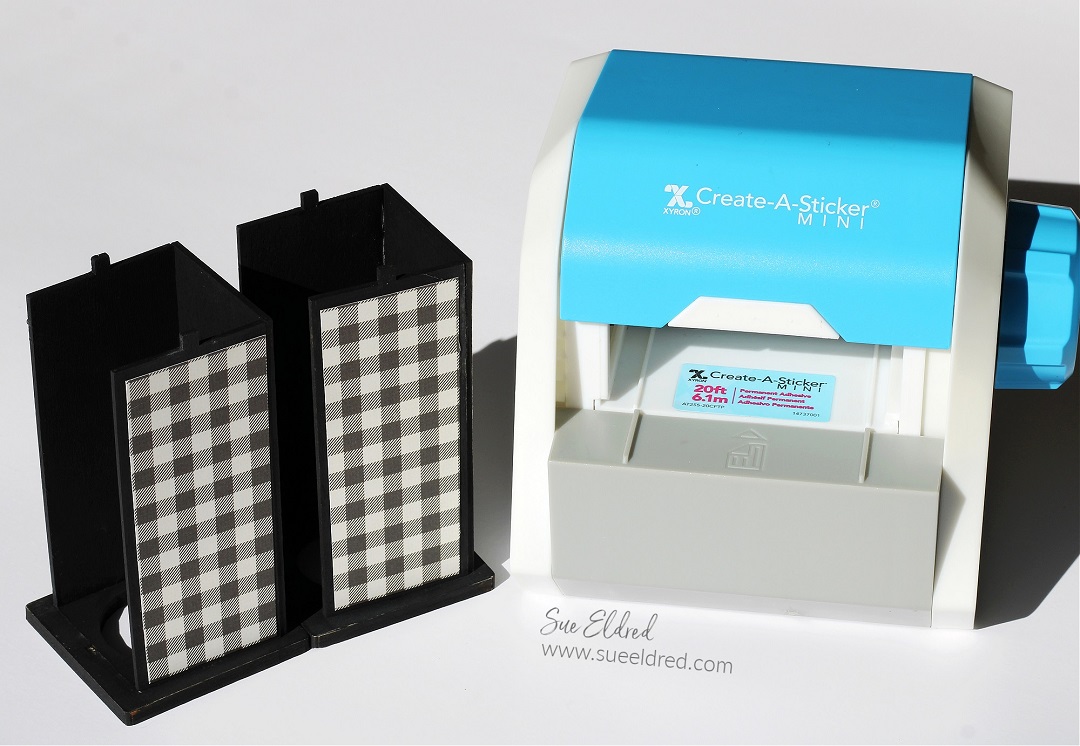
4. Place the strips of paper into the Xyron Create a Sticker Mini* design side-up. Crank the handle
of the Xyron Create a Sticker Mini* to run it through the machine. As it goes through, it adds a
complete layer of adhesive to the back of the paper.

Mini Holiday Lanterns a Dollar Store DIY

5. Remove the paper from the liner and apply it to the sides of the lantern.

Mini Holiday Lanterns a Dollar Store DIY

6. Measure and cut a piece of translucent vellum to fit behind the front “X” panel. Use the Xyron Mega Runner* to add adhesive to the center and edges of the front panel. Place the vellum over the front panel.

Mini Holiday Lanterns a Dollar Store DIY

7. Use the Xyron Mini Glue Gun* to adhere the lantern back together.

Mini Holiday Lanterns a Dollar Store DIY

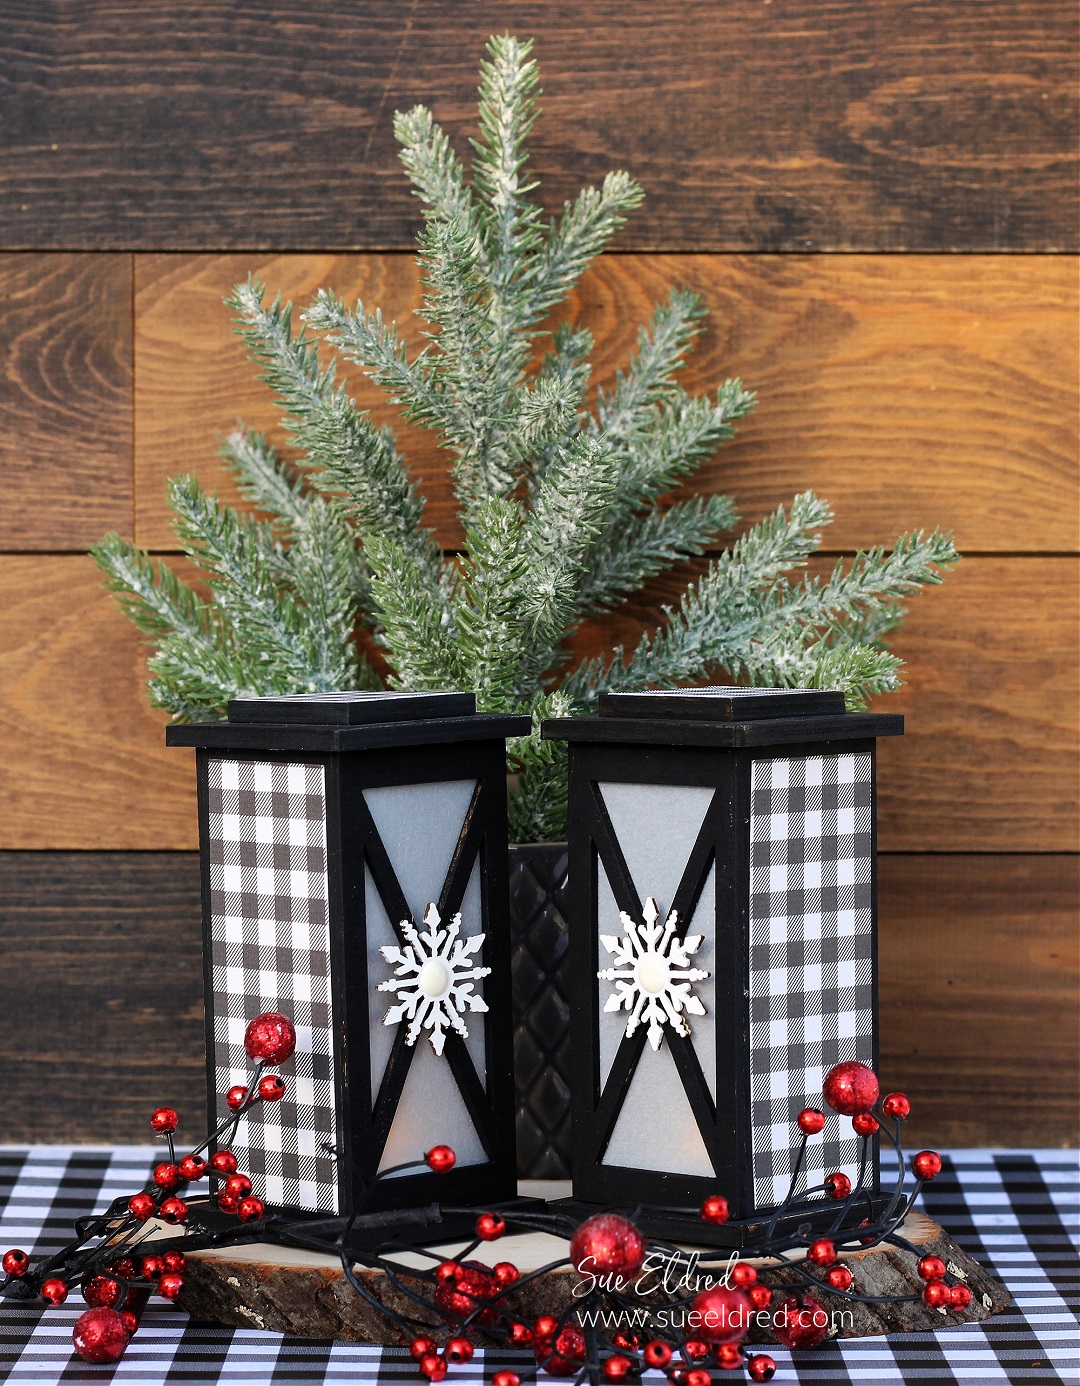
8. Paint the wood snowflakes with white acrylic paint. Glue it to the front of the lantern. Add a white enamel dot to the center of the snowflake.

Mini Holiday Lanterns a Dollar Store DIY

Use as a tabletop decoration or add ribbon to the lantern for hanging on the Christmas Tree.

New Products at Scrapbook.com!

Fall Jenga Block Projects with Xyron

Fall Jenga Block Projects with Xyron

How to make Fall Jenga Block Projects with Xyron.

These projects are Quick and Easy and are a great way to use up small scraps of paper.

Fall Jenga Block Projects with Xyron

Xyron Logo

 This is a sponsored post for Xyron.  I have been provided product and compensation in exchange for my creative ideas.  The views and opinions are my own.

Fall Jenga Block Projects with Xyron

How to make a Jenga Block Pumpkin

Materials Used:    (*affiliate links)

*Disclosure:  This blog uses ads and affiliate links.  If you choose to make a purchase using one of the links, I receive a small commission (at no additional cost to you) that helps offset the costs of maintaining this blog.  Thanks for your support!

Fall Jenga Block Projects with Xyron

Directions:

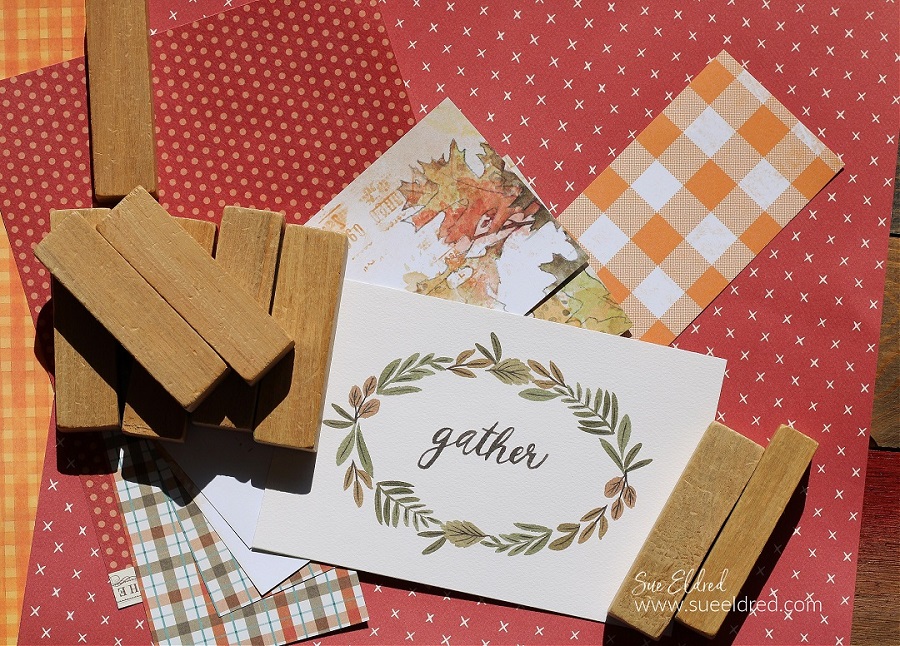
  • Paint three Jenga Blocks* with orange acrylic paint.
  • Paint the small wood cube with brown acrylic paint
  • Cut six strips of fall scrapbook paper ¾” x 3”.
  • Place the strips of paper, design side up, into the Xyron Create a Sticker Mini*. Crank the handle to run the strips of paper through the Create a Sticker Mini. As the paper strips go through the Xyron Create a Sticker Mini*, it adds a complete layer of adhesive onto the back.

Fall Jenga Block Projects with Xyron

  • Place the strips of paper onto the front and back of the Jenga Blocks*.

Fall Jenga Block Projects with Xyron

Fall Jenga Block Projects with Xyron

  • Glue the small wood cube and the leaves to the top of the pumpkin.
  • Tie a small twine bow and glue it to the front of the pumpkin.
  • Adhere the word Thankful onto a small layer using the Xyron Mega Runner* and attach it to the front of the pumpkin.

Fall Jenga Block Projects with Xyron

The Jenga Block Pumpkin is a great way to use small scraps of your favorite Fall scrapbook paper.

Fall Jenga Block Projects with Xyron

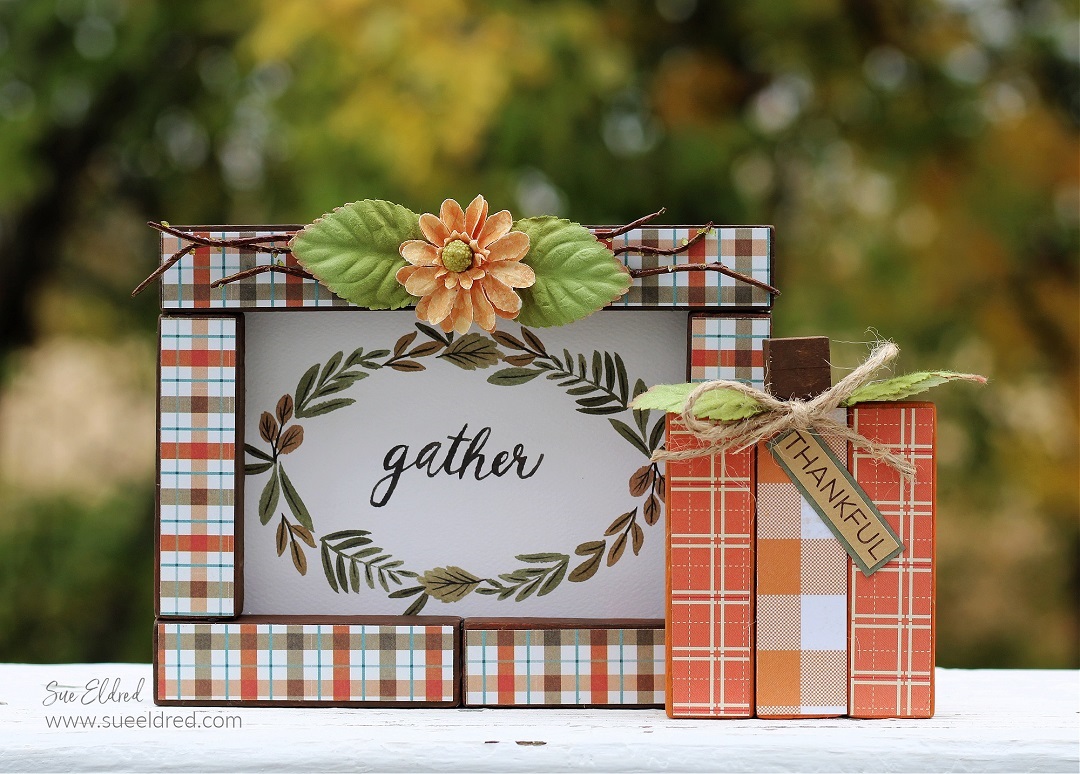
Another simple Fall project is the Jenga Block Frame.

Fall Jenga Block Projects with Xyron

Directions:

  • Paint six Jenga Blocks* with brown acrylic paint.
  • Cut 12 strips of fall scrapbook paper ¾” x 3”.
  • Place the strips of paper, design side up, into the Xyron Create a Sticker Mini*. Crank the handle to run the strips of paper through the Create a Sticker Mini. As the paper strips go through the Xyron Create a Sticker Mini*, it adds a complete layer of adhesive onto the back.
  • Place the strips of paper onto the front and back of the Jenga Blocks*.
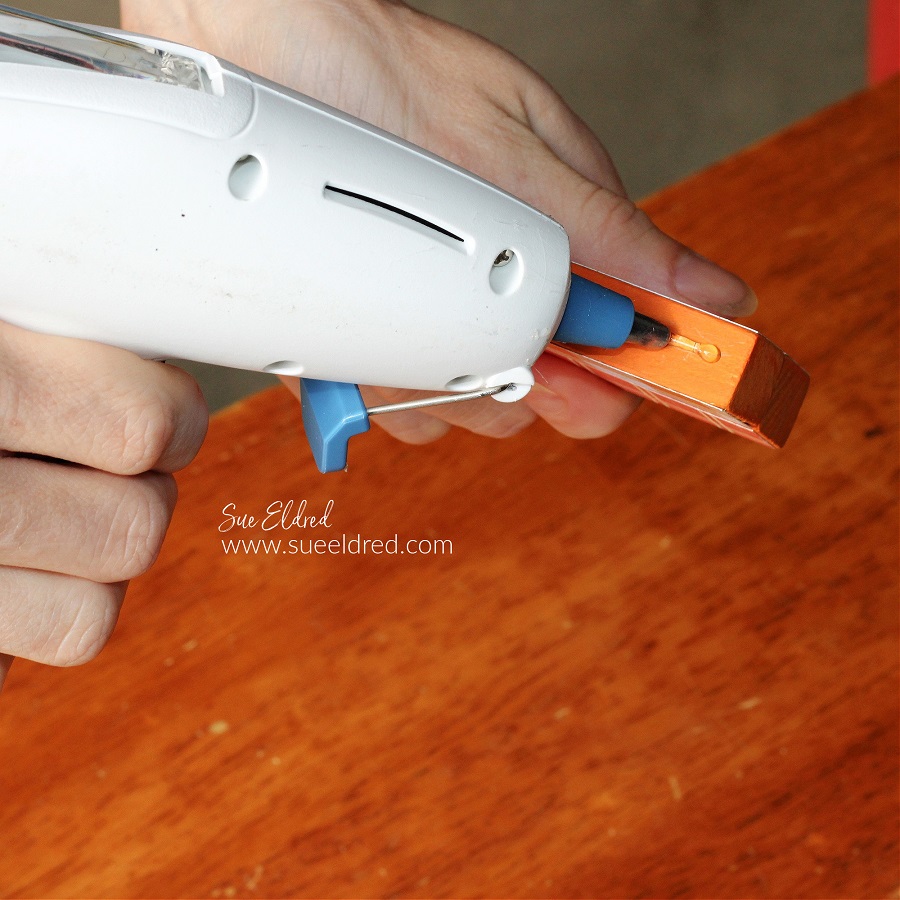
  • Hot Glue the blocks together to form a frame.
  • Adhere greeting or photo to the back of the frame.
  • Embellish the frame by gluing on a small fall flower and leaves*.

For a truly inexpensive Fall Craft, you can pick up the wood blocks at Dollar Tree.

Faux Stone Geometric Box

Faux Stone Geometric Box

Add a little dimension to your paper crafting projects this Holiday Season.

The Faux Stone Geometric Box was made with Eileen Hull New Geometric Box Die by Sizzix*,

Sizzix Matboard* and Deco Arts Dimensional Effects Texture Paste*.

*Disclosure:  This blog uses ads and affiliate links.  If you choose to make a purchase using one of the links, I receive a small commission (at no additional cost to you) that helps offset the costs of maintaining this blog.  Thanks for your support!

666046 Sizzix Geometric Box Die by Eileen Hull

How to make a Faux Stone Geometric Box:

  • The Geometric Box Die goes together really easily and is also expandable.
  • Die-cut the box* using mat board* and a Big Shot Die-Cutting Machine*. 
  • You will need to cut two pieces of the middle section of the box.  
  • Carefully fold the box on the score lines.
  • Assemble the box with the tabs on each side of the box. I like to use Rapid Fuse Adhesive* to glue the box. It dries and holds in 30 seconds.

DIY Faux Stone Geometric Box

How to make a Faux Stone Geometric Box

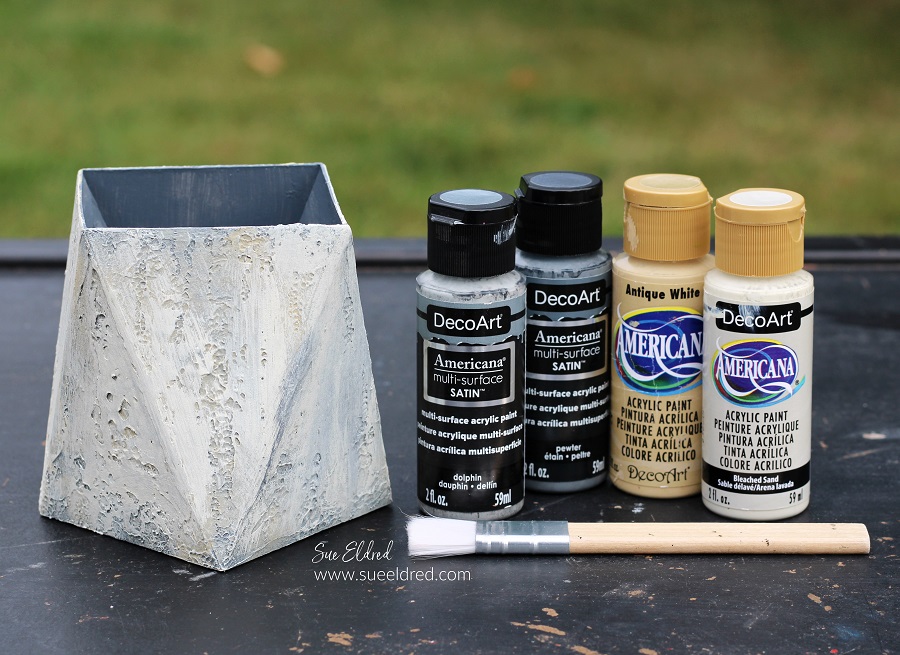
  • Use dark gray acrylic paint to paint the entire box. (inside and out)
  • Use a dry brush with a small amount of paint to apply lighter coats of paint over the outside of the box. I painted from dark to light. I used a combination of the dry brush technique with stippling to get my desired look.

How to make a Faux Stone Geometric Box

  • For my Holiday Embellishment, I used a 1″ gold pendant blank for jewelry making and a 1″ plaid scrapbook paper circle glued in the center.
  • Tie the gold pendant around the top of the box using a piece of braided twine.

How to make a Faux Stone Geometric Box.

Add a small faux Christmas Tree for a sophisticated Holiday Decoration.

Eileen Hull Educator Logo

Disclosure:  This is a sponsored post.  As a member of the Eileen Hull Educator Team, I have been provided product in exchange for my creative ideas.  The view and opinions are my own. 

Amazon Fall Rug Event

Materials Used:    (*affiliate links)

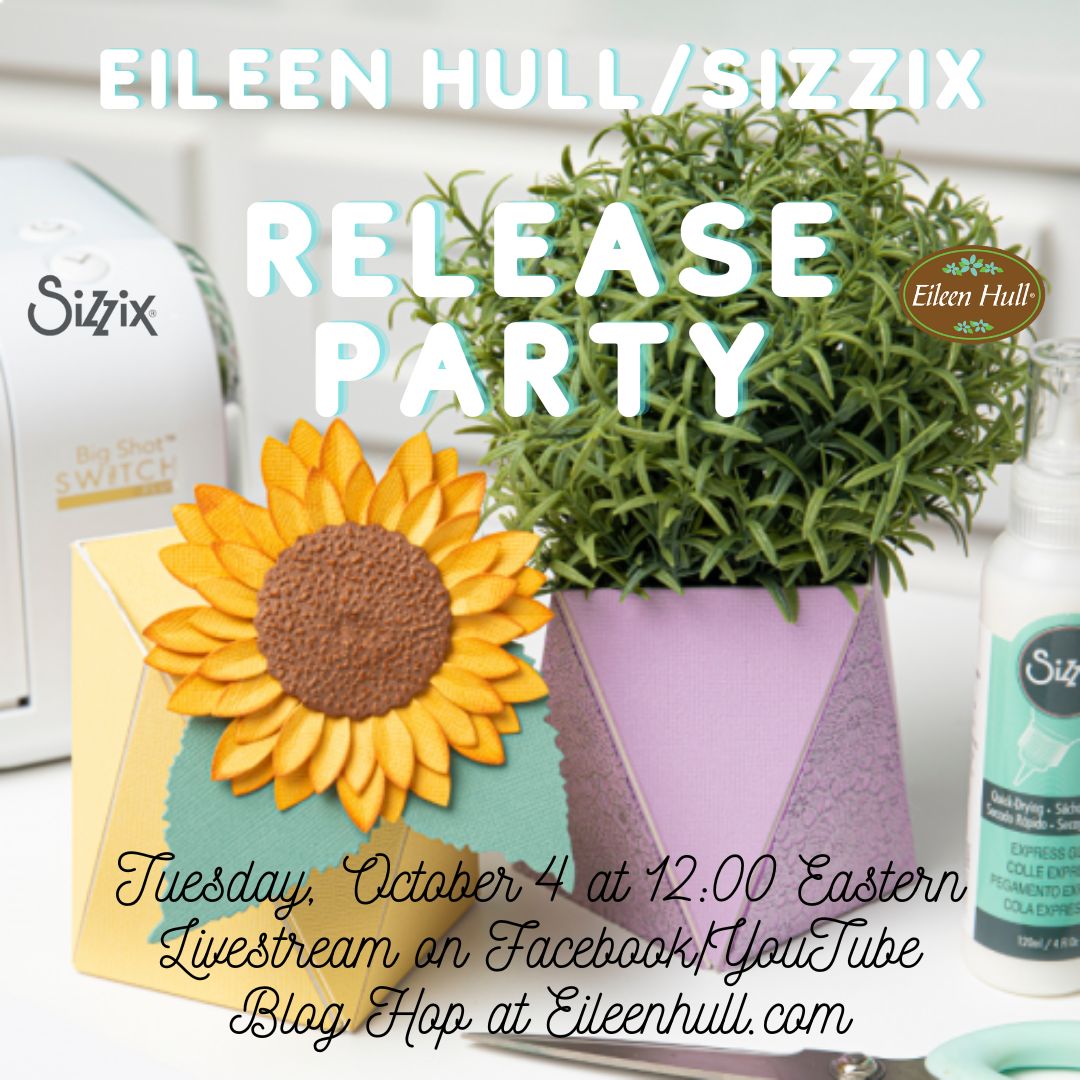
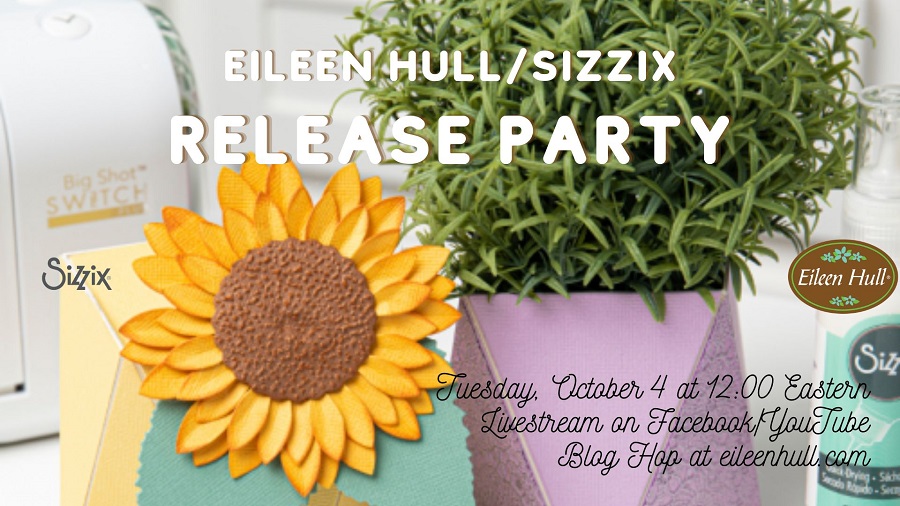
Eileen Hull/Sizzix Chapter 4 Release Party

Eileen Hull Sizzix Chapter 4 Release Party

New Chapter 4 Dies by Eileen Hull and Sizzix

The Eileen Hull teams are having a New Release Blog Hop

using the New Eileen Hull/Sizzix Chapter 4 Dies.

Faux Stone Geometric Box

Looking to add a little dimension to your paper crafting projects?

The Faux Stone Geometric Box was made with Eileen Hull’s new

Eileen Hull Geometric Box Die by Sizzix*, Sizzix Matboard*

and Deco Arts Dimensional Effects Texture Paste*.

See the full tutorial here for the Faux Stone Geometric Box.

*Disclosure:  This blog uses ads and affiliate links.  If you choose to make a purchase using one of the links, I receive a small commission (at no additional cost to you) that helps offset the costs of maintaining this blog.  Thanks for your support!
How to make a dimensional Sunflower-Sue's Creative Workshop www.sueeldred.com 6165

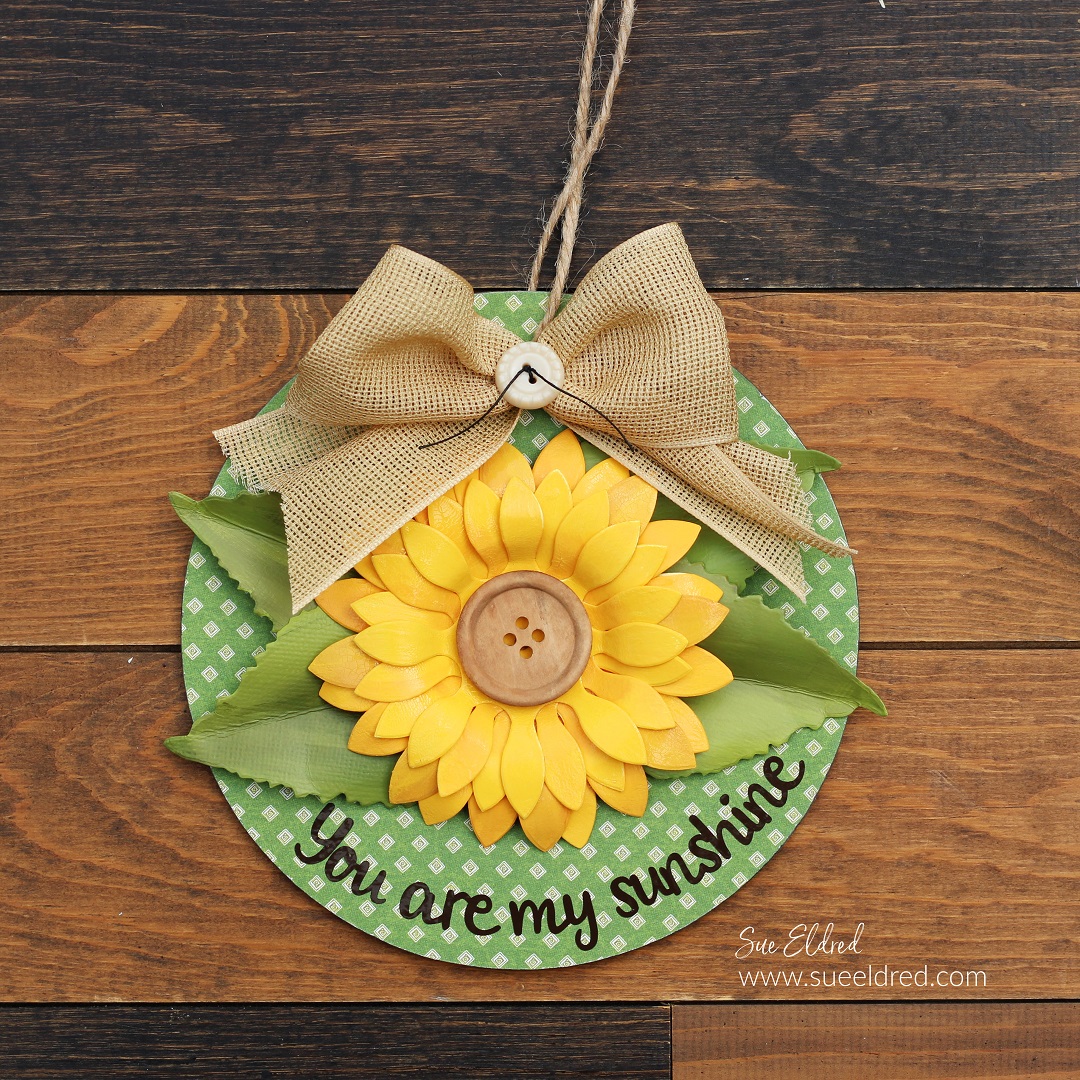
The Simple Country Sunflower…

was made using Eileen Hull Large Sunflower Die by Sizzix*,

acrylic paint, and mod podge*.

I will share tutorials on each project on my blog later in the week.  

Eileen Hull and Sizzix Chapter 4 Release Party

Check out the Eileen Hull’s Blog for the Blog Hop and even more ideas. 

Eileen Hull Sizzix Release Blog Hop:

Pam Bray
Jennie Atkinson
Sarah Lizzie
Lisa Hoel
Sharon Curtis
Tonya Trantham
Elizabeth Robinson
Jenny Marples
Maggi Harding
Sue Eldred  (you are here)
Karen Bearse

Eileen Hull Educator Logo

Disclosure:  This is a sponsored post.  As a member of the Eileen Hull Educator Team, I have been provided product in exchange for my creative ideas.  The view and opinions are my own. 

Sizzix Craft Box