Upcycled Brass Christmas Ornament

Simple Christmas Ornament Makeover

A Simple Christmas Ornament Make Over.

I ran across a couple of brass Christmas Ornaments from several years ago.

I was cleaning out my excess Christmas decorations when I found them.

I first threw them away before retrieving them from the trash.

They’re not especially valuable.

Simple Christmas Ornament Makeover

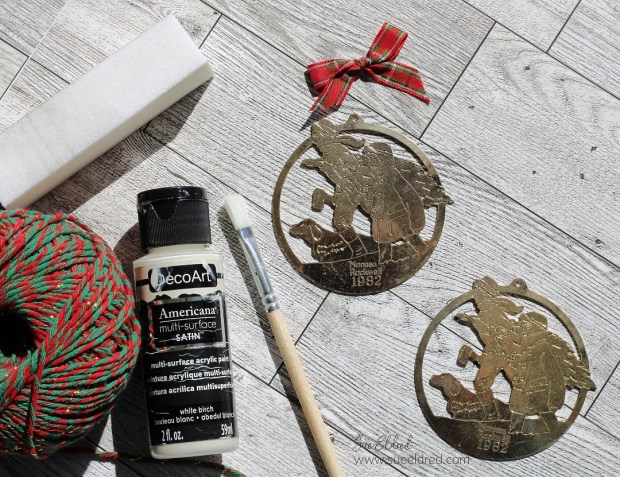
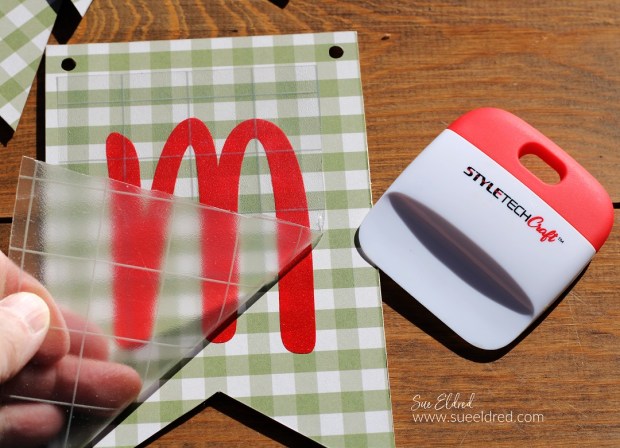
They were a 1982 Norman Rockwell promotional ornament from McDonald’s.

Because 1982 was a significant year (for me) I couldn’t throw them away.

So, I decided to try painting them.  (I had nothing to lose.)

Spring Baking Cups

*Disclosure:  This blog uses ads and affiliate links.  If you choose to make a purchase using one of the links, I receive a small commission (at no additional cost to you) that helps offset the costs of maintaining this blog.  Thanks for your support!

Simple Christmas Ornament Makeover

Here’s what I did to update the ornament:

  • Lightly sand the ornament with an extra fine sanding block* to remove dirt and grim.
  • The sanding smoothed the ornament and removed the brassy gold finish. Sanding also made the ornament silver, which I liked better.
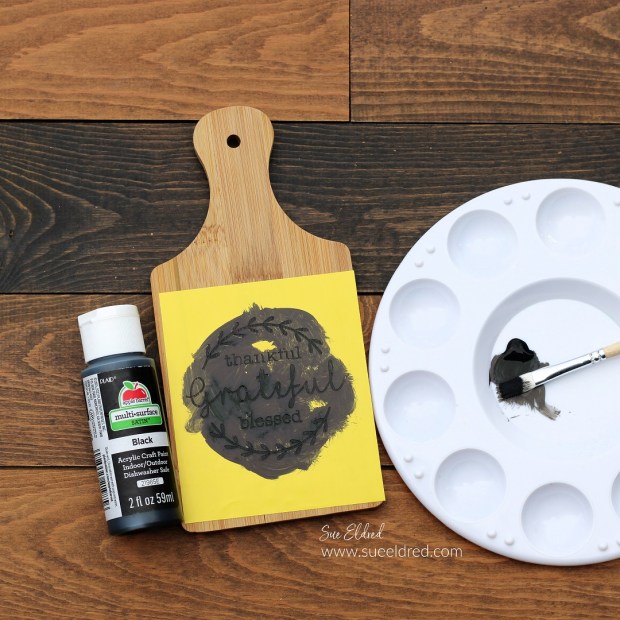
  • Paint the ornament with a multi-Media paint* that will adhere to the metal.
  • I used Deco Art’s Multi-Media Paint in Birch.
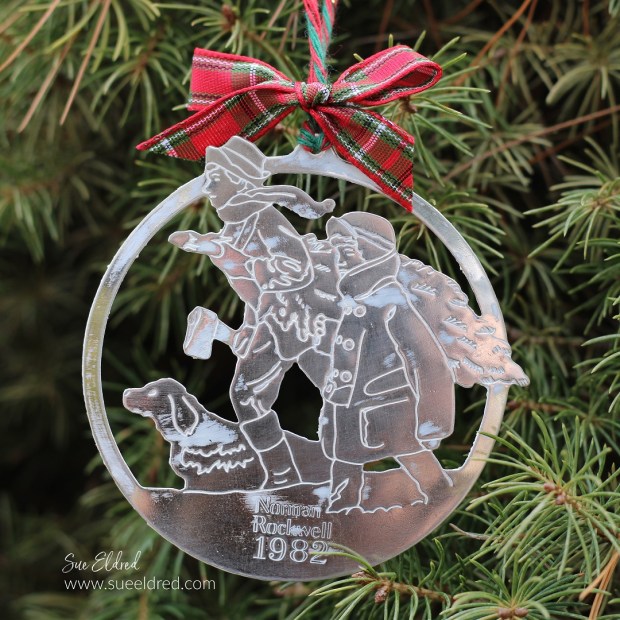
  • Once the paint dries, lightly sand the ornament to expose the details.
  • While sanding, I made sure not to remove all the white paint from the face of the ornament. I like the “snowy look” of the white.
  • It’s also probably a good idea to spray the ornament with a matte spray sealer*.

Now the ornament looks great and compliments the other decorations on my Christmas Tree.

Buy Your Crafting Supplies Now at Dollar Tree starting at $1.25!

Santa’s Letter Box

Santa's Letter Box using Sizzix Slotted Box die

Create a Holiday Mailbox for letters to Santa using the Sizzix Slotted Treat Box Die by Eileen Hull*.

A fun project to make for Christmas!

Santa's Letter Box using Sizzix Slotted Box die by Eileen Hull.

To say I have a lot of Holiday Scrapbook paper would be a understatement!

Paper crafters have a tendency to “save” their special scrapbook paper

for just the right project.

We also have a tendency to hoard said special paper.

Santa's Letter Box using Sizzix Slotted Box die by Eileen Hull.

Sometimes its fun to use what you have on hand.

I dug deep into my hoarded Graphic 45 Christmas Scrapbook paper

to make the Santa Letter Box.

One of my favorite tips…

  • Before I die-cut the mat board, I like to use the Xyron Creative Station* to add adhesive to the back of the paper.  It gives the paper a complete layer of adhesive with no bubbles.  It really is easy to use.

*Disclosure:  This blog uses ads and affiliate links.  If you choose to make a purchase using one of the links, I receive a small commission (at no additional cost to you) that helps offset the costs of maintaining this blog.  Thanks for your support!

Santa's Letter Box

When making the Santa Letter Box…

  • I adapted the box by adding 1″ strips of matboard* around the existing box lid. The extra strips allowed the box to have a lip that fits over the edge of the box.

Santa's Letter Box

  • I added three additional layers of graduated sized matboard to the lid for dimension using foam tape.
  • I glued thrifted gold cording around each layer to cover the Foam Tape*.
  • A wood knob painted red completes the lid.

Santa's Letter Box

For the base of the letter box, I used an old metal lamp base. 

(At least, that’s what I think it is.)

We found it in my Dad’s garage while cleaning it out a few years ago.

It’s fun to use old things in unusual ways.

Santa's Letter Box

The Santa Letter Box adds a little Christmas Magic to your Holiday Decorating.  

Materials Used:  (*affiliate links)

Eileen Hull Educator Logo

Disclosure:  This is a sponsored post.  As a member of the Eileen Hull Educator Team, I have been provided product in exchange for my creative ideas.  The view and opinions are my own. 

How to Create a “Merry” Holiday Banner

How to Create a Merry Holiday Banner

How to make a “Merry” Banner to add to your Holiday Decorations.

Now that the weather has turned cooler, I’m starting to plan my Holiday decorating.

If you love banners and quick and easy projects, this one’s for you.

How to Create a Merry Holiday Banner

Materials Used:  (*affiliate links)

*Disclosure:  This blog uses ads and affiliate links.  If you choose to make a purchase using one of the links, I receive a small commission (at no additional cost to you) that helps offset the costs of maintaining this blog.  Thanks for your support!

StyletechCraft products brought to you by ATSM Craft*

How to Create a Merry Holiday Banner

Directions:

  • Cut the scrapbook paper slightly larger than the wood banner pieces.
  • Place the scrapbook paper design side up in the Xyron Creative Station®*

How to Create a Merry Holiday Banner

  • Turn the handle of the Creative Station to run the paper through.  As it runs through, it adds complete adhesive covering on the underneath side of the paper.

How to Create a Merry Holiday Banner

How to Create a Merry Holiday Banner

How to Create a Merry Holiday Banner

  • Lay the Transfer paper over the vinyl and gently rub with a vinyl scraper tool.

How to Create a Merry Holiday Banner

How to Create a Merry Holiday Banner

  • Paint the wood beads with red and green acrylic paint.
  • String the banner and wood beads onto ribbon or twine.

I wanted to keep the banner pieces simple. 

But you could add Holiday Flowers and embellishments to make it special.

“This is a sponsored post.  As a member of the StyleTechCraft Design Team I have been provided product and compensation in exchange for my creative ideas.  The views and opinions are my own.

Want more Holiday Workshop pictures?

In my excitement to share the news of the “Gnome for Christmas”

2023 Holiday Workshop, I forgot to add the individual pictures of the projects.  

Sue's 2023 Gnome for Christmas Holiday Workshop

Gnome for Christmas Cards and Tags

We will be making several cards using Echo Park’s Gnome for Christmas Collection.  You will receive a package of Gnome for Christmas Frames and Tags Ephemera* and 12 double-sided 6″ x 6″ coordinating paper*.  You will have enough left over to make several additional cards or tags.

Sue's 2023 Gnome for Christmas Holiday Workshop

Christmas Tea Bag Folder with Tags

Relax and Enjoy the Holiday Season with a cup of Christmas Tea and this cute little folded Christmas Tea Bag Folder.  It also uses the Gnome for Christmas paper.  This would be a great little addition to a gift bag or basket.  Or use it as a present topper.

Sue's 2023 Gnome for Christmas Holiday Workshop

3D Gnome Hot Cocoa Stand Card

I know I promised that I wouldn’t go overboard with the “Gnome” theme, but I couldn’t resist this adorable 3D card.  I used a SVG Cut file from the Silhouette Store to create this card.  And… would you believe I already have all the pieces cut and packaged for this one.  (I know shocking!)

FYI….You will need a glue pen or liquid adhesive to add all the pieces together.  It’s easy though, I promise.

2023 Gnome for Christmas Workshop

Holiday Note Pad Holder

If you’re looking for a simple little gift idea this Christmas, this is an easy one to make.  It uses the Sizzix Notepad Die by Eileen Hull*.  The inside cover of the notepad has red snowflake paper with a Kraft Colored Sticky note pad.  You’ll also get a mini pen that fits inside.

*Disclosure:  This blog uses ads and affiliate links.  If you choose to make a purchase using one of the links, I receive a small commission (at no additional cost to you) that helps offset the costs of maintaining this blog.  Thanks for your support!

Sue's 2023 Gnome for Christmas Holiday Workshop

Macramé Santa Gnome Ornament

You’ve probably seen several versions of this cute little macramé ornament going around on social media.  This is my version of the macramé Santa ornament.  (I used chunky red and white yarn instead of macramé cord.)  A simple ornament that could be used to make a garland or change up the colors to make a cute little gnome.  I personally plan on make several of these little guys this year.

Sue's 2023 Gnome for Christmas Holiday Workshop

Mini Farmhouse Christmas Door Hanger Ornament

This 6″ white wood Christmas Door Hanger is made using StyleTechCraft Glitter Vinyl.  The Mini Farmhouse Christmas Door Hanger would look cute just hanging on the tree or even cuter in the center of a small Christmas Wreath.

Just so you know…It took every fiber of my being not to make this one red.  (Big RED Fan Here!)  Since my tree is red and white, I made it white instead.  (wood beads not included)

Sue's 2023 Gnome for Christmas 
Holiday Workshop

The “Gnome for Christmas” Holiday Workshop

is Saturday November 11th from 10:00 to 2:00.

Grab a friend and join me for a fun day of Holiday Crafting with friends.

Cost is $40.00 A soup and sandwich lunch along with snacks and deserts is included in the price of the workshop.  And everyone that attends receives a prize.

Reserve your spot today by emailing me at suesholidayworkshop@yahoo.com. 

(Payment is due by November 1st.)

For more information CLICK HERE.    

Mini Fall Charcuterie Board

How to make a Mini Fall Charcuterie Board

How to make a Stenciled Mini Fall Charcuterie Board

using StyleTechCraft removable vinyl.  This is my first attempt at

a Charcuterie Board, so, in true “Sue” fashion, I went miniature.

How to make a Mini Fall Charcuterie Board

I picked up this miniature cutting board at Hobby Lobby earlier this Season.

(With their fall sale it cost under $2.)

Materials Used:  (*Affiliate Links)

*Disclosure:  This blog uses ads and affiliate links.  If you choose to make a purchase using one of the links, I receive a small commission (at no additional cost to you) that helps offset the costs of maintaining this blog.  Thanks for your support!

StyletechCraft products brought to you by ATSM Craft*

How to make a Mini Fall Charcuterie Board

  • I like to use StyleTechCraft adhesive vinyl to customize everything I can.  It’s so fun and satisfying.  But there are a few instances where vinyl isn’t the only option.  Did you know you can use your cut files with vinyl to create custom stencils?
  • I used an SVG cut file, my Silhouette Cameo Electronic Die Cutting Machine*, and StyleTechCraft Matte Removable Vinyl* to create the perfect fall stencil for my mini cutting board project.

How to make a Mini Fall Charcuterie Board

  • I gave the cutting board and leaf a light sanding with fine-grit sandpaper.

How to make a Mini Fall Charcuterie Board

  • I rubbed Walnut Gel Stain* on both sides of the leaf.  It will make a great package tag.

How to make a Mini Fall Charcuterie Board

  • Lay the Transfer paper over the vinyl and gently rub with a vinyl scraper tool.  Make sure all the little inside letter pieces transfer.
  • Place the Vinyl Transfer Tape* and vinyl onto the wood pieces.  Rub over Vinyl Transfer Tape* and gently remove from the vinyl.

How to make a Mini Fall Charcuterie Board

  • Paint the inside area of the vinyl with Black Multi-Purpose Acrylic Paint*.  (You may need two coats.)
  • Carefully remove the vinyl from the wood.  Use a sharp point to remove the vinyl from the inside of the lettering.
  • Once the lettering is fully dry, lightly sand to smooth the design.

How to make a Mini Fall Charcuterie Board

The black paint makes it look like it has been wood burned.  (but it’s not!)

I debated back and forth whether to seal the wood or not.

I didn’t know if it mattered for use.

I used a Multi-Purpose Sealer* on both the board and the leaf.

I reasoned that the board is more decorative than it is utilitarian.

So, it was just a matter of preference.

Mini Fall Charcuterie Board

Wouldn’t it look cute with a mini loaf of pumpkin bread?  

Just wrap it up with a ribbon and add the Hello Fall Tag for an

adorable Fall Hostess Gift.

Or use it for a mini party for two.

Welcome Autumn Pillow

for another fun Fall Stenciled project click here.

“This is a sponsored post.  As a member of the StyleTechCraft Design Team I have been provided product and compensation in exchange for my creative ideas.  The views and opinions are my own.

Make a Pumpkin Treat Box for your Favorite Trick or Treaters

How to make a Pumpkin Treat Box

How to make a Pumpkin Gift Box

using the XL Card Caddy Die* from Sizzix and Eileen Hull.

It’s a fun little Halloween Treat Box for your favorite Trick or Treaters.

Eileen Hull Educator Logo

Disclosure:  This is a sponsored post.  As a member of the Eileen Hull Educator Team, I have been provided product in exchange for my creative ideas.  The view and opinions are my own. 

How to make a Pumpkin Gift Box

Materials Used:       (*affiliate links)

*Disclosure:  This blog uses ads and affiliate links.  If you choose to make a purchase using one of the links, I receive a small commission (at no additional cost to you) that helps offset the costs of maintaining this blog.  Thanks for your support!

How to make a Pumpkin Gift Box using the XL Card Caddy Die from Sizzix and Eileen Hull.

Directions:

How to make a Pumpkin Gift Box using the XL Card Caddy Die from Sizzix and Eileen Hull.

StyletechCraft products brought to you by ATSM Craft*

How to make a Pumpkin Gift Box using the XL Card Caddy Die from Sizzix and Eileen Hull.

  • Adhere the sides to the card caddy base using Rapid Fuse Adhesive*.  The Die comes with scored side pieces that are perfect for putting the box together.  I wasn’t thinking and cut two pieces of matboard for my sides.  Both will work.  (the one that comes with the die would have been a lot easier)

How to make a Pumpkin Treat Box-Sue's Creative Workshop www.sueeldred.com 2459

  • Create a handle for the pumpkin treat box using wire and small wood beads.
  • Punch a hole on both sides of the box and attach the handle.

a little Pocket Full of Holiday Cheer

Mini Pocket of Cheer Christmas Ornament

How to make a Pocket Full of Holiday Cheer Christmas Ornament.

I’m Enveloping the Christmas in July Holiday Season with a Pocket Full of Holiday Cheer.

Mini Pocket of Cheer Christmas Ornament

Materials Used: (*affiliate links)

*Disclosure:  This blog uses ads and affiliate links.  If you choose to make a purchase using one of the links, I receive a small commission (at no additional cost to you) that helps offset the costs of maintaining this blog.  Thanks for your support!

Mini Pocket of Cheer Christmas Ornament

To make the Ornament:

  • Die cut two small envelopes using the Eileen Hull Envelope, Folder & Flowers Die Set* from Sizzix using red and green faux leather paper.  (you could also use scrapbook paper)
  • Cut the sides off the green envelope and glue it to the inside of the red envelope.  
  • Fold the envelope on the score lines and glue the bottom sides together.

Mini Pocket of Cheer Christmas Ornament

  • Punch two small holes on each side of the envelope flap.  Add a small piece of twine for hanging.
  • Hot glue small pieces of faux greenery and berries to the inside of the envelope. 
  • Place a small holiday greeting on the bottom of the envelope.  
  • Adhere a small holiday sticker to the greenery.  

Mini Pocket of Cheer Christmas Ornament

  • Add another Holiday Greeting Sticker to the back of the envelope.  I added 3D foam squares to the back of the sticker for added dimension.

Mini Pocket of Cheer Christmas Ornament

It is a quick and easy Holiday Ornament to add to the front of a package.

Or you could make several to hang on your Christmas Tree.  (you’ve got time)

Eileen Hull Educator Logo

Disclosure:  This is a sponsored post.  As a member of the Eileen Hull Educator Team, I have been provided product in exchange for my creative ideas.  The view and opinions are my own. 

Let the Easter Egg Hunt Begin

DIY Easter Egg Hunt Sign using StyleTechCraft Glossy Vinyl

Whether you are hosting a super large gathering or a small hunt for three wild

and crazy boys, the “The Hunt Is On” Easter Egg Sign is a fun way to let the fun begin.

For this project, I’ve combined my love of Dollar Tree Finds and my favorite StyletechCraft* vinyl.

DIY Easter Egg Hunt Sign using StyleTechCraft Glossy Vinyl

Materials Used:    (*affiliate links)

*Disclosure:  This blog uses ads and affiliate links.  If you choose to make a purchase using one of the links, I receive a small commission (at no additional cost to you) that helps offset the costs of maintaining this blog.  Thanks for your support!

DIY Easter Egg Hunt Sign using StyleTechCraft Glossy Vinyl

Directions:

  • Remove the twine hanger from the back of the sign.

The Hunt is One SVG File from The Silhouette Store

DIY Easter Egg Hunt Sign using StyleTechCraft Glossy Vinyl

  • I applied the background vinyl first.
  • Lay the transfer paper over the words.
  • Rub over the transfer paper with a vinyl scraper tool and lift the design from the white paper backing.
  • Lay the transfer paper onto the sign and rub over the design.  Remove the transfer paper.
  • Line up the colored eggs one at a time over the background design.

StyletechCraft products brought to you by ATSM Craft*

DIY Easter Egg Hunt Sign using StyleTechCraft Glossy Vinyl

  • Apply the word “Hunt” over the vinyl eggs.

DIY Easter Egg Hunt Sign using StyleTechCraft Glossy Vinyl

Even if you’re not having an Easter Egg Hunt, the sign makes a cute centerpiece/decoration.

I’m off to fill some eggs.  Happy Easter!


“This is a sponsored post.  As a member of the StyleTechCraft Design Team I have been provided product and compensation in exchange for my creative ideas.  The views and opinions are my own.

Spring Tabletop Kit  New Products at Scrapbook.com!

DIY Spring Bunny Door Hanger

How to make a Spring Bunny Door Hanger

How to Make a Spring Bunny Door Hanger with Acrylic Paint and StyleTechCraft Vinyl.

I love changing out my decorations with the seasons.

For Spring this year, I decided I needed a new bunny.

This cute little bunny door hanger makes me smile every time I see him.

Dollar Tree* always seems to have the perfect wood cut out for me to use.

And when it only costs $1.25, it’s affordable too.

*Disclosure:  This blog uses ads and affiliate links.  If you choose to make a purchase using one of the links, I receive a small commission (at no additional cost to you) that helps offset the costs of maintaining this blog.  Thanks for your support!

How to make a Spring Bunny Door Hanger with a Dollar Tree Bunny, Acrylic Paint, and StyleTechCraft Glossy Craft Vinyl.

Materials Used to Make Bunny Door Hanger:   (*affiliate links)

StyletechCraft products brought to you by ATSM Craft*

How to make a Spring Bunny Door Hanger with a Dollar Tree Bunny, Acrylic Paint, and StyleTechCraft Glossy Craft Vinyl.

How to make The Spring Bunny Door Hanger:

How to Make a Spring Bunny Door Hanger with Acrylic Paint and StyleTechCraft Vinyl-Sue's Creative Workshop www.sueeldred.com 9785

  • My project was inspired by a Large Floral Rabbit Decoration that I saw at Michael’s Craft Store.  I liked the look of the painted flowers on the rabbit.  But since my hand-painting skills are not that good, a floral stencil would have to do.

How to make a Spring Bunny Door Hanger with a Dollar Tree Bunny, Acrylic Paint, and StyleTechCraft Glossy Craft Vinyl.

How to make a Spring Bunny Door Hanger with a Dollar Tree Bunny, Acrylic Paint, and StyleTechCraft Glossy Craft Vinyl.

“This is a sponsored post.  As a member of the StyleTechCraft Design Team I have been provided product and compensation in exchange for my creative ideas.  The views and opinions are my own.

How to make a Spring Bunny Door Hanger with a Dollar Tree Bunny, Acrylic Paint, and StyleTechCraft Glossy Craft Vinyl.

How to make a Spring Bunny Door Hanger with a Dollar Tree Bunny, Acrylic Paint, and StyleTechCraft Glossy Craft Vinyl.

  • For the florals, line up the vinyl over the painted area.
  • Gently rub over the transfer tape with the scraper tool.
  • Remove the transfer tape.

How to make a Spring Bunny Door Hanger with a Dollar Tree Bunny, Acrylic Paint, and StyleTechCraft Glossy Craft Vinyl.

  • To create the handle, paint several wood beads with the same acrylic paint as the flowers.
  • String the beads onto a piece of natural twine*.  
  • An Easy DIY Tip: Dip the end of the twine into craft glue. Twirl the fibers with your fingers tips to make the strands tight. Once the glue dries, it’s easy to add the beads.

How to make a Spring Bunny Door Hanger with a Dollar Tree Bunny, Acrylic Paint, and StyleTechCraft Glossy Craft Vinyl.

  • I rubbed a little pink paint onto the face before adding the whiskers.

How to make a Spring Bunny Door Hanger with a Dollar Tree Bunny, Acrylic Paint, and StyleTechCraft Glossy Craft Vinyl.

  • I added adhesive rhinestones to the inside of the smaller flowers.
  • A Hello Spring Greeting finishes off the door hanger.

How to Make a Spring Bunny Door Hanger with Acrylic Paint and StyleTechCraft Vinyl-Sue's Creative Workshop www.sueeldred.com 9894

I decided to add the Bunny Door Hanger to the inside of my Boxwood Wreath.

I think it looks cute hanging on my front door.

Spring Party Collection

I Love You more than Donuts.

I Love You More than Donuts Card

“I Love You More than Donuts” Valentine’s Day Card.

As I mentioned in my last post, my husband and I aren’t that gushy romantic couple.

This card is the Valentine’s Day card that I made for him.

I Love You More than Donuts Card

He really is a sweetie…

In the early years of our marriage, my husband would buy me a donut every weekend morning.

It was one of the sweet little things he would do for me.

That lasted until I told him I couldn’t eat another donut. (I know, I’m an ungrateful wife.)

But recently, my husband has been on a donut kick again.

And sometimes, if I ask nicely, he’ll buy one for me.

So technically, this should have been his Valentine’s card to me. (I hope!)

Happy Valentine’s Day Everyone!

I Love You More than Donuts Card

Here’s What I Used to make the Donuts Valentine’s Card:  (*affiliate links)

StyletechCraft products brought to you by ATSM Craft*

*Disclosure:  This is a sponsored post.  This blog uses ads and affiliate links.  If you choose to make a purchase using one of the links, I receive a small commission (at no additional cost to you) that helps offset the costs of maintaining this blog.  Thanks for your support!