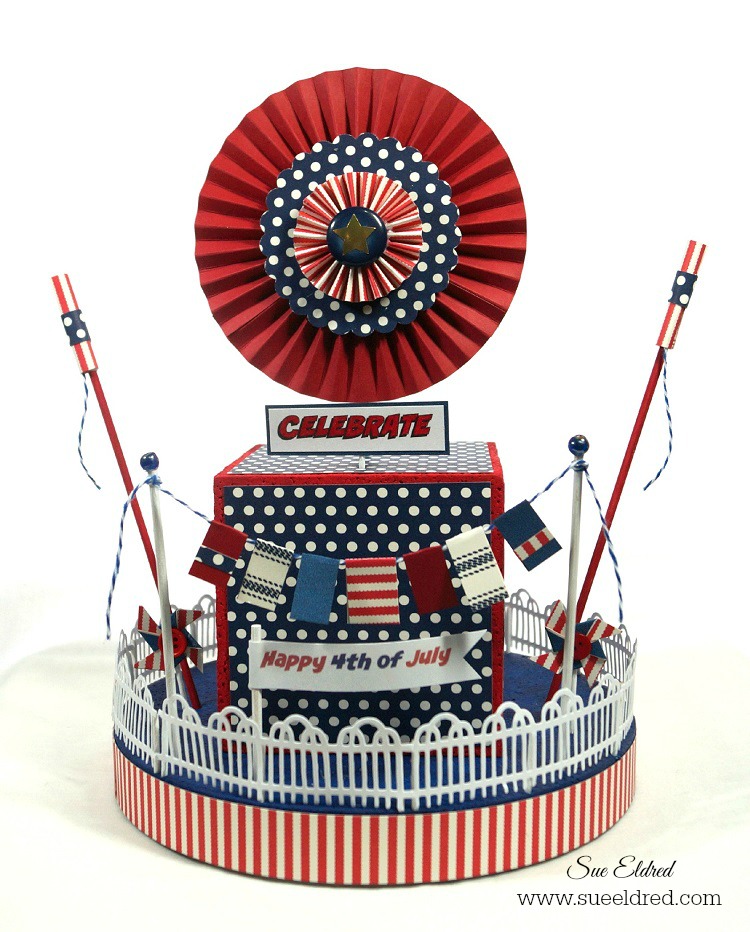
How to make a 4th of July Centerpiece with Fireworks, Flags, Banners and Pinwheels

What do you think about when you hear the words “4th of July”?

For me it’s… White picket fences, fireworks and the good old red white and blue. 

Or a 4th of July Celebration Centerpiece with Fireworks, Flags, Banners and Pinwheels all

rolled into one.   I created this 4th of July centerpiece a couple years ago, since it’s one

of my favorite projects, I thought I’d share it again.   Enjoy!

How to make a 4th of July Centerpiece…

Products Used:                 (*affiliate link)

Directions:

  1.  Paint the round disc with Navy Blue paint.

2.  Cut two 1” x 12” strips of the red striped paper and one 1” x 2” piece. Adhere to the side of the disc with double stick tape roller.

3.  Die-cut 7 fence sections.

4.  Paint 15 round toothpicks white. (set four aside to use later.)

5.  Cut 11 toothpicks in half. Glue one toothpick half on each end and middle of the fence with the pointed end facing down.

6.  Insert fence sections onto the top edge of the disc.

7.  Paint the 4” cube red.

8.  Cut five 3 ¾” x 3 ¾” pieces of Navy & Ivory dot paper. Adhere to the sides and top of the cube. Glue cube to center of the disc.

9. Paint two bamboo skewers white. Cut skewers to 5”.

10.  Glue small blue beads to top of each skewer.

11.  Create small ½” flags from scraps of paper and cardstock. Adhere onto a 12” piece of blue and white twine.  Tie ends of the twine to top of the skewers to make a flag banner. Insert into disc.
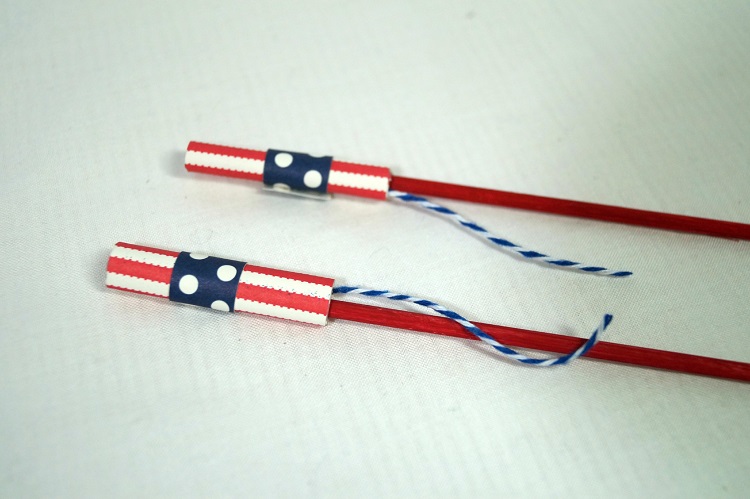
12.  To create Bottle Rockets:  Paint two bamboo skewers red.  Cut two pieces of red striped paper 1 3/4” x two. Wrap around pencil to curve paper. Remove pencil and roll tightly to form a small tube. Wrap a 1/2” strip of navy dot paper around tube.  Glue a small piece of twine inside of tube to create the bottle rocket wick. Glue tube onto red bamboo skewer and insert into disc. Create second bottle rocket for other side of the disc.

13.  Punch two 3” Navy and Ivory Dots scalloped circles.

14.  Cut two strips of red card-stock: 1 1/4”” x 12” and 2 1/4” x 6 1/2” . Adhere the two strips together to form one long 2 1/4” x 18” strip of red card-stock.

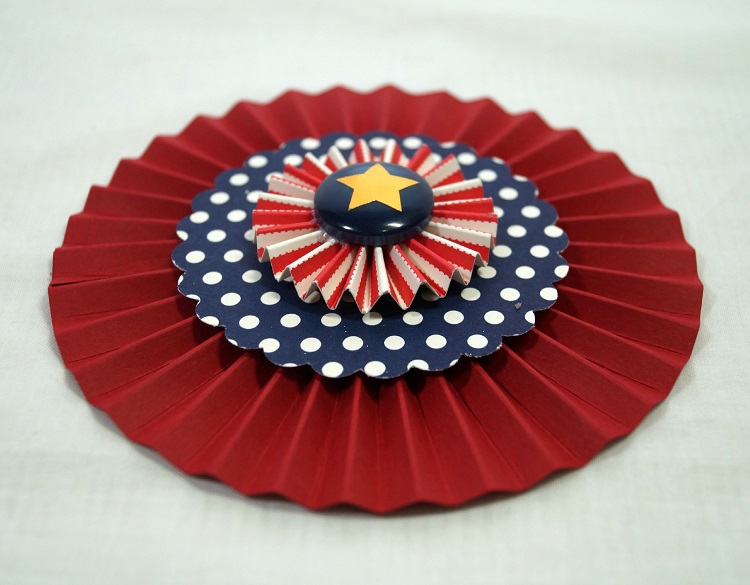
15.  Using scoring board and scoring tool. Score card-stock every 1/4” down the entire length. Fold strip accordion fold. Glue ends together with a strong adhesive to form a cylinder.

16.  On a flat surface, gather the bottom of the cylinder tight while spreading and pushing down on the top to create the Rosette.

17.  With a strong adhesive, attach one of the scalloped circles to the center of the Rosette. Hold into place until the adhesive starts to hold.

18.  Turn the Rosette over and attach the second scalloped circle onto the other side of the rosette.

19.  Create a second smaller rosette using a 1” x 12” strip of red striped paper. Score strip every 1/4”.  (repeat steps 16 and 17)

20.  Glue blue button into center of the rosette to hold in place. Glue onto center of the scalloped circle. Add star sticker to center of button.

21.  Paint a bamboo skewer with Navy paint. Cut into a 5” piece. Insert into back of finished Rosette.
22.  Insert finished Rosette into top of the 4″ cube.

23.  Create small pinwheels by adhering two pieces of 1” x 1” paper together.  On each corner, cut diagonally two-thirds of way to square’s center, dividing each corner into two points. Bring every other point to center so that the points overlap. Glue into place.

24.  Glue small red button to center of each pinwheel.  Glue onto white painted toothpick and insert into base.

25.  Create and print computer generated “CELEBRATE” and “4th of July” onto white card-stock.  Cut and layer to size and adhere onto picks and skewers and insert onto centerpiece.

This project was created for and sponsored by Smoothfoam and Canvas Corp Brands.

For more summer fun…click on Slimer ad below

Slimer

Disclaimer:  This blog uses ads and affiliate links.  If you choose to make a purchase using one of the links, I receive a small commission (at no additional cost to you) that helps offset the costs of maintaining this blog.  Thanks for your support!

Join Amazon Kindle Unlimited 30-Day Free Trial

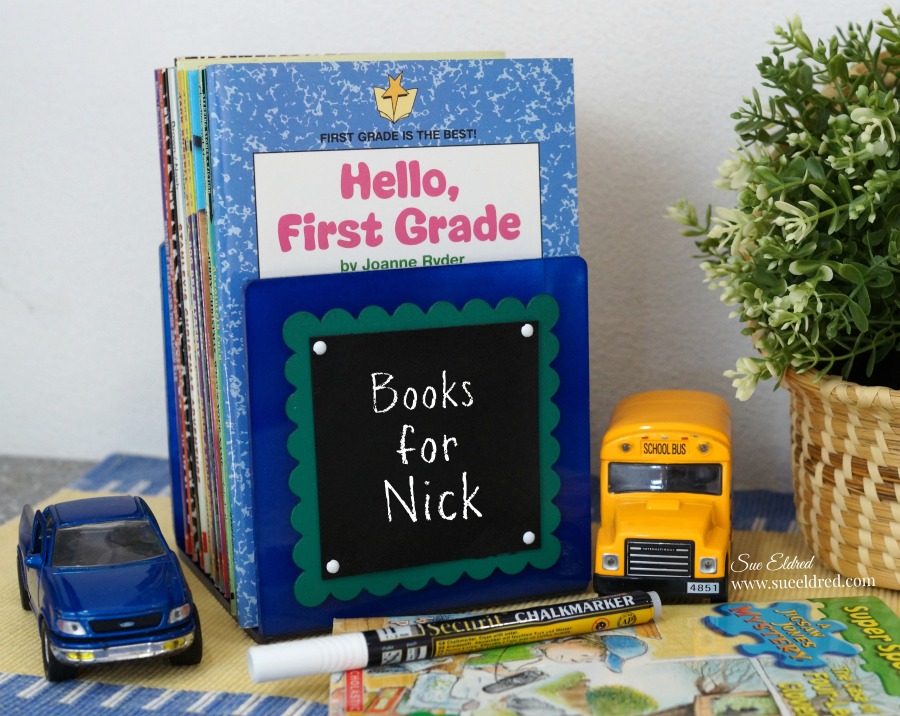
for the love of reading… “Books for Nick”

My grandson Nick learned to read this year in Kindergarten.

This new ability has renewed his love of books.

Not just any old book will do, it has to be a chapter book.

To keep Nick from rummaging through all the bookshelves…

I created a small book stand for him to use with all the age appropriate books

I’ve saved through the years.  (He hasn’t seen it yet, I think he’s going to like it.)

To create Nick’s bookstand…

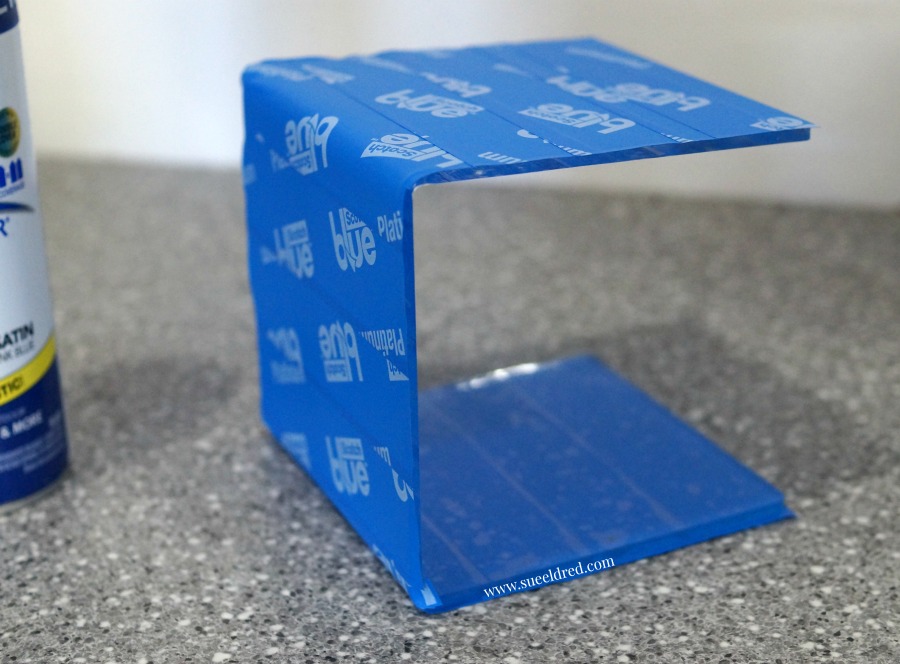
I used a Square Display Riser* (affiliate link) from a set of 3 acrylic risers I received from

Deflecto as part of my monthly Design Team box.

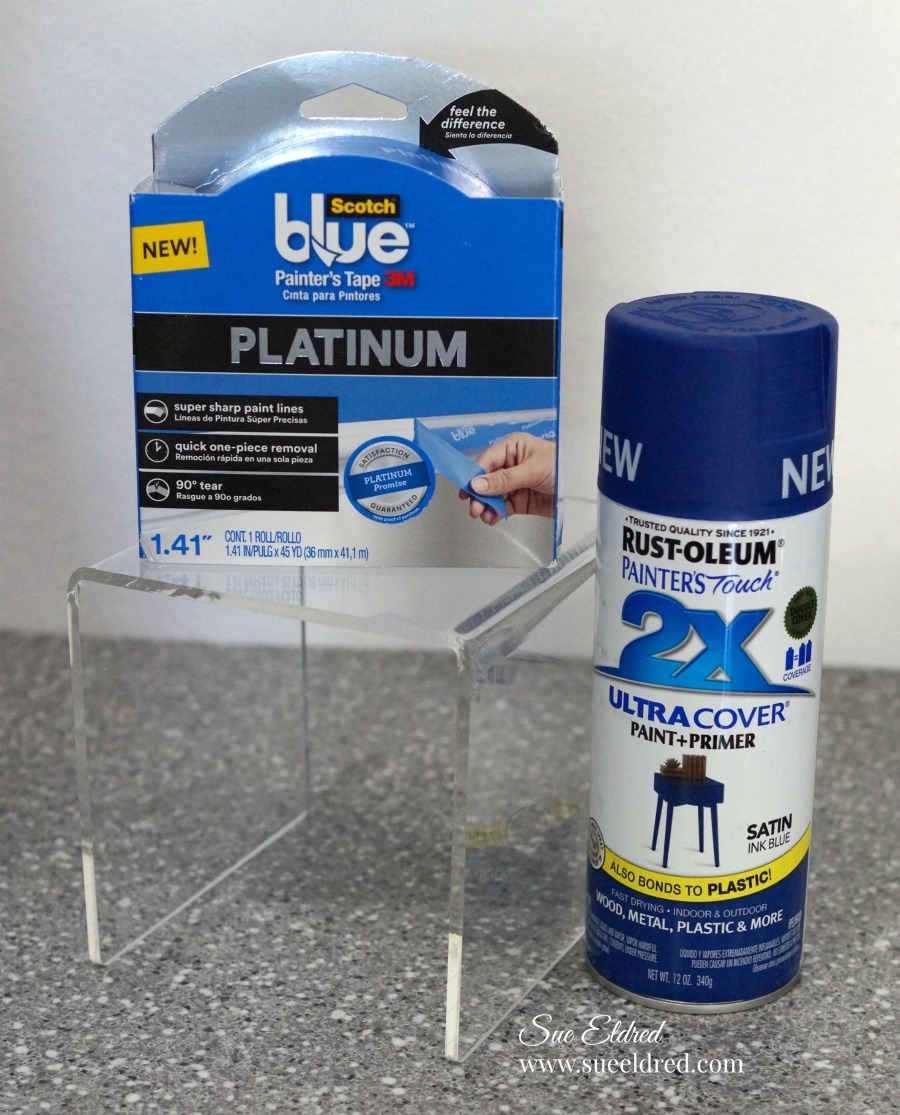
I covered the outside of the Square Display Riser* with ScotchBlue Platinum Painter’s Tape*.

I sprayed the inside of the Square Display Riser*

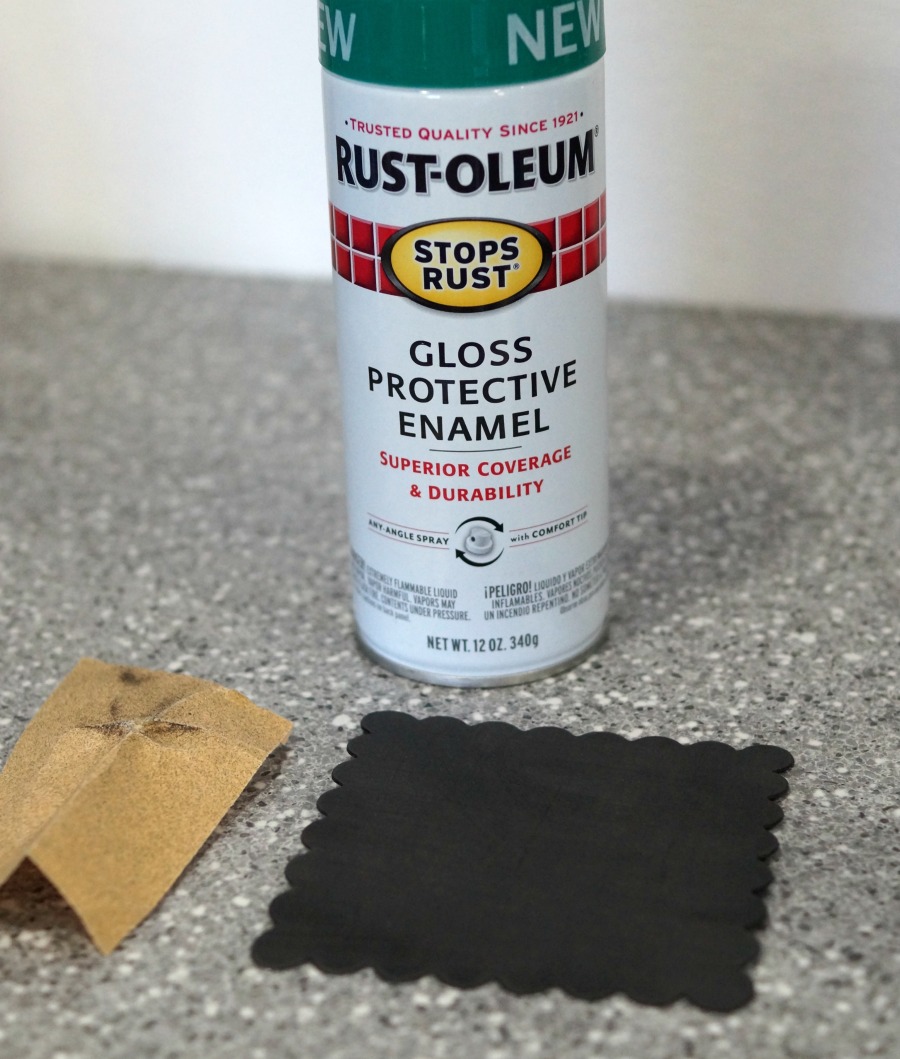
with Rust-Oleum Painter’s Touch Multi Purpose Spray Paint*.

I die-cut a scalloped square from black chalkboard vinyl (Sign Tags w/Wet Erase Marker)

and roughed it up with extra fine sandpaper for better paint adhesion.

I then painted the vinyl square with green spray paint.

For the Mini Chalkboard…

  • I cut a smaller piece of the black chalkboard vinyl and punched holes on each of the four corners to add decorative brads before gluing with Beacon’s Quick Grip Glue* onto the painted scalloped square.
  • I glued the completed scalloped square onto the Square Display Riser*.
  • The mini chalkboard is a great place to write encouraging reminders.

 “This is a sponsored post. As a member of the Deflecto Design Team I have been provided product in exchange for my creative ideas, views and opinions.”

For more summer fun… click on ad below.

Slimer

Disclaimer:  This blog uses ads and affiliate links.  If you choose to make a purchase using one of the links, I receive a small commission (at no additional cost to you) that helps offset the costs of maintaining this blog.  Thanks for your support!

Join Amazon Kindle Unlimited 30-Day Free Trial

Heartbreaker Sweatshirt

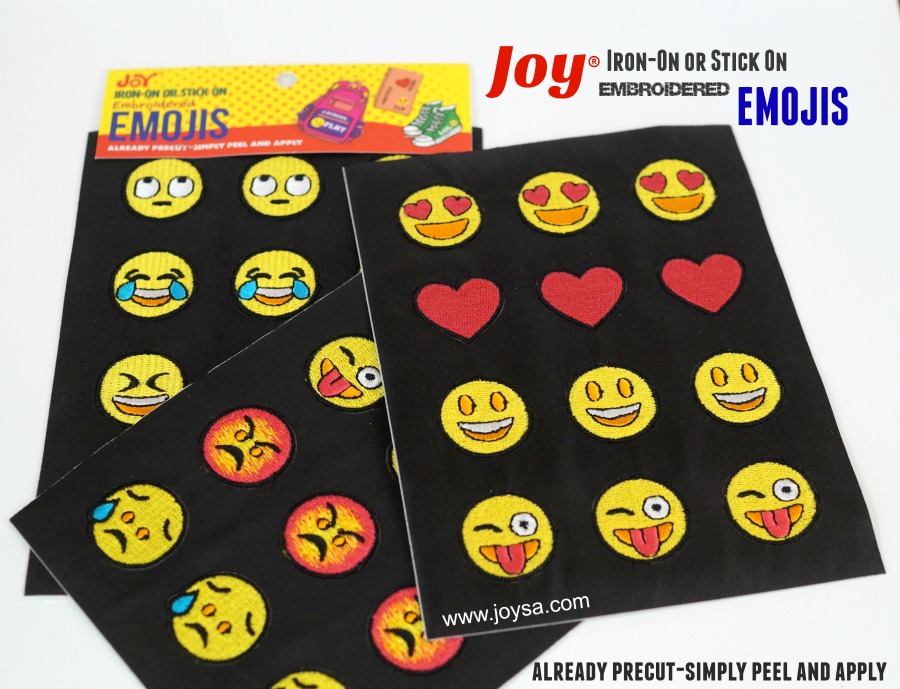
My teenage son was intrigued when I showed him my stack of new Emoji iron-on patches.

“Can I use one?”,  he asked.

Curious to what was in his head, I said “yes” on one condition.

He had to let me photograph what ever he made.  (He agreed.)

After deciding  on the perfect placement, he even ironed on the patches himself.

I have to admit it turned out real cute.

Ask for Emoji iron-on patches at your local craft store.

 *As a member of the Creating with Joy Design Team, this post was sponsored by JOY® SA.

Easy Photo Transfer on Wood Slices with Mod Podge

Easy DIY Photo Transfer project using Mod Podge Photo Transfer Medium

I’ve used Mod Podge® several times over the years, but had never tried

Mod Podge Photo Transfer Medium*.     (*affiliate link)

I was surprised at how easy the process was and how well the project turned out.

For my project…

I used a color copy of my son in his favorite Woody pajamas and favorite Woody toy.

It’s hard to believe that this sweet faced boy is now graduating from High School.

I also used a wood slice from Walnut Hollow* for my project.

The wood slice had been previously kiln dried, sanded and was ready to use.

Directions:

  1. Do not use actual photographs, you must use photo copies made from a dry toner type copier.
  2. Lay wood slice over picture and trace around wood slice.  Cut around traced lines.
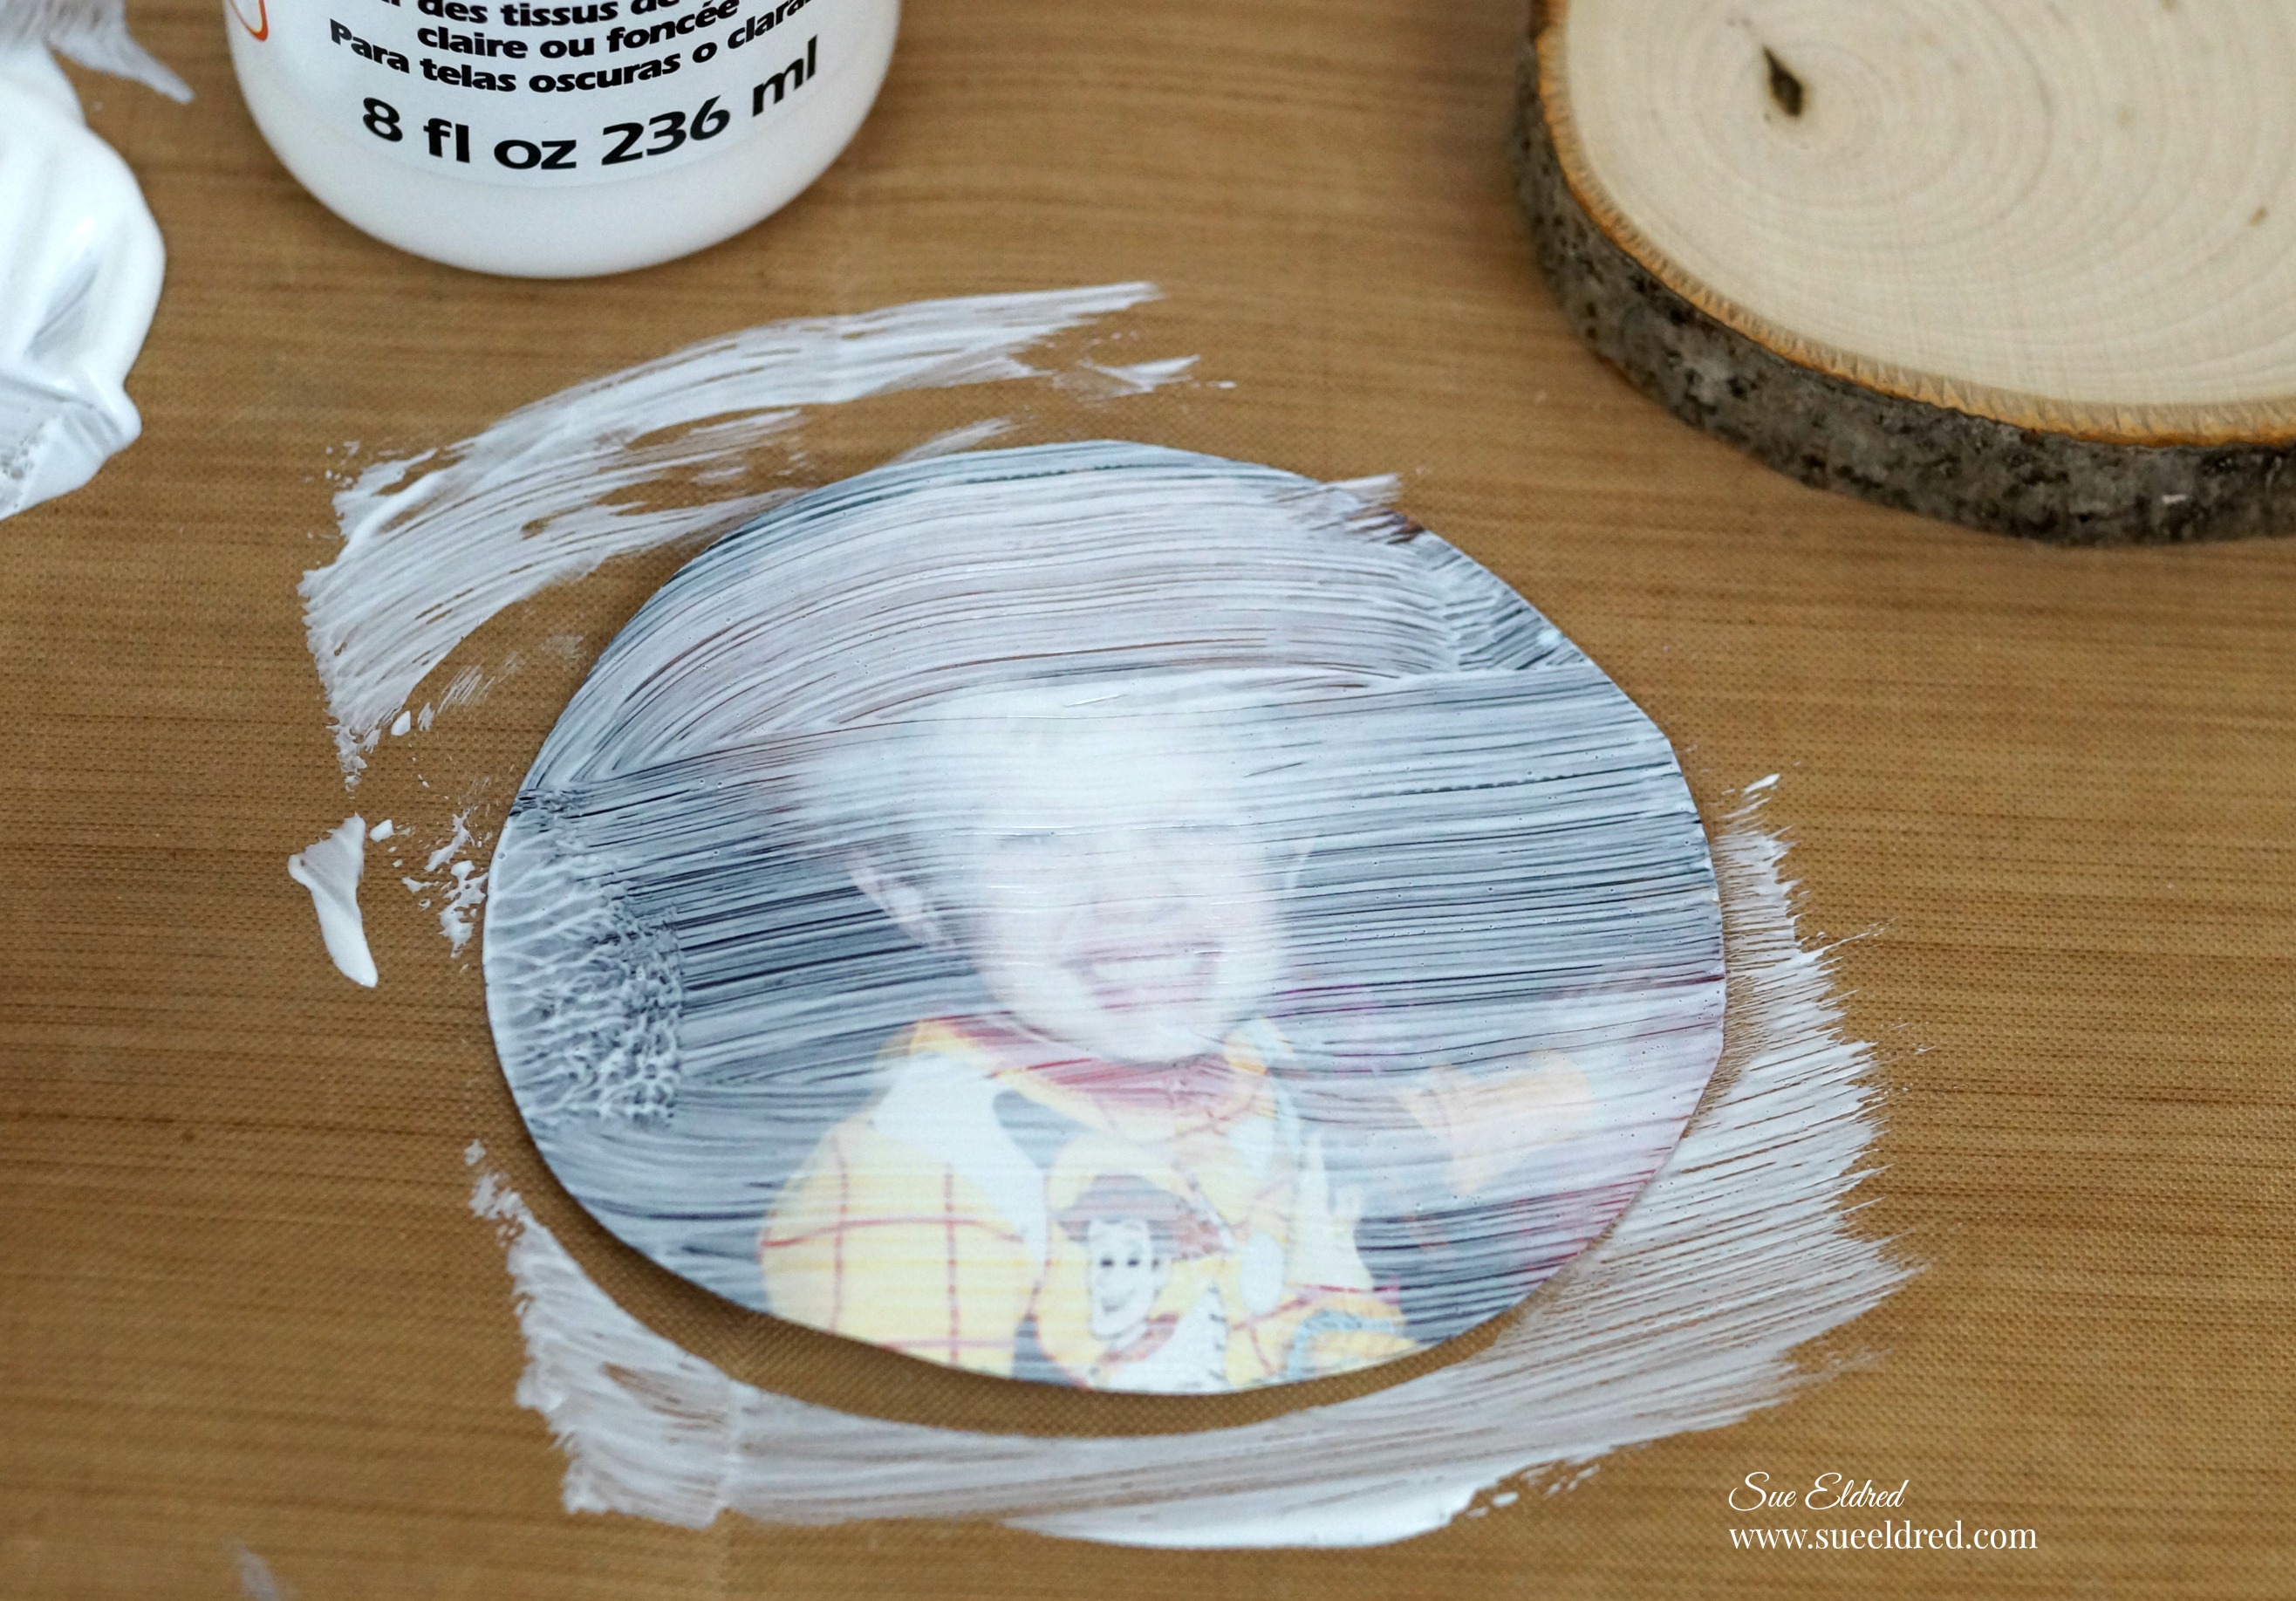
  3. Using a 1″ Foam Brush*, brush over image with a medium application of Mod Podge Photo Transfer Medium*. The medium will be opaque.
  4. Carefully lift image off, making contact only slightly with the image edge. Flip the coated image over and position over the wood slice.   Lightly press from the center out to release any air bubbles.   Wipe away any excess medium that may have been squeezed out from the image. Allow to dry overnight.
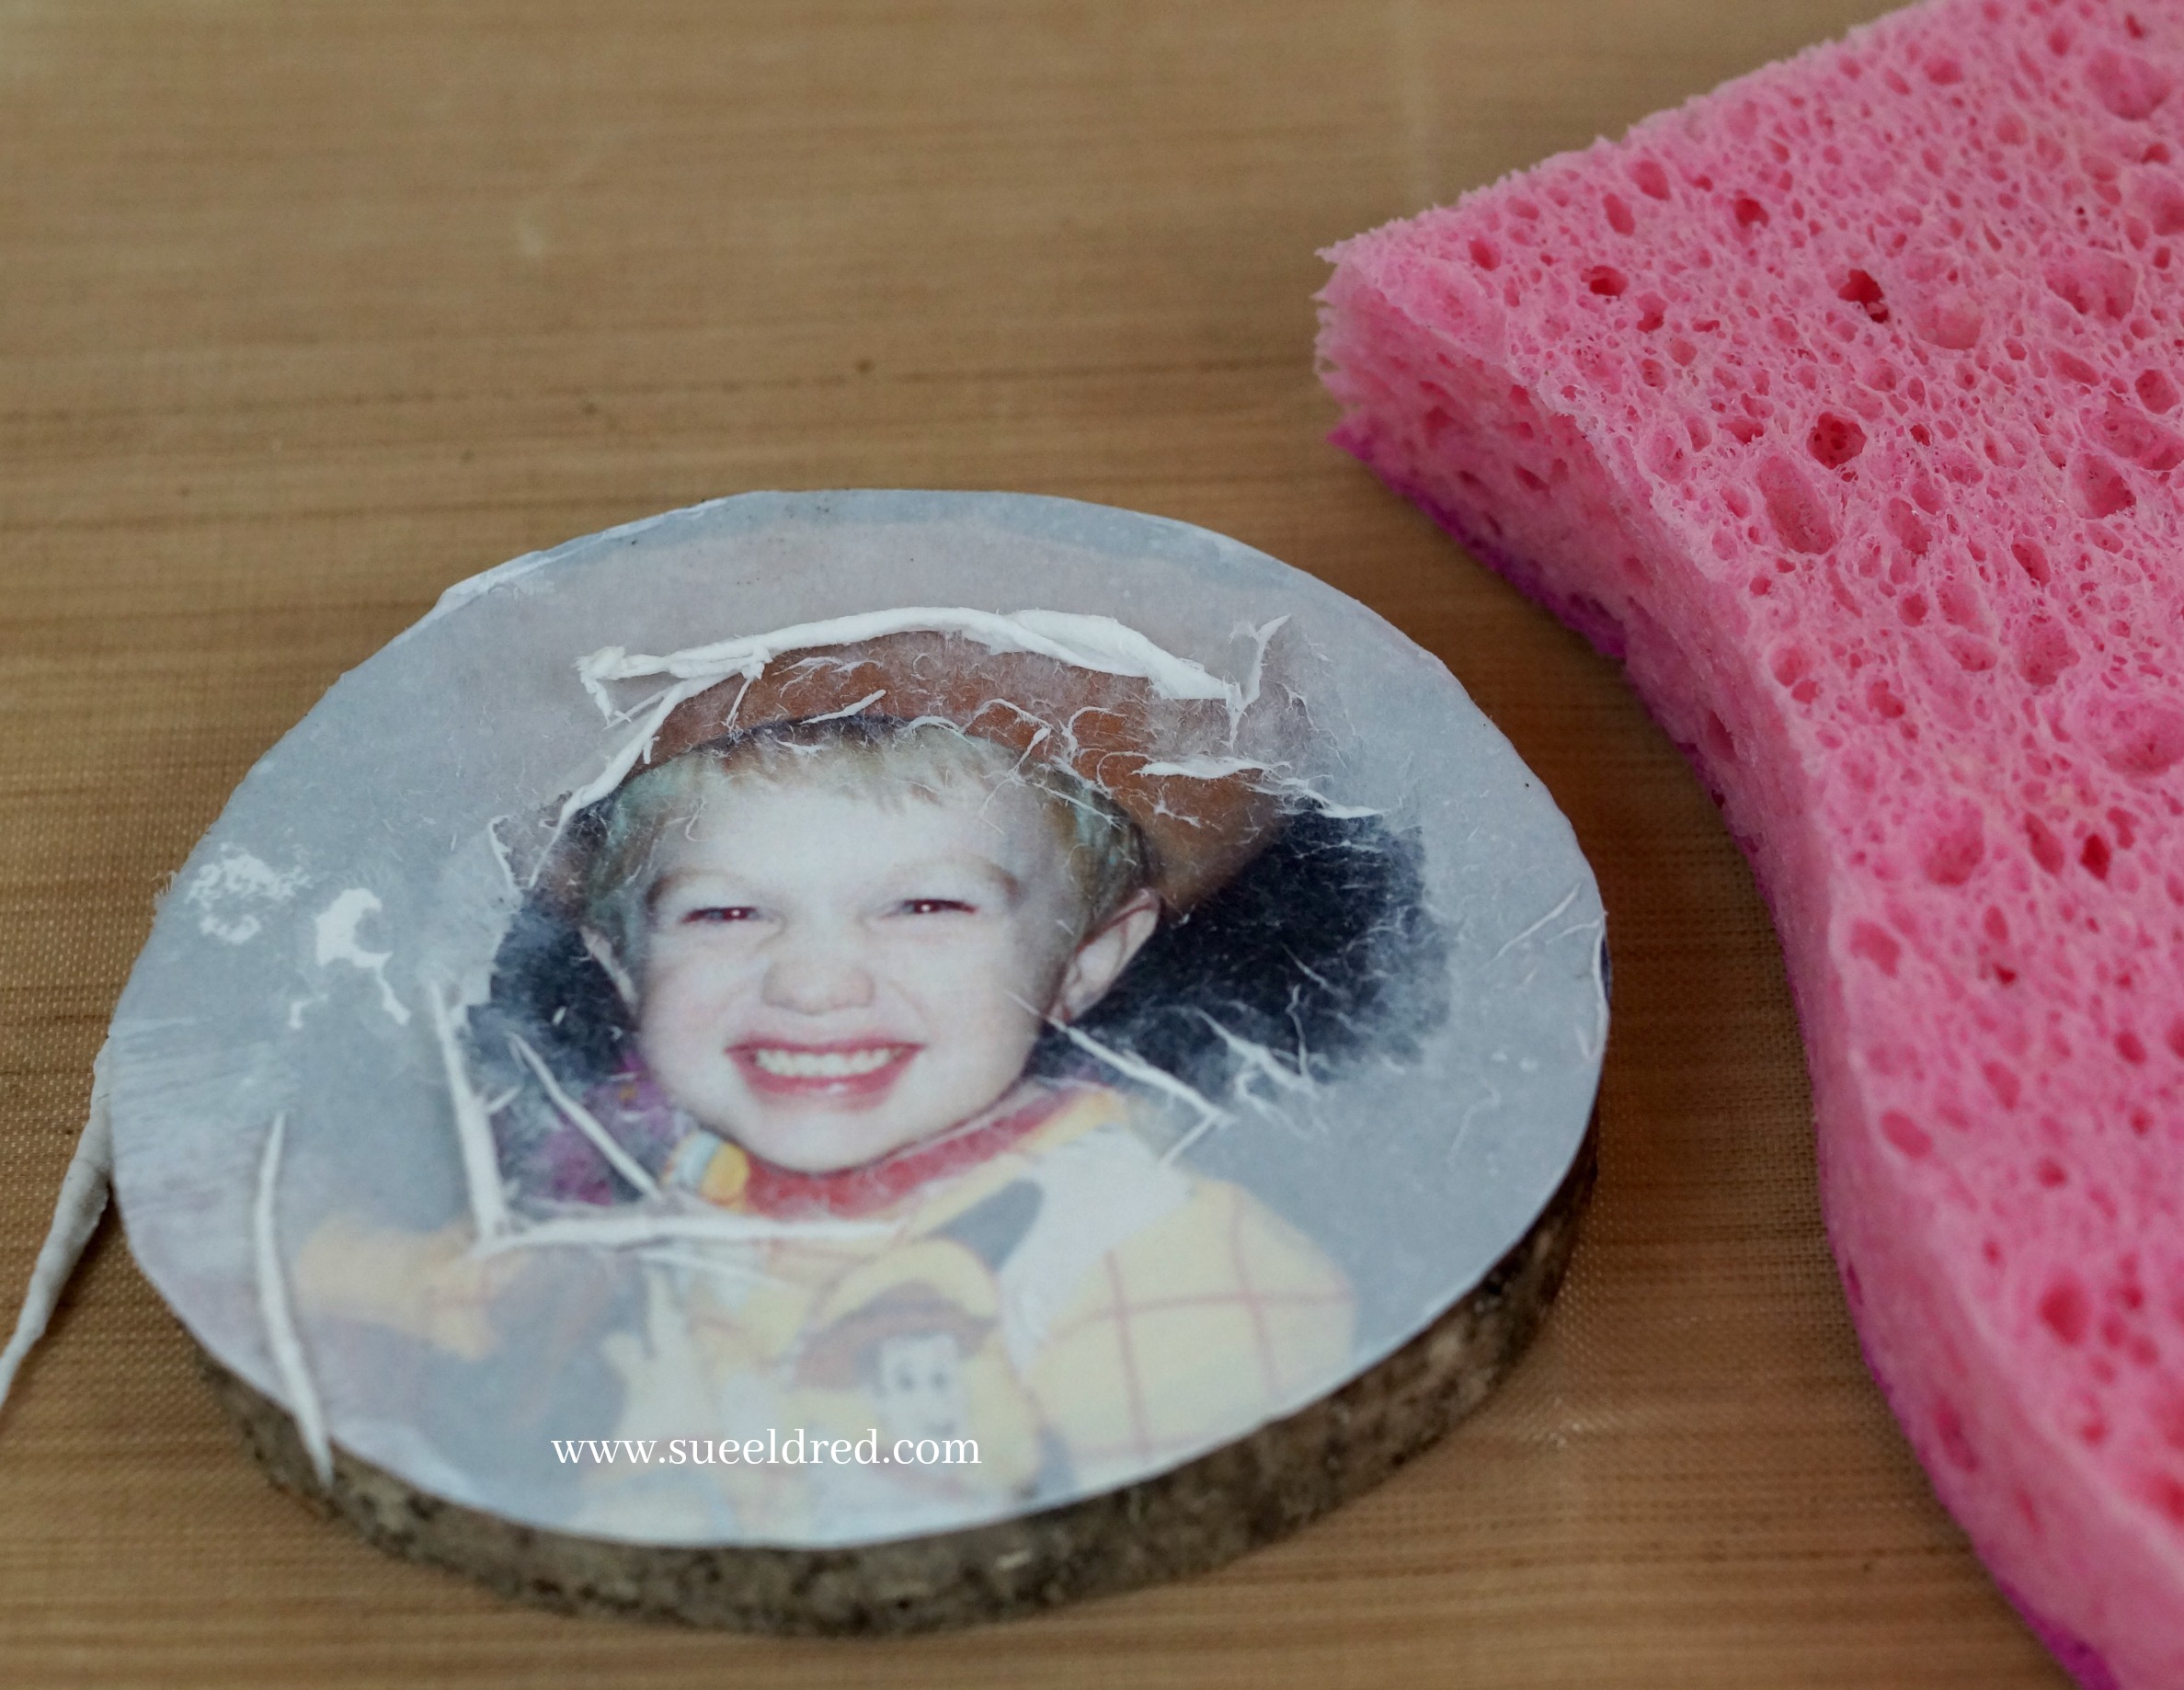
  5. Wet a sponge with water, squeeze excess water from sponge then dampen the exposed backside of the image transfer. Immediately as the paper is wet, an image will appear. Allow the wet image to rest a couple moments to soften the paper.

Shop Your Fav Brands at Scrapbook.com

5.  Using your damp sponge or a fingertip, begin to lightly rub over the damp paper to peel away layers. Be careful not to be rough with the wet paper as it may be fragile. After removing several layers of paper, stop and allow transferred image to dry. Once dry, white areas will appear where paper remains. Repeat steps to moisten and lightly rub the surface to remove the remaining paper layers. Allow to dry.

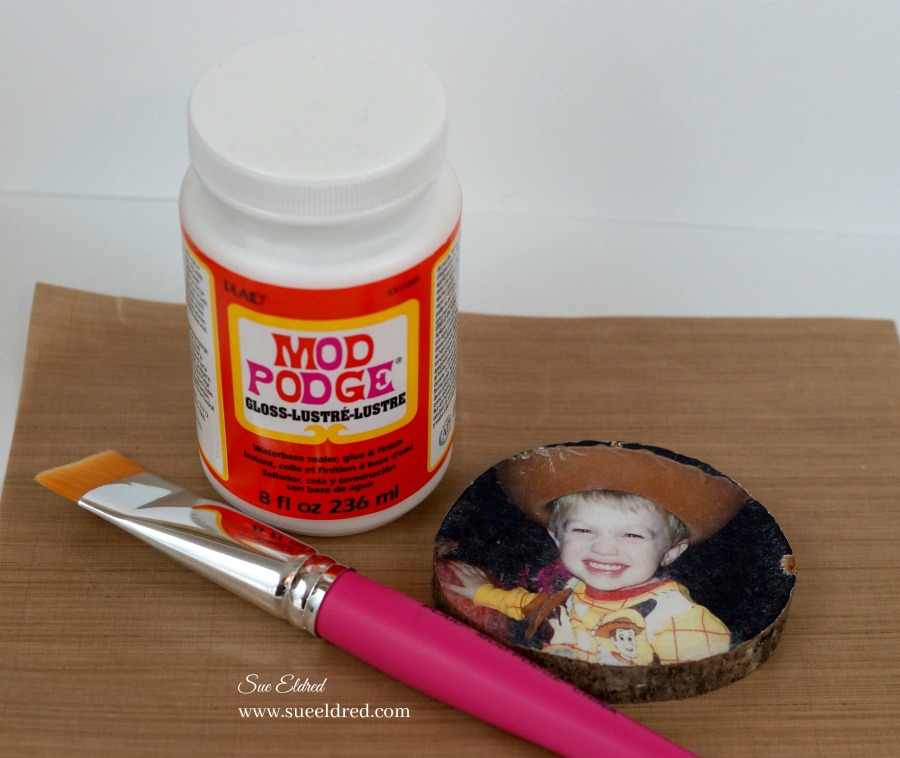
6.  If desired, brush a coat of Mod Podge Matte Finish* or Mod Podge Gloss Finish* over the project surface to seal and protect.

Basic Directions from plaidonline.com

Did you Know…

In 1967, Jan Wetstone created Mod Podge in her garage as an easy-to-use decoupage solution for crafting enthusiasts. Since then, the brand has gone beyond just decoupage with 17 different formulas that include Matte, Gloss, Dishwasher safe, and Sparkle as well as top coats for Brushstrokes and Chalkboard. The introduction of the Mod Melter made embellishing your craft projects a breeze, along with the endless creative options found in Dimensional Magic, Photo Transfer Medium, and Collage Clay.


*Disclosure:  This blog uses ads and affiliate links.  If you choose to make a purchase using one of the links, I receive a small commission (at no additional cost to you) that helps offset the costs of maintaining this blog.  Thanks for your support!
 

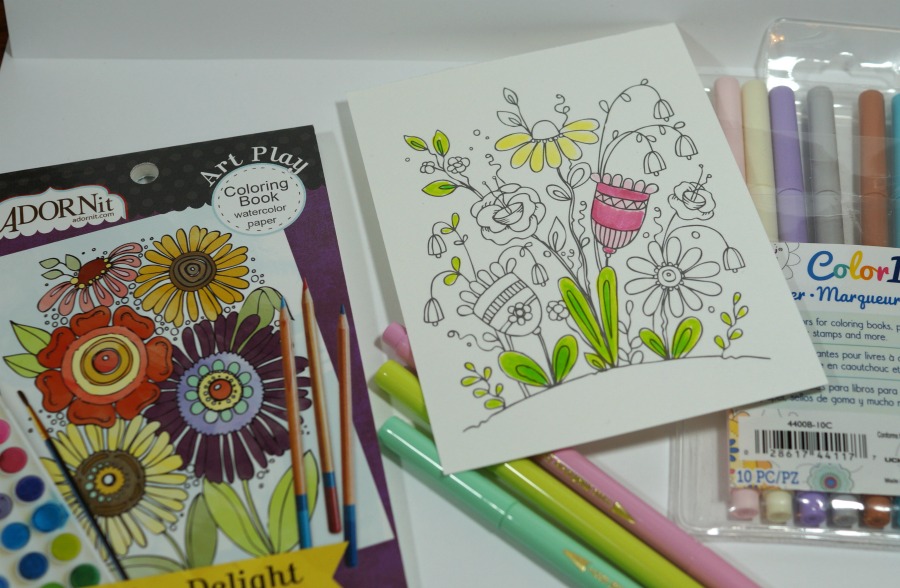
ADORNit: “Embrace Each Day” card

A bright and cheerful card for all you Moms out there.

It doesn’t matter if put your feet up, take a walk, plant those flowers or hug those little ones…

What ever you need to do to embrace the day.  (fyi…I plan on doing all the above)

Happy Mother’s Day.

Card Details…                                                                          (*affiliate link)

This card was sponsored by ADORNit as part of being an ADORNit “it girl” ambassador.

Disclaimer:  This blog uses ads and affiliate links.  If you choose to make a purchase using one of the links, I receive a small commission (at no additional cost to you) that helps offset the costs of maintaining this blog.  Thanks for your support!
Life’s a Journey

Of all the goodies I received from ADORNit as part of being an “it girl”  this wood plaque

was the first project I wanted to tackle.

So…on a night when I had so many things I could/should have done,

I spent a relaxing evening just painting.

I haven’t done this in such a long time.  It was just what I needed.

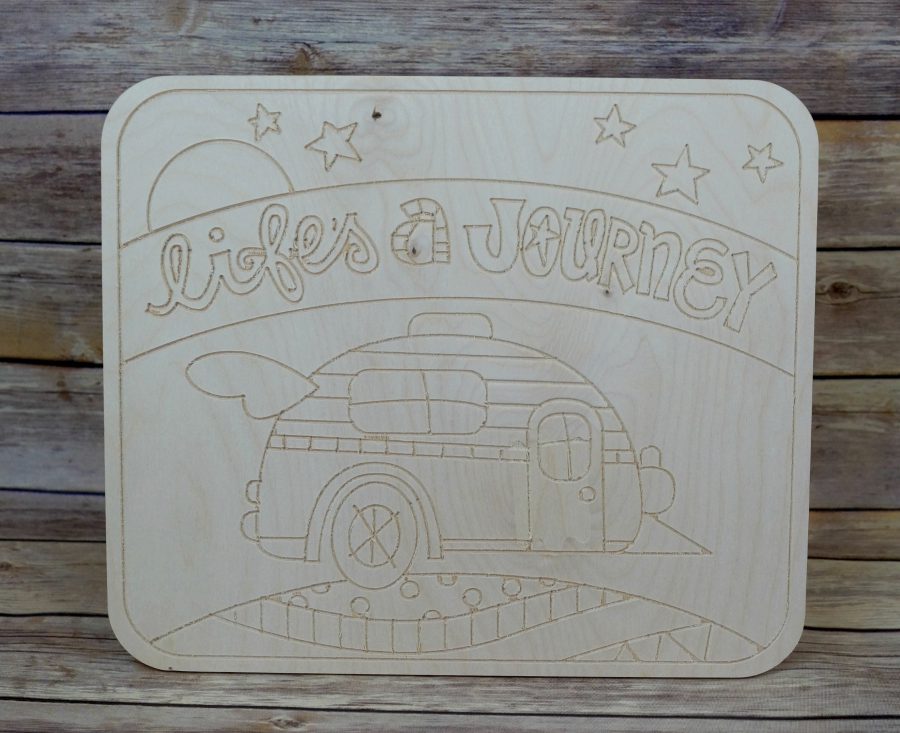
I started with this plain life’s journey plaque from ADORNit.           (measures 11″ x 13″)

I used a small flexible nail file to run through the grooved channels to clean it up a bit.

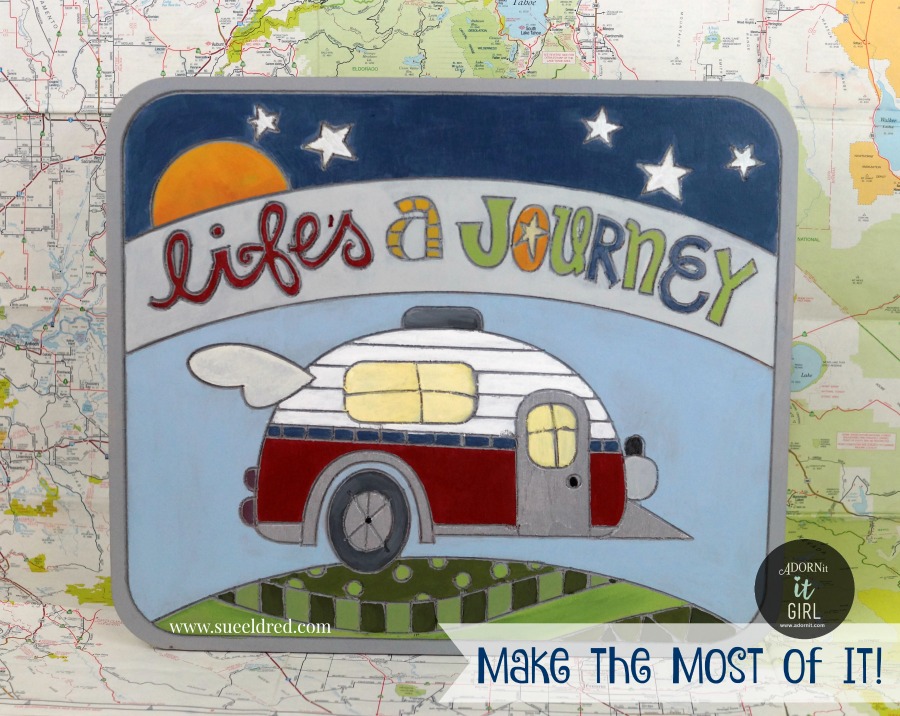
I base coated the entire plaque with gray acrylic paint.

Having the gray paint, deep in the grooves of the plaque, works as the outline between colors

to make the colors stand out.

For me, having grooved channels made it so easy to paint and stay in the lines.

FYI…You might want to seal coat your project once your finished.

I’ll be honest… I’ve never been camping in my life. 

I’m not sure what drew me to this plaque so much.

My idea of roughing it is a bad hotel room.

Hmmm…Maybe if I had a cute little camper like this, I might even try it.

Life’s a Journey, Make the Most of it!

Monograms, Emojis and a little baby tee

With babies,  sometimes you only get a small window for  the shot you want.

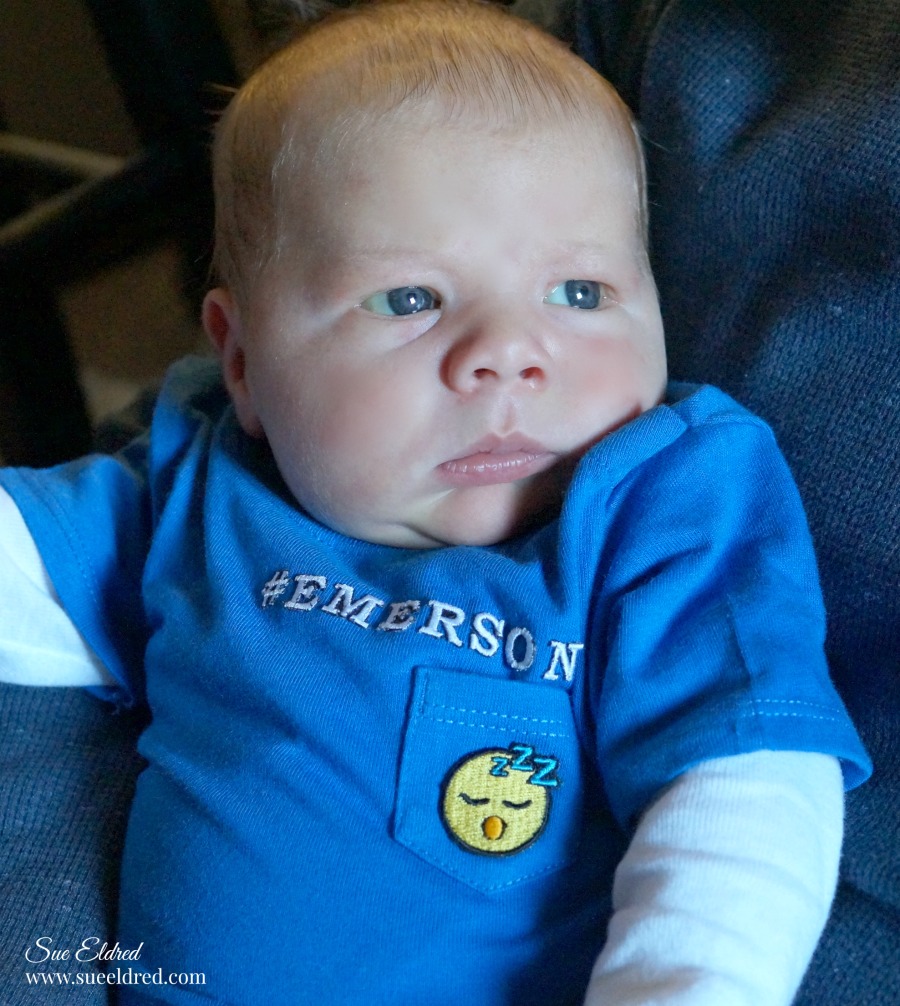
The plan was to take a picture of him sweetly sleeping while wearing the shirt  with

the sleeping  Emoji.  As soon as we put the shirt on him he was wide awake.

Once awake we got all kinds of scrunched up newborn faces.  (some kind of funny)

I finally got this sweet little picture comfortably on his daddy’s lap

I got a kick out of these new emoji patches (that fit perfectly on a itty bitty pocket tee).

So easy to use.  Just position in place, cover with a thin white cloth and iron.

#Emerson…his first personalized shirt.

*Disclaimer:  As a member of the Creating with Joy design team, this project was created for and sponsored by Joy SA.

Easy DIY Golf Themed Party Ideas

Easy DIY Golf Themed Party Ideas

How to Throw a Golf Themed Birthday Party…

We recently celebrated a milestone birthday for my husband,

who is quite the avid golfer.

He’s been playing golf since he was a kid and even caddied as a teen.

It only seemed fitting that we celebrate with a Golf Themed Birthday Party.

Easy DIY Golf Themed Party Ideas

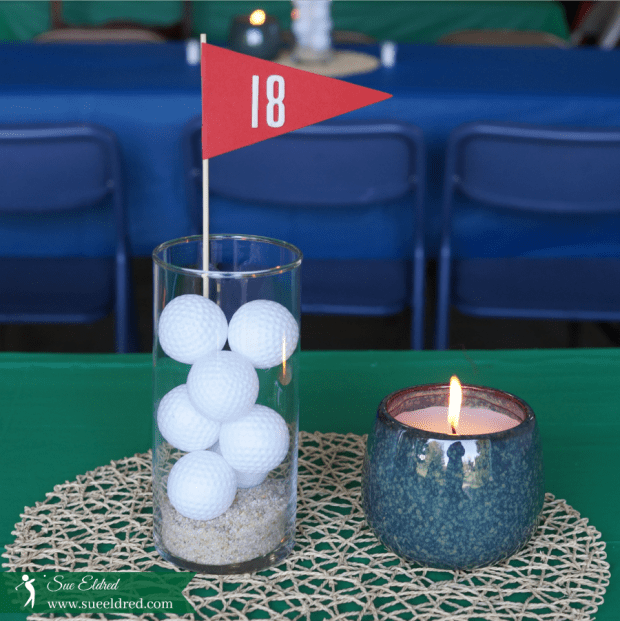
The Centerpiece was quite easy…

I used a cylinder vase from Dollar Tree* along with decorative sand and

inexpensive plastic practice golf balls*.

I cut pennants from red cardstock and glued them onto Bamboo Skewers*,

then added White Chipboard Numbers Stickers*.

Disclosure:  This Blog uses ads and affiliate links.  If you choose to make a purchase using one of the links, I receive a small commission (at no additional cost to you) that helps offset the costs of maintaining this blog.  Thanks for your support!

Easy Golf Themed Party Ideas

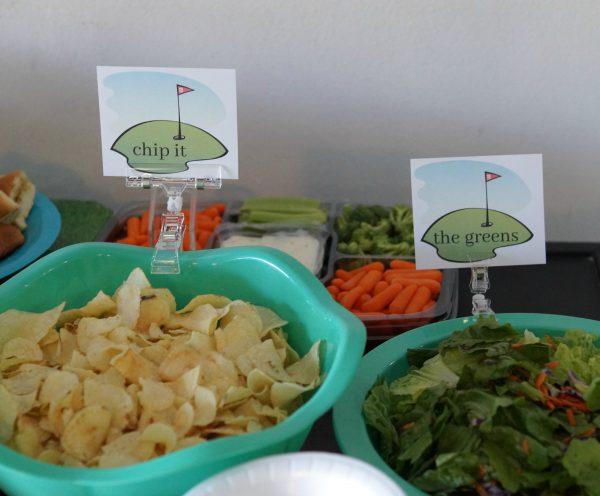
I kept the menu simple with his favorite foods, fried chicken, pasta,

sandwiches, chips and salad.

For fun… I used golf lingo to create little signs to label some of the food.

I used a “free golf clipart” that I found online and customized each sign using

a photo editing site.

Easy Golf Themed Party Ideas

To clip the signs onto the serving dishes,

I used Wide Clip Sign Holders* and

Versa Grip Double-Clip Sign Holders* from Deflecto Craft Solutions.

Disclosure:  “This is a sponsored post. As a member of the Deflecto Design Team I have been provided product and compensation in exchange for my creative ideas, views and opinions.”

Easy Golf Themed Party Ideas

Of course… there was the Water Hole and an Arnold Palmer Station.

Easy Golf Themed Party Ideas

Create your own Arnold Palmer drink with lemonade and tea (or sweet tee).

Easy Golf Themed Party Ideas

To keep with the theme… I used a Grass Tablecover*on the serving table,

Golf Party Paper Plates & Napkins* and hung Inflatable Golf Balls* from the ceiling.

They also make large golf ball balloons.

I also purchased a large Golf Party Banner from Amazon* to hang on the wall.

Easy Golf Themed Party Ideas

The party wouldn’t be complete without a golf themed birthday cake.

Easy Golf Themed Party Ideas

I purchased the cute little Pull Back Golf Cart* from Amazon only to find out it was also
available as part of the themed cake from Walmart.  (oh well)

The golf cart was a huge hit with both the young and the old.

My husband said he’s keeping this one for himself.

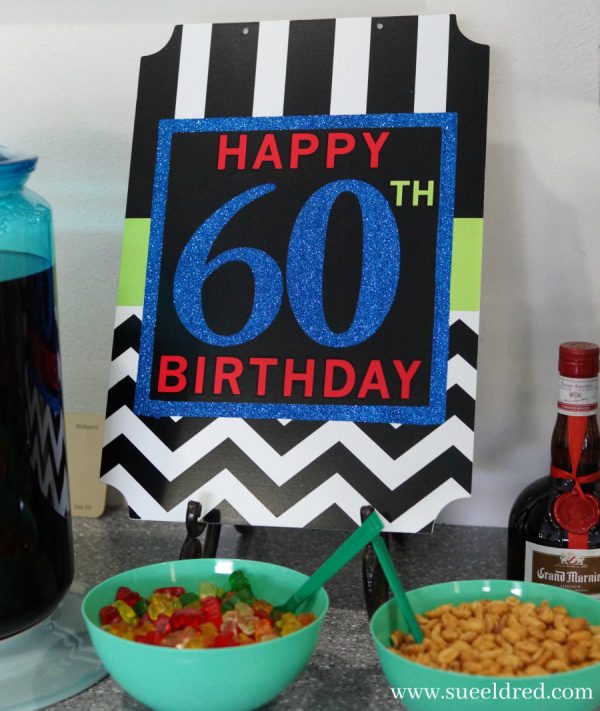
I had to get these “Oh No The Big 60” Candles* for the cake.

Easy Golf Themed Party Ideas

The golf themed birthday party was shared with our large and wonderful

extended family on a beautiful, sunny (and cool) evening out in our garage/party

room.  I had so much fun planning this special “Par-Tee” for him.

It was easy thanks to a little help from Deflecto Craft Solutions

and purchases from Amazon, Dollar Tree*, Party City and Oriental Trading.

For another Fun Golf Themed Party Idea ↓

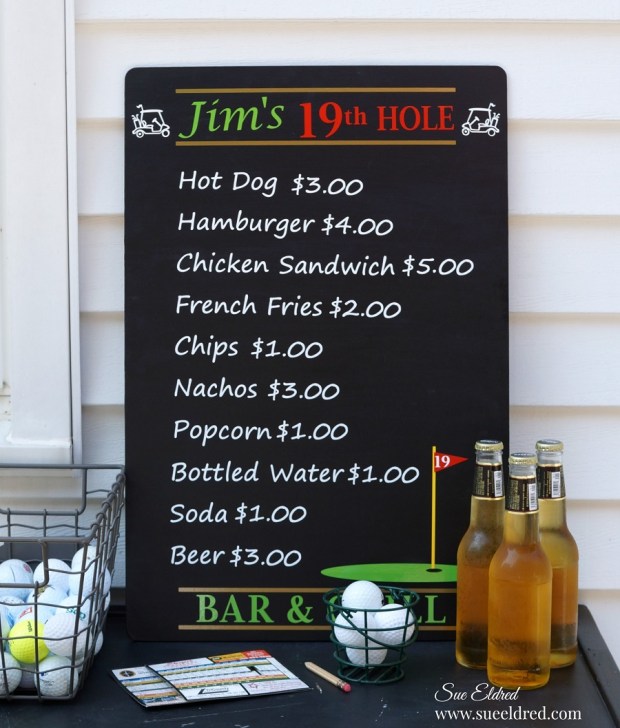
Just for Fun-DIY Golf Menu Board

Just for Fun…DIY Golf Menu Board  (Click here)

Shop Your Fav Brands at Scrapbook.com

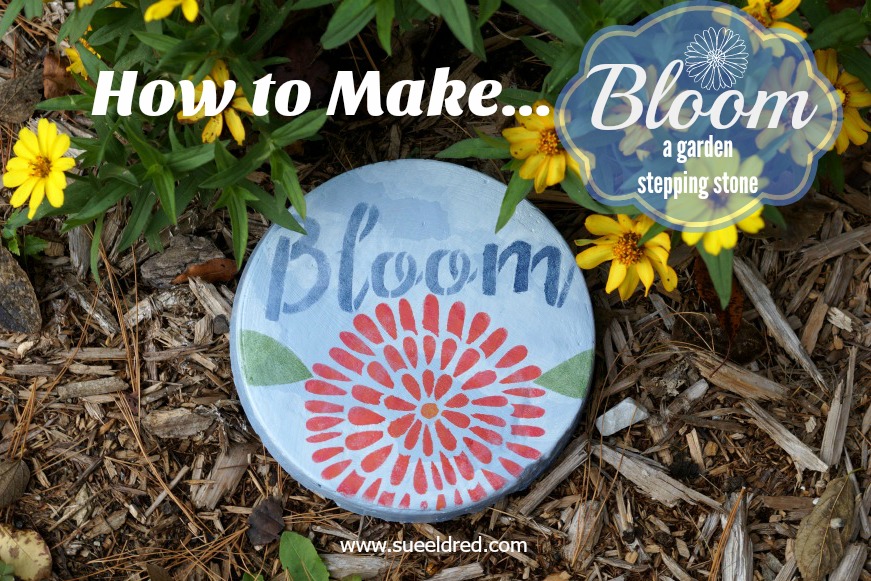
DIY…Bloom Garden Stepping Stone

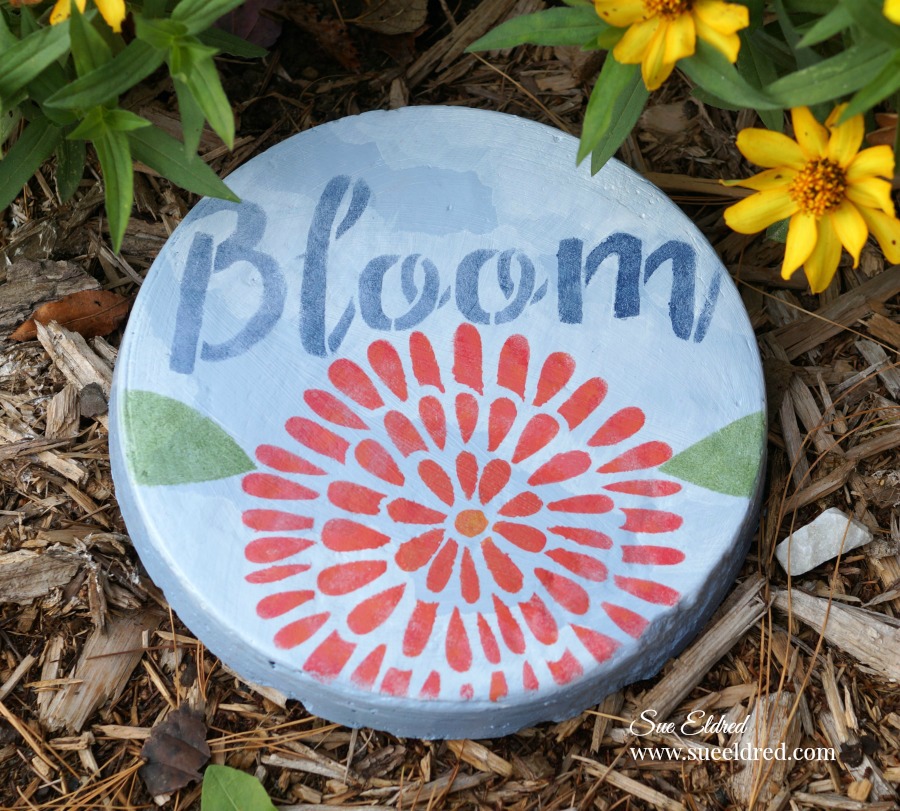
Create a little fun and whimsy in your Garden with a Bloom Garden Stepping Stone.

(The links and instructions to make the Garden stone are included down below.)

I just got the Garden Issue of Craft Ideas Magazine and I’m so excited that I can finally share

with you my “Bloom Garden Stone”.   (you can find it on page #24)

Make sure to check out the entire Garden issue of Craft Ideas,

the issue is full of great garden themed ideas and inspiration.

Materials and Supplies:                                                                                    (*affiliate links)

Directions:

  1. Cover the sides and bottom of an old cake pan with Petroleum Jelly for easy removal.
  2. Mix Rapid Set Concrete Mix according to manufacturer’s instructions.  Fill pan with cement approx. 1″ thick. Shake pan a little to fill in the gaps and smooth.  Allow a couple hours for cement to set before removing from the pan.  Let the cement stone dry for a day or two before painting.

3.  To create a better surface for painting and stenciling, paint cement stone first with DecoArt DS17-9 Americana Multi-Purpose Sealer*

4.  Mix together Night Sky and Cotton Ball acrylic paint and basecoat entire stone.

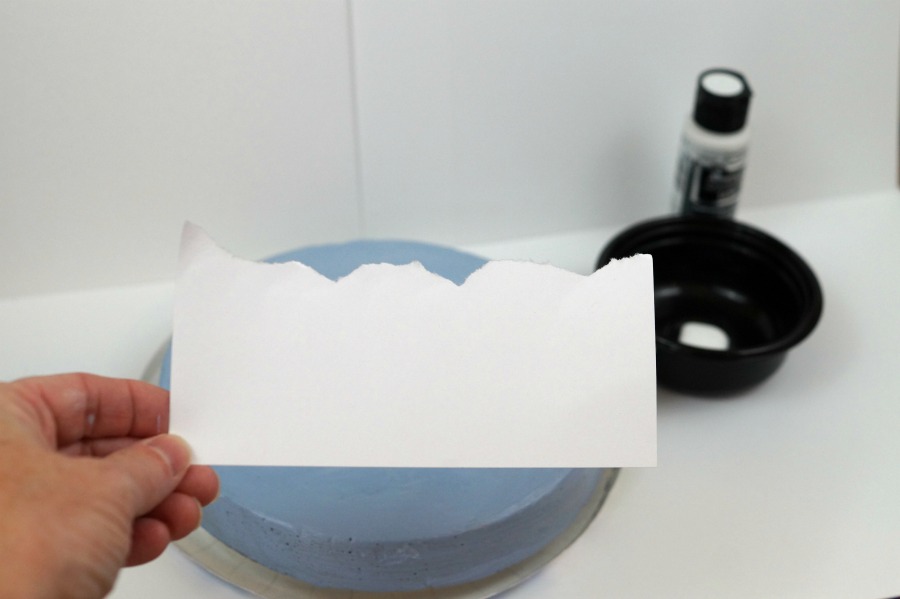
5.  Tear a piece of white cardstock with an irregular edge as shown to create a mask stencil for  cloud background.

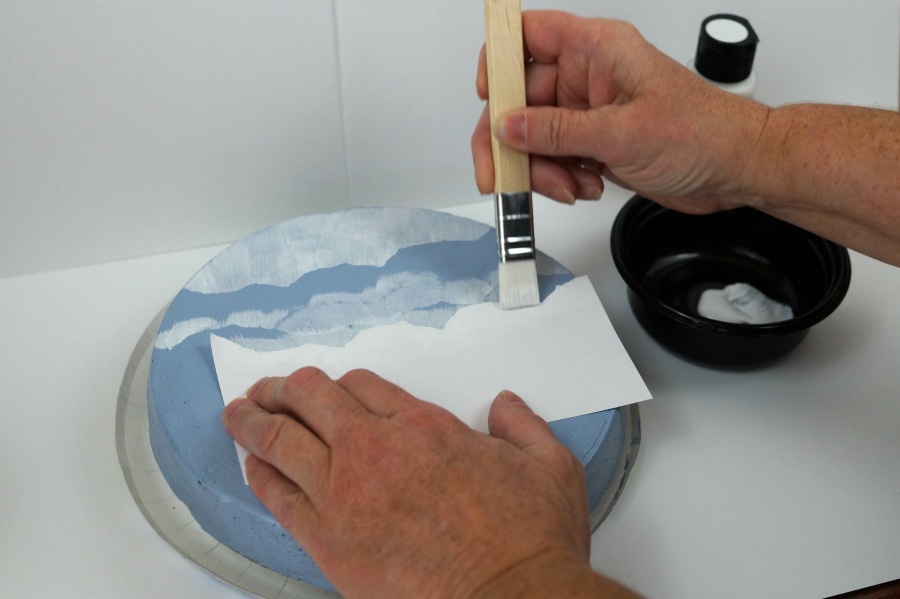
6.  Place cloud mask stencil onto stone and paint with an upward motion. Move mask stencil around stone to paint additional clouds and let dry.

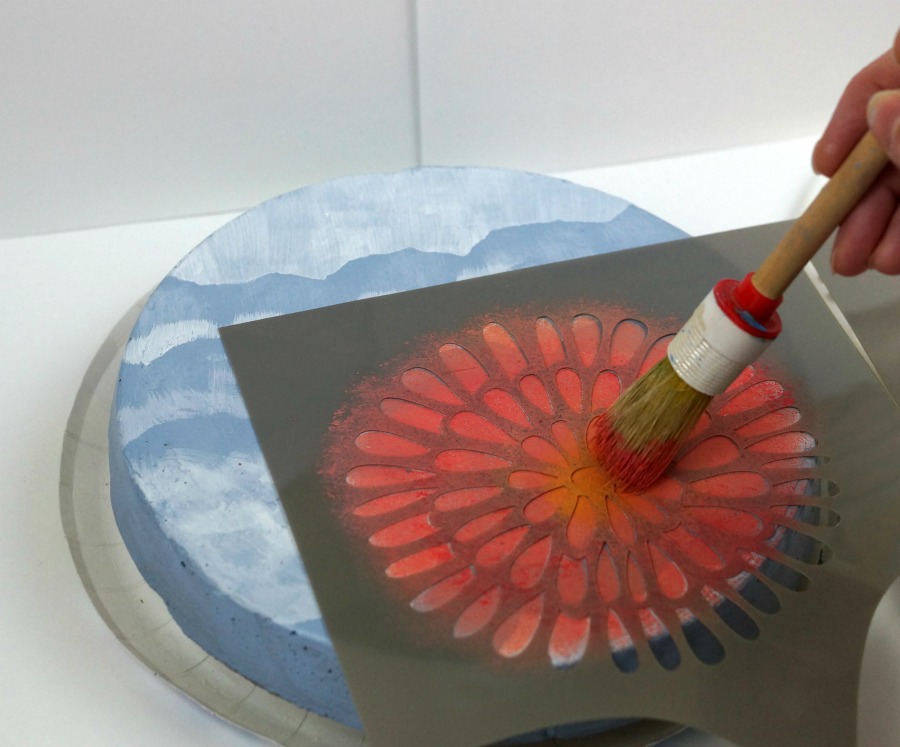
7.  Stencil bloom flower using a mixture of Watermelon Slice and Marigold and stencil “bloom” with Night Sky as shown.  Paint leaves Woodland Green and let dry.

8.  Apply DecoArt Americana DuraClear Varnishes* using paintbrush over stone to help protect the stone from the outdoor elements.

You also might like this stepping stone project I created with my grandson Nick.

The Bloom Garden Stone was created for and sponsored by Craft Ideas Magazine.  Craft Ideas for Every Occasion, Every Skill Level.

Join Amazon Kindle Unlimited 30-Day Free Trial

*Disclaimer:  This blog uses ads and affiliate links.  If you choose to make a purchase using one of the links, I receive a small commission (at no additional cost to you) that helps offset the costs of maintaining this blog.  Thanks for your support!

Revamped Sunglass Case

revamped-sunglass-case-sues-creative-workshop-4565

I picked up a “free” sunglass case at the Thrift Store the other day.

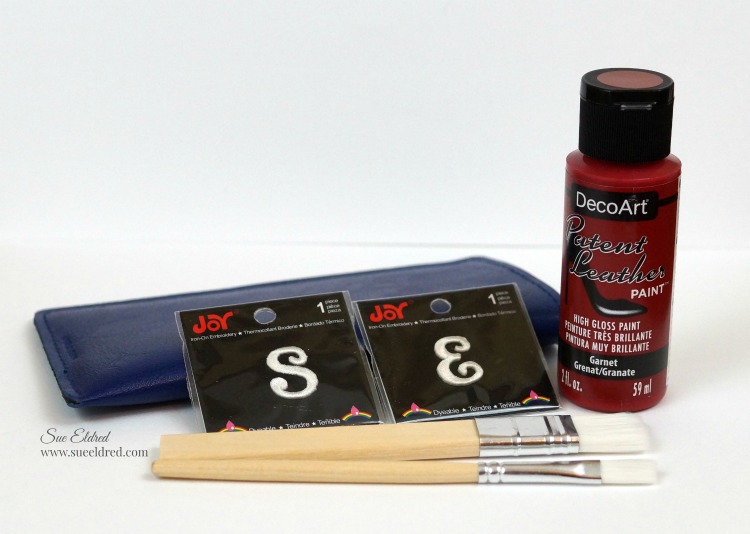
I was looking for something to paint using  the  New Patent Leather Paint

that I received from DecoArts.

I love the look of shiny patent leather.  And… in red?  Oh my!

monogramed-sunglass-case-before-sues-creative-workshop-4314

Combine them all with embroidered letters from Joy*

and you have a personalized custom monogrammed sunglass case.

Here’s what I did to my case…

  • If your case is old, wipe it down with rubbing alcohol to remove any dirt or grime.
  • Apply a even coat of patent leather paint onto the sunglass case with a soft bristle brush.
  • The paint will have a tacky feel as it dries.  Allow to dry between coats.  You may want to give the case a second coat of paint.
  • To give the case a custom monogram.  Using a good craft glue, glue Iron-on Embroidered letters from “Joy” on to the case.

*As a member of the Creating with Joy Design Team, this post was sponsored by JOY® SA.

Save on Paper Crafting Supplies at CreateForLess!

*Disclaimer:  This blog uses ads and affiliate links.  If you choose to make a purchase using one of the links, I receive a small commission (at no additional cost to you) that helps offset the costs of maintaining this blog.  Thanks for your support!