for little storage needs…

for-little-storage-needs-4892

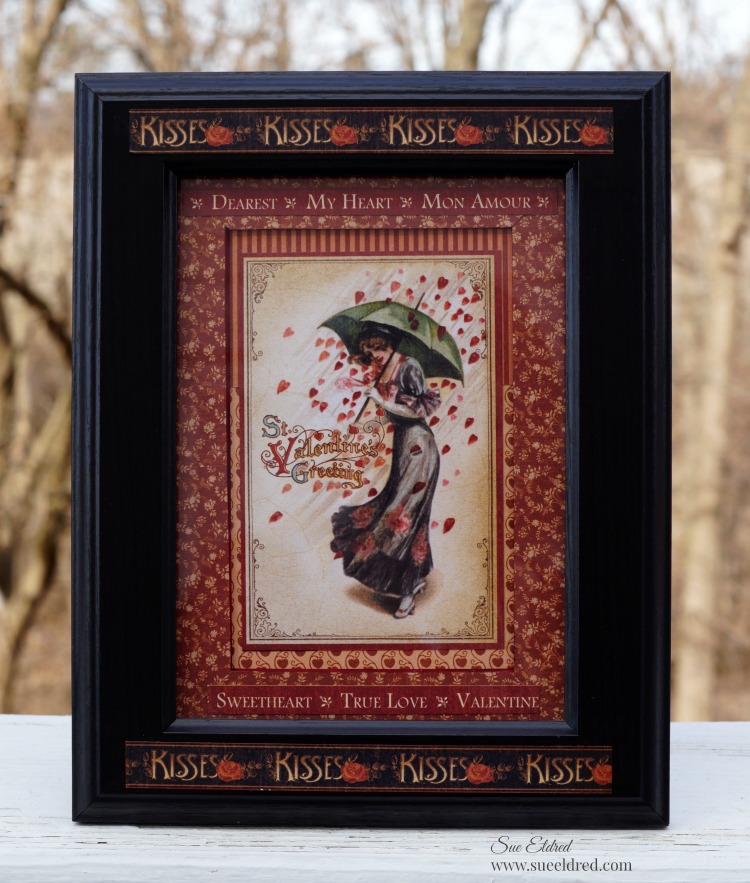
Sometimes the smallest things take up the most room in your heart.                      (A. A. Milne)

Now that my new grandson has finally arrived in all his adorable sweetness…

It’s hard to believe that someone so small can need so many things.

for-little-storage-needs-sues-creative-workshop-4842

(*Amazon Affiliate Link)

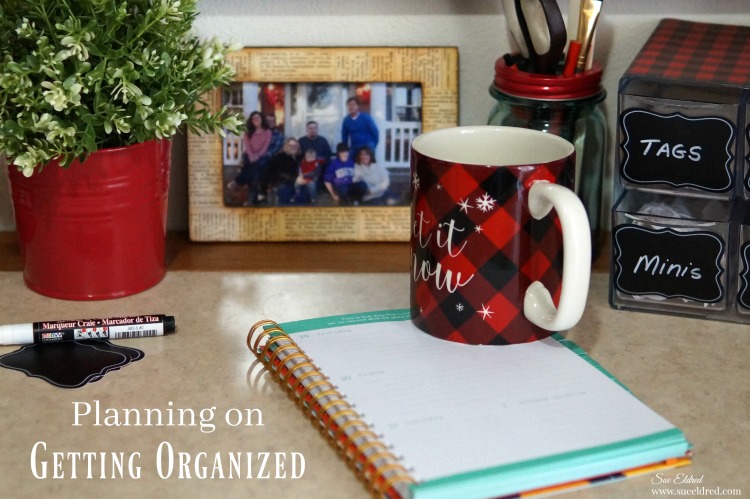
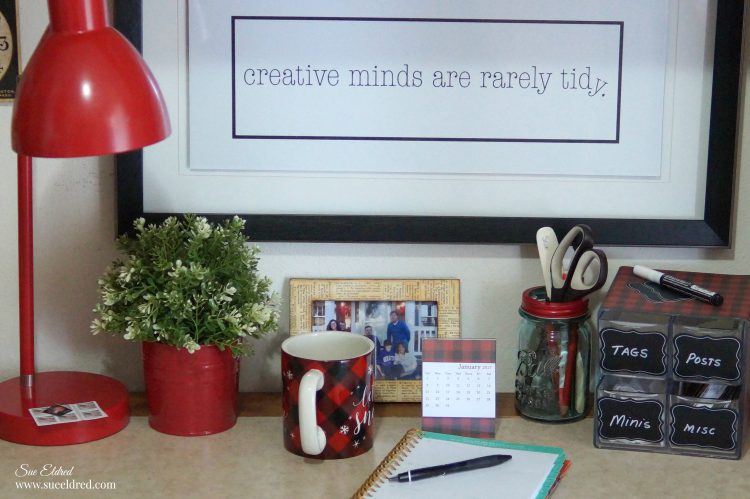
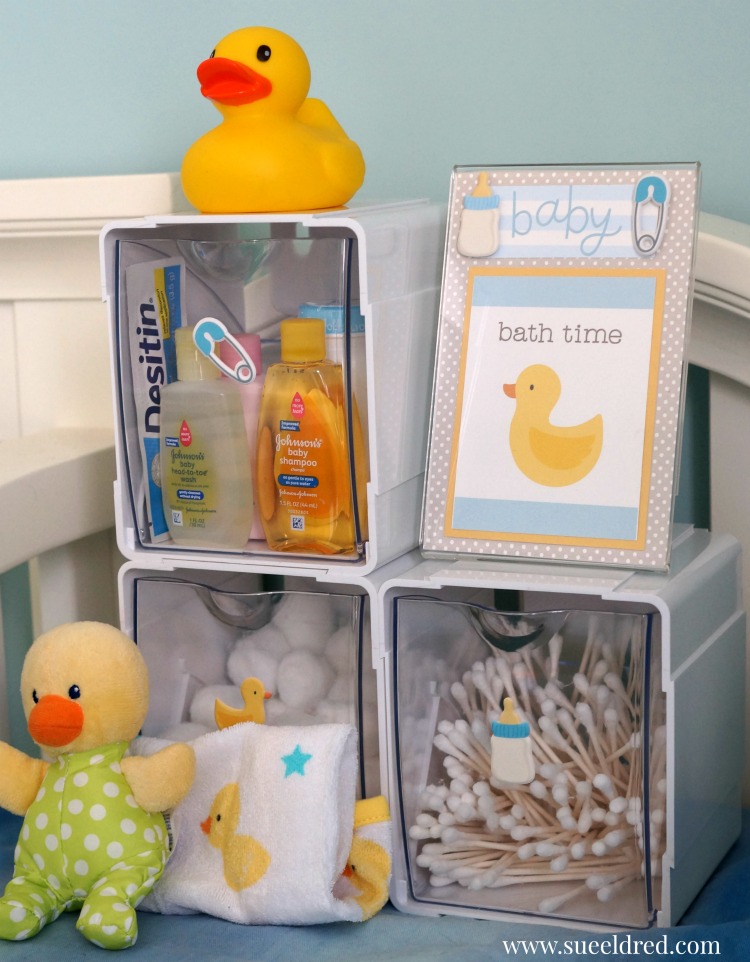
 I created the Bath Time Organizer, for my Daughter in Law, to make bath time a little easier.

For the organizer, (and bath time sign) I used puffy  stickers from the “lullaby” collection

from Pebbles Inc. and Deflecto Tilt Bins*

little-storage-close-up-4851

*Shop Amazon – Create an Amazon Baby Registry

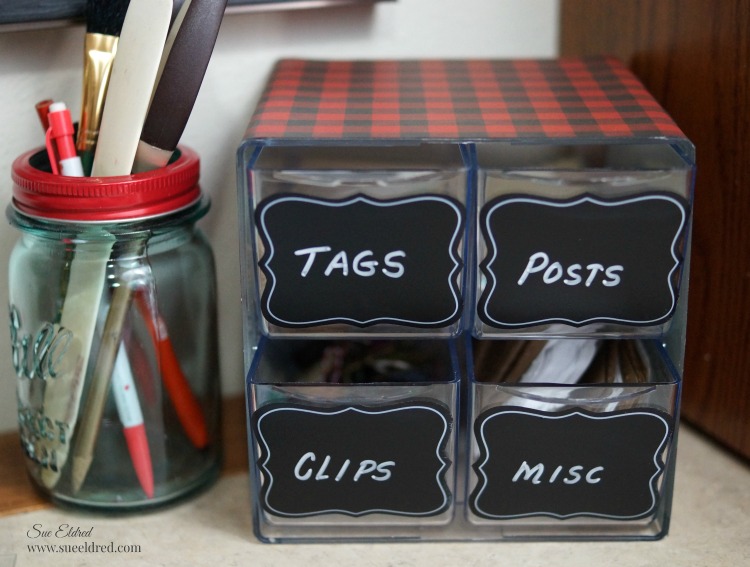
The bins are interlocking and stackable.

Great for little storage needs in the nursery, craft room, garage, kitchen and even the kid’s room.

Wherever you need a little extra storage.


You can purchase these bins by themselves or as a set of four from Amazon*.

Use on table, mount direct to wall or hang using the Deflecto Mounting Bar* (sold separately).

*AD amazon-baby

*Disclaimer:  This post uses ads and affiliate links.  If you choose to make a purchase using one of the links, I receive a small commission (at no additional cost to you) that helps offset the costs of maintaining this blog.  Thanks for your support!

 “This is a sponsored post. As a member of the Deflecto Design Team I have been provided product in exchange for my creative ideas, views and opinions.”

 Adorable Baby Sweaters

Quick and Easy Make Up Bag Make-Over

It’s the little things in life that make me happy…

I was packing and getting ready for my last trip when I noticed how dingy my make up bag

was.  Yuck!   It was time for a change.  (My make up needed a make-over.)

Looking around, I found this cute little pink ticking canvas bag from Canvas Corp Brands.

The bag was the perfect size, but kind of simple.  It needed a little make-over, too.

To add a little extra personality, I used iron-on letters from Joy with lace and buttons.

I glued the lace trim and buttons on my bag using Beacon Fabri-Tac Adhesive*.

A very quick and easy project to do and now my makeup bag is “BEAUTIFUL”.

Shop Your Fav Brands at Scrapbook.com

*Disclosure:  This blog uses ads and affiliate links.  If you choose to make a purchase using one of the links, I receive a small commission (at no additional cost to you) that helps offset the costs of maintaining this blog.  Thanks for your support!

beautiful-make-up-bag-3951

A cute and easy make-over done in minutes.   (If only getting ready was that easy!)

JOY Embroidered letters can be found at your local craft stores in a variety of sizes, colors, simple and decorative fonts.

“This is a sponsored post.  As a member of the Joy® Design Team I have been provided product and compensation in exchange for my creative ideas.  The views and opinions are my own.

Craft Ideas Magazine: Dreams Come True Card

craft-ideas-magazine-spring-2017-sues-creative-workshop

The newest issue of Craft Ideas Magazine arrived in the mail this week.

Even though I knew it was going to be in there, it’s still exciting to see one of your cards in print.

My dreams come true card using paper and stickers from Paper House Productions

is on page 71.   With Spring Fever setting in big time this week, it was the perfect time to

receive the Spring Issue.

craft-ideas-spring-2017

Make sure to pick up an issue for yourself.

dreams-come-true-card-sues-creative-workshop

Dreams Come True

A simple and elegant card perfect for weddings.

Finished Card Size:  5” x 7”

Supplies Used:

  • P-2007 Love 12” Double Sided Scrapbook Paper  (Paper House Productions)
  • STCX-1001 Wedding Day Cardstock Stickers  (Paper House Productions)
  • STDM-0024 Just Married 3D Stickers  (Paper House Productions)
  • Cardstock: Kraft and Cream
  • 5/8” Sheer Ribbon
  • 3D Foam Mounting Square (Scrapbook Adhesives by 3L)
  • Double Sided Tape Runner

Tools:

  • Paper Cutter
  • Scissors

dreams-come-true-sues-creative-workshop

Directions:

  1. Cut the top left corner of the paper 4 ½ ” x 6 ½ ”. (“dreams come true”)
  2. Add the “lace” border sticker to the bottom of the paper.
  3. Embellish the bottom right corner with the leaves sticker and the 3D white flowers.
  4. Add a foam mounting square under the “heart” and add heart and 3D butterfly to the embellishments,
  5. Adhere onto a 4 3/4” x 6 3/4” kraft cardstock layer and then onto a cream 5” x 7” card.
  6. Add simple ribbon bow to top of the card.

dreams-come-true-close-up-sues-creative-workshop

Graphic 45…”A Place in Time” Valentine Frame

graphic-45-valentines-frame-sues-creative-workshop-4157

A little throw back Thursday…

to one of my favorite Valentine projects.  (made 4 years ago)

On the frame, I used Graphic 45’s “Place in Time” collection and a little cut and paste .

Which is now available as a Deluxe Collector Edition. 

(*affiliate link)
Graphic 45 4501470 Deluxe Collectors Edition Place In Time
*I am an Amazon Affiliate.  If you choose to purchase from Amazon using the above link, I receive a small commission that helps offset the cost of running this blog.

a little Valentine Love

valentines-frame-sues-creative-workshop-4136

When I flipped over the calendar this morning it hit me.

Less than 2 weeks until Valentine’s Day.

After all these years…

it’s still fun to throw a few hearts around to make sure he doesn’t forget.

I created this cute little Valentine’s decoration using a clear 4″ x 6″

acrylic craft frame from Deflecto Craft Solutions, scrapbook paper and stickers.

The sticker in the middle says “I belong with you & you belong with me”.

I think he’ll get the hint.


“This is a sponsored post. As a member of the Deflecto Design Team I have been provided product in exchange for my creative ideas, views and opinions.”


Planning on Getting Organized

planning-on-getting-organized-3609

If I were the type to make New Years Resolutions…

One of my goals would be to GET ORGANIZED.

Now that he house is a bit calmer and my to-do list quite a bit shorter,

I’ve been able to work in my office again.

It feels good sitting down, organizing my thoughts, throwing away old notes…

Planning for the New Year.

I’m a planner, a list maker.

I love the clean slate that a new calendar gives.

buffalo-plaid-organizer-close-up-3500(*amazon affiliate link)

One of the ways I like to organize is by giving items a “home”.

By putting “like” items together everything starts making sense.

This 4 Drawer Stackable Cube Organizer*  works great for small items on my desk or anywhere

I might need a little organization.  Great in the kitchen, bathroom and even the garage.

buffalo-plaid-organizer-close-up-3520

For fun, I personalized my organizer by adding buffalo plaid scrapbook paper around the outside

and labeling each drawer with chalkboard stickers.

buffalo-plaid-mini-calendar-close-up-3518

I even made myself a mini desk calendar using a 3″ x 4″ clear acrylic stand, leftover scrapbook

and a cute little calendar from Taylored Expressions.

plaid-let-it-snow-mug-3818

Even my coffee mug matches.

Did I mention I love Buffalo Plaid?

desk-3690

I’m happy when everything is neatly organized.  (not that it always is)

Next up is the closet in my guest room where I keep the extra design team product that

won’t fit in my tiny little office/workspace.

Big job, Big plans.  I’ll keep you posted!


“This is a sponsored post. As a member of the Deflecto Design Team I have been provided product in exchange for my creative ideas, views and opinions.”

*I am a Amazon Affiliate.  If you choose to purchase from Amazon from the above link, I receive a small commission that helps offset the costs of running this blog.  Thanks!

Holiday DIY with Old Kitchen Hardware

old-jar-of-hardware-sues-creative-workshop-3257

I have this old jar of assorted hardware on my shelf in my workshop.

I keep it just in case.  (Why you ask?)

Because I’m a “you never know” type of crafter.

old-hardware-before-sues-creative-workshop-3261

I had picked up a bag of old kitchen hardware at a garage sale a couple years ago

for fifty cents and used it on a few projects and even made a couple of ornaments.

(you can see them here)


While it may be too late for you to make this year…

it’s an idea that you can put away on the shelf, so to speak, for next year.

old-kitchen-hardware-spray-painted-cream-sues-creative-workshop-3263

Here’s how I made my ornament…

After disassembling the hardware, I spray painted the base plate cream.

What a difference spray paint makes.

go-around-edge-of-the-hardware-with-silver-leaf-paint-pen-sues-creative-workshop-3266

I added silver around the edge using a  Chisel Point Calligraphy Paint Marker, Silver*    (*affiliate link)

embellish-the-top-of-the-ornament-with-pine-stem-and-glitter-berry-sues-creative-workshop-3267

I used the small hole at the top of the hardware plate to string red and white twine.

I embellished it with a glitter berry cut from a glitter berry sprig (see previous picture)

wrapped around a small craft pine stem to form a small swag.

I glued the pine swag and small red and white bow to the hardware with

Beacon Adhesives Zip Dry.*

painted-snowflake-sues-creative-workshop-3271   let-it-snow-christmas-ornament-made-from-old-kitchen-hardware-close-up-sues-creative-workshop

I painted a small wood snowflake, found at the craft store, with silver acrylic paint and added

the “let it snow” sticker from Small Talk Stickers by Tim Holtz Idea-ology*.

I added a small red pearl to cover the bottom hole in the hardware and glued the

snowflake on top.

let-it-snow-ornament-made-from-old-kitchen-hardware-sues-creative-workshop-3290

A quick and easy upcycled ornament for the Christmas Tree.

Join Amazon Kindle Unlimited 30-Day Free Trial

Disclaimer:  This blog uses ads and affiliate links.  If you choose to make a purchase using one of the links, I receive a small commission (at no additional cost to you) that helps offset the costs of maintaining this blog.  Thanks for your support!

Christmas Photo Shoot

christmas-card-photo-layout-3140

On a unseasonably warm day in early November…

when my daughter was home visiting,

I made the family sit down for our first ever Christmas Card Photo Shoot.

I had all the props and seating planned out.  It was going to be fun.

With some being less than enthusiastic, this is what I had to deal with…

because of the warmth, my husband would not change into long pants,

my oldest forgot that we were going to be doing this, so he too had on shorts.

Once captured, my youngest grandson would not be in the picture without the

Target Toy Ad and my youngest son insisted on wearing his bandana.

Maybe next year, I’ll go back to making homemade cards. (sounds easier)

Merry Christmas from my family to yours.

christmas-card-photo-layout-close-up-3157


My “Christmas Card Photo Shoot” layout was created with papers and stickers

from Paper House Productions.

The Christmas Card Photo Shoot Layout was created for and sponsored by Paper House Productions.

How to make a Christmas Tree in a Bottle Necklace

mini-tree-in-a-bottle-necklace-sues-creative-workshop-1161

How to make a Christmas Tree in a Bottle Necklace

I got this idea from a project I’d seen made by Tim Holtz.  Of course, I had to find a cheaper way to make it.  I’ve seen small bottles like these at Hobby Lobby with the jewelry supplies.  (I got mine online.)

Very Important…Make sure the base of the tree is small enough to fit in the top of the bottle.

Materials Used:  (*affiliate link)

 Dollar Tree-Everything always $1 – Shop Now*

*Disclaimer:  This post uses ads and affiliate links.  If you choose to make a purchase using one of the links, I receive a small commission (at no additional cost to you) that helps offset the costs of maintaining this blog.  Thanks for your support!

Directions:

  1. Squirt several drops of peeled paint ink* into the mini mister* and dilute it with water.
  2. Place a bleached bottle brush tree onto a protective surface.  Generously spray the tree with the diluted ink.  (You may want to wear rubber gloves.  I took 3 days until the ink came entirely off my fingers.)
  3. After the tree is dry, rub glitter glue* onto the tree.  Allow glitter glue to fully dry before continuing.
  4. Apply a small bit of all-purpose adhesive* onto the end of the Q-tip.  Insert the Q-tip into the bottle and add the glue to the bottom center of the bottle.
  5. Using the reverse grip tweezers, insert the tree into the bottle, and stick onto the glue.
  6. Pour glitter or micro beads into the bottle.
  7. Add a thin layer of adhesive around the side of the cork and place it back into the bottle.
  8. Screw a loop screw onto the top of the cork and add a necklace.

If you’re feeling a little funky…how about making your tree pink or purple? 

If you liked the Christmas Tree in a Bottle here’s another project you might like.

Click here for the Mini Ketchup Bottle Snow Globe Instructions. ↓