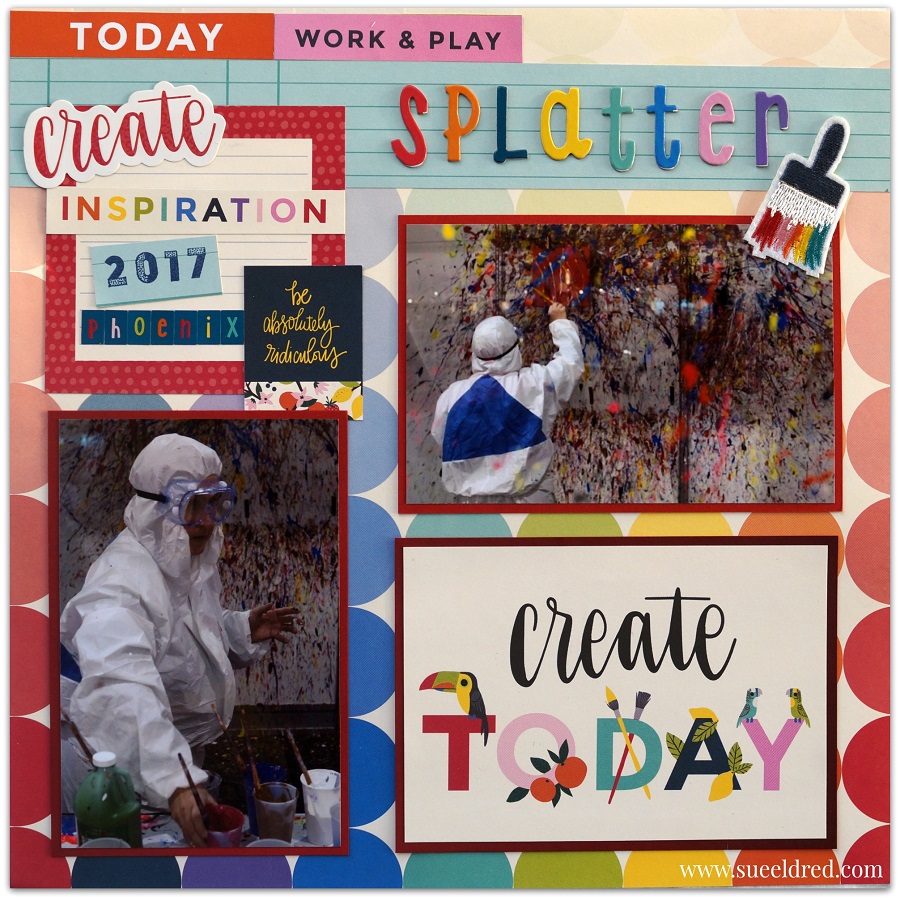
How to make a DIY Memo Pad Holder

How to Make a DIY Memo Pad Holder…

I’m a list maker.

I make lists for things to do, groceries to buy, photos to edit, ideas, gardening…

I’m actually using the “Choose Joy” Memo Pad Holder as I sit and write this post.

The Choose Joy Memo Pad Holder with its sweet florals reminds me of everything summer.

And speaking of summer…it’s going to be a busy one.  (which means more lists)

DIY Memo Pad Holder Supplies Used:      (*affiliate link)

How to make a DIY Memo Pad Holder…

  • Cut cardstock to measure 8 ¼” x 10 ½”.
  • Score the cardstock at 5 1/8″ and 5 3/8″

  • Cut a 5″ x 2 ½” piece of decorative scrapbook paper to go around the top of the memo pad.
  • Place the paper, design side up, into the end of the Xyron 3″ Sticker Maker* and pull the paper through.  Rub the protective covering and peel back to expose sticker.
  • I use the XYRON Adhesive Eraser* to remove any extra adhesive from the edges.

  • Align paper on the top of the memo pad band and wrap around to the back of the pad.

Did you know that you can use the Xyron Sticker Maker with ribbon?

  • Run ribbon though the Xyron 1.5-inch Sticker Maker*.
  • Center and adhere onto the middle of the scrapbook paper border.  Wrap extra ribbon around back of the memo pad.

  • Use the Xyron Mega Runner* to adhere the notepad onto the inside cover.
  • On the other side of the inside cover, create a pocket using coordinating paper and embellishments.
  • Add adhesive to three sides of the pocket and adhere inside cover.  Perfect place for receipts and additional lists.

Embellish front cover with an inspirational quote, ribbon and flowers.

(a cute picture of the kids would be nice too)

XYRON MEGA RUNNER GIVEAWAY…

Xyron is giving me a Xyron Mega Runner to give away to one lucky blog reader.

It’s super simple to enter.

Leave a comment on my blog mentioning the Xyron Mega Runner by 5-31-18 to be eligible.

One entry per day.  US and Canada Only (color may vary)

“This is a sponsored post.  As a member of the Xyron Design Team I have been provided product and compensation in exchange for my creative ideas.  The views and opinions are my own.”

*Disclosure:  This blog uses affiliate links.  If you choose to make a purchase using one of the links, I receive a small commission (at no additional cost to you) that helps offset the costs of maintaining this blog.  Thanks for your support!

Splatter Painting

Splatter Painting

When you get an opportunity to look absolutely ridiculous…

have a little fun and make a really big creative mess, well…you just need to take it!

Last year at the Creativation Show, there was a clear acrylic booth set up called

the “Splatter Room”.  As the name suggests, splatter painting is extremely messy.

So…dressed in a hazmat suit and goggles,

I went to town choosing paint and splattering it all over my canvas.

Oh, what a glorious mess! 

It was so much fun and the highlight of my day.

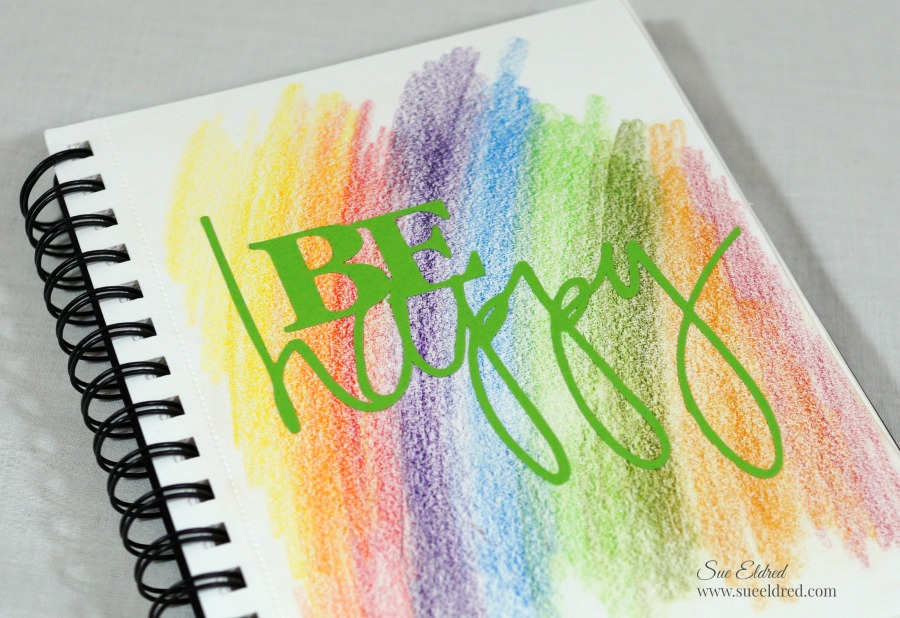
The Shimelle “Box of Crayons” collection from American Crafts was the perfect collection

for my crazy, colorful pictures taken on my Splatter Day.

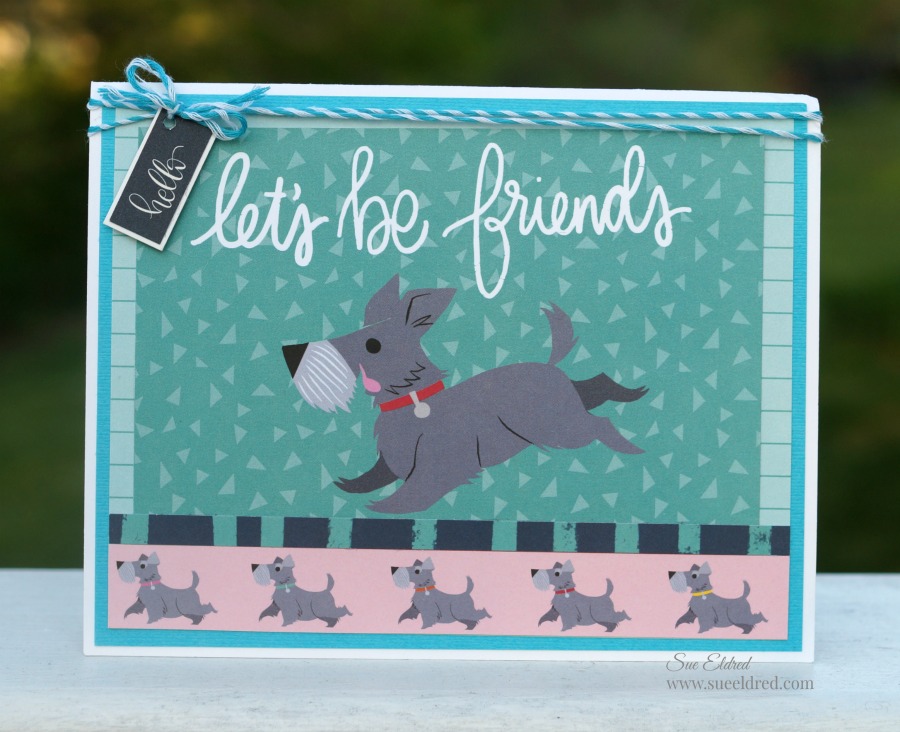
Last Saturday, National Scrapbooking Day, I spent my day divided between playing with

paper and playing in the dirt.  (I do love a glorious mess.)

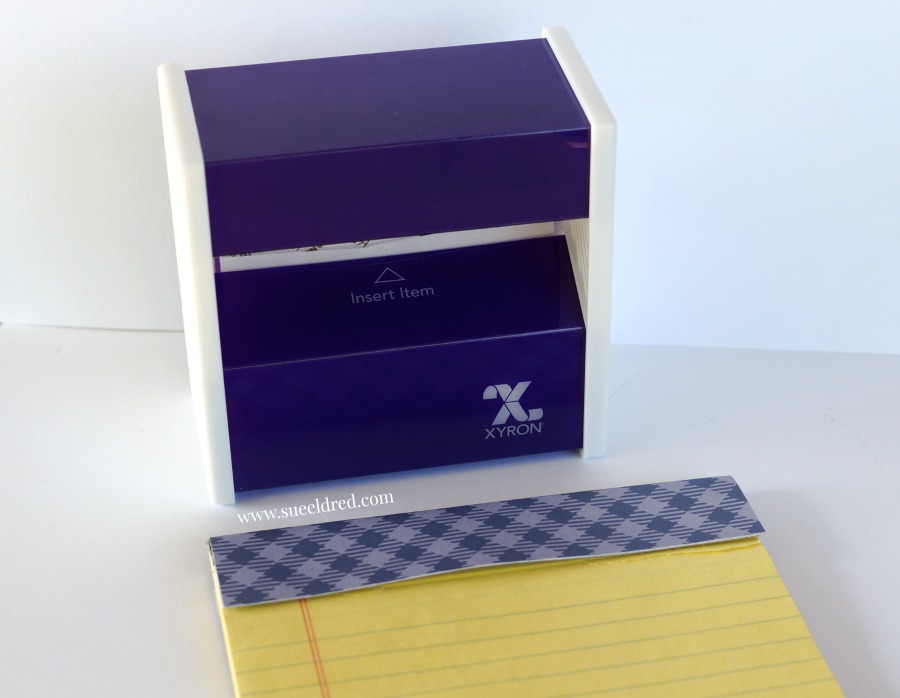
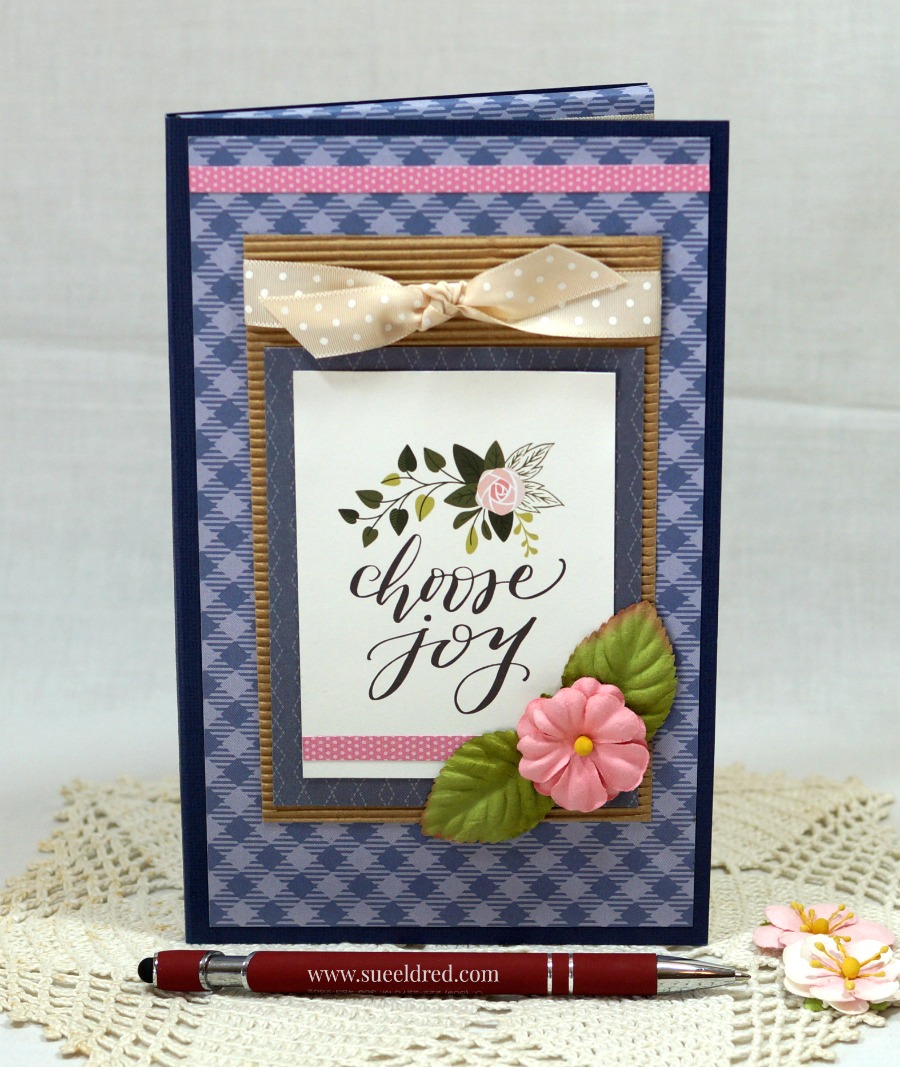
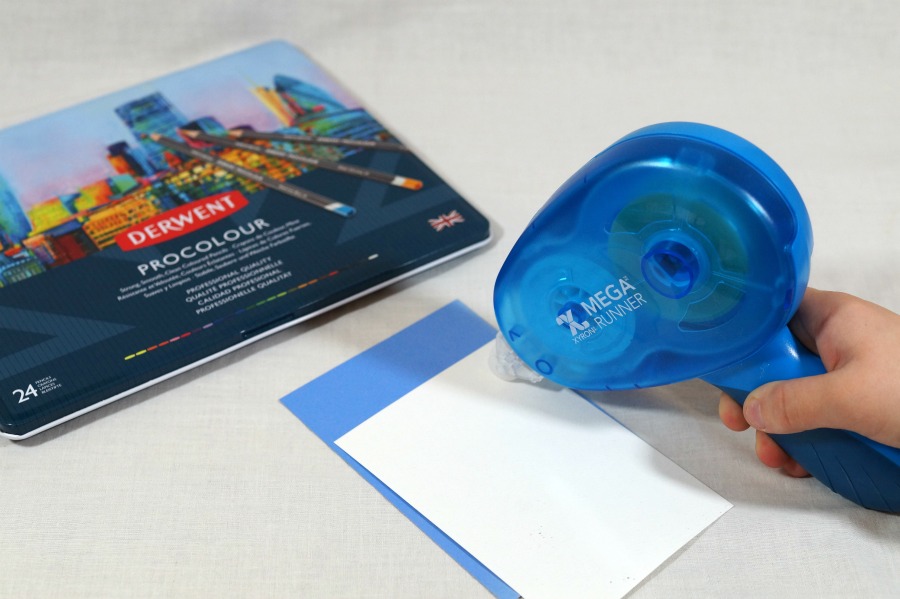
The “let’s be friends” card was another project that I made using the “box of crayons” collection

and my Xyron Tape Runner*.

“This is a sponsored post. As a member of the Xyron Design Team I have been provided product and compensation in exchange for my creative ideas.  The views and opinions are my own.”

*Disclosure:  This blog uses affiliate links.  If you choose to make a purchase using one of the links, I receive a small commission (at no additional cost to you) that helps offset the costs of maintaining this blog.  Thanks for your support!

American Crafts… Shimelle “box of crayons” collection. 

Spring Quilt Card

It’s been a while since I’ve used rubber stamps to make a card… 

and I’ll admit that it felt really good to sit and watercolor a image again.

Interesting fact…In 1996, my creative journey was started with rubber stamps.

This week the Xyron Design Team has partnered up with Deep Red Rubber Stamps.

I choose the Color Me Spring Quilt cling stamp to use in my project.

Spring Quilt Card products used:      (*affiliate links)

I like using art markers ( and dye ink pads) to water color my stamped image.

I scribble using the marker onto a piece of acetate. (or anything non-porous) and pick up

the ink from the marker with the water-brush and paint the image.

When layering the card…

The Xyron Creative Station* is great for adding adhesive to the back of intricate pieces.

For simple layers I use my Xyron Tape Runner*

I also use the XYRON Adhesive Eraser* to remove any extra adhesive that might show.

Embellish the card using self adhesive flower rhinestones and a sheer ribbon bow.

“This is a sponsored post. As a member of the Xyron Design Team I have been provided product and compensation in exchange for my creative ideas.  The views and opinions are my own.”

*Disclosure:  This blog post uses affiliate links.  If you choose to make a purchase using one of the links, I receive a small commission (at no additional cost to you) that helps offset the costs of maintaining this blog.  Thanks for your support!

Coloring with Derwent and Xyron

I recently received a special box of Derwent Procolour Colored Pencils* to try out along with

the Derwent Big Book*.  As soon as I got them, I couldn’t wait to try them and scribble in my

new sketch book.  I have used several different brands of colored pencils through the years and

I was impressed by the smooth clean lines and easy blending.


Happy with my scribbling…I decided to keep the page and add the words “Be Happy”.

This would be a great start to a scrapbook layout.


I also used my new Derwent Procolour Colored Pencils* to color in a page from a

Mini Coloring Book* for grown-ups.  I adhered the coloring page to cardstock using my

Xyron Mega Runner* for a quick and easy card.

 “This is a sponsored post. As a member of the Xyron Design Team I have been provided product and compensation in exchange for my creative ideas.  The views and opinions are my own.”

*Disclosure:  This blog post uses affiliate links.  If you choose to make a purchase using one of the links, I receive a small commission (at no additional cost to you) that helps offset the costs of maintaining this blog.  Thanks for your support!

DIY Bloom Floral Plaque

Bloom into Spring with this DIY Bloom Floral Plaque.

I admit it…I’m an adhesive snob.

There’s nothing worse than spending hours on a project and then it  comes undone

from using the wrong adhesives.

I tell people all the time “not all adhesives are created equal”.

That’s one reason why I was so excited to be on the Xyron 2018 Design Team.

Xyron has Good Adhesive!

The DIY Bloom Floral Plaque is the first of many projects to come using Xyron.

DIY Bloom Floral Plaque Products Used:    (*Affiliate Links)

*Disclosure:  This blog post uses affiliate links.  If you choose to make a purchase using one of the links, I receive a small commission (at no additional cost to you) that helps offset the costs of maintaining this blog.  Thanks for your support!

How to make a DIY Bloom Floral Plaque…

  • Lay a piece of a 8 1/2″ x 8 1/2″ piece of decorative scrapbook paper (design side up) on the Xyron Creative Station, 9″* crank the handle to run the paper through the machine.  As it moves through the Xyron Creative Station it adds adhesive to the back side of the paper.
  • Easy to use and it doesn’t need any electricity.

       You get complete coverage, no gluing, no wrinkling, no bubbles!

  • Lay Wood Flower Shaped Plaque onto the adhesive side of the paper.
  • Carefully cut around the wood shape with a craft knife and craft cutting mat.

  • Gently sand away rough-cut edges on the paper using an extra fine sanding block.

  • I used my electronic die cutting machine and cut files to create pieces for my background.  The Xyron Creative Station* is great for adding adhesive to the back of intricate pieces.

  • After the layers are adhered together, I use the XYRON Adhesive Eraser* to remove any extra adhesive from the edges of my pieces.  Remember to use a gentle touch.

The XYRON Adhesive Eraser* is one of my favorites must have tools.  I keep it on my desk at all times.

I think every paper crafter should carry one in their supply box.

  • For added detail…use a gold paint pen to edge around the outside of the Wood Flower Shaped Plaque and the decorative scrapbook paper oval.

  • My Xyron Creative Station* makes quick work of assembling all the pieces of my DIY Bloom Floral Plaque.
  • Finish embellishing the plaque with a few paper flowers glued into place with craft glue.

 “This is a sponsored post. As a member of the Xyron Design Team I have been provided product and compensation in exchange for my creative ideas.  The views and opinions are my own.”

March Calendar Girl Card

The March Calendar Girl card was made by using one the pages from my

Calendar Girls Mini Coloring Book* by Adornit.

The card was water colored using dye ik pads and a Waterbrush*

I apply the ink directly onto a piece of acetate and pick up the ink with my water-brush.

MATERIAL LIST:                            (*affiliate links)

Shop Your Fav Brands at Scrapbook.com

March Calendar Card Directions:

  1. Form a 5 x 6 ¾ inch card from cream cardstock.
  2. Cut green chevron patterned paper to 4 ¼ x 6 inches. Adhere to gold cardstock and trim a small border. Adhere layers onto 4 ½ x 6 ¼ olive green layer and then onto the cream card base.
  3. Cut Calendar Girl coloring page to 3 ¼ x 4 ¾ inches.
  4. Apply light watercolor wash to coloring page using waterbrush and ink from light blue dye ink pad.
  5. Color on acetate sheet with the salmon marker; pick up color with waterbrush and color girls face on coloring page.
  6. Dab ink onto the acetate sheet with ink pads. Pick up color with waterbrush and paint the rest of the calendar image.
  7. Add gold accents to the glasses, center of flower, skirt, socks and lettering using the gold gel pen.
  8. Add diamond stickles to the girl’s hair and vest.
  9. Adhere calendar girl to a thin gold cardstock border and onto the front of the card base.
  10. Add green enamel dots to the bottom corner of the card.
  11. Tie a sheer ivory ribbon to left side of card.

Finished card size: 5” x 6 ¾.”

March Calendar Girl was sponsored by ADORNit.

*Disclaimer:  This blog uses ads and affiliate links.  If you choose to make a purchase using one of the links, I receive a small commission (at no additional cost to you) that helps offset the costs of maintaining this blog.  Thanks for your support!

Make it Personal

Re-purpose a canvas bag and make it personal!

Last year I received a really nice, large and sturdy canvas bag from a event I attended.

While I really do appreciate all the sponsor’s named on that bag…

I knew I use it more if I made it personal.

With Joy Iron-on Embroidered letters personalizing it was a snap…

choosing from the large variety of colors and fonts available wasn’t quite as easy.

Step one…  Remove the sponsor’s iron-on transfer logo with a

XYRON Adhesive Eraser (*affiliate link).

While this may not work for every type of bag, it worked great on this one.

Making it Personal…

  • Set dry iron to cotton setting.
  • Surface of fabric to which letters are to applied should be clean.
  • Cover Letters with a lightweight or sheer pressing cloth.
  • Using firm pressure, iron over letters for 30 seconds.
  • Turn item over, iron on back for 30 seconds.
  • Allow to cool before handling.

Joy® iron-on, embroidered letters are available in a variety of fonts, sizes and colors. White letters can also be colored with dye, paint, markers and more to create custom colors!

“Make it Personal”  was created for and sponsored by Joy SA.

Shop Your Fav Brands at Scrapbook.com

*Disclaimer:  This blog uses ads and affiliate links.  If you choose to make a purchase using one of the links, I receive a small commission (at no additional cost to you) that helps offset the costs of maintaining this blog.  Thanks for your support!

Shop Amazon Scrapbooking Supplies*

Xyron 2018 Design Team

Sorry I haven’t posted much lately.

That stupid influenza bug had me sidelined and wiped out for the last couple of weeks.

It feels good to feel good again.

And now for some Exciting News…

It is such an honor to have been chosen by Xyron to be on their 2018 Xyron Design Team

and work along side these lovely and talented ladies.  It’s going to be a good year!