Spring Quilt Cards

Spring Quilt Cards

Spring Quilt Cards made with Eileen Hull’s Faux Postage Die from Sizzix.

Over the weekend, I decided to make a couple of floral Spring cards using the New Faux Postage Die from Eileen Hull*.

I know the dies are perfect for making little faux postage stamps.

But, I like to think of the pieces like a quilt.

It’s all good no matter how you use the die.

Eileen Hull Educator Logo

Disclosure:  This is a sponsored post.  As a member of the Eileen Hull Educator Team, I have been provided product in exchange for my creative ideas.  The view and opinions are my own. 

Spring Quilt Cards

Materials Used:  (*affiliate links)

*Disclosure:  This blog uses ads and affiliate links.  If you choose to make a purchase using one of the links, I receive a small commission (at no additional cost to you) that helps offset the costs of maintaining this blog.  Thanks for your support!

Spring Quilt Cards

The Thank You Card reminds me a sweet floral quilt for a little girl’s bed.

It really is easy to find coordinating paper when using a paper pad.

I cut out flowers from one of the large floral-patterned papers.

To make them dimensional, I added Thin 3D Foam Squares*

underneath the flowers.

Spring Quilt Cards

Would you believe the paper for the Enjoy Card was from the same floral paper pad.

I die-cut the black floral paper using the faux postage die.

I used one small section from the die-cut paper to create my card.

I again “fussy cut” a few flowers to put on the front of the card.

After adding several layers, my card measured 4 1/4″ x 4 1/4″,

the perfect size for putting into a A2 envelope*.

DIY Gold Bunny Silhouette Pillow & Treat Bag

DIY Gold Bunny Silhouette Pillow & Treat Bag

Add a little glam this Spring with this cute Gold Bunny Silhouette Pillow.

It’s an easy project to make.  Even if you’re a simple sewer, like me.

The Bunny reminds me of a Lindt Gold Foiled Chocolate Easter Bunny*,

and who doesn’t like that?

DIY Gold Bunny Silhouette Pillow & Treat Bag

Materials Used to Make the Gold Bunny Pillow:  (*affiliate links)

StyletechCraft products brought to you by ATSM Craft*

*Disclosure:  This blog uses ads and affiliate links.  If you choose to make a purchase using one of the links, I receive a small commission (at no additional cost to you) that helps offset the costs of maintaining this blog.  Thanks for your support!

DIY Gold Bunny Silhouette Pillow & Treat Bag

How to make the Gold Silhouette Bunny Pillow:

  • Choose your fabric.  Cut the fabric into two squares or rectangles of equal size.  (I cut my cream fabric to 14″ x 14″ to make a 12″ pillow.)
  • Place the two fabric pieces together right-side in.
  • Sew the edges together, leaving a 2-inch opening along one side.
  • Turn the pillow right-side out.
  • Fold the raw edges in and press them flat.
  • Using the Silhouette Cameo Electronic Die-Cutting Machine* and an SVG file from The Silhouette Store, I created a design for the pillow.
  • Cut the design using Gold Heat Transfer Vinyl* making sure to mirror the image.
  • Place the shiny side down on the cutting mat.
  • After you’ve cut the design, weed the excess material away from the design, leaving only the parts you want to transfer.
  • Position the design on your fabric.  Use an iron or a heat press to apply heat and pressure to the design, following the manufacturer’s instructions.
  • Peel off the transfer tape.
  • Stuff the pillow with Poly-Fil®* and sew the opening closed.

DIY Gold Bunny Silhouette Treat Bag

I knew a head of time that I wanted to make a couple of small treat bags.  I decreased the size of the bunny and cut it at the same time as the pillow design.

How to make the Bunny Treat Bag:

  • Cut a piece of gold polka dot fabric approx. 10″ x 14″.
  • On both ends of the fabric, fold down approx. 1″ and sew a seam across the top.  That should leave you with a 3/4″ pocket.
  • Fold the material in half and sew the remaining sides closed.
  • Trim excess material on the seams and turn the fabric inside out to reveal the bag.
  • Iron the gold HTV bunny on the front of the bag.  (see above directions)
  • Cut two small slits on the top pocket of the bag on each end.
  • Cut two 24″ pieces of gold ribbon.
  • Attach a small safety pin to the end of a piece of ribbon.  Thread the ribbon through the top of the bag, remove the safety pin, and knot the ribbon.
  • On the opposite end of the bag, thread the second piece of ribbon through.
  • Pull both ends of the ribbon to gather and close the bag.

DIY Gold Bunny Silhouette Treat Bag

With all the warm weather we’ve had lately, Spring Fever has hit me pretty hard.

I’ve completely rid my decor of anything resembling Winter.

I’m ready for Spring, Bunnies, and Flowers!

DIY Gold Bunny Silhouette Pillow & Treat Bag

“This is a sponsored post.  As a member of the StyleTechCraft Design Team I have been provided product and compensation in exchange for my creative ideas.  The views and opinions are my own.

New 2024 Sizzix Dies by Eileen Hull

New Sizzix Dies by Eileen Hull

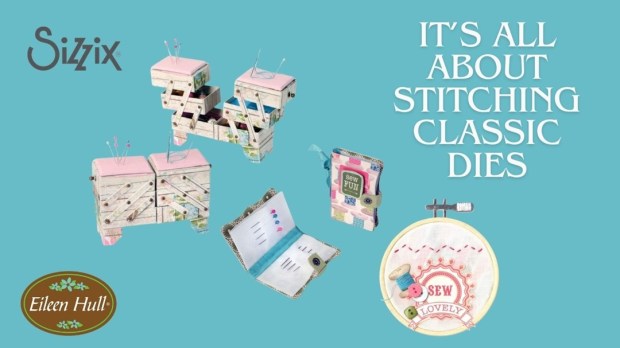
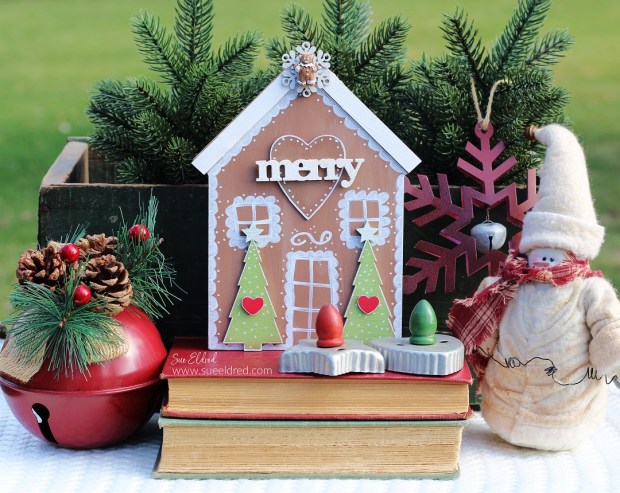
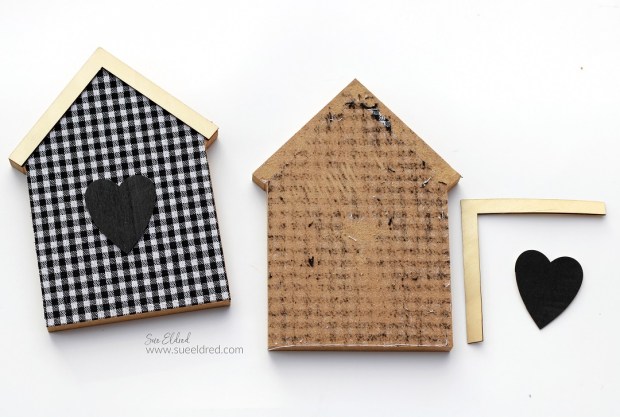
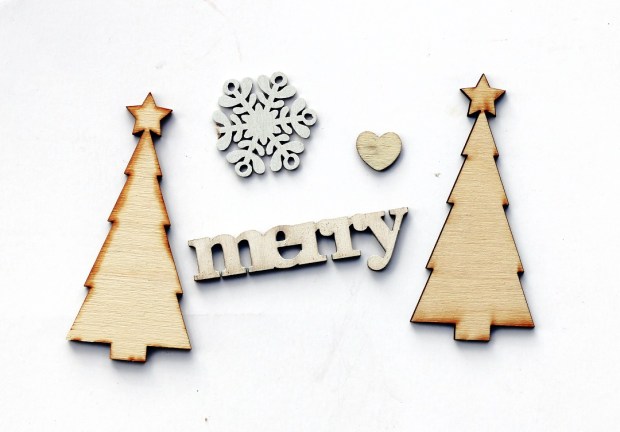
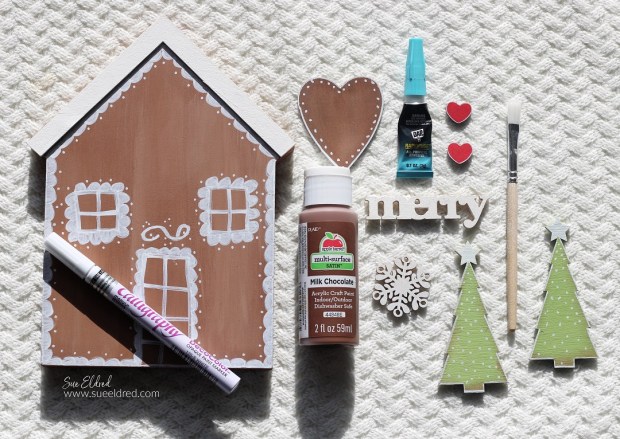
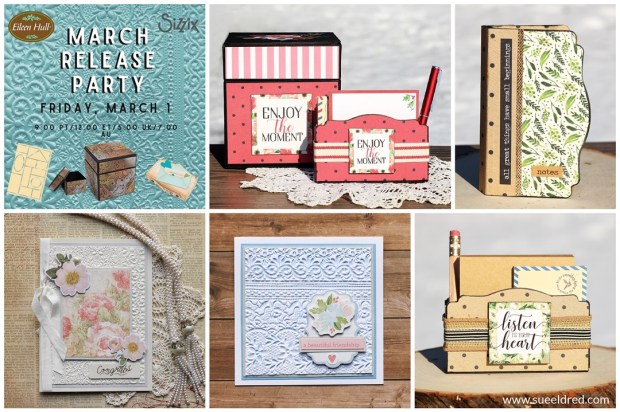
New Dies from Eileen Hull and Sizzix

I’m excited that I finally get to share the samples I made using the New Sizzix dies by Eileen Hull.  It’s always fun getting new dies to play with.  And these are now my new favorites. (that is until next time)

Embossed Wedding Card

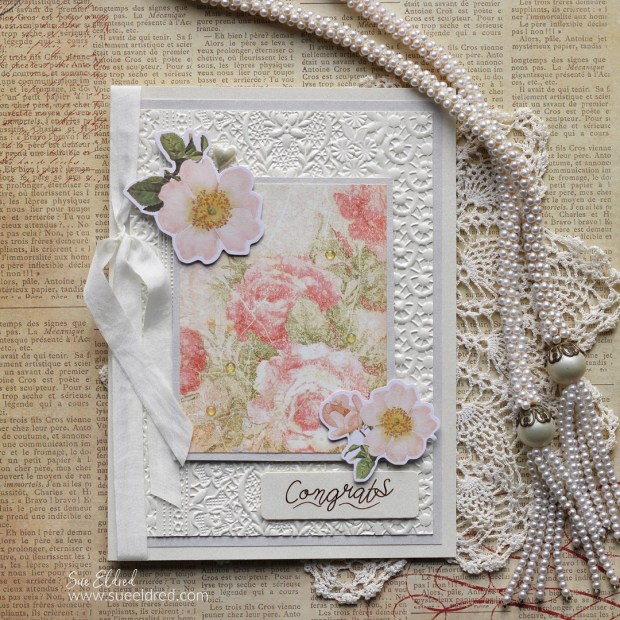
Elegantly Embossed Wedding Card

My first card uses Sizzix® 3D Textured Impressions® A5 Embossing Folder-Lace by Eileen Hull*.

I really love the new larger size.  The Lace 3D embossing folder is so amazing! It’s a new LARGE size measuring 8 1/2” x 5 3/4”. It works great on bigger journal covers, card backgrounds and on home decor pieces.

The base of the card was embossed using cream cardstock.  I used a piece of old “Baby 2 Bride” paper from Graphic 45 for the front of the card.  I used pearlized cardstock in pearl and silver for the layers.

*Disclosure:  This blog uses ads and affiliate links.  If you choose to make a purchase using one of the links, I receive a small commission (at no additional cost to you) that helps offset the costs of maintaining this blog.  Thanks for your support!

Embossed Birthday Card

Blue Embossed Birthday Card

I created a delicate background for a feminine birthday card by inking the embossing folder with blue ink.  I inked directly onto the embossing folder and placed white cardstock inside.  I’m in love with how soft and subtle it looks.

Listen to Your Heart Mini Book

How about a new Mini Book?

This one uses the Sizzix® ScoreBoards™ Die – Mini Book by Eileen Hull®*.

Listen to Your Heart Mini Book-Sue's Creative Workshop www.sueeldred.com 3911

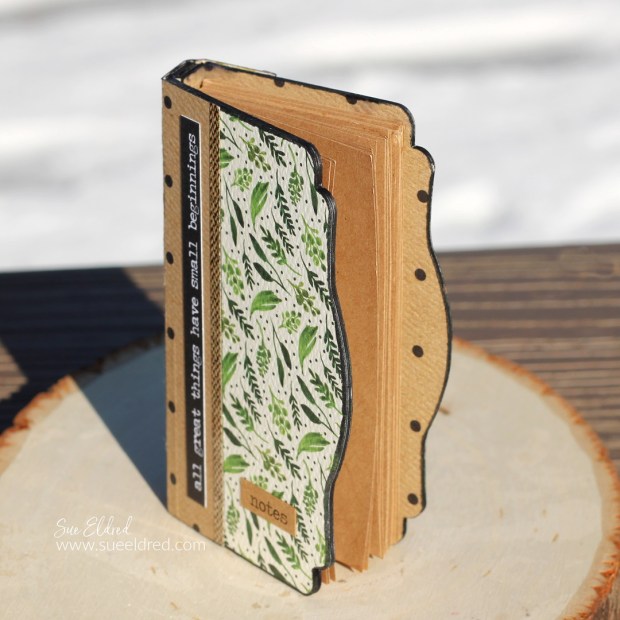
The Mini Book is great because you can create a book using your scraps. This book measures 3 3/4” x 2 1/4” and comes with a strap/handle and tiny label for the book cover. It makes a great bag topper if you fold it in the middle. It is also the perfect size for business cards. Die cut it from felt and stitch up a tiny wallet!

Listen to your Heart Mini Desk Organizer

Listen to your Heart Mini Desk Organizer

I added sides to the mini book using small pieces of matboard and created a small desk organizer.

Enjoy the Moment Storage Box

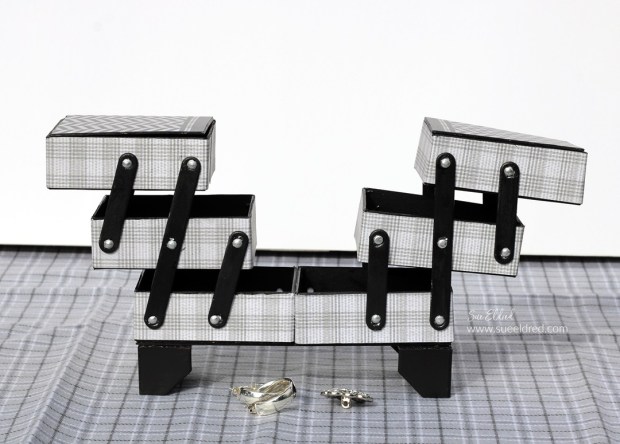
Do you love storage box dies? 

This box uses the Sizzix® ScoreBoards™ XL Die – Storage Box by Eileen Hull®*.

The Storage Box is an XL ScoreBoard die measuring 4” square, the largest square box yet! This box is constructed with a removable top and may be used in many ways, such as organizing desk and office supplies, as a gift box, storing craft supplies and packaging for baked treats.

Enjoy the Moment Storage Box

I love how easy this was to put together and what a perfect size it is.

Enjoy The Moment Storage Box and Mini Desk Organizer

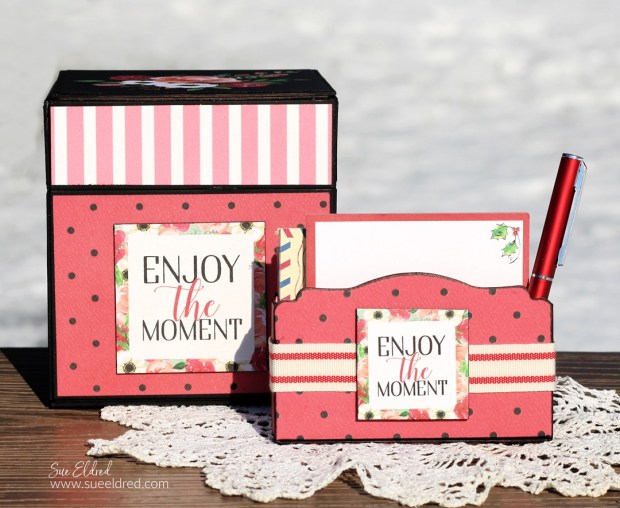
Of course, I had to make a mini desk organizer to match the storage box. 

Sizzix 666560 Faux Postage Thinlet Die by Eileen Hull

Eileen also created a new Faux Postage Thinlet Die* that I didn’t get around to making a sample for.  (Faux Postage Thinlet Card sample post to come later this month.)

The full panel is designed to fit on a 5” x 7” card and creates a fun postage stamp effect. You can also cut (or tear) each stamp apart and use the individual pieces as a miniature work of art! These dies coordinate with similar dies: Snail Mail (A-2 card size) and Mini Slimline (6” x 3”).

New Eileen Hull and Sizzix March Release Party

Visit Eileen’s Blog for additional information on this collection and to see lots of ideas from the team.

The Release Party will be held on Friday, March 1 at noon Eastern on Eileen’s YouTube, Facebook, and Instagram channels.

There’s a giveaway too- join the live and hear how you can win…

You can find these dies in your local scrapbook stores.  If they don’t carry them, ask them to order.  Eileen also carries them in her Etsy shop and would love your support!

Eileen Hull Educator Logo

Disclosure:  This is a sponsored post.  As a member of the Eileen Hull Inspiration Team, I have been provided product in exchange for my creative ideas.  The view and opinions are my own. 

Sizzix Cantilever Jewelry Box

Sizzix Cantilever Jewelry Box

Cantilever Jewelry Box

Last month, Sizzix reintroduced a few older “classic” dies,

including the Cantilever Box Die*.

I promised I’d make one, and I finally made a Cantilever box

using the Cantilever Die by Eileen Hull*.

Instead of making a sewing box, I made mine into a jewelry box.

*Disclosure:  This blog uses ads and affiliate links.  If you choose to make a purchase using one of the links, I receive a small commission (at no additional cost to you) that helps offset the costs of maintaining this blog.  Thanks for your support!

Sizzix Canteliveer Box Die

Putting it all together…

  • Included on the back of the die-cut packaging are image directions on how to assemble the box.
  • Cut out the pieces as show in the picture above.
  • I used three sheets of the Sizzix Making Essentials Matboard* to die-cut all the pieces used to make the Cantilever Jewelry Box.

Materials Used:  (*affiliate links)

Sizzix Cantilever Jewelry Box

  • I painted all my die-cut pieces with Black Multi-Surface Acrylic Paint*.  I did that before gluing.
  • The instructions on the box showed using a hot glue gun to assemble the boxes. Eileen told me she uses Zip Dry Adhesive* and rubber bands to assemble the boxes. I wasn’t a big fan of using the hot glue gun and will definitely try the Zip Dry Adhesive* the next time.

Sizzix Cantilever Jewelry Box

  • I cut 1″ strips of a single-sided grey plaid paper and ran them through the Xyron 3″ Disposable Sticker Maker* to add adhesive to the back of the strips.
  • I carefully added the strips around the edges of each box.  Since the paper I used was single-sided, it was easy to cover the boxes.
  • Once all the boxes were assembled, putting the cantilever box together wasn’t too hard.
  • For added stability, I glued the bottom two boxes together.  I also added a 2″ x 6″ piece of black painted matboard to the bottom before adding the feet.

Eileen Hull Educator Logo

Disclosure:  This is a sponsored post.  As a member of the Eileen Hull Educator Team, I have been provided product in exchange for my creative ideas.  The view and opinions are my own. 

Buffalo Plaid Valentine Heart

How to make a Buffalo Plaid Valentines Heart Door Hanger-Sue's Creative Workshop www.sueeldred.com 4085

How to Make a Buffalo Plaid Door Hanger for Valentine’s Day.

An inexpensive Valentine’s Day project using items found at Dollar Tree*

and my favorite StyleTechCraft adhesive vinyl.

StyletechCraft products brought to you by ATSM Craft*

*Disclosure:  This blog uses ads and affiliate links.  If you choose to make a purchase using one of the links, I receive a small commission (at no additional cost to you) that helps offset the costs of maintaining this blog.  Thanks for your support!

How to make a Buffalo Plaid Valentines Heart Door Hanger

Materials Used:  (*affiliate links)

Buy Your Crafting Supplies Now at Dollar Tree starting at $1.25!

*Disclosure:  This blog uses ads and affiliate links.  If you choose to make a purchase using one of the links, I receive a small commission (at no additional cost to you) that helps offset the costs of maintaining this blog.  Thanks for your support!

How to make a Buffalo Plaid Valentines Heart Door Hanger

Directions:

  • Remove the twine hanger from the wood heart.
  • Paint the heart with acrylic paint.  I used white.
  • I created a large heart mask for the center of the wood heart using StyleTechCraft Matte Removable Vinyl*.  
  • Press down the edges of the mask so that paint can’t get under the mask.

How to make a Buffalo Plaid Valentines Heart Door Hanger

  • Cut 1″ strips of Removable Vinyl*.  Lay the strips across the wood heart.
  • Rub your finger over the vinyl strips to make sure that they are secure and have no gaps.
  • Paint inside the stripes with a thin coat of acrylic paint.  Be careful not to apply the paint too thick.   Only one thin coat of paint is needed.
  • Remove the vinyl strips.
  • Allow the paint to fully dry before continuing to the next step.

How to make a Buffalo Plaid Valentines Heart Door Hanger

  • Next, add strips of removable vinyl vertically over the heart.
  • Make sure the tape is flat with no gaps.
  • Paint over the heart with a thin coat a darker pink paint.
  • Carefully remove the tape.  Allow the paint to dry.

How to make a Buffalo Plaid Valentines Heart Door Hanger

  • Remove the strips and the heart mask.  Allow the paint to dry.
  • Lightly sand the wood heart. Sanding smooths the paint and helps to hide any little imperfections.
  • Wipe with a clean cloth.

How to make a Buffalo Plaid Valentines Heart Door Hanger

StyletechCraft products brought to you by ATSM Craft*

How to make a Buffalo Plaid Valentines Heart Door Hanger

How to make a Buffalo Plaid Valentines Heart Door Hanger

  • Hot glue faux flowers, glitter heart pick, and ribbon bow to the top of the heart.
  • Add ribbon to the top two holes for hanging.
  • Hang the Wood Heart on a Door or add it to the center of a Wreath.

“This is a sponsored post.  As a member of the StyleTechCraft Design Team I have been provided product and compensation in exchange for my creative ideas.  The views and opinions are my own.

My Nutty Valentine

My Nutty Valentine

My Nutty Valentine is fun spin on the traditional Valentine’s Day gift. 

It’s for people like me that are not mushy Valentine’s Day gift-givers.

My Nutty Valentine

My inspiration came from a small can of peanuts* that I found at Dollar Tree*.

My husband is a peanut-loving guy who I’m nuts about.

So, I thought I would make something fun with a can of peanuts*.

*Disclosure:  This blog uses ads and affiliate links.  If you choose to make a purchase using one of the links, I receive a small commission (at no additional cost to you) that helps offset the costs of maintaining this blog.  Thanks for your support!

My Nutty Valentine

Materials Used:  (*affiliate links)

StyletechCraft products brought to you by ATSM Craft*

My Nutty Valentine

Directions:

My Nutty Valentine-Sue's Creative Workshop www.sueeldred.com 3764

  • Cut a strip of decorative scrapbook paper to fit around the peanut can.
  • Adhere the paper to the can using a double-stick tape roller*.

My Nutty Valentine-Sue's Creative Workshop www.sueeldred.com 3765

  • Lay the Transfer paper over the vinyl and gently rub with a vinyl scraper tool.

My Nutty Valentine-Sue's Creative Workshop www.sueeldred.com 3778

My Nutty Valentine-Sue's Creative Workshop www.sueeldred.com 3782

My Nutty Valentine

  • Don’t forget to decorate the top of the can.
  • I cut a 3″ circle from bronze vinyl and adhered it and a small red heart to the top of the can.

My Nutty Valentine

  • Wrap Blue and White Twine* around the top of the can and add a small white tag.
  • And just so my husband knows, I added “I’m Nut’s About You” on the side of the can.

My Nutty Valentine

A Cute Alternative to the Traditional Valentine’s Gift. 

“This is a sponsored post.  As a member of the StyleTechCraft Design Team I have been provided product and compensation in exchange for my creative ideas.  The views and opinions are my own.

A Stitch in Time with Classic Dies

A Stitch in Time with Eileen Hull's Classic Dies

It’s all about Stitching with Classic Dies from Sizzix* and Eileen Hull.  

I’ve had the pleasure to work with Eileen’s Dies for the last few years,

and while these Classic Dies may be old, they’re new to me.  (and maybe you)

Eileen Hull's It's all about Stitching Classic Dies

The Classic Cantilever Sewing Box, Embroidery Hoop* and Needle Book dies have been re-released because Sizzix Customers asked.

These classic dies all relate to stitching. But there are so many other ways to use them. They are all Bigz dies, which are versatile because of the number of materials they can cut through.

A Stitch in Time with Eileen Hull's Classic Dies

“Stitched with Love” Embroidery Hoop*

Sizzix Embroidery Hoop Die by Eileen Hull

The Embroidery Hoop* measures 4” and is designed to be cut from thick material such as matboard or chipboard. You can actually tuck thin fabrics in the hoop and stitch on them. Or you can die cut from paper and use the hoop on card fronts. Use the pieces separately or all together.

A Stitch in Time with Eileen Hull's Classic Dies

The Needle Book

The Needle Book is also a ScoreBoard die and features a pretty scalloped edge to the book. It measures 3 1/2” x 2 1/4″ x 1/2″ and is perfect for storing your stitching needles and pins- works great when made from felt! But it can also be made from matboard, chipboard, leather or fabric- one of the benefits of the Bigz dies.

  • To create my needle book, I die-cut two layers.
  • The top layer is a cotton print, and the inside layer is thick grey felt.
  • The strap has two layers: a grey plaid flannel and grey felt. I hand-stitched the strap layers together and added a black snap closure.

A Stitch in Time with Eileen Hull's Classic Dies

For the inside of the needle book, I cut a small piece of canvas to fit inside.

I sewed it and a small strip of flannel to the center of the gray felt.

I hand stitched all the layers of the needle book together using a simple blanket stitch.

Cantilever Sewing Box Die from Sizzix and Eileen Hull

Cantilever Sewing Box

With all the Holiday Hoopla, I didn’t get a chance to make a sample for the Cantilever Sewing Box.

I promise I will get to it soon and share it later this month.

A Stitch in Time with Eileen Hull's Classic Dies

Please join us for the It’s All about Stitching Release Party that will be held on Tuesday, January 2nd at noon Eastern time on Eileen Hull’s YouTube, Facebook and Instagram pages. The team will be sharing creative ways to use these dies- we can’t wait to share them with you! There will be giveaways so make sure to tune in and see how to enter to win!”

For more inspiration using Eileen’s Stitching Dies:

Eileen Hull Designs 
Pam Bray
Sarah Lizzie
Lisa Hoel
Jenny Marples
Maggi Harding
Susie Bentz
Tonya Trantham
Sue Eldred  (you are here)
Sharon Curtis
Jennie Atkinson
Teresita Arvelo

Eileen Hull Educator Logo

Disclosure:  This is a sponsored post.  As a member of the Eileen Hull Educator Team, I have been provided product in exchange for my creative ideas.  The view and opinions are my own. 

Top 3 Favorite Projects for 2023

Eileen Hull & Sizzix Top 3 Projects of 2023

My top 3 Favorite Sizzix/Eileen project of 2023

Every year the Eileen Hull Teams are asked to pick our three

favorites Sizzix/Eileen Hull projects for the year.

Generally, they’re all my favorites, but these are my top favorites.

(Click on the pictures or links below ↓ to go to the original post with all the details.)

New Chapter 3 Dies from Sizzix and Eileen Hull

The Treasure Box

The Treasure Box is made with Eileen’s Slotted Treat Box Die* from the New Chapter 3 Dies that were released earlier this year.  I reached into my hoarded stash of paper to make this vintage style box.

It’s a great size for holding special treasures.

You can read more about this project here.

*Disclosure:  This blog uses ads and affiliate links.  If you choose to make a purchase using one of the links, I receive a small commission (at no additional cost to you) that helps offset the costs of maintaining this blog.  Thanks for your support!

Mini Pocket of Cheer Christmas Ornament

Mini Christmas Envelope

Holiday Projects are always my favorite projects.

This one uses Eileens Envelope, Folder & Flowers Thinlet Die Set* from Sizzix.

You can see the project tutorial here.

Our Life Our Story Folio Album

Our Life Our Story Mini Album

This little album uses Eileen’s Card Case Die by Sizzix*.  

It is a fun little album with sturdy chipboard pockets perfect

for inserting small notebooks or cards.

You can read more about this project here.

Make sure to “Follow Me” for fun Eileen Hull/Sizzix projects in 2024.

Eileen Hull Educator Logo

Disclosure:  This is a sponsored post.  As a member of the Eileen Hull Educator Team, I have been provided product in exchange for my creative ideas.  The view and opinions are my own. 

DIY Wood Gingerbread House

DIY Wood Gingerbread House

Is it me, or is there even more Gingerbread House projects this year?

I’ve been seeing so many cute ones.

So…I decided why not jump on the Gingerbread House

Trend with one of my last crafty Holiday projects this season.

DIY Wood Gingerbread House

I found this wood house shape at Dollar Tree* earlier this year.

Next, I needed to deconstruct the house.

With patience, I removed the wood heart and house trim

using a craft knife*.  After removing the gingham fabric from the

wood house, I sanded the house smooth with a palm sander*.

*Disclosure:  This blog uses ads and affiliate links.  If you choose to make a purchase using one of the links, I receive a small commission (at no additional cost to you) that helps offset the costs of maintaining this blog.  Thanks for your support!

DIY Wood Gingerbread House

In my workshop, I have a jar of wooden holiday pieces.

I thought these would be perfect for my Gingerbread House.

DIY Wood Gingerbread House

I painted the house and all the pieces using acrylic paint.

I outlined and doodled on the house and wood pieces using a white paint pen*.

It was fun and relaxing, but my doodling skills could definitely use a little work.

The Gingerbread House makes a cute addition to my Holiday Decorations.

DIY Wood Gingerbread House

With just one week until Christmas Eve…

I always wish I could have made more projects.

But, I have to remind myself there’s always next year.

Here’s to taking time and enjoying the rest of the Holiday Season.

How to make a Mini Christmas Dollhouse

Mini Christmas Dollhouse-Sue's Creative Workshop www.sueeldred.com 3502

How to make a Miniature Christmas House using a Dollar Tree Dollhouse*.

On Instagram the other day, I saw a reel by Jessica Grant on how to make a

Gingerbread House using a Dollhouse she purchased at Dollar Tree*.

(It was so adorable, you need to check it out.)

*Disclosure:  This blog uses ads and affiliate links.  If you choose to make a purchase using one of the links, I receive a small commission (at no additional cost to you) that helps offset the costs of maintaining this blog.  Thanks for your support!

Dollar Tree Dollhouse

I love miniatures, doll houses, and Christmas.

So, of course, I had to run over the next day and pick up a couple for myself.

There were two different dollhouses* to choose from.  (I bought one of each.)

How to make a Dollar Tree Dollhouse into a Miniature Christmas House.

The house was simple to dissasemble, which makes it perfect for painting.

How to make a Dollar Tree Dollhouse into a Miniature Christmas House.

I spray painted the pink house white, the roof gray, and the windows and doors gold.

It’s important to use a paint that sticks well to plastic.

Because I am an impatient crafter and couldn’t’ wait to put it together,

I have a few scratches on my house.

I sealed the paint on my house with a clear matte finish sealer*.

Mini Christmas Dollhouse

I also picked up these fairy lights*.

I’m not sure if I’m going to use them or not.

The pink of the original dollhouse shows through when the lights are on.

(I should have given the house an additional coat of paint.)

Mini Christmas Dollhouse

As a crafter, I have a stash of Christmas miniatures I’ve collected over the years.

They really came in handy this time.  (You can always check out your local craft store.)

I glued them onto the front of the house using Rapid Fuse All Purpose Adhesive*.

Mini Christmas Dollhouse

I’m in love with this Christmas Dollhouse.

It looks so real.  I want to live in that house.