
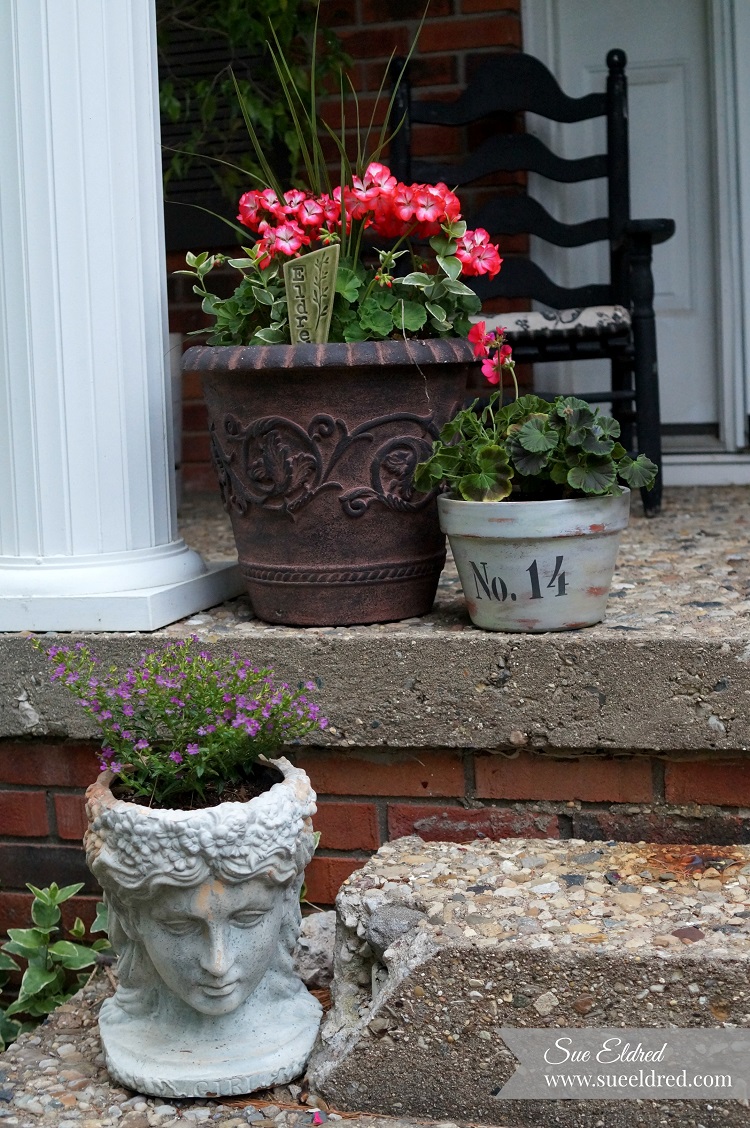
It’s front porch sitting time…
Time for sitting on the porch swing, sipping a glass of iced tea and relaxing the evening away.
But before I can relax, I need to finish putting flowers in containers and I need to give a couple
of old boring terra cotta pots a little sprucing up with a little paint and stencils.
I decided to give this plain terra cotta pot an aged looked with
Americana Décor Chalky Finish Paint from DecoArt.
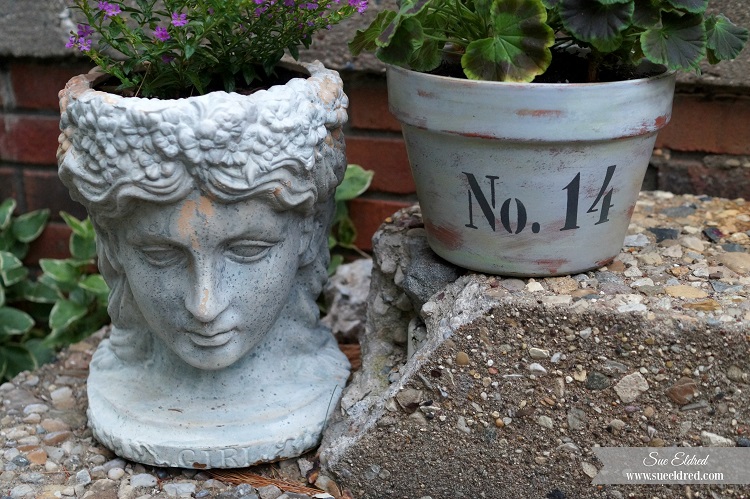
How to age a Terra Cotta Pot with Chalky Finish Paint
Supplies Used: (*affiliate link)
- Terra Cotta Pot
- Patio Paint Home and Garden Stencils – Vintage Numbers*
- Americana Décor Chalky Finish Paint-* yesteryear, everlasting, new life, relic
- Americana Décor Crème Wax- Golden Brown*
- Paint Brush, Stencil Brush*
- Very Fine Sandpaper*
- Clean Lint Free Cloth
- Removable Blue Painters Tape*

Directions:
- Paint the terra cotta pot with “yesteryear” (gray) chalky finish paint. I gave the pot some white highlights with “everlasting” chalky finish paint.
- Wipe the pot with a clean soft damp cloth (or white paper towel) to remove some of the paint.
- To give the pot a mossy look… Dry brush “new life” (green) chalky finish paint around the base of the pot, under the ridge and on the top edge. Soften the green paint by wiping with a damp cloth if needed.
- Apply reusable stick on stencils to painted pot. Mask around the stencil with removable painter’s tape. Use a stipple brush to apply “relic” Chalky Finish paint inside open stencil area.
- Remove stencil.
- Lightly sand pot with extra fine sand paper.
- Apply Americana® Décor “golden brown” crème wax over pot using a clean lint free cloth. Wipe with cloth to create an aged look.

This post was sponsored by the good folks at DecoArt.

Join Amazon Kindle Unlimited 30-Day Free Trial
Disclosure: This blog uses ads and affiliate links. If you choose to make a purchase using one of the links, I receive a small commission (at no additional cost to you) that helps offset the costs of maintaining this blog. Thanks for your support!


