How to make “Mae’s Sweet Little Photo Frame Stand”…
Last Fall, we had family pictures taken.
I especially love this sweet picture of my granddaughter Mae.
I wanted to make a photo stand for her picture to put on my desk.

For Mae’s Frame…
I used the frame from the New Sizzix Frame Pocket Journal Die by Eileen Hull*
and the Phone Stand Die by Eileen Hull* for a quick and easy project.
I “Crafted my Stash” using an old Authentique Scrapbook Paper Collection.

Materials Used: (*affiliate links)
- Sizzix Frame Pocket Journal Die by Eileen Hull*
- Sizzix Scoreboards XL Die-Phone Stand by Eileen Hull*
- Sizzix Thinlets Tile Alphanumeric Die by Eileen Hull*
- Sizzix Big Shot Plus Die-Cutting Machine*
- Sizzix Making Essentials Matboard*
- Scrapbook Paper
- Xyron Create a Sticker*
- Rapid Fuse Adhesive*
- Clear Acetate*
- Trims, Ribbon, and Charm

*Disclosure: This blog uses ads and affiliate links. If you choose to make a purchase using one of the links, I receive a small commission (at no additional cost to you) that helps offset the costs of maintaining this blog. Thanks for your support!

How to make the Photo Frame Stand:
- Die-cut the Phone Stand using White Matboard*, a Sizzix Big Shot Plus Die-Cutting Machine*, and the Phone Stand Die*. Adhere a piece of scrapbook paper on the top section of the phone stand.
- For the frame die, cut the Matboard* slightly larger than the area that you will be die-cutting. Cut a piece of scrapbook paper the same size as the matboard. I like to run the paper through a Xyron Create a Sticker Machine* to add a complete layer of adhesive to the back of the paper. Adhere the paper onto the matboard. Place the covered matboard design down on the die and die cut using the Sizzix Big Shot Plus Die-Cutting Machine*.


- Carefully fold the phone stand on the scored lines and adhere the phone stand with a strong adhesive.
- My favorite is Rapid Fuse Adhesive*. It dries quickly and holds strong.
- I glued a piece of clear acetate onto the inside of the frame to protect the photo before adhering it to the front of the phone stand.
- I added green trim on the bottom to give it a little “vintage granny chic vibe”.

- I used the Sizzix Thinlets Tile Alphanumeric Die by Eileen Hull* to create the name on the bottom of the frame.
- The letters hang over the bottom of the frame.
- To match the thickness of the frame, I added two thin strips of mat board under the letter tiles.
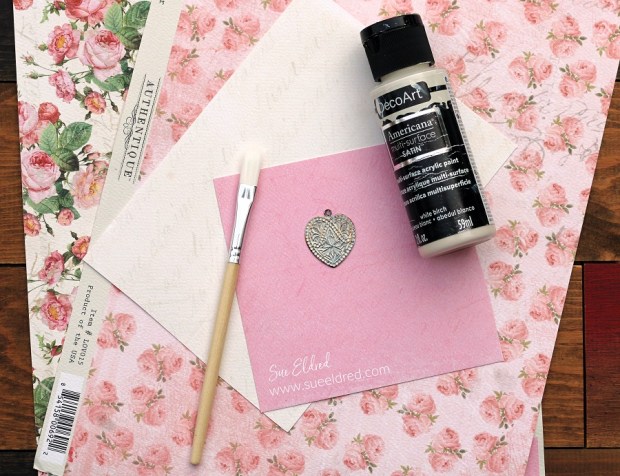
- For added detail, I painted a brass heart with White Birch DecoArt Multi-Media Paint.
- I rubbed a little of the paint off to show the details in the brass charm.
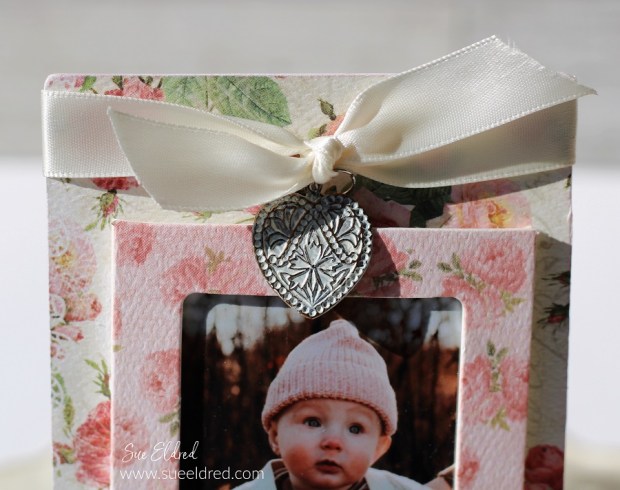
- Tie the brass charm onto the top of the frame with a simple cream-colored satin ribbon.

I’m so in love with this sweet baby girl. She’s been such a great addition to our family.
Would you believe she got my blue eyes? (None of my kids has them.)
![]()
Disclosure: This is a sponsored post. As a member of the Eileen Hull Educator Team, I have been provided product in exchange for my creative ideas. The view and opinions are my own.