Random Letter Art

You don’t need to be perfect, you are awesome.

I’ve been on the Creating with Joy Design Team for the past 5 years.

During that time I’ve created all kinds of projects using a large variety of Embroidered Iron-On

letters.  And because I occasionally change my mind of what I want my projects to say,

I have a bag of random letters.

For this month’s Design Team project I decided to use from that bag of random letters.

I gathered my letters together to see what I could spell.

Doesn’t it look like a colorful bowl of Alphabet Soup?
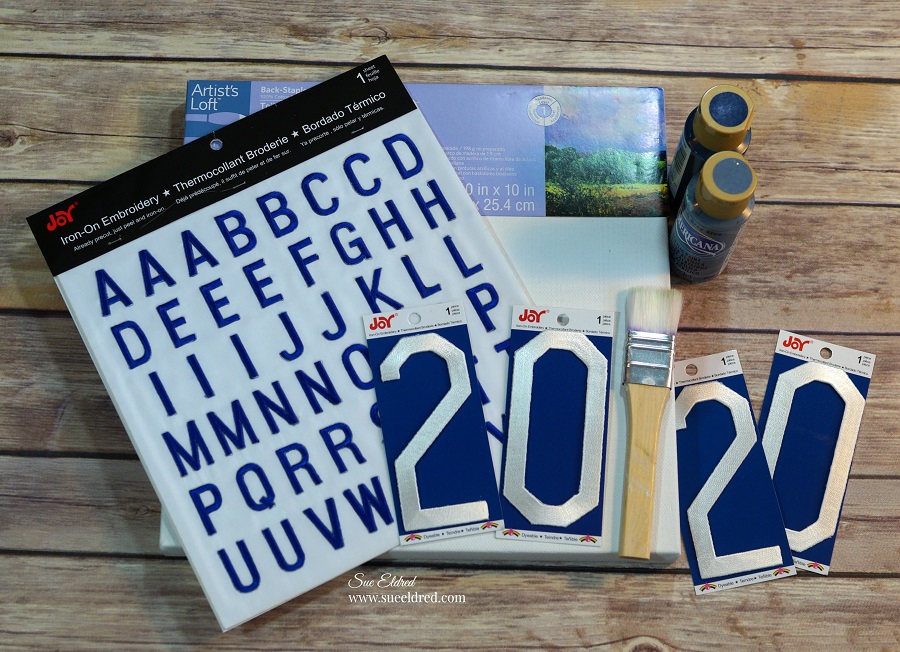
Supplies Needed:

To make a Framed Word Art…

  • Measure and cut a 8″ x 10″ piece of Kraft cardstock* to fit inside frame.
  • Cut a 5 1/2″ x 7 1/2″ piece of white heavyweight cardstock.
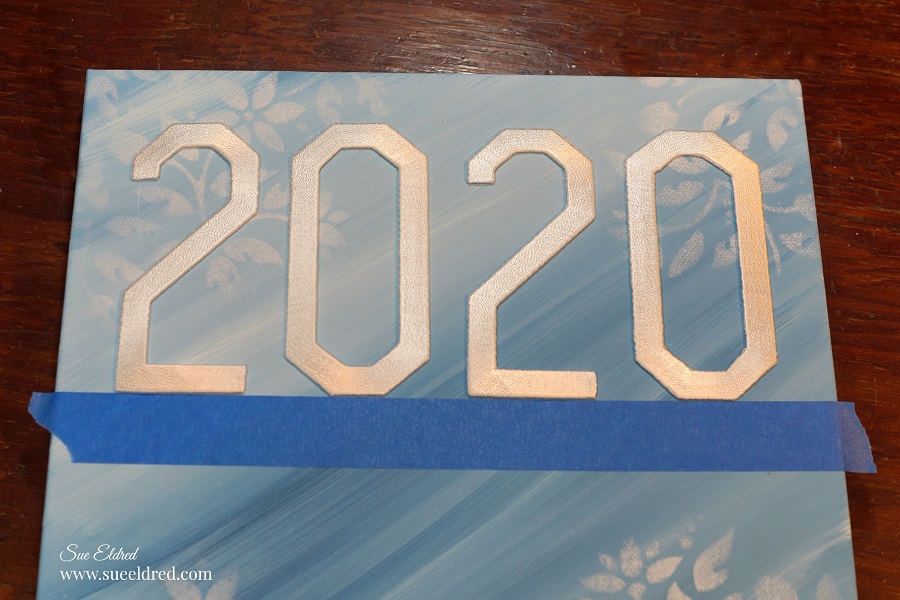
  • Arrange letters on white cardstock to play with the random letter placement.
  • Use a piece of removable painters tape to keep the letters in line.  (just because it’s not perfect doesn’t mean it can’t be straight.)
  • Apply fabri-tac glue* to the back of the letters before adhering them to the paper.  (I used my finger tip to rub the glue to the letters.)
  • Cut a piece of black cardstock 5 3/4″ x 7 3/4″, adhere finished letter art onto the black cardstock.  Adhere white and black layers onto Kraft cardstock and place inside frame.
  • Optional:  Glass in or Out?  I left the glass out of the frame for photography purposed.  I added the glass back in after I was finished taking the picture.

*Disclosure:  This blog uses affiliate links.  If you choose to make a purchase using one of the links, I receive a small commission (at no additional cost to you) that helps offset the costs of maintaining this blog.  Thanks for your support!

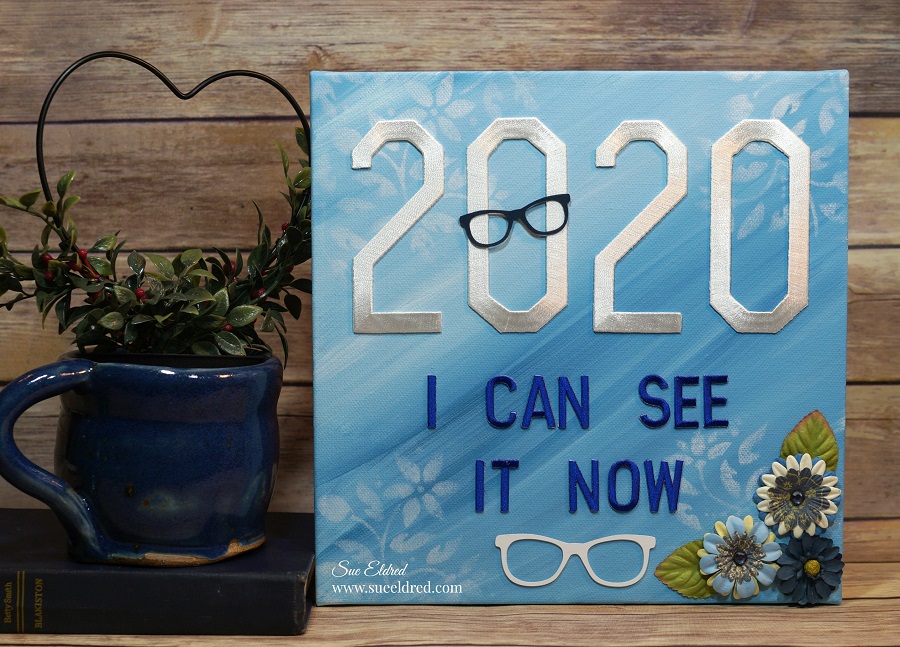
A little matting and a frame and I have a fun inspirational piece of  Random Letter Art.

“This is a sponsored post.  As a member of the Joy® Design Team I have been provided product and compensation in exchange for my creative ideas.  The views and opinions are my own.

Sweet as Honey Pocket Notebook

How to Create a Pocket Notebook Album…

If you love yellow and black your going to love the bee inspired paper pack from DCWV.

Once I looked through the paper pack and  saw the gold embossed patterned papers I knew

it needed to be made into a mini album.

I used the Eileen Hull Notebook die along with the 12″ x 12″ paper pad to create my album.

You can find the DCWV Honey Dear Premium Paper Stack exclusively at JoAnn Fabrics.

To Create the Sweet as Honey Pocket Notebook I Used:                (*affiliate link)

*Disclosure:  This blog uses affiliate links.  If you choose to make a purchase using one of the links, I receive a small commission (at no additional cost to you) that helps offset the costs of maintaining this blog.  Thanks for your support!

Directions:

  • Cut two 6″ x 8-1/2″pieces of decorative scrapbook paper for the front and inside of the cover.
  • Lay decorative scrapbook paper (design side up) on the  Xyron Creative Station* crank the handle to run the paper through the machine.  As it moves through the Xyron Creative Station it adds adhesive to the back side of the paper.
  • Easy to use and it doesn’t need any electricity.
  • I like using the Xyron Creative Station* when making mini books because you get complete coverage, no wrinkling, no bubbles!

  • Cut a piece of mat board 6″ x 8-1/2″.
  • Adhere the decorative paper on each side of the mat board.
  • Lay the covered mat board over the notebook die* sandwiched between two cutting plates.
  • Crank the handle of the Sizzix Big Shot Die Cutting Machine*and run the die through the machine.  The Big Shot will cut and score the mat board.

  • The notebook die creases the center of mat board as it goes through the Big Shot Die Cutting Machine* making it easy to fold the cover for your mini album.

  • Cut a 2 1/4″ x 5″ strip of decorative paper to use for the spine and run it through the Xyron Creative Station*.  Adhere to spine.
  • Included in the Honey Dear Premium Stack is two pages with twelve 3″ x 4″ journaling cards.  Choose one of the journaling cards from the page to embellish the front cover of the notebook.

  • Choose 5 coordinating patterns from the Honey Dear Premium Paper Stack.  Cut the pages using the notebook die.
  • Crease on the center score lines.
  • Using gold and white twine, wrap the twine around the inside creases and around the outside of the book cover to secure the pages.

  • After I had all my pages together, I tied the piece of twine together in one knot on the spine and tucked in the ends.

A cute little pocket notebook for taking notes or adding pictures.

After making the pocket notebook… 

I decided to make a gift card holder with tag using the Gift Card Folder & Label Die*.

To make the Gift Card Holder:

  • Cut a piece of 6″ x 9″ paper from the Honey Décor Premium Paper Stack.
  • Lay the paper over the Gift Card Folder Die* sandwiched between two cutting plates.
  • Crank the handle of the Sizzix Big Shot Die Cutting Machine*and run the die through the machine.  The die cuts and scores the gift card folder.
  •  Fold along the score lines on the three sides to create a little pocket.
  • Adhere bottom three flaps together using a xyron tape runner*.
  • Cut a 1″ strip of coordinating paper to create a band.  Adhere the band to the holder using the xyron tape runner*.
  • The Gift Card Folder Die* also comes with card insert and tab to use for holding gift cards.

“This is a sponsored post.  As a member of the Xyron Makers Program I have been provided product in exchange for my creative ideas.  The views and opinions are my own.

Organizing the Craft Cabinet

Organizing the Craft Cabinet with Deflecto Storage

I have been slowly working on creating my perfect workspace since last Spring

when I moved my craft room into my son’s old bedroom.

I’ve been taking my time, I want to get it right.

It’s coming along beautifully.  (I hope to share it soon.)

As crafter’s go, I’m a fairly neat and tidy person.

I’m also a fan of closed-door storage.

With closed-door storage, cabinets can easily get ignored and out of control.

I had one of those ignored craft cabinets.

After clearing out the cabinet, I organized items into clear storage containers from Deflecto.

Because I’m such a nice person, I occasionally allow others to use my craft supplies.

Labeling the bins not only look good, but it’s helpful for those looking for supplies.

I used a  Silhouette Cameo Electronic Die Cutting Machine* to create and cut the words out of

StyleTechCraft black adhesive vinyl*.

I used transfer paper to apply the words onto the clear bins.

*Disclosure:  This blog uses affiliate links.  If you choose to make a purchase using one of the links, I receive a small commission (at no additional cost to you) that helps offset the costs of maintaining this blog.  Thanks for your support!

As a self proclaimed organizing nut, I find labeled bins extremely satisfying.

Clear bins make everything easier to find.

The bins are also easy to take with you when you need to work.

They keep your work space clutter-free and your supplies close at hand.

My newly Organized Craft Cabinet.  Everything fits so nice in this space.

Here’s what I used to organize my Craft Cabinet:    (*Amazon Affiliate Links)

Look for Deflecto products on Amazon, Scrapbook.com and at Michaels and Hobby Lobby.

“This is a sponsored post. As a member of the Deflecto Design Team I have been provided product in exchange for my creative ideas, views and opinions.” 

Great Craft and Home Storage from Deflecto

As a crafter, I LOVE great Craft and Home storage.

That’s just one of the reasons I like working with Deflecto.

I have their organization pieces all over my house and craft room.

I’m excited to let you know that…

Deflecto has been working on a New and Improved website for the last several months.

And it’s finally done!

They’ve updated it with a fresh modern feel with Great Inspiration and Great Products.

With links to fun videos and blog posts.

But don’t just take my word for it, check it out for yourself at www.deflecto.com.

“This is a sponsored post. As a member of the Deflecto Design Team I have been provided product in exchange for my creative ideas, views and opinions.” 

Washi Tape Heart

Washi Tape Heart Card

I love a clean and simple card, and this Washi Tape Heart Card is so simple to make.

To make the Washi Tape Heart Card…

  • Create the cut-out heart layer by cutting various sizes of hearts on a 4 3/4″ x 6 3/4″ piece of white cardstock.  I used a  Silhouette Cameo Electronic Die Cutting Machine*.  (You can also use punches or dies to create the hearts.)
  • Center the cut-out heart layer onto a white 5″ x 7″ card and lightly traced the hearts with a pencil.
  • Cover the heart outlines with several different strips of coordinating washi tape pieces.
  • Use a tape runner to adhere to the cut-out heart layer onto the front of the card, aligning it with the washi tape.

*Disclosure:  This blog uses affiliate links.  If you choose to make a purchase using one of the links, I receive a small commission (at no additional cost to you) that helps offset the costs of maintaining this blog.  Thanks for your support!

A Clean and Simple Valentines Day Card.  

Just stamp a simple greeting onto the front of the card,

or you could cut the words out of red glossy craft vinyl as I did. 

I’m glad my husband doesn’t read my blog.  

This card will make a perfect Valentine’s Day card for him.

I want to share with you the perfect organizer for holding washi tape.

The small three-drawer organizer* from Deflecto was made with washi tape in mind.

Each of the three drawers are divided and can hold a lot of washi tape.

The small three-drawer organizer* is also great for holding small ink pads and paintbrushes.

“This is a sponsored post. As a member of the Deflecto Design Team I have been provided product in exchange for my creative ideas, views and opinions.”

2020 I can see it now!

Twenty Twenty is “clearly” going to be a year of stupid puns and silly memes.

We might as well get used to it.

So, if you can’t beat them, you might as well join them.

Joy Iron-on Embroidered Letters are great for making creative and funny t-shirts,

they’re also great for making creative and funny signs.

Here’s what I used to make my 2020 Canvas:

*Disclosure:  This blog uses affiliate links.  If you choose to make a purchase using one of the links, I receive a small commission (at no additional cost to you) that helps offset the costs of maintaining this blog.  Thanks for your support!

Directions:

  • Paint the entire canvas with a generous amount of white acrylic paint.  While the white paint is still wet, softly blend the navy blue paint.

  • Once the canvas has dried.  Position the Jacobean Floral Stencil* onto the corner of the canvas and tape down the edges with removable painter’s tape to keep the stencil from moving.
  • Use a  stipple brush to lightly apply white acrylic paint inside open stencil areas.

  • The stenciling creates a nice subtle background.
  • Stencil all four corners of the canvas.

  • To keep the numbers and letters straight, use a piece of blue painters tape on the canvas.
  • Glue letters and numbers onto the canvas using Fabri Tac Adhesive.

  • To make it a little more “Punny”…I created glasses out of cardstock using my Silhouette Cameo Electronic Die Cutting Machine*.  To make the glasses more sturdy, I made three of each size and stacked and glued them together.
  •  Glue glasses and flower embellishments onto canvas.

You can find a wide selection of Joy® embroidered iron-on letters and alphabet sheets in different sizes at your local craft stores!

“This is a sponsored post.  As a member of the Joy® Design Team I have been provided product and compensation in exchange for my creative ideas.  The views and opinions are my own.

Don’t throw away those Christmas Photo Cards!

What do you do with all those Christmas Photo Cards you’ve just received? 

Before you put all your Christmas Crafting Supplies away…

I have one last project for you to make.

The Beloved Christmas Photo Card.

I love annual Christmas photo cards and how it  shows how your family changes from

one year to the next.  I have a hard time throwing them away after the season is over.

What do you do with them besides putting them in a box?

This year, I finally decided to make an album to put them in.

The album had to be simple so that I can easily add the next years’ photo cards and easy

enough that I would actually do it.

This is how I made it…

  • I started with two 5-1/2″ x 8-1/2″ pieces of white matboard and two 12″ x 12″ pieces of Christmas Scrapbook paper.
  • I used my Xyron Creative Station* to add adhesive to the back of the scrapbook paper before adhering it to the matboard.  I added the second piece of scrapbook paper to the other side of the matboard.
  • I used my  Silhouette Cameo Electronic Die Cutting Machine* to create the words and cut them from Glittered Self Adhesive Vinyl from StyleTechCraft.
  • I added a small Christmas chipboard sticker on the front of the album to add dimension.
  • Punch a hole in the top of the matboard covers with a Crop-A-Dile Punch*.
  • Align the Photo Cards with the top cover and use a pencil to draw a mark on the card so you’ll know where to punch the hole.
  • Using a large book ring, I added my cards to my album with the most recent photo cards on top.

For your convenience here’s these are the products I used:    


*Disclosure:  This blog uses affiliate links.  If you choose to make a purchase using one of the links, I receive a small commission (at no additional cost to you) that helps offset the costs of maintaining this blog.  Thanks for your support!

“This is a sponsored post.  As a member of the StyleTechCraft Design Team I have been provided product in exchange for my creative ideas.  The views and opinions are my own.

Special Delivery Envelope

Christmas Special Delivery Envelope

As promised, I want to share with you a few more samples made with the NEW RELEASE

Tammy Tutterow Stamps and Dies from The Maker’s Movement.

The first thing that came to mind when I looked at the Special Delivery Card Kit was Valentines.

It also makes a super cute Christmas Envelope perfect for stuffing a Holiday gift card.

Who doesn’t want a little extra “love”?

MOD274 Special Delivery Card Kit

Special Delivery Love Envelope for Valentine’s Day

The top flap is creased to fold.  It makes the cutest little envelope to tuck in a sweet note.

The journaling card die that fits inside the envelope makes it the perfect embellishment

for Scrapbooking or Cardmaking.

When open the envelope measures 3 3/4″ x 4 3/4″.

The back of the Special Delivery Love Envelope.

How cute is the postage stamp die?

A little more LOVE…

I made a couple tags using the Nested Rounded Tags and the Sweet Petites Sentiment Stamps.

I love both of these sets.  Great for any time of the year!


MOD279 Nested Round Tags       MSD213 Sweet Petites Stamps

*FTC Disclosure… “This is a sponsored post.  I have been provided product and compensation in exchange for my creative ideas.  The views and opinions are my own.”

New Release Stamps and Dies from the Maker’s Movement

I’m taking a break from my usual Christmas crafting craziness to share with you a few

of the New Release dies and stamps by Tammy Tutterow and The Maker’s Movement.

I recently got the opportunity to play with these new dies and stamps and I’m in love.

First up… The Library Card Die Set

This was a fun set to play with.  The Library Card Set makes into a great tag or

journaling embellishment for a scrapbook page.

I think the pull-out card would look cute with a small picture.


  • MOD277 Library Card Set

I love that the Library Card set has three sizes of labels that nest perfectly.

Square Nested Tag Die Set and Sweet Petite Posey Set

Look at all the details of the Square Nested Tag Die Set.  (love the hole reinforcement covers)

Used along with the Petite Posey Die Set, you have the making of some sweet little tags.

I inked the petals and added dimension to the flowers using a large ball stylus and a foam mat.


Used on the tags:

  • MOD278 Nested Box Tags
  • MOD275 Petite Posey Set
  • MSD213 Sweet Petite Sentiment Stamps

Sweet Petite Stamp and Die Set

If I had to pick a favorite from Tammy Tutterow’s New Release Collection, the

MSD213 Sweet Petite Stamp and Die Set might be my favorite.


So easy to put together a quick card or tag with this set.

Mini File Folder Die Set

The set was created with memory keeping and planners in mind.

I like to be different.  I used the mini folders as the inside of a mini album.

  • MOS222 Planner Dates Stamp Set

I used the days of the week stamps from the Planner Dates Stamp Set on the file labels.

The mini album cover was made from mat board that I covered with scrapbook paper.

I added the folders to the inside of the album with twine wrapped around the outside of

the spine.

    ← Look at the cute torn page.

  • MOD276 Mini File Folder Die Set

Next week I’ll have a few more samples from the collection to share with you.

Make sure to check out all the dies and stamps from the Maker’s Movement.

*FTC Disclosure… “This is a sponsored post.  I have been provided product and compensation in exchange for my creative ideas.  The views and opinions are my own.”

Red Buffalo Plaid Hot Chocolate Bar

Fun and Easy Red Buffalo Plaid Party Ideas

The theme for this year’s Sue’s Holiday Workshop was “Mad for Plaid”.

To add to the fun of the event, I created a Red Buffalo Plaid Hot Chocolate Bar.

The Hot Chocolate Bar was simple to put together and was a big hit.

The most important part of the Hot Chocolate bar is the Hot Chocolate.

I went back and forth trying to decide on how I wanted to present the Hot Chocolate.

There are so many recipes online for delicious hot chocolate.

Because this was a “creative event”, I went with a little more creative approach.  (and simple)

For my Hot Chocolate Jars…

I found little tiny mason jars at Michaels Craft Store.  I created labels for the jars using a

Silhouette Cameo Electronic Die Cutting Machine* and Red Glossy Craft Vinyl from

StyleTechCraft.  I applied my labels onto the jars using Vinyl Transfer Tape* .

I tied a small plaid chipboard house made from Eileen Hull’s House Ornament Die*

with twine around the neck of the jar.

*Disclosure:  This blog uses affiliate links.  If you choose to make a purchase using one of the links, I receive a small commission (at no additional cost to you) that helps offset the costs of maintaining this blog.  Thanks for your support! 

The jars were filled with enough Hot Chocolate mix for one individual serving.  

They make a great party favor, and the guest gets to take home a cute little jar.

I put all the jars on the bottom of a plain black two-tiered metal stand.

I applied Red Buffalo Plaid Washi Tape* around the rim.

This little detail helped make it stand out and added to the theme.

On the top of the metal stand I added spoons, mini chocolate chips, candy canes.

I also left a place for a can of whipped cream (not yet added to this picture).

For the Table…

I used a black tablecloth for the base of my table and cut a red buffalo plaid runner from

plaid flannel.  (Sew Simple…I didn’t even sew the edges.)

It’s a really quick and inexpensive way to create the look

Air Pots filled with Hot Water made making the Hot Chocolate easy and mess-free.

For a vintage feel, I used large mason jars filled with extra hot chocolate mix,

extra marshmallows, and caramels.

I picked up the Buffalo Plaid Insulated Coffee Cups* and Red Buffalo Plaid Party Supplies* online.

A Hot Chocolate Bar would not be complete without frosted sugar cookies.

My sweet daughter in law baked these sugar cookies from my favorite sugar cookie recipe.

You can see the sugar cookie recipe here.

(The little red bird was made using an Easter Chick cookie cutter.)

I made the Holiday Hot Chocolate Sign by painting a wood bracket sign with black chalkboard

paint.  I used a Silhouette Cut SVG file from the Silhouette Store and my Silhouette Cameo

Electronic Die Cutting Machine* and resized the image to fit my sign.

I used red and white glossy craft vinyl from StyleTechCraft.

To complete the fun, I had fun Red Buffalo Plaid Themed Photo Props*.

I used Red and Black Buffalo Plaid wrapping paper on the background wall.

A fun way to break the ice and get the party started.

Red Buffalo Plaid Party Supplies Available on Amazon.