Fall Sunflower Get Well Card

Fall Sunflower Get Well Card

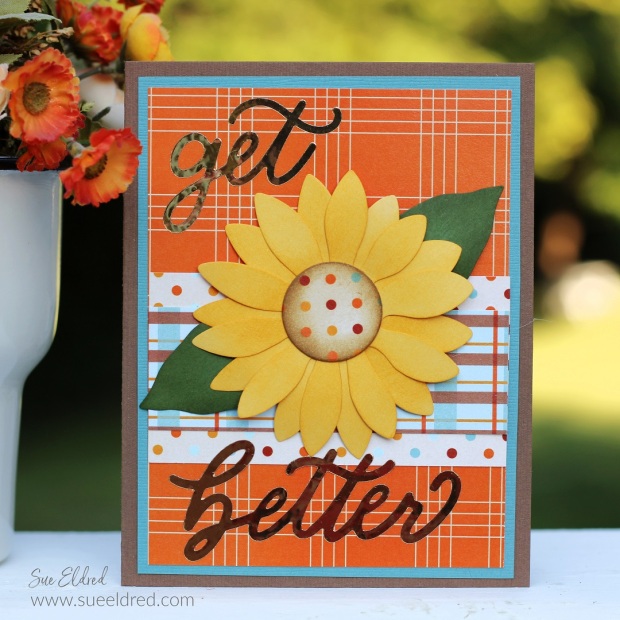
A Bright and Cheery Card to brighten someone’s day.

This simple Get-Well card uses dies and paper from The Maker’s Movement.

Maker's Movement

Disclosure:  This is a sponsored post for The Maker’s Movement.  I have been provided product and compensation in exchange for my creative ideas.  The view and opinions are my own. 
Fall Sunflower Get Well Card

Materials Used:  (*affiliate links)

*Disclosure:  This blog uses ads and affiliate links.  If you choose to make a purchase using one of the links, I receive a small commission (at no additional cost to you) that helps offset the costs of maintaining this blog.  Thanks for your support!

Fall Sunflower Get Well Card

Directions:

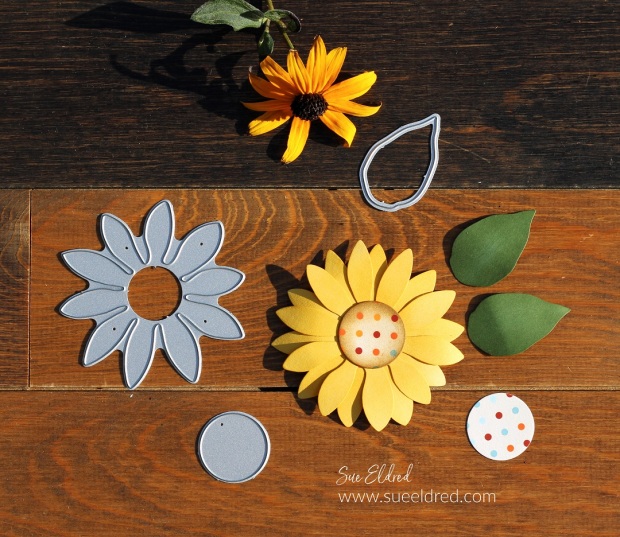
  • Die-cut the pieces for the flower out of cardstock. You will need two flowers cut from the large flower die.
  • Ink the cardstock flower with yellow ink to give the petals a little color variation and depth.

Fall Sunflower Get Well Card

  • Use the side of a pencil to gently round the edges of the petals.

Fall Sunflower Get Well Card

  • Glue the center of the flowers together using Tombow Mono Aqua Liquid Glue*.
  • Instead of a brown center for the sunflower, I cut a circle using polka dot paper from the Autumn Breeze Paper Pad.

Fall Sunflower Get Well Card

  • Die-cut the words “get better” using StyleTechCraft Gold Chrome Adhesive Vinyl*and the Get Better Die Set.
  • The card uses simple layers using the Autumn Breeze Paper Pad.
  • Finished Card Size 4 1/4″ x 5 1/2″.

StyletechCraft products brought to you by ATSM Craft*

Three Projects with Eileen Hull’s New Chapter 3 Release

Projects using Eileen Hull's New Chapter 3 Dies from Sizzix

Eileen Hull’s New Chapter 3 Dies from Sizzix.

I am excited to share three projects I created using Eileen Hull’s New Chapter 3 Sizzix

die collection!

They are a fun group of dies.

Each piece in the set stands alone but also coordinates with the others

to make a truly versatile and valuable addition to your collection.

Back to School Gift Box

Back to School Teacher Gift Box

If you’re looking for to “butter up” the new teacher, this BTS gift box is a fun project to make.

The Back-to-School Teacher Gift Box uses Eileen’s New XL Card Box Die*.

I LOVE this Die* and I can’t wait to share all the ideas I have for this die for the Holidays.

*Disclosure:  This blog uses ads and affiliate links.  If you choose to make a purchase using one of the links, I receive a small commission (at no additional cost to you) that helps offset the costs of maintaining this blog.  Thanks for your support!

Puppy Love Skinny Mini Album-Sue's Creative Workshop www.sueeldred.com 4902

Puppy Love Skinny Mini Album

Eileen’s Skinny Mini Book Box Die* makes the perfect sized album for pictures

of my pup Dexter.

The die also comes with the side parts to make it into a box.  (genius!)

Puppy Love Skinny Mini Album

I created accordion pages for the inside of the album by scoring and attaching 6″ x 12″ cardstock.

Skinny Mini Elements Christmas Poinsettia Card.

Skinny Mini Elements Christmas Poinsettia Card

While the Skinny Mini Elements Die* is not a Christmas Die,

it sure makes one cute Christmas card.

It coordinates perfectly with the Skinny Mini Book Box Die*.

Sizzix Skinny Mini Elements Christmas Poinsettia Card-Sue's Creative Workshop www.sueeldred.com 4940

This card comes with a little back story.

After I made this card, I sent Eileen a picture of the finished project.

She messaged me back that I was brilliant for making the poinsettias using the cut-outs

from the die.  I agreed that “would have” been brilliant, but (darn it) I had used premade

paper poinsettias for the card.

Up for the challenge, I remade the red poinsettia using the cut-outs from the die.

I left the white poinsettias for comparison.  (and laziness)

I cut the points off the side and arranged the petals on foam mounting squares.

Voila, a poinsettia!

Eileen Hull Chapter 3 Release Party

Check out the Eileen Hull’s Blog below for even more ideas. 

Here’s the list of Chapter #3 Blog Hop Stops:

Eileen Hull Educator Logo

Disclosure:  This is a sponsored post.  As a member of the Eileen Hull Educator Team, I have been provided product in exchange for my creative ideas.  The view and opinions are my own. 

Sweet Summer Sentiments Scrapbook Page

Sweet Summer Sentiments Scrapbook Page-Sue's Creative Workshop www.sueeldred.com 4730

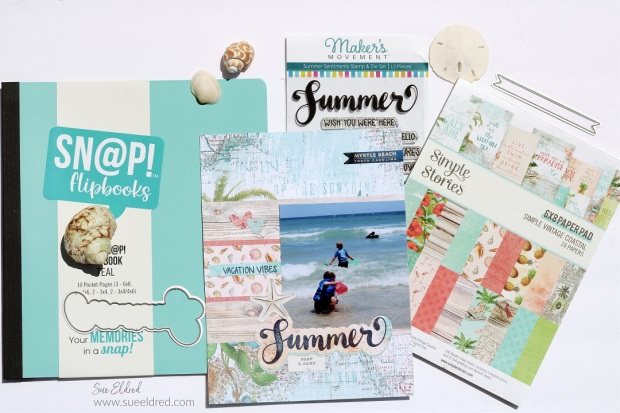
A Sweet Summer Sentiments Scrapbook Page using the Simple Stories Simple Vintage

Coastal Scrapbook Collection and Maker’s Movement Summer Sentiments Stamp and Die Set.

It’s been a while since I’ve done any scrapbooking. 

I thought last year’s pictures from our vacation to Myrtle Beach might be a great

place to start.  (I’ve been meaning to work on them for a while.)

Maker's Movement

Disclosure:  This is a sponsored post for The Maker’s Movement*.  I have been provided product and compensation in exchange for my creative ideas.  The view and opinions are my own. 

Sweet Summer Sentiments Scrapbook Page

Materials Used:   (*affiliate links)

Simple Stories-Simple Vintage Coastal

*Disclosure:  This blog uses ads and affiliate links.  If you choose to make a purchase using one of the links, I receive a small commission (at no additional cost to you) that helps offset the costs of maintaining this blog.  Thanks for your support!

Sweet Summer Sentiments Scrapbook Page-Sue's Creative Workshop www.sueeldred.com 4703

Last year after our trip, I bought a 6″ x 8″ SN@P Flipbook* from Simple Stories to put my pictures in.

I thought the smaller size would be perfect for my vacation album.

Inspired by the Summer Sentiments Stamp & Die Set from The Maker’s Movement

I decided to get out my supplies and start working on the album again.

I used Stazon Midnight Blue Ink* to stamp the words “Summer” and “Vacation Vibes.”

Sweet Summer Sentiments Scrapbook Page-Sue's Creative Workshop www.sueeldred.com 4719

I like to bring home the vacation book with maps and ads to use as ephemera in my album.

I found an ad with the words “Myrtle Beach, South Carolina” in the perfect shade of blue.

I cut the words out using the “banner die” from the Summer Sentiments Stamp & Die Set.

Sweet Summer Sentiments Scrapbook Page

One page done and several more to go.  

Let’s Eat Cake Birthday Card

Eat Cake Birthday Card

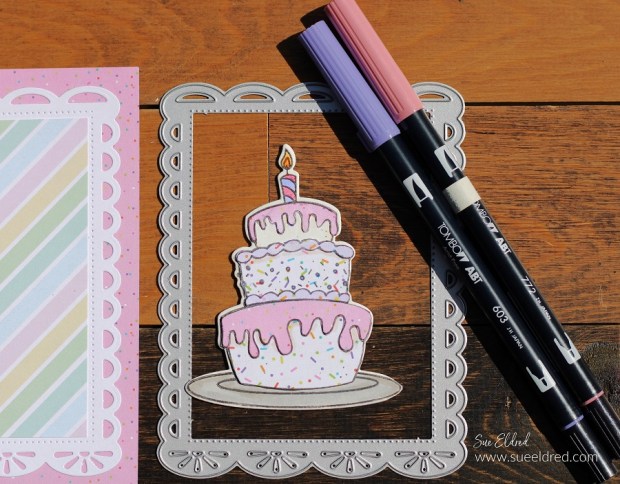
Nothing like getting a sweet 3-tiered layered cake for your Birthday.

Thanks to the Eat Cake Stamp and Die Set from The Maker’s Movement,

you can send everyone a special cake on their birthday.

Maker's Movement

Disclosure:  This is a sponsored post for The Maker’s Movement.  I have been provided product and compensation in exchange for my creative ideas.  The view and opinions are my own. 

Eat Cake Birthday Card

Materials Used: (*affiliate links)

Shop Tombow

*Disclosure:  This blog uses ads and affiliate links.  If you choose to make a purchase using one of the links, I receive a small commission (at no additional cost to you) that helps offset the costs of maintaining this blog.  Thanks for your support!

Eat Cake Birthday Card

Directions:

Eat Cake Birthday Card

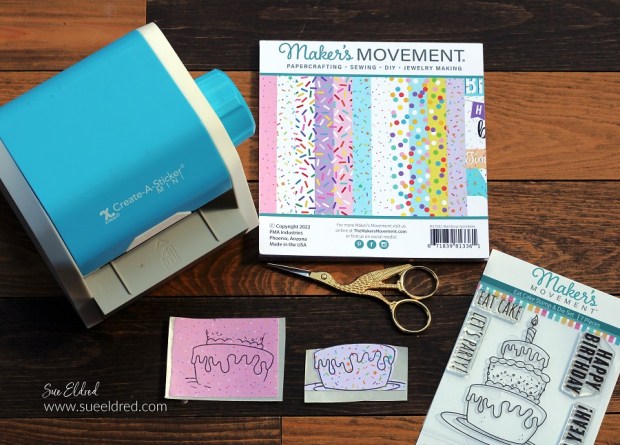
  • Stamp portions of the cake on patterned paper from the Rainbow Sprinkles Paper Pad.
  • For extra dimension, place the stamped paper onto white cardstock.
  • Cut the “icing layer” using a fine-detailed scissor and adhere the layer on top of the cut-out cake layer.
  • My secret ingredient for this “fussy cut” 3-tiered cake is my Xyron Create a Sticker Mini*. It makes applying the layers extremely easy.  Just place the paper into the machine and crank the handle, as it runs through the sticker-maker it adds a layer of adhesive onto the back of the paper.
Eat Cake Birthday Card

  • Cut a frame using the Crafty Chica Nested Frame Die Set and white cardstock.
  • Use paper from the Simply Spring Slimline Paper Pad to create a layer for the inside of the frame.

Eat Cake Birthday Card

  • Here’s a closeup of the cake all layered up.  Each layer is slightly thicker than the first.
  • Color the top of the candle using Tombow ART Markers*.
  • Add 3D Foam Mounting Squares* to the back of the cake and place it onto the bottom of the frame.

Eat Cake Birthday Card

  • Cut a small “Happy Birthday” banner from the Rainbow Sprinkles Paper Pad and add to the top of the card.
  • A fun birthday card for any age.

Mae’s Baby Shower Banner

Mae's Baby Shower Banner

Mae’s Baby Shower Banner

This past weekend we held a baby shower for my daughter

and soon-to-be granddaughter Mae.

The theme was April Showers Brings Mae Flowers.

My daughter gave me full permission to do “my thing.”

Everything was pink and flowery. (I had fun.)

One of the decorations that I made was a banner with my granddaughter’s name.

It was a simple project that we used along with a few balloons and giant rosettes

to create a place to take photos.

Mae's Baby Shower Banner

If you’re interested in making a banner for your next party here’s what I used: 

*Disclosure:  This blog uses ads and affiliate links.  If you choose to make a purchase using one of the links, I receive a small commission (at no additional cost to you) that helps offset the costs of maintaining this blog.  Thanks for your support!

Mae's Baby Shower Banner

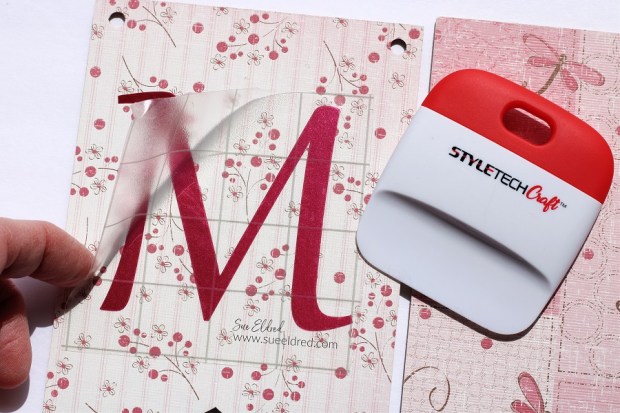
  • Cut the scrapbook paper slightly larger than the wood banner pieces.
  • Place the scrapbook paper design side on the Xyron Creative Station®*
  • Turn the handle of the Creative Station to run the paper through.  As it runs through, it adds complete adhesive covering on the underneath side of the paper.

Mae's Baby Shower Banner

Mae's Baby Shower Banner

Mae's Baby Shower Banner

Mae's Baby Shower Banner

I wanted to keep the banner pieces simple. 

But you could add all kinds of flowers and embellishments to make it special.

Mae's Baby Shower Banner

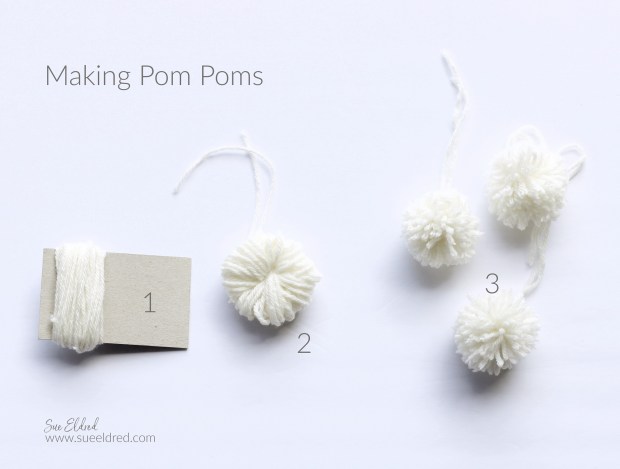
How to make small pom-poms:

  1. Cut a small piece of matboard or cardboard approx. 2 inches. Loosely wrap the yarn around the matboard 50 times.
  2. Slide the wrapped yarn off the matboard and tightly tie the middle of the loops with a second piece of yarn.
  3. Cut all the loops with a pair of scissors. (Leave the second piece of yarn long.) Give the pom-pom a shake. Then the fun part, give the pom-pom a haircut, trimming all the ends the same size.

Mae's Baby Shower Banner

  • I added the banner pieces and wood beads onto a long piece of pink ribbon.
  • I spread the banner pieces to make room and tied the pom-poms directly onto the ribbon. Trim the long strings of the pom-poms.

Mae's Baby Shower Banner

I found these Cute Floral Pails* at Dollar Tree* and filled them with pansies. 

They were the perfect addition to our Spring themed baby shower.

Mae's Baby Shower Banner

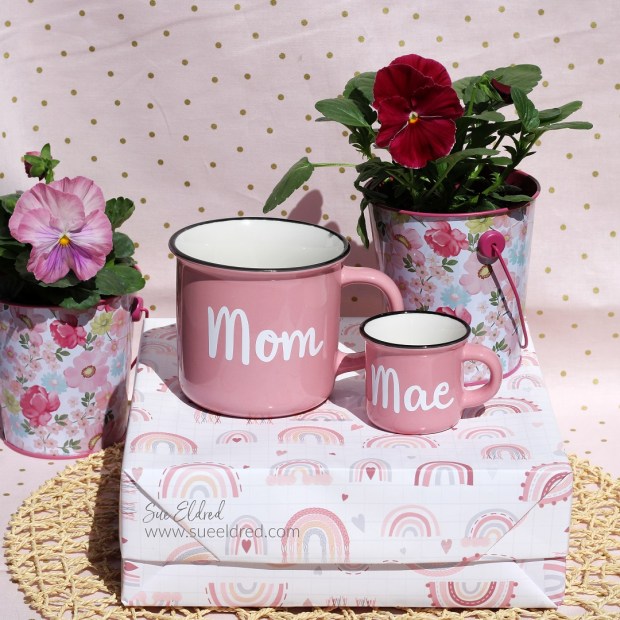
I picked up these cute pink mugs at Hobby Lobby and used StyleTechCraft White Glossy Vinyl

to make the words for the Mom and Mae cups.

I used the Mom mug during the shower to hold pink cutlery.

It was so much fun planning this party.

I’ll be sharing more details of the shower soon.

“This is a sponsored post.  As a member of the StyleTechCraft Design Team I have been provided product and compensation in exchange for my creative ideas.  The views and opinions are my own.

Home Sweet Home Shadow Box

Home Sweet Home Shadow Box Frame

The Home Sweet Home Shadow Box was made with Eileen Hull’s

New Shadow Box Dies and Elements from Sizzix.

Home Sweet Home Shadow Box Frame

I used a combination of several of the new dies to make my Home Sweet Home Shadow Box.

The shadow box was die-cut using a thick kraft cardstock. (110 lbs.)

I added double-sided adhesive foam behind the house, grass, flowers, and sign to

make it dimensional. I used toothpicks cut and painted white behind the picket fence

and inserted them into tiny holes poked into the base of the shadow box.

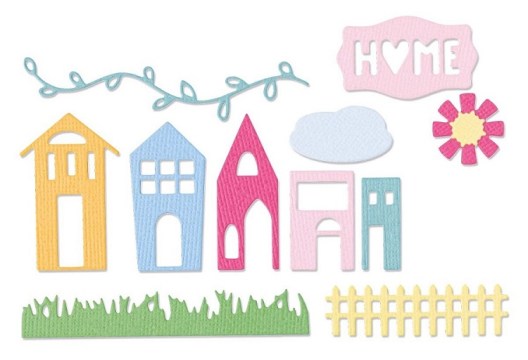
665935 Sizzix Shadow Box Elements by Eileen Hull

665935 Sizzix Shadow Box Elements, 12 pcs. Thinlet Die Set*

This Die set includes four houses along with a range of decorative elements to make your designs pop. The Shadowbox Elements Die set works hand in hand with the Sizzix Thinlits Shadow Box Frames #2 by Eileen Hull to create a beautifully detailed center piece within the Shadowbox.

*Disclosure:  This blog uses ads and affiliate links.  If you choose to make a purchase using one of the links, I receive a small commission (at no additional cost to you) that helps offset the costs of maintaining this blog.  Thanks for your support!

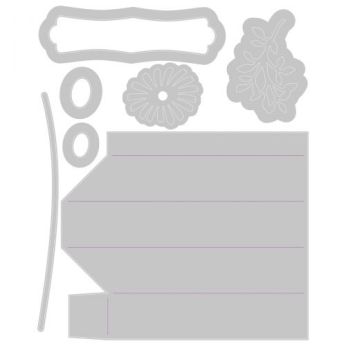
665938 Sizzix Shadow Box Frame #1 by Eileen Hull 665938 Sizzix Shadow Box Frame #1

665938 Sizzix Shadow Box Frames #1, 7 pc. Thinlet Die Set*

665939 Sizzix Shadow Box Frames #2 by Eileen Hull

665939 Sizzix Shadow Box Frames #2, 3 pc. Thinlet Die Set*

Eileen Hull/Sizzix Chapter 2 Release Party

Check out the Designers Links below for even more ideas. 

There is a giveaway too! Comment on each participating designer’s blog and during the live on Tuesday and let us know what you would create with these dies, and you will be entered to win one of the items in the Chapter 2 release!

Eileen Hull Designs

Eileen Hull Educator Logo

“This is a sponsored post.  As a member of the Eileen Hull Educator Team, I have been provided product in exchange for my creative ideas.  The views and opinions are my own.

Card Making with StyleTechCraft Vinyl

Card Making with StyleTechCraft Vinyl

Cardmaking with Vinyl…

Did you know that the same vinyl you use to embellish everyday items

around your home can be used to create beautiful cards?

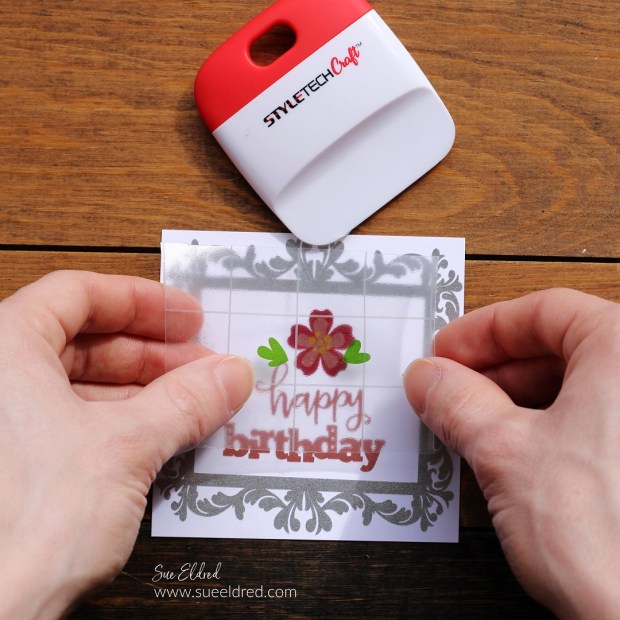
StyleTechCraft adhesive vinyl makes it easy to create cards with intricate and delicate designs.

Use it with your Cricut or Cameo electronic cutters and even with steel rule dies.

The possibilities are endless!

Card Making with StyleTechCraft Vinyl

This month the StyleTechCraft Design Team was asked to use Polished Metal Vinyl

to create a project.  In the past several years, I’ve added StyleTechCraft vinyl

to almost every imaginable surface around my house.

I have used it on plates, glasses, coffee cups, vases, metal, wood and more.

But I often forget to use it to create cards.

Card Making with StyleTechCraft Vinyl

Materials Used:

Styletech Craft products brought to you by ATSM Craft

*Disclosure:  This blog uses ads and affiliate links.  If you choose to make a purchase using one of the links, I receive a small commission (at no additional cost to you) that helps offset the costs of maintaining this blog.  Thanks for your support!

Card Making with StyleTechCraft Vinyl

Card Details:

Card Making with StyleTechCraft Vinyl

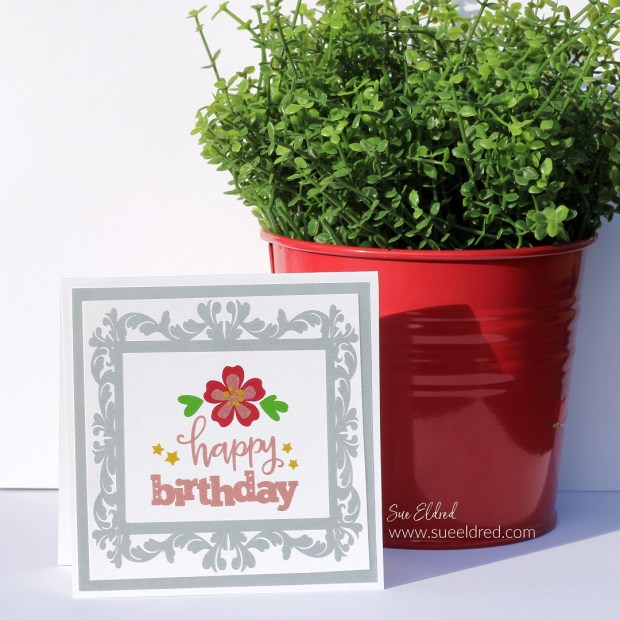
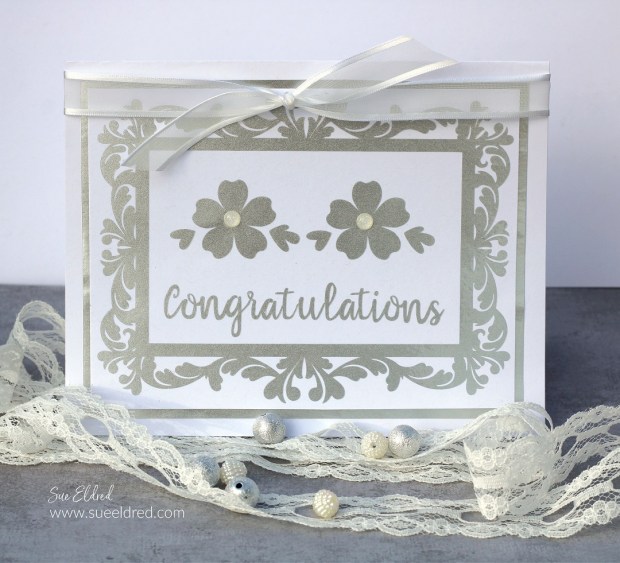
After making the birthday card, I thought the silver was so light and delicate that

it would make a perfect Congratulations card. Perfect for a wedding or anniversary.

“This is a sponsored post.  As a member of the StyleTechCraft Design Team I have been provided product and compensation in exchange for my creative ideas.  The views and opinions are my own.

Mae’s Treasure Box

Mae's Treasure Box made using Eileen Hull Sizzix XL Scoreboard Book Box Die

I wanted to share a little more about how I made Mae’s Treasure Box.

I am getting my first granddaughter, Mae, sometime in May.

(To say I’m excited is a bit of an understatement.)

Mae’s Treasure Box is a little box that her mom can slip into the top drawer

of her dresser and add all the little snippets of babyhood that she wants to save.

Mae's Treasure Box made using Eileen Hull Sizzix XL Scoreboard Book Box Die

As some of you may know…

I currently have three adorable, sweet, and loving grandsons in my life.

I wouldn’t trade them for the world.  But after all the trucks and blue stuff,

I’m excited that I’m finally getting a little “pink” in my life.

Mae's Treasure Box made using Eileen Hull Sizzix XL Scoreboard Book Box Die

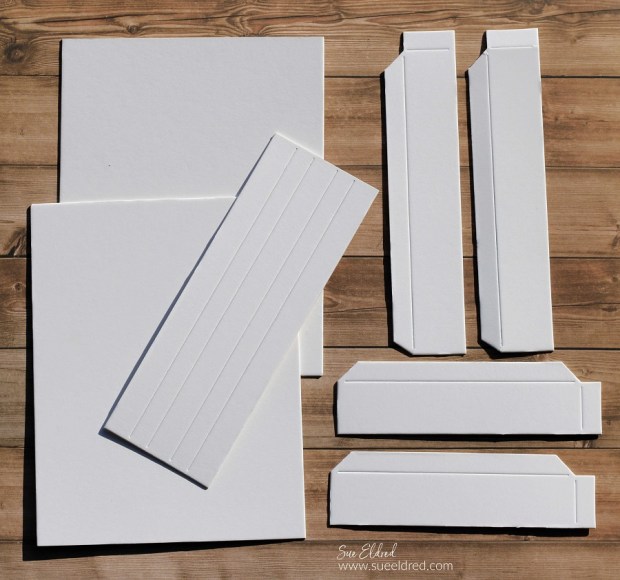
The “treasure box” was made using Eileen Hull’s New Book Box Die*.

I dug deep into my hoard of paper and found this sweet blue and pink floral paper.

It reminds me of Vintage Florals from the ’40s or ’50s.

Mae's Treasure Box made using Eileen Hull Sizzix XL Scoreboard Book Box Die

To make the treasure box:  

Mae's Treasure Box made using Eileen Hull Sizzix XL Scoreboard Book Box Die

  • I used the Xyron Creative Station* to add adhesive to the back of my paper before sticking it to the matboard.  (Usually, I adhere the paper to the matboard before die-cutting.)

*Disclosure:  This blog uses ads and affiliate links.  If you choose to make a purchase using one of the links, I receive a small commission (at no additional cost to you) that helps offset the costs of maintaining this blog.  Thanks for your support!

Mae's Treasure Box made using Eileen Hull Sizzix XL Scoreboard Book Box Die

Mae's Treasure Box made using Eileen Hull Sizzix XL Scoreboard Book Box Die

Mae's Treasure Box made using Eileen Hull Sizzix XL Scoreboard Book Box Die

  • Apply adhesive to the bottom tabs.

Mae's Treasure Box-Sue's Creative Workshop www.sueeldred.com 2039

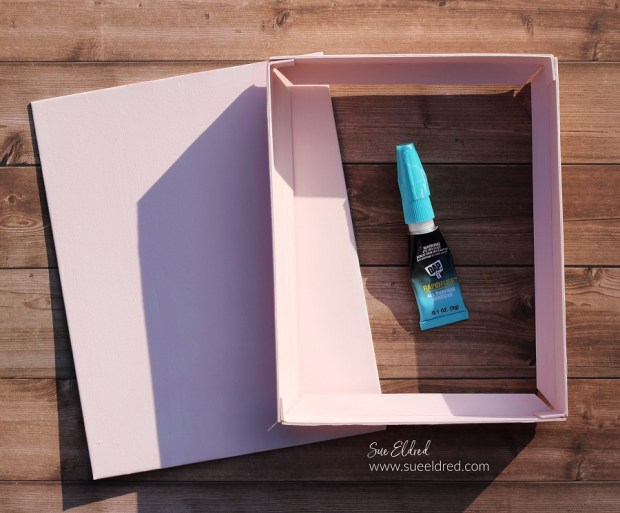
  • Glue the sides to the bottom rectangle.

Mae's Treasure Box made using Eileen Hull Sizzix XL Scoreboard Book Box Die

  • I added an extra piece of Mat Board* covered with matching paper to fit inside the box to cover up the side tabs.
  • I glued a pink glittery chipboard letter M on the inside corner of the box.

Mae's Treasure Box made using Eileen Hull Sizzix XL Scoreboard Book Box Die

Eileen Hull Educator Logo

Disclosure:  This is a sponsored post for Eileen Hull and Sizzix.  As an Eileen Hull Educator, I have been provided product in exchange for my creative ideas.  The view and opinions are my own. 

Heart Cards for All Occasions

Heart Cards for All Occasions

If you like making cards with hearts…

there’s no reason to stop just because Valentine’s Day’s over.

You can make heart cards any time of the year.

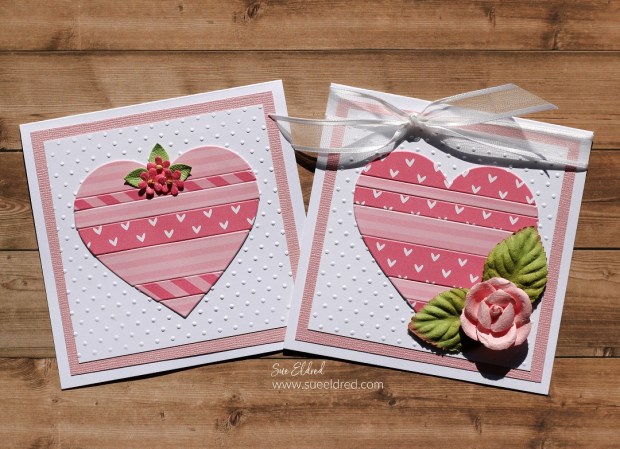
Maker's Movement Striped Heart Die

I used the New Striped Heart Die* from The Maker’s Movement with several of

their older dies to create several Heart Cards for use with several of life’s celebrations.

Hearts and Love are great anytime.

Maker's Movement

Disclosure:  This is a sponsored post for The Maker’s Movement.  I have been provided product and compensation in exchange for my creative ideas.  The view and opinions are my own. 

Heart Cards for All Occasions

Pink Heart Card

  • I played with different patterns in the same pink hues to make these simple heart cards.
  • I adhered the paper onto white cardstock using my Xyron Creative Station* to make a double layer before die-cutting the heart.  It gives the “heart” a little dimension without being too much.

*Disclosure:  This blog uses ads and affiliate links.  If you choose to make a purchase using one of the links, I receive a small commission (at no additional cost to you) that helps offset the costs of maintaining this blog.  Thanks for your support!

Heart Cards for All Occasions

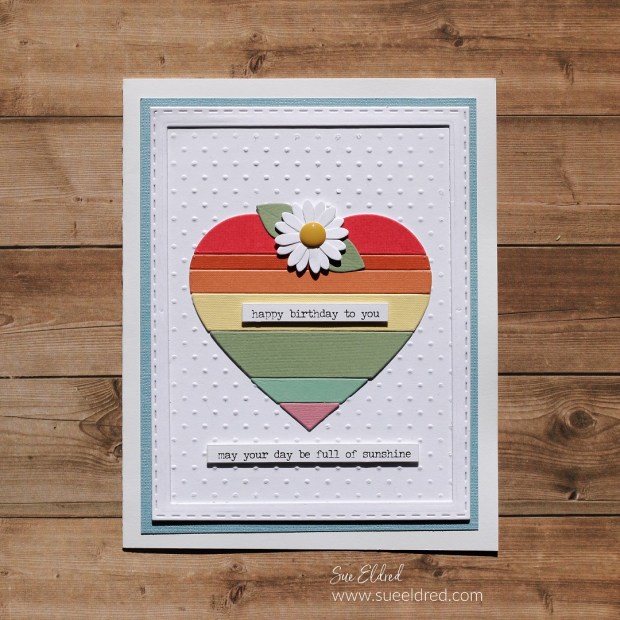
Rainbow Heart Card

  • I used cardstock in several muted colors of the rainbow to create this card. Instead of spacing the stripes apart, I butted them close to each other.
  • I used the daisy and leaf dies from the You’re my Jam Stamp & Die Set* to make the flower on the top of the heart.
  • I made the Frame using the Nested Stitched Rectangles Die Set*.

Heart Cards for All Occasions

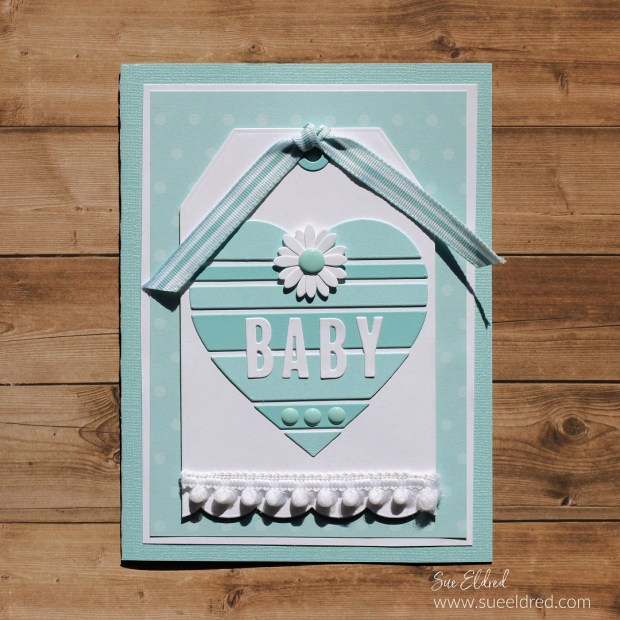
Baby Heart Tag Card

  • Monochromatic shades of pale blue make this sweet baby heart.
  • I used the Large Nested Tag Die Set* to create the tag.
  • I trimmed down the bottom edge using the Borders 1 Die Set*.
  • I cut the word B-A-B-Y out of white cardstock using the Alphabet Die Set*.

Heart Cards for All Occasions

Gold Heart Card

  • Perfect to use as a Birthday, Anniversary, or Wedding Card.
  • I used a shimmery gold cardstock to create an elegant-looking heart.
  • The red rose on the top of the heart was made using the spiral flower die from the In Full Bloom Stamp & Die Set.
  • After I die-cut the spiral flower, I gently molded the cardstock using a molding mat* and a large ball stylus*. I used pointed-reverse tweezers* to wind the flower and curl the leaves.
  • Stamp the word “Congratulations” from the Welcome Home Stamp & Die Set onto white cardstock and die-cut a banner using the banner die from the Message in a Bottle Stamp & Die Set.

Simple Heart Shaker Card

Simple Heart Shaker Card

Shake things up this Valentine’s Day with a cute Simple Heart Shaker Card

made with the Simple Heart Shaker Die Set from The Maker’s Movement.

Maker's Movement

Disclosure:  This is a sponsored post for The Maker’s Movement.  I have been provided product and compensation in exchange for my creative ideas.  The view and opinions are my own. 

Simple Heart Shaker Card

Materials Used:     (*affiliate link)

*Disclosure:  This blog uses ads and affiliate links.  If you choose to make a purchase using one of the links, I receive a small commission (at no additional cost to you) that helps offset the costs of maintaining this blog.  Thanks for your support!

Simple Heart Shaker Card

How to make a Simple Heart Shaker Card

  • Start with a 5″ x 5″ white card base.
  • Die-cut the pieces for the shaker element using the Always & Forever paper pad.

Simple Heart Shaker Card

  • Cut 3¼” x 3¼” piece of striped paper, die-cut the heart shape in the center of the striped paper.
  • Cut a 3¼” x 3¼” piece of Valentine’s words.
  • Die-cut a silver heart border using silver adhesive vinyl or silver cardstock.
  • Die-cut a pink gingham frame using the scalloped frame die.

Love You Forever Valentine's Day Card

  • To create the dimensional rose on the front of the card, “fussy cut” a large and small rose from the rose background paper found in the paper pad.
  • Place a small a thin 3D foam square* under both roses and adhere the smaller rose to the top of the larger rose.

Simple Heart Shaker Card

  • Adhere the scalloped gingham frame to the front of the striped paper with the heart cut-out.
  • Cut a 3¼” x 3¼” piece of clear acetate.  Remove the protective coating off of the acetate and adhere to the back of the heart-opening.
  • Adhere the silver heart border to the front of the acetate inside the heart-opening.
  • Die-cut the adhesive craft foam using the square foam cutter die.  You’ll need to use one that is larger than the heart-opening.
  • Adhere the craft foam square to the back of the acetate.
  • Cut a 4½” x 4½” rose background layer and adhere to the center of the white card.
  • Adhere the Valentine words layer to the center of the rose background layer.
  • The easiest way to add the shaker sprinkles is to place the sprinkles onto the middle of the valentine words layer.  Remove the protective coating from the back of the foam square frame and place the layers over the shaker sprinkles and onto the white card.

Simple Heart Shaker Card

  • Adhere the dimensional rose to the front of the card at the top of the heart.
  • Cut the tiny words “You are the best” using the Valentine’s word paper and adhere to the bottom of the gingham frame.
  • Add valentine’s greeting (found in the Always & Forever paper pad) to the inside of the card.