
Mae’s Baby Shower Banner
This past weekend we held a baby shower for my daughter
and soon-to-be granddaughter Mae.
The theme was April Showers Brings Mae Flowers.
My daughter gave me full permission to do “my thing.”
Everything was pink and flowery. (I had fun.)
One of the decorations that I made was a banner with my granddaughter’s name.
It was a simple project that we used along with a few balloons and giant rosettes
to create a place to take photos.

If you’re interested in making a banner for your next party here’s what I used:
- Wood Banner Shapes*
- Decorative Scrapbook Paper
- Xyron Creative Station®*
- Wood Beads*
- White Yarn*
- DecoArt Pink Chiffon Acrylic Paint* and Paintbrush
- Craft Knife* and Cutting Mat*
- Sanding Block*
- StyleTechCraft Pink Chrome Vinyl*
- StyleTechCraft Vinyl Transfer Tape*
- StyleTechCraft Vinyl Tool Kit*
- Silhouette Cameo Electronic Die Cutting Machine*

*Disclosure: This blog uses ads and affiliate links. If you choose to make a purchase using one of the links, I receive a small commission (at no additional cost to you) that helps offset the costs of maintaining this blog. Thanks for your support!

- Cut the scrapbook paper slightly larger than the wood banner pieces.
- Place the scrapbook paper design side on the Xyron Creative Station®*.
- Turn the handle of the Creative Station to run the paper through. As it runs through, it adds complete adhesive covering on the underneath side of the paper.


- Adhere the paper onto the front of the Wood Banner.
- Place the Wood Banner onto the Cutting Mat* and cut the excess paper using a Craft Knife*.
- Use a Sanding Block* to smooth any rough edges.

- I cut the letters for the name Mae using StyleTechCraft Pink Chrome Vinyl* and a Silhouette Cameo Electronic Die Cutting Machine*.

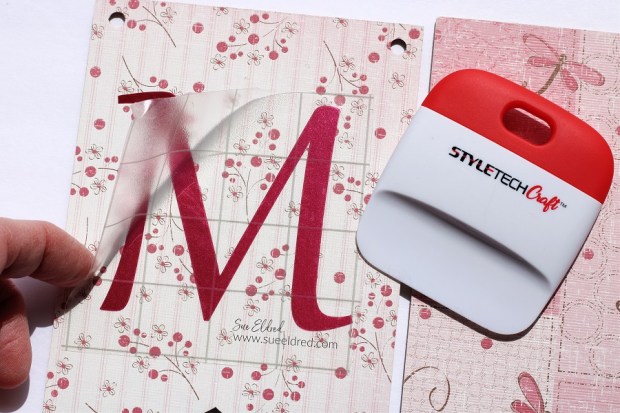
- Use StyleTechCraft Vinyl Transfer Tape* to adhere the vinyl onto the front of the banner.

I wanted to keep the banner pieces simple.
But you could add all kinds of flowers and embellishments to make it special.
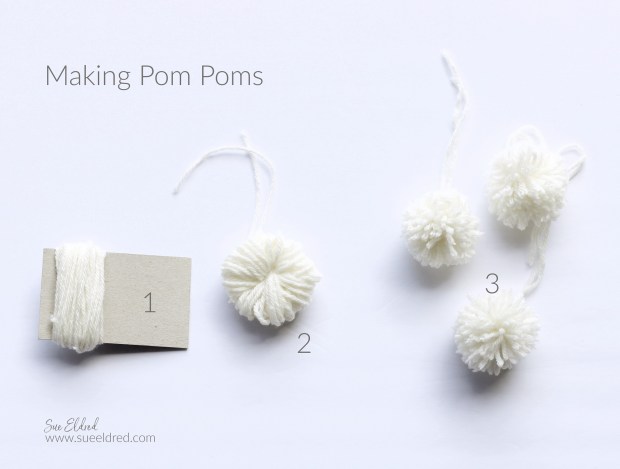
How to make small pom-poms:
- Cut a small piece of matboard or cardboard approx. 2 inches. Loosely wrap the yarn around the matboard 50 times.
- Slide the wrapped yarn off the matboard and tightly tie the middle of the loops with a second piece of yarn.
- Cut all the loops with a pair of scissors. (Leave the second piece of yarn long.) Give the pom-pom a shake. Then the fun part, give the pom-pom a haircut, trimming all the ends the same size.

- I added the banner pieces and wood beads onto a long piece of pink ribbon.
- I spread the banner pieces to make room and tied the pom-poms directly onto the ribbon. Trim the long strings of the pom-poms.

I found these Cute Floral Pails* at Dollar Tree* and filled them with pansies.
They were the perfect addition to our Spring themed baby shower.
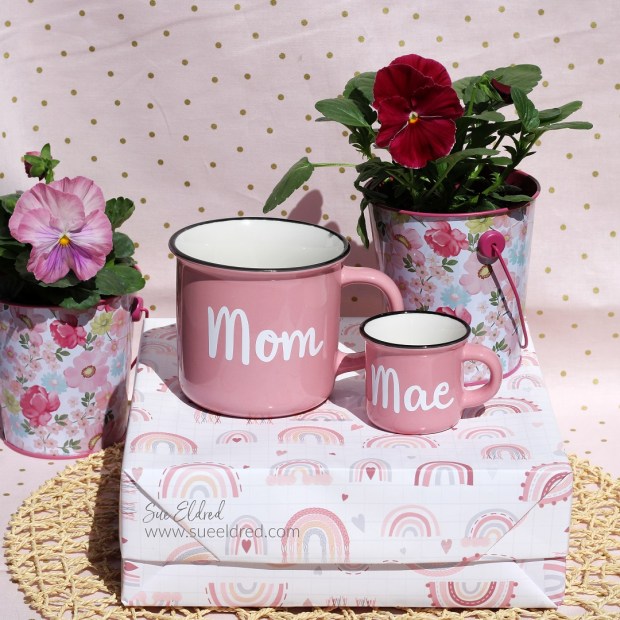
I picked up these cute pink mugs at Hobby Lobby and used StyleTechCraft White Glossy Vinyl
to make the words for the Mom and Mae cups.
I used the Mom mug during the shower to hold pink cutlery.
It was so much fun planning this party.
I’ll be sharing more details of the shower soon.
![]()
“This is a sponsored post. As a member of the StyleTechCraft Design Team I have been provided product and compensation in exchange for my creative ideas. The views and opinions are my own.
