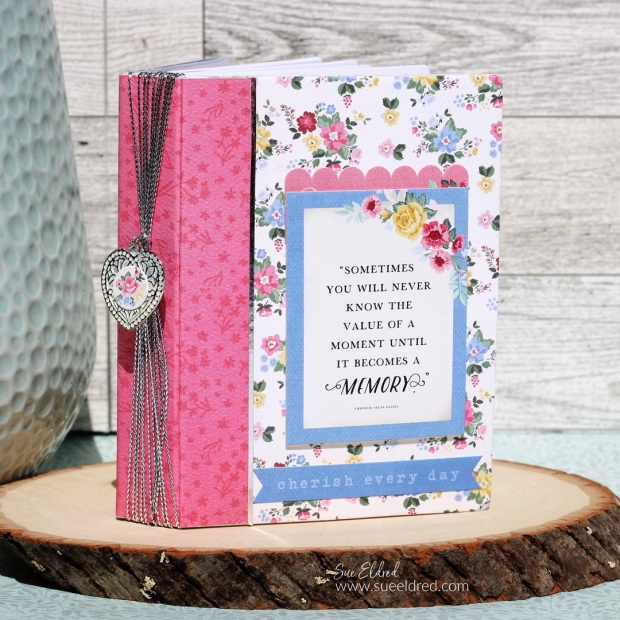
Summer Blooms Mini Album

Summer Bloom Mini Album

How to make a Summer Blooms Mini Album…

I love Summer Blooms and fell in love with the new Bloom Collection*

from Echo Park as soon as I saw it.

Using the Sizzix Notebook Die by Eileen Hull* and the Bloom Collection*,

I made this cute little pocket-sized mini album.
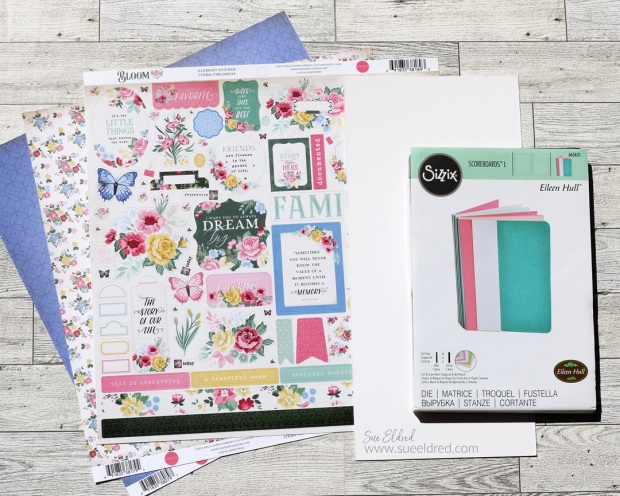
Summer Bloom Mini Album

Materials Used:    (*affiliate links)

*Disclosure:  This blog uses ads and affiliate links.  If you choose to make a purchase using one of the links, I receive a small commission (at no additional cost to you) that helps offset the costs of maintaining this blog.  Thanks for your support!
Summer Bloom Mini Album

Directions:

  • Cut two 6″ x 8-1/2″pieces of decorative scrapbook paper for the front and inside of the cover.
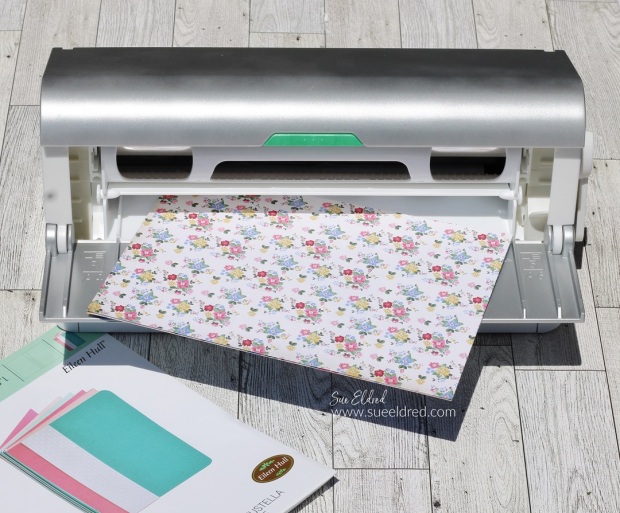
  • Lay decorative scrapbook paper (design side up) on the Xyron Creative Station* crank the handle to run the paper through the machine.  As it moves through the Xyron Creative Station it adds adhesive to the back side of the paper.
  • Easy to use and it doesn’t need any electricity.
  • I like using the Xyron Creative Station* when making mini books because you get complete coverage, no wrinkling, no bubbles!
Summer Bloom Mini Album

  • Cut a piece of mat board 6″ x 8-1/2″.
  • Adhere the decorative paper on each side of the mat board.
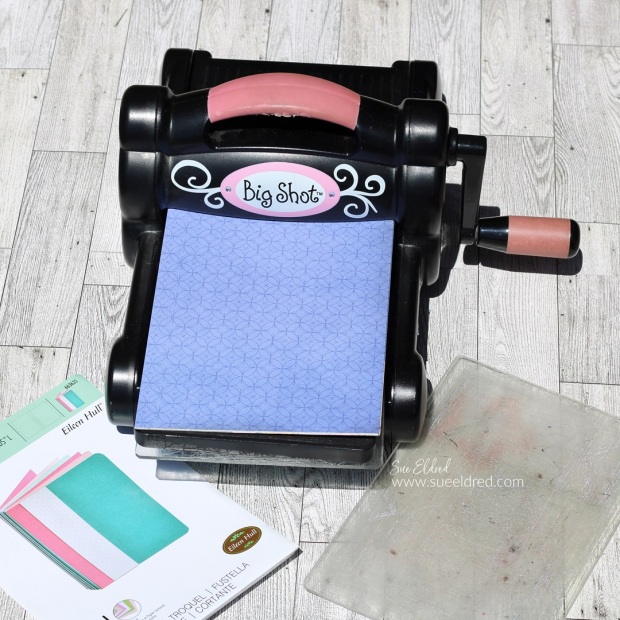
  • Lay the covered mat board over the notebook die* sandwiched between two cutting plates.
  • Crank the handle of the Sizzix Big Shot Die Cutting Machine* and run the die through the machine.  The Big Shot will cut and score the mat board.
Summer Bloom Mini Album-Sue's Creative Workshop www.sueeldred.com 4717

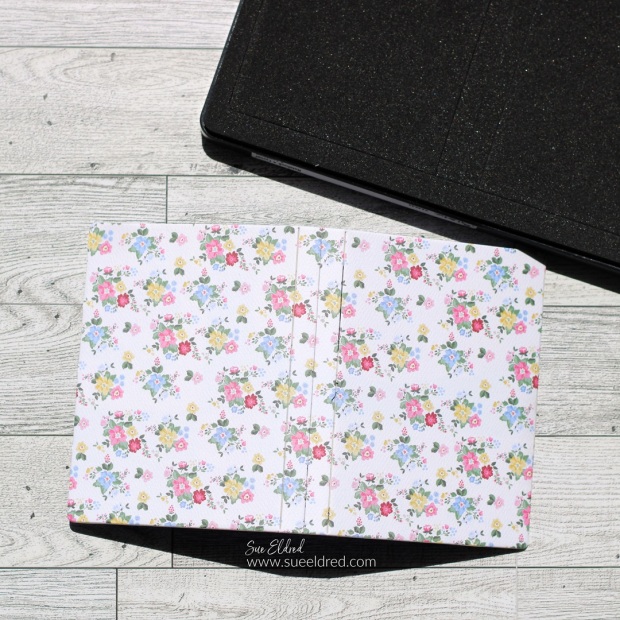
  • The notebook die creases the center of mat board as it goes through the Big Shot Die Cutting Machine* making it easy to fold the cover for your mini album.
Summer Bloom Mini Album-Sue's Creative Workshop www.sueeldred.com 4734

  • Cut a 2 1/4″ x 5″ strip of decorative paper to use for the spine and run it through the Xyron Creative Station*.  Adhere the strip to the spine of the book.
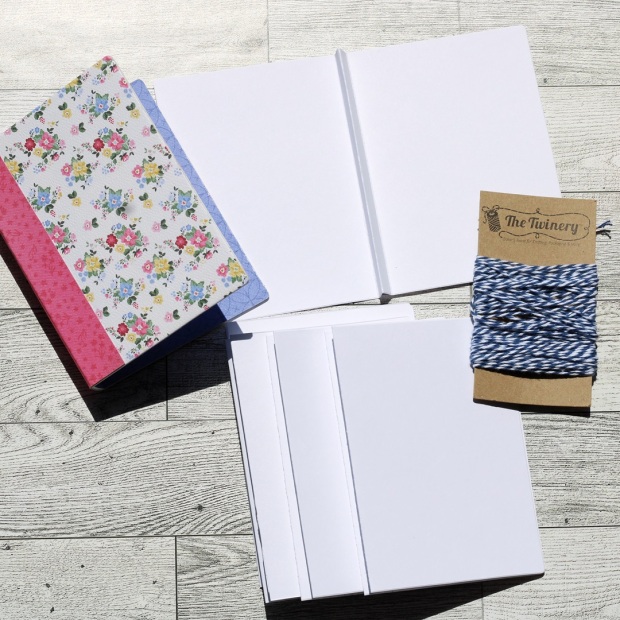
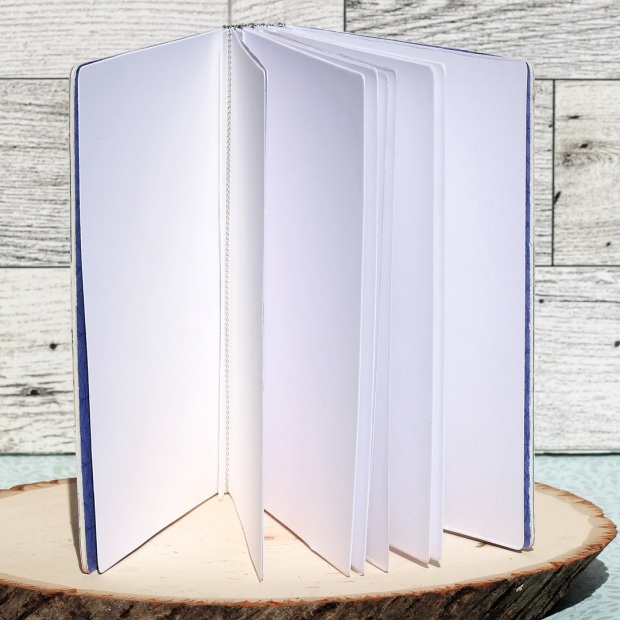
  • Cut 5 cardstock pages using the notebook die.
  • Crease the cardstock on the center score lines.
Summer Bloom Mini Album

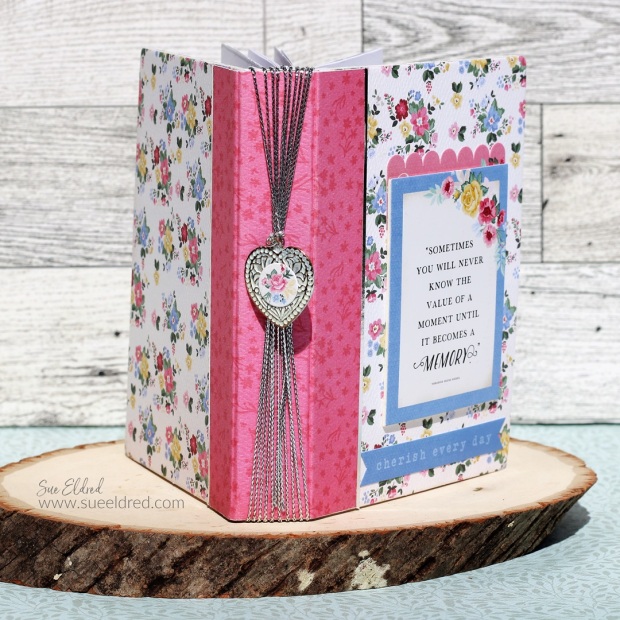
  • Wrap the twine around the inside creases and around the outside of the book cover to secure the pages.
  • FYI…I wanted this Mini Album to be all about the pictures, so I kept the pages white. There are no fancy embellishments or special pages inside this album.
Summer Bloom Mini Album-Sue's Creative Workshop www.sueeldred.com 4776

  • After I had all my pages together, I tied the pieces of twine together in one knot on the spine and added a small metal heart charm.   I placed a small floral sticker from the Bloom Collection* to the center of the heart.
  • As an afterthought, after I took the above pictures, I added Sizzix Effects™ Liquid Gloss* over the heart. The Liquid Gloss gives the heart a clear domed look and will seal in the sticker.
Summer Bloom Mini Album

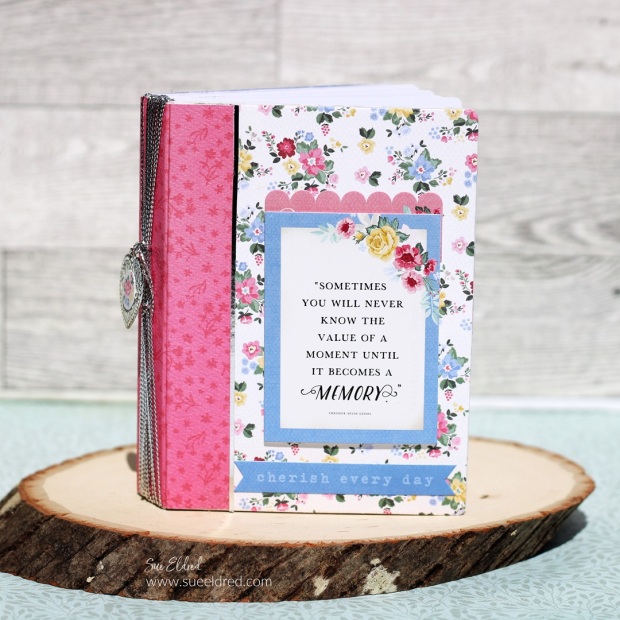
  • Decorate the front of the album with Stickers from the Bloom Collection*.
  • For added dimension, place the sticker on a small piece of matboard.

Eileen Hull Educator Logo

Disclosure:  This is a sponsored post.  As a member of the Eileen Hull Educator Team, I have been provided product in exchange for my creative ideas.  The view and opinions are my own. 

Spring Quilt Cards

Spring Quilt Cards

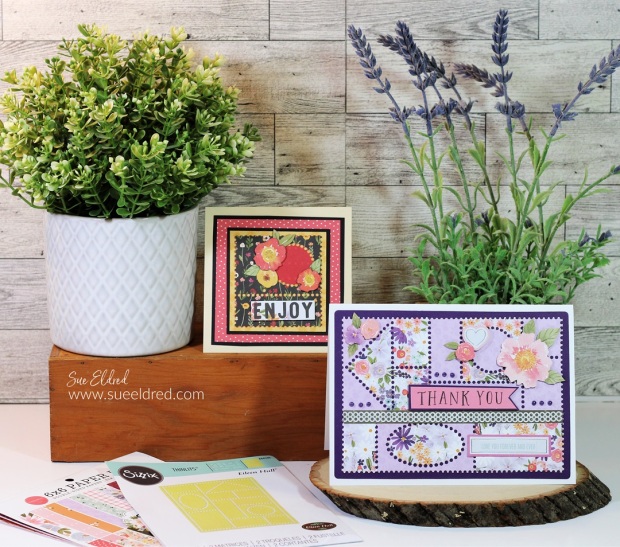
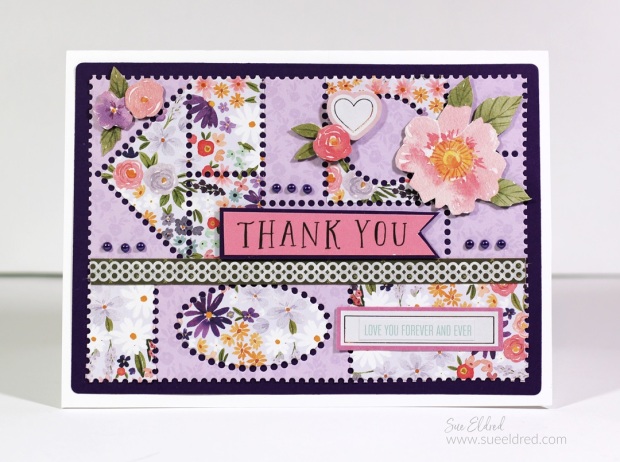
Spring Quilt Cards made with Eileen Hull’s Faux Postage Die from Sizzix.

Over the weekend, I decided to make a couple of floral Spring cards using the New Faux Postage Die from Eileen Hull*.

I know the dies are perfect for making little faux postage stamps.

But, I like to think of the pieces like a quilt.

It’s all good no matter how you use the die.

Eileen Hull Educator Logo

Disclosure:  This is a sponsored post.  As a member of the Eileen Hull Educator Team, I have been provided product in exchange for my creative ideas.  The view and opinions are my own. 

Spring Quilt Cards

Materials Used:  (*affiliate links)

*Disclosure:  This blog uses ads and affiliate links.  If you choose to make a purchase using one of the links, I receive a small commission (at no additional cost to you) that helps offset the costs of maintaining this blog.  Thanks for your support!

Spring Quilt Cards

The Thank You Card reminds me a sweet floral quilt for a little girl’s bed.

It really is easy to find coordinating paper when using a paper pad.

I cut out flowers from one of the large floral-patterned papers.

To make them dimensional, I added Thin 3D Foam Squares*

underneath the flowers.

Spring Quilt Cards

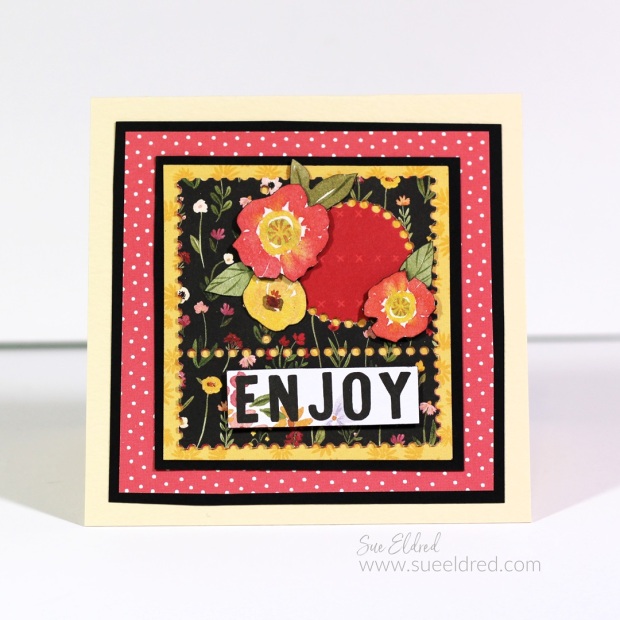
Would you believe the paper for the Enjoy Card was from the same floral paper pad.

I die-cut the black floral paper using the faux postage die.

I used one small section from the die-cut paper to create my card.

I again “fussy cut” a few flowers to put on the front of the card.

After adding several layers, my card measured 4 1/4″ x 4 1/4″,

the perfect size for putting into a A2 envelope*.

Sizzix Cantilever Jewelry Box

Sizzix Cantilever Jewelry Box

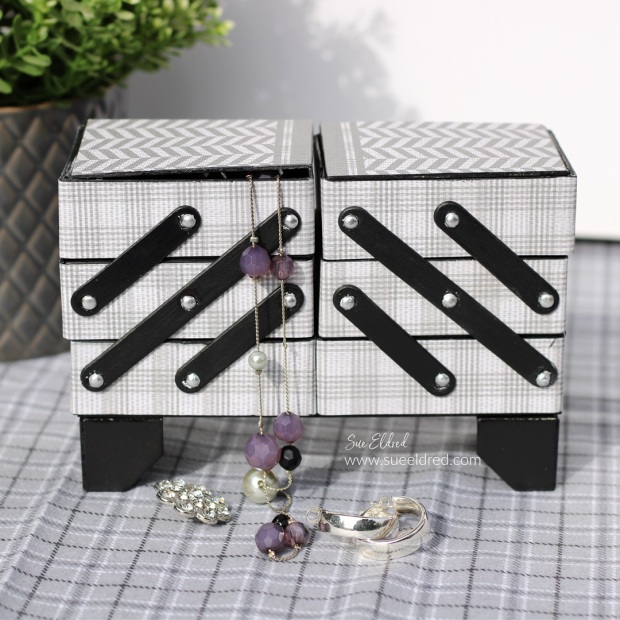
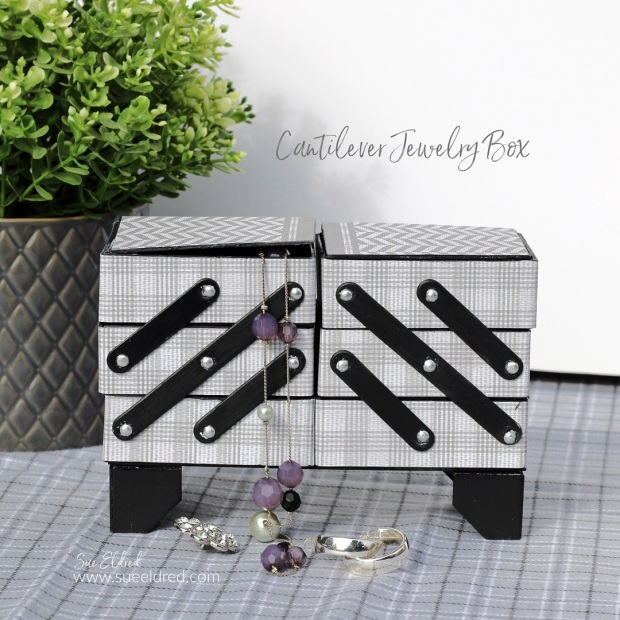
Cantilever Jewelry Box

Last month, Sizzix reintroduced a few older “classic” dies,

including the Cantilever Box Die*.

I promised I’d make one, and I finally made a Cantilever box

using the Cantilever Die by Eileen Hull*.

Instead of making a sewing box, I made mine into a jewelry box.

*Disclosure:  This blog uses ads and affiliate links.  If you choose to make a purchase using one of the links, I receive a small commission (at no additional cost to you) that helps offset the costs of maintaining this blog.  Thanks for your support!

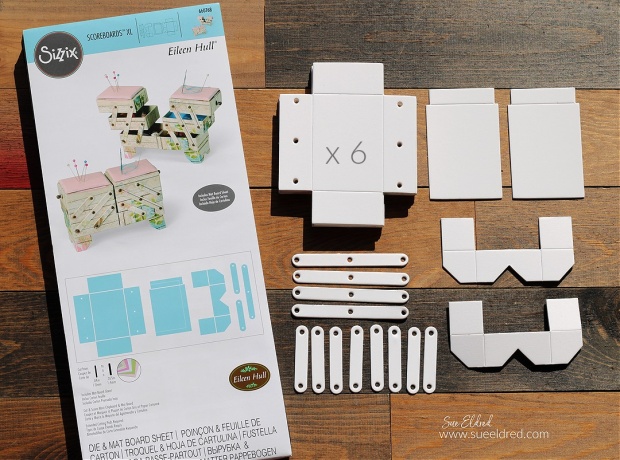
Sizzix Canteliveer Box Die

Putting it all together…

  • Included on the back of the die-cut packaging are image directions on how to assemble the box.
  • Cut out the pieces as show in the picture above.
  • I used three sheets of the Sizzix Making Essentials Matboard* to die-cut all the pieces used to make the Cantilever Jewelry Box.

Materials Used:  (*affiliate links)

Sizzix Cantilever Jewelry Box

  • I painted all my die-cut pieces with Black Multi-Surface Acrylic Paint*.  I did that before gluing.
  • The instructions on the box showed using a hot glue gun to assemble the boxes. Eileen told me she uses Zip Dry Adhesive* and rubber bands to assemble the boxes. I wasn’t a big fan of using the hot glue gun and will definitely try the Zip Dry Adhesive* the next time.

Sizzix Cantilever Jewelry Box

  • I cut 1″ strips of a single-sided grey plaid paper and ran them through the Xyron 3″ Disposable Sticker Maker* to add adhesive to the back of the strips.
  • I carefully added the strips around the edges of each box.  Since the paper I used was single-sided, it was easy to cover the boxes.
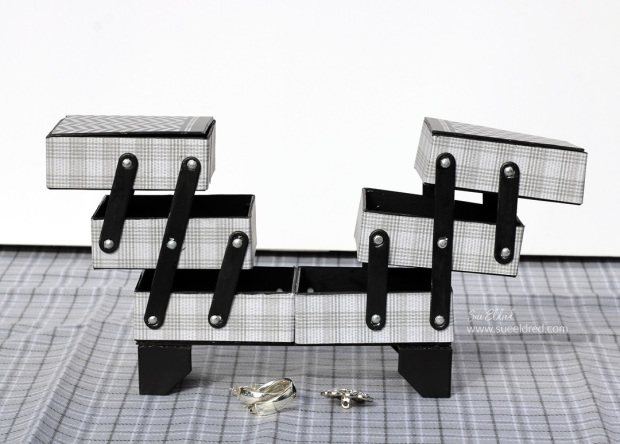
  • Once all the boxes were assembled, putting the cantilever box together wasn’t too hard.
  • For added stability, I glued the bottom two boxes together.  I also added a 2″ x 6″ piece of black painted matboard to the bottom before adding the feet.

Eileen Hull Educator Logo

Disclosure:  This is a sponsored post.  As a member of the Eileen Hull Educator Team, I have been provided product in exchange for my creative ideas.  The view and opinions are my own. 
My Nutty Valentine

My Nutty Valentine

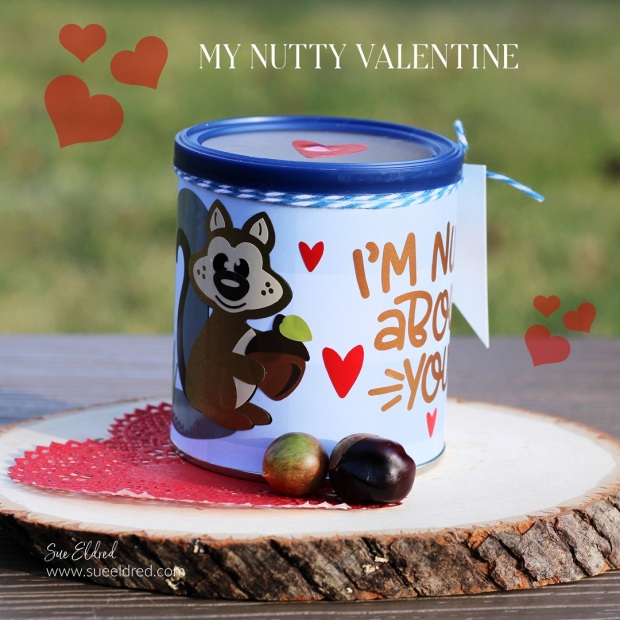
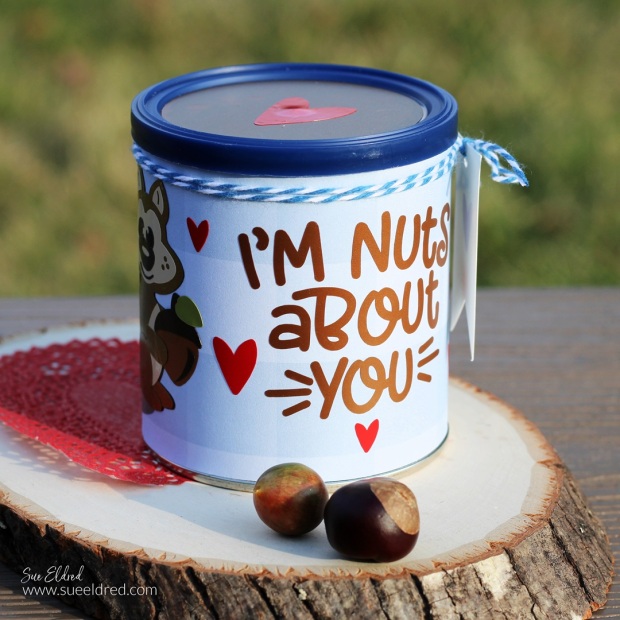
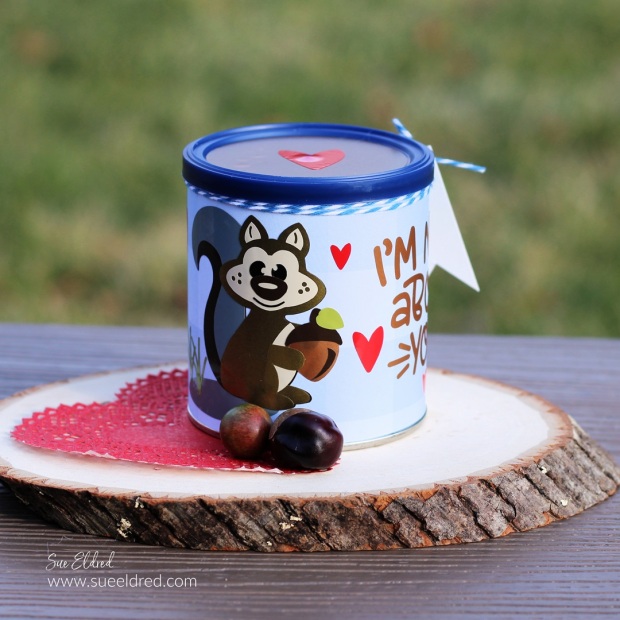
My Nutty Valentine is fun spin on the traditional Valentine’s Day gift. 

It’s for people like me that are not mushy Valentine’s Day gift-givers.

My Nutty Valentine

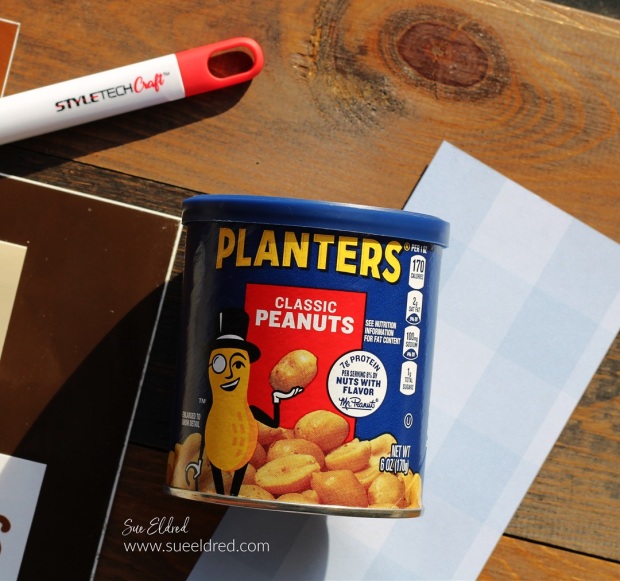
My inspiration came from a small can of peanuts* that I found at Dollar Tree*.

My husband is a peanut-loving guy who I’m nuts about.

So, I thought I would make something fun with a can of peanuts*.

*Disclosure:  This blog uses ads and affiliate links.  If you choose to make a purchase using one of the links, I receive a small commission (at no additional cost to you) that helps offset the costs of maintaining this blog.  Thanks for your support!

My Nutty Valentine

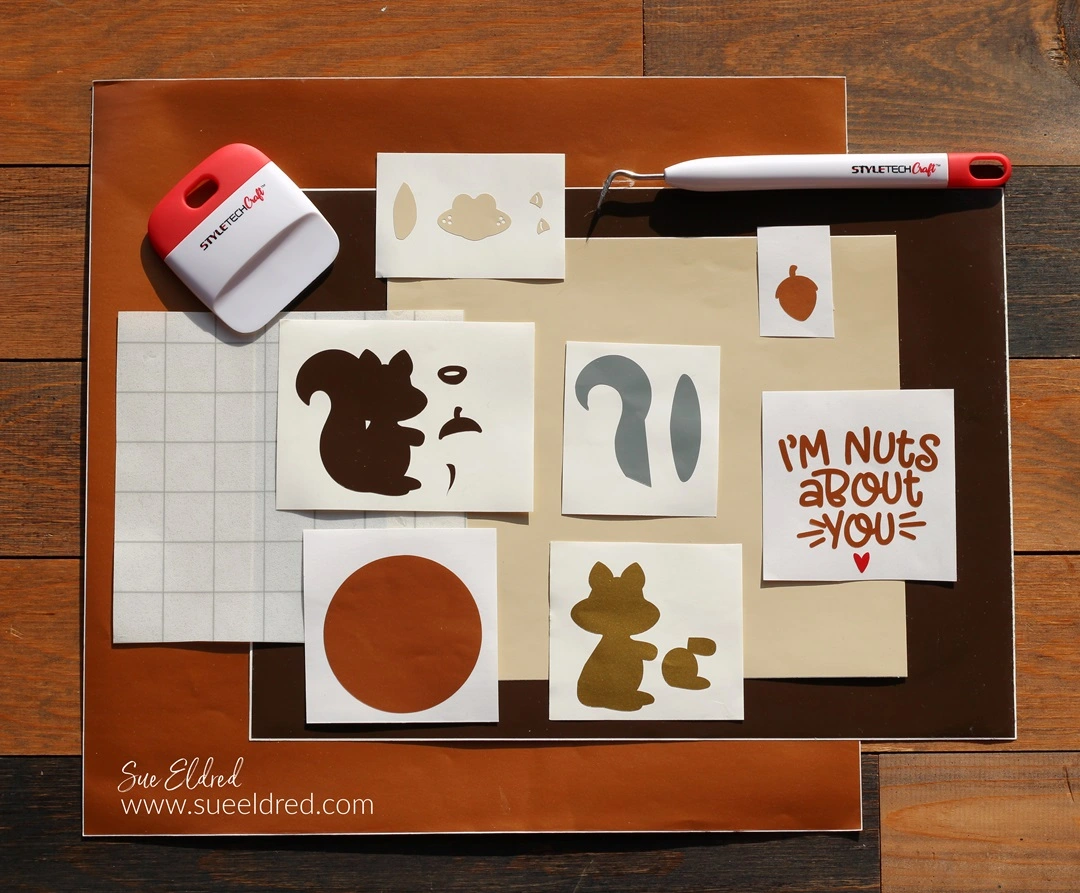
Materials Used:  (*affiliate links)

StyletechCraft products brought to you by ATSM Craft*

My Nutty Valentine

Directions:

My Nutty Valentine-Sue's Creative Workshop www.sueeldred.com 3764

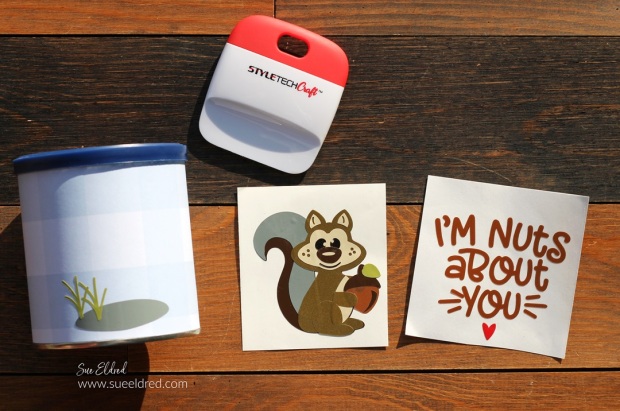
  • Cut a strip of decorative scrapbook paper to fit around the peanut can.
  • Adhere the paper to the can using a double-stick tape roller*.

My Nutty Valentine-Sue's Creative Workshop www.sueeldred.com 3765

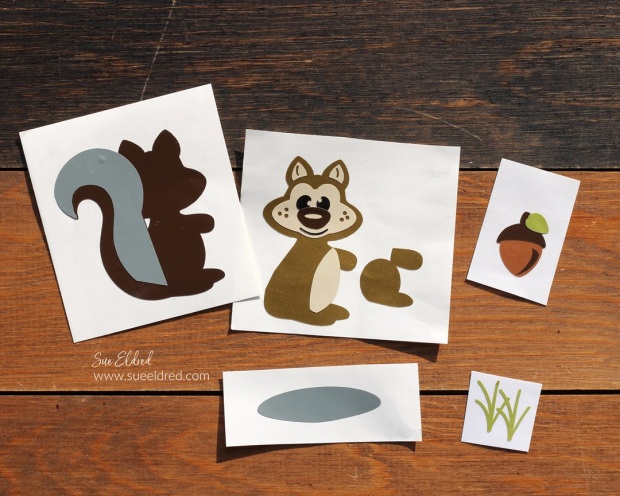
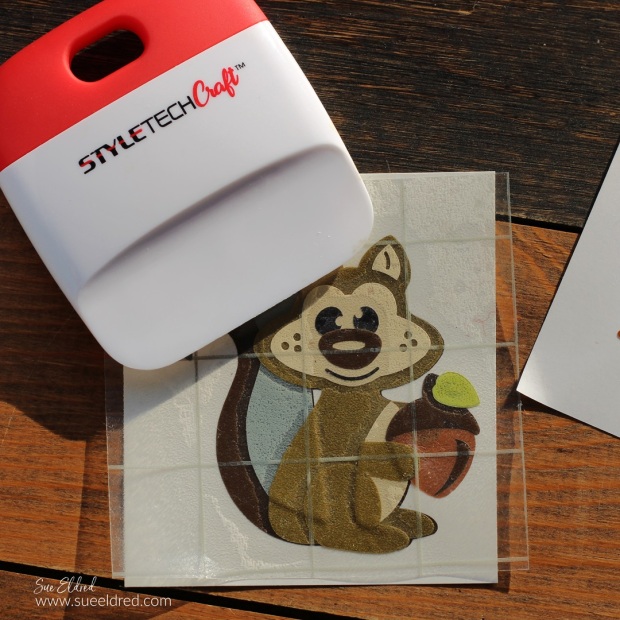
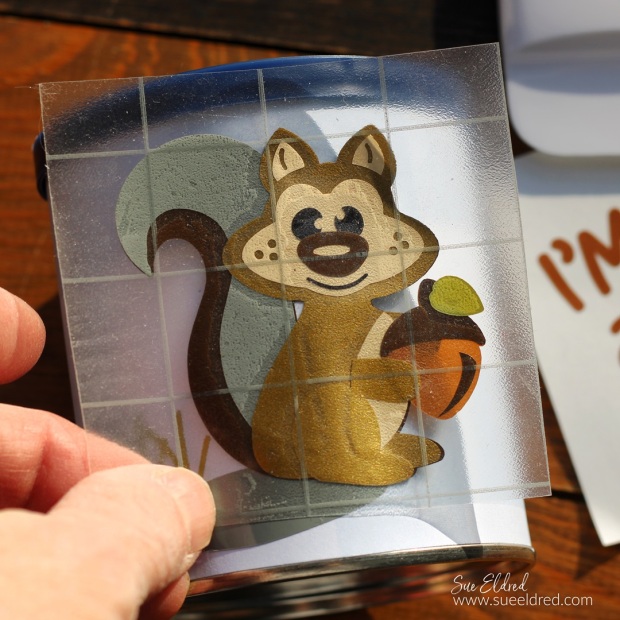
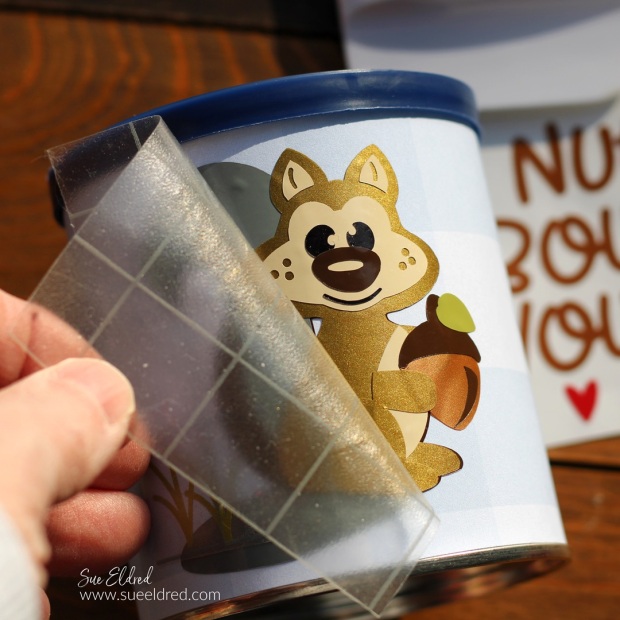
  • Lay the Transfer paper over the vinyl and gently rub with a vinyl scraper tool.

My Nutty Valentine-Sue's Creative Workshop www.sueeldred.com 3778

My Nutty Valentine-Sue's Creative Workshop www.sueeldred.com 3782

My Nutty Valentine

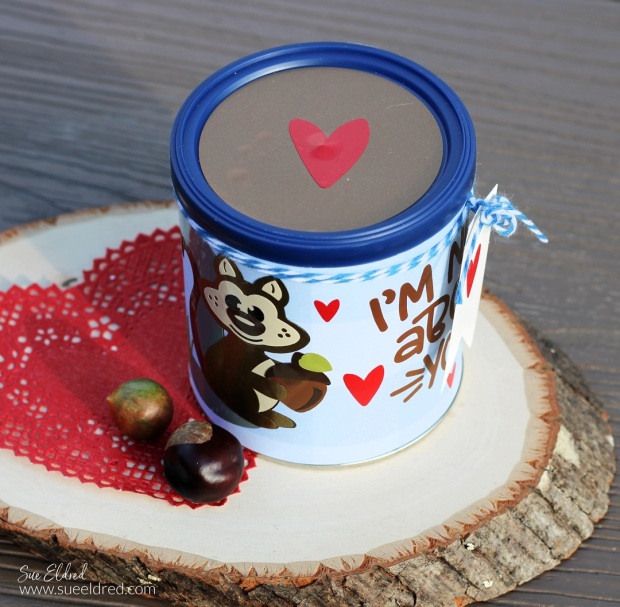
  • Don’t forget to decorate the top of the can.
  • I cut a 3″ circle from bronze vinyl and adhered it and a small red heart to the top of the can.

My Nutty Valentine

  • Wrap Blue and White Twine* around the top of the can and add a small white tag.
  • And just so my husband knows, I added “I’m Nut’s About You” on the side of the can.

My Nutty Valentine

A Cute Alternative to the Traditional Valentine’s Gift. 

“This is a sponsored post.  As a member of the StyleTechCraft Design Team I have been provided product and compensation in exchange for my creative ideas.  The views and opinions are my own.

Top 3 Favorite Projects for 2023

Eileen Hull & Sizzix Top 3 Projects of 2023

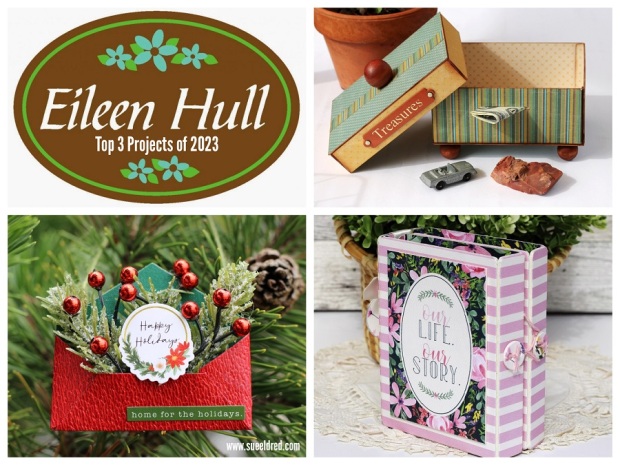
My top 3 Favorite Sizzix/Eileen project of 2023

Every year the Eileen Hull Teams are asked to pick our three

favorites Sizzix/Eileen Hull projects for the year.

Generally, they’re all my favorites, but these are my top favorites.

(Click on the pictures or links below ↓ to go to the original post with all the details.)

New Chapter 3 Dies from Sizzix and Eileen Hull

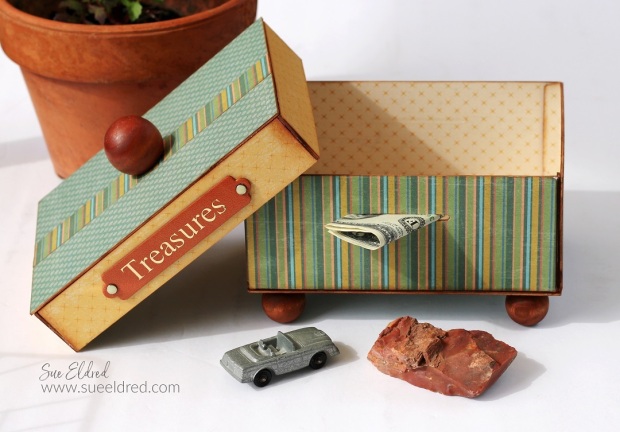
The Treasure Box

The Treasure Box is made with Eileen’s Slotted Treat Box Die* from the New Chapter 3 Dies that were released earlier this year.  I reached into my hoarded stash of paper to make this vintage style box.

It’s a great size for holding special treasures.

You can read more about this project here.

*Disclosure:  This blog uses ads and affiliate links.  If you choose to make a purchase using one of the links, I receive a small commission (at no additional cost to you) that helps offset the costs of maintaining this blog.  Thanks for your support!

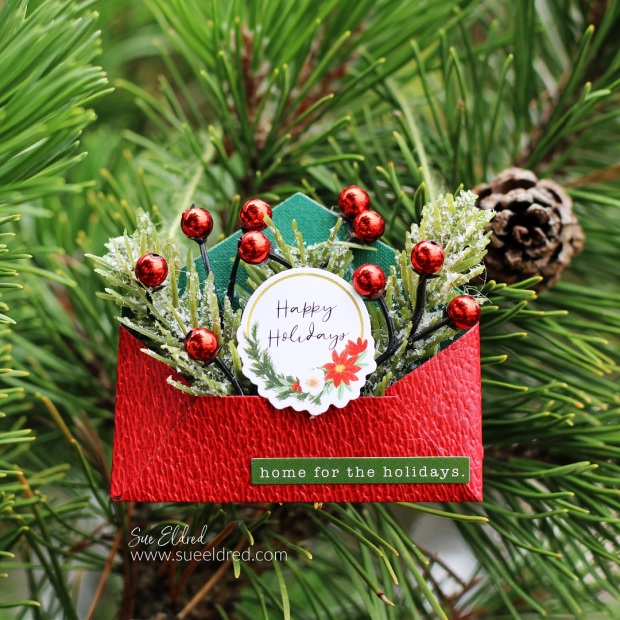
Mini Pocket of Cheer Christmas Ornament

Mini Christmas Envelope

Holiday Projects are always my favorite projects.

This one uses Eileens Envelope, Folder & Flowers Thinlet Die Set* from Sizzix.

You can see the project tutorial here.

Our Life Our Story Folio Album

Our Life Our Story Mini Album

This little album uses Eileen’s Card Case Die by Sizzix*.  

It is a fun little album with sturdy chipboard pockets perfect

for inserting small notebooks or cards.

You can read more about this project here.

Make sure to “Follow Me” for fun Eileen Hull/Sizzix projects in 2024.

Eileen Hull Educator Logo

Disclosure:  This is a sponsored post.  As a member of the Eileen Hull Educator Team, I have been provided product in exchange for my creative ideas.  The view and opinions are my own. 

Christmas Quilt Card

Christmas Quilt Card

Christmas Quilt Card

Have you finished sending out your Christmas Cards yet?

I’m close to being done, but if you’re not, here’s a last-minute

card using Eileen Hull’s Mini Slimline & Tickets Die Set by Sizzix*

Christmas Quilt Card

Materials Used:  (*affiliate links)

*Disclosure:  This blog uses ads and affiliate links.  If you choose to make a purchase using one of the links, I receive a small commission (at no additional cost to you) that helps offset the costs of maintaining this blog.  Thanks for your support!

Christmas Quilt Card

  • I know the pieces of the die are technically tickets.  I think when it’s all assembled, it looks like a quilt.  (so there you have it!)
  • I used paper from the “Happy Christmas” Paper Pad* to cut three bases. 

Christmas Quilt Card

  • I adhered one base to the die-cut layer.  The others, I cut apart. I used those to create a patchwork base.

Christmas Quilt Card

  • I used stickers from the Happy Christmas Sticker Book* to embellish the front of the card.  
  • Here’s a simple tip I learned from a class I took from Mrs Grossman (of Mrs. Grossman Sticker Company) many years ago. To make stickers die-cuts, brush baby powder on the back to remove the stickiness.

Christmas Quilt Card

The Slimline Ticket die would make a great card for any occasion.

Eileen Hull Educator Logo

Disclosure:  This is a sponsored post.  As a member of the Eileen Hull Educator Team, I have been provided product in exchange for my creative ideas.  The view and opinions are my own. 
Santa’s Letter Box

Santa's Letter Box using Sizzix Slotted Box die

Create a Holiday Mailbox for letters to Santa using the Sizzix Slotted Treat Box Die by Eileen Hull*.

A fun project to make for Christmas!

Santa's Letter Box using Sizzix Slotted Box die by Eileen Hull.

To say I have a lot of Holiday Scrapbook paper would be a understatement!

Paper crafters have a tendency to “save” their special scrapbook paper

for just the right project.

We also have a tendency to hoard said special paper.

Santa's Letter Box using Sizzix Slotted Box die by Eileen Hull.

Sometimes its fun to use what you have on hand.

I dug deep into my hoarded Graphic 45 Christmas Scrapbook paper

to make the Santa Letter Box.

One of my favorite tips…

  • Before I die-cut the mat board, I like to use the Xyron Creative Station* to add adhesive to the back of the paper.  It gives the paper a complete layer of adhesive with no bubbles.  It really is easy to use.

*Disclosure:  This blog uses ads and affiliate links.  If you choose to make a purchase using one of the links, I receive a small commission (at no additional cost to you) that helps offset the costs of maintaining this blog.  Thanks for your support!

Santa's Letter Box

When making the Santa Letter Box…

  • I adapted the box by adding 1″ strips of matboard* around the existing box lid. The extra strips allowed the box to have a lip that fits over the edge of the box.

Santa's Letter Box

  • I added three additional layers of graduated sized matboard to the lid for dimension using foam tape.
  • I glued thrifted gold cording around each layer to cover the Foam Tape*.
  • A wood knob painted red completes the lid.

Santa's Letter Box

For the base of the letter box, I used an old metal lamp base. 

(At least, that’s what I think it is.)

We found it in my Dad’s garage while cleaning it out a few years ago.

It’s fun to use old things in unusual ways.

Santa's Letter Box

The Santa Letter Box adds a little Christmas Magic to your Holiday Decorating.  

Materials Used:  (*affiliate links)

Eileen Hull Educator Logo

Disclosure:  This is a sponsored post.  As a member of the Eileen Hull Educator Team, I have been provided product in exchange for my creative ideas.  The view and opinions are my own. 
How to Create a “Merry” Holiday Banner

How to Create a Merry Holiday Banner

How to make a “Merry” Banner to add to your Holiday Decorations.

Now that the weather has turned cooler, I’m starting to plan my Holiday decorating.

If you love banners and quick and easy projects, this one’s for you.

How to Create a Merry Holiday Banner

Materials Used:  (*affiliate links)

*Disclosure:  This blog uses ads and affiliate links.  If you choose to make a purchase using one of the links, I receive a small commission (at no additional cost to you) that helps offset the costs of maintaining this blog.  Thanks for your support!

StyletechCraft products brought to you by ATSM Craft*

How to Create a Merry Holiday Banner

Directions:

  • Cut the scrapbook paper slightly larger than the wood banner pieces.
  • Place the scrapbook paper design side up in the Xyron Creative Station®*

How to Create a Merry Holiday Banner

  • Turn the handle of the Creative Station to run the paper through.  As it runs through, it adds complete adhesive covering on the underneath side of the paper.

How to Create a Merry Holiday Banner

How to Create a Merry Holiday Banner

How to Create a Merry Holiday Banner

  • Lay the Transfer paper over the vinyl and gently rub with a vinyl scraper tool.

How to Create a Merry Holiday Banner

How to Create a Merry Holiday Banner

  • Paint the wood beads with red and green acrylic paint.
  • String the banner and wood beads onto ribbon or twine.

I wanted to keep the banner pieces simple. 

But you could add Holiday Flowers and embellishments to make it special.

“This is a sponsored post.  As a member of the StyleTechCraft Design Team I have been provided product and compensation in exchange for my creative ideas.  The views and opinions are my own.

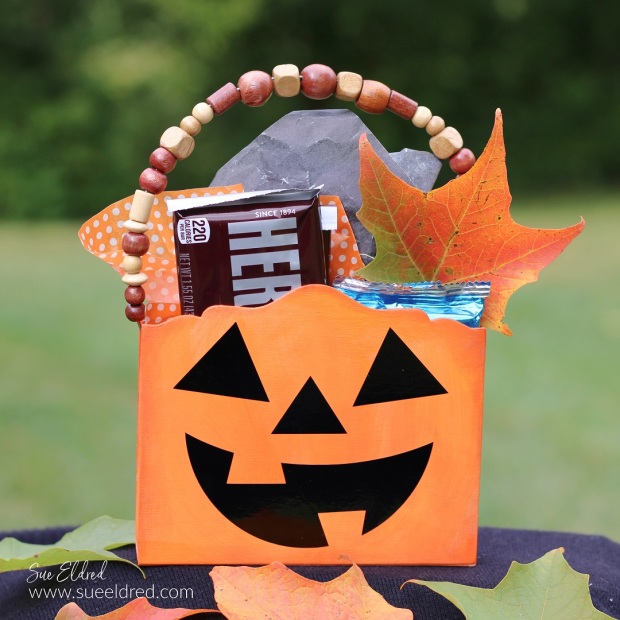
Make a Pumpkin Treat Box for your Favorite Trick or Treaters

How to make a Pumpkin Treat Box

How to make a Pumpkin Gift Box

using the XL Card Caddy Die* from Sizzix and Eileen Hull.

It’s a fun little Halloween Treat Box for your favorite Trick or Treaters.

Eileen Hull Educator Logo

Disclosure:  This is a sponsored post.  As a member of the Eileen Hull Educator Team, I have been provided product in exchange for my creative ideas.  The view and opinions are my own. 

How to make a Pumpkin Gift Box

Materials Used:       (*affiliate links)

*Disclosure:  This blog uses ads and affiliate links.  If you choose to make a purchase using one of the links, I receive a small commission (at no additional cost to you) that helps offset the costs of maintaining this blog.  Thanks for your support!

How to make a Pumpkin Gift Box using the XL Card Caddy Die from Sizzix and Eileen Hull.

Directions:

How to make a Pumpkin Gift Box using the XL Card Caddy Die from Sizzix and Eileen Hull.

StyletechCraft products brought to you by ATSM Craft*

How to make a Pumpkin Gift Box using the XL Card Caddy Die from Sizzix and Eileen Hull.

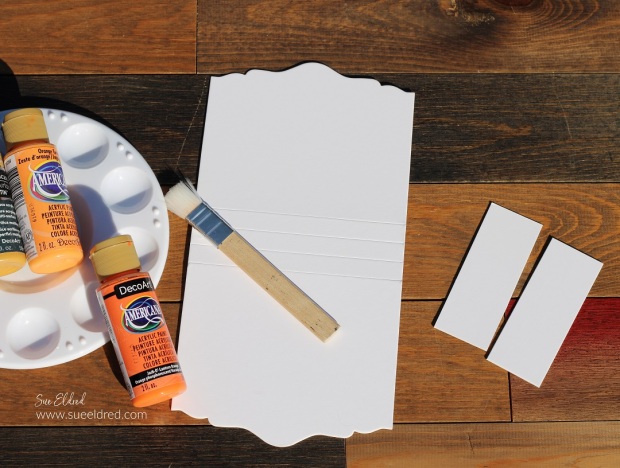
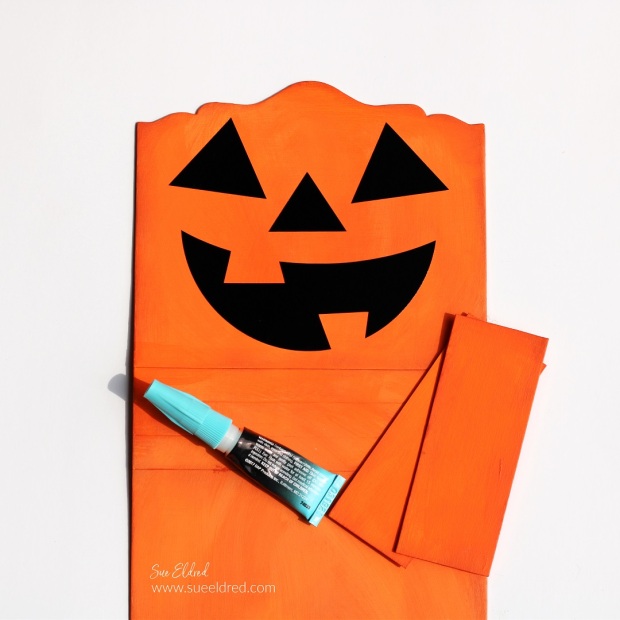
  • Adhere the sides to the card caddy base using Rapid Fuse Adhesive*.  The Die comes with scored side pieces that are perfect for putting the box together.  I wasn’t thinking and cut two pieces of matboard for my sides.  Both will work.  (the one that comes with the die would have been a lot easier)

How to make a Pumpkin Treat Box-Sue's Creative Workshop www.sueeldred.com 2459

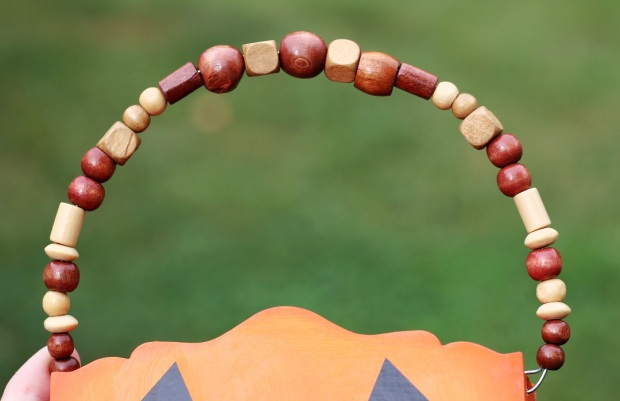
  • Create a handle for the pumpkin treat box using wire and small wood beads.
  • Punch a hole on both sides of the box and attach the handle.

How to make a Shaker Tag

How to make a Shaker Tag

Make a Shaker Tag using the Specimen Card

from the Eileen Hull New Field Notes Die from Sizzix.

Last month, we shared projects using Eileen’s New Chapter 3 release dies.

Today I thought I’d share a simple tutorial on how to make a Shaker Tag

using the Field Notes & Specimen Card Die*.

Eileen Hull Educator Logo

Disclosure:  This is a sponsored post.  As a member of the Eileen Hull Educator Team, I have been provided product in exchange for my creative ideas.  The view and opinions are my own. 
How to make a Shaker Tag

Materials Used to make the Shaker Tag:  (*affiliate links)

*Disclosure:  This blog uses ads and affiliate links.  If you choose to make a purchase using one of the links, I receive a small commission (at no additional cost to you) that helps offset the costs of maintaining this blog.  Thanks for your support!

How to make a Shaker Tag

Directions:

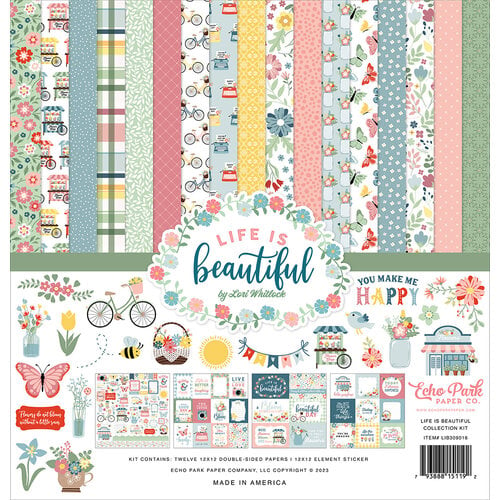
  • I used the Life is Beautiful Collection Kit*.  It comes with beautiful papers, greetings, and stickers perfect for my tag.
  • Cut a 4″ x 5″ piece of scrapbook paper for the front of the tag.
  • For ease of assembly, I used the Xyron Creative Station* to add adhesive onto the back of the paper.  Place the paper in the machine, crank the handle to run the paper through.  As it goes through the machine it adds a complete layer of adhesive to the back of the paper.

How to make a Shaker Tag

  • Place the paper onto the Specimen Card* section of the die.  Sandwich the die between the cutting plates.  Crank the handle of the Big Shot Plus* to run it through to cut out the shape.

How to make a Shaker Tag

How to make a Shaker Tag

  • Place the paper for the inside of the tag onto the chipboard tag. Add adhesive to the small rectangle and place into the opening on the back.
  • Remove the protective coating from both sides of the small piece of acetate.
  • Remove the adhesive coating from the tag front. Place the acetate over the inside opening of the tag.
  • Remove the first protective coating from foam tag. Line up and place onto the tag front.
  • Place sequins in the small well the foam has created. Remove the second protective coating from the foam and place the back of the tag onto the foam.

How to make a Shaker Tag

  • Decorate the front of the tag using stickers from the collection kit.  Add 3D adhesive foam squares* to the back of the butterfly and watering can.
  • Tie a simple ribbon on the top of the tag.
  • Add the tag to a gift or bag for the perfect addition.