Top 3 Favorite Projects for 2022

Top 3 Favorite Eileen Hull Projects for 2022

My Top 3 Sizzix/Eileen Hull Paper Crafting Projects.

Every year the Eileen Hull Teams are asked to pick our three favorites Sizzix/Eileen Hull projects

for 2022.  Generally, they’re all my favorites, but these are my top favorites.

(Click on the pictures or links below ↓ to go to the original post with all the details.)

Mae's Treasure Box made using Eileen Hull Sizzix XL Scoreboard Book Box Die

Mae’s Treasure Box

This year I finally got a granddaughter.

Mae is one of the sweetest, happiest, mellowest babies I have ever met.

I love her to pieces. She has the best little smile.

Mae’s Treasure Box is a little box that her mom can slip into the top drawer

of her dresser and add all the little snippets of babyhood that she wants to save.

The “treasure box” was made using Eileen Hull’s Book Box Die*.

You can see the full project details here.

*Disclosure:  This blog uses ads and affiliate links.  If you choose to make a purchase using one of the links, I receive a small commission (at no additional cost to you) that helps offset the costs of maintaining this blog.  Thanks for your support!

Faux Stone Geometric Box

Faux Stone Geometric Box

The Faux Stone Box is one of my favorites because it’s different than most projects I do.

And it’s one of those projects I had an idea for before I made it,

and it turned out just how I envisioned.

The Faux Stone Geometric Box was made with Eileen Hull’s Geometric Box Die by Sizzix*,

Sizzix Matboard* and Deco Arts Dimensional Effects Texture Paste*.

You can see the full project details here.

Home for Christmas Mini Album

Home for Christmas Mini Album

Holiday Crafting is my favorite time of year to craft so it’s no surprise to find a Christmas project

in my top three. This was a fairly simple little album to make.

I used the Sizzix Notepad Scoreboard Die by Eileen Hull*

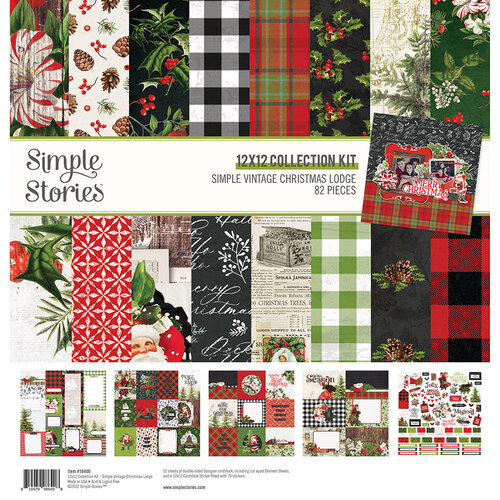
and paper from Simple Stories Simple Vintage Christmas Lodge Collection*.

It’s the perfect little album for adding a few of your favorite Holiday Pictures and Memories.

You can see the full project details here.

Eileen Hull Educator Logo

Disclosure:  This is a sponsored post.  As a member of the Eileen Hull Educator Team, I have been provided product in exchange for my creative ideas.  The view and opinions are my own. 

Christmas Mason Jar Shaker Tags

Christmas Mason Jar Shaker Tags

I’m shaking up the Holidays with some cute Christmas Mason Jar Shaker Tags.

These little Mason Jar Dies from The Maker’s Movement make the cutest

Mason Jar Shaker Tags.

And…If you’re a paper crafter like me,

you probably have a lot of special Christmas Paper scraps.

(You know, the ones you can’t throw away.)

The Mason Jar Shaker Tag is a great project to use up those bits and pieces

from “Christmas Paper Past”.  That’s what I did!

Christmas Mason Jar Shaker Tags

Materials Used for the Christmas Mason Jar Shaker Tags:  (*affiliate link)

  • M13583 Nested Shaker Jars Die Set
  • Mini Maker Die Cutting Machine*
  • Clear Acetate
  • Double Sided Adhesive Craft Foam
  • Shaker Sprinkles
  • Scrapbook Paper
  • Xyron Create a Sticker Mini*
  • Twine
  • Christmas Embellishments

*Disclosure:  This blog uses ads and affiliate links.  If you choose to make a purchase using one of the links, I receive a small commission (at no additional cost to you) that helps offset the costs of maintaining this blog.  Thanks for your support!

How to make a Halloween Shaker Tag

These Mason Jar Shaker Tags aren’t just for Christmas.

Click here for my Halloween Tags.

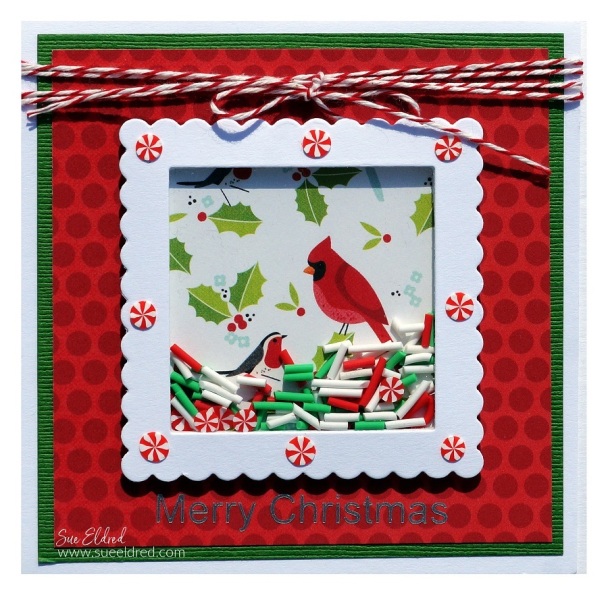
Cardinal Shaker Card

Shaker Sprinkles are great for making Shaker Cards.

Here’s a bonus…The Cardinal Shaker Card is a project from last year’s Holiday Workshop that I never shared.

Maker's Movement

Disclosure:  This is a sponsored post for The Maker’s Movement*.  I have been provided product and compensation in exchange for my creative ideas.  The view and opinions are my own.

Handmade Holiday Tags made with Cork

Making Holiday Tags using Cork

Make your Gifts Special with Handmade Holiday Tags made with Sizzix Cork Sheets*.

If you’ve been here before, you know I love experimenting with new materials.

So, when Sizzix offered to send me some rolls of their cork sheets, I gladly accepted.

(I especially love the way it looks on kraft-colored wrapping paper.)

Disclosure:  This is a sponsored post.  I have been provided product in exchange for my creative ideas.  The view and opinions are my own. 

Making Holiday Tags using Cork

Materials Used:  (*affiliate links)

*Disclosure:  This blog uses ads and affiliate links.  If you choose to make a purchase using one of the links, I receive a small commission (at no additional cost to you) that helps offset the costs of maintaining this blog.  Thanks for your support!

Making Holiday Tags using Cork

With the help of my sewing machine and a few of my favorite Eileen Hull dies.

Making the tags was fairly easy to do.

Making Holiday Tags using Cork

Stitched Snowflake Tag

  • I die-cut the tags using the large tag die from the Tags Die Set*.
  • I sewed the tags together using a sewing machine with silver thread
  • Die-cut a paper snowflake.  Sew the Snowflake and white pom-pom trim onto the tag.

Making Holiday Tags using Cork

Fun and Festive Reindeer Tag

  • The reindeer tag uses a small wood reindeer that I painted silver.
  • Glue the reindeer and bow onto the front of the tag.
  • The word stickers on the reindeer and snowflake tags are from the Simple Vintage Christmas Lodge Sticker Sheet*.
  • The deep red satin ribbon makes this tag feel special.

Making Holiday Tags using Cork.

Simple and Elegant Joy Tag

Simple greenery picked from a bush outside adds to the natural feel of this tag.

Up to 30% off Christmas Crafts

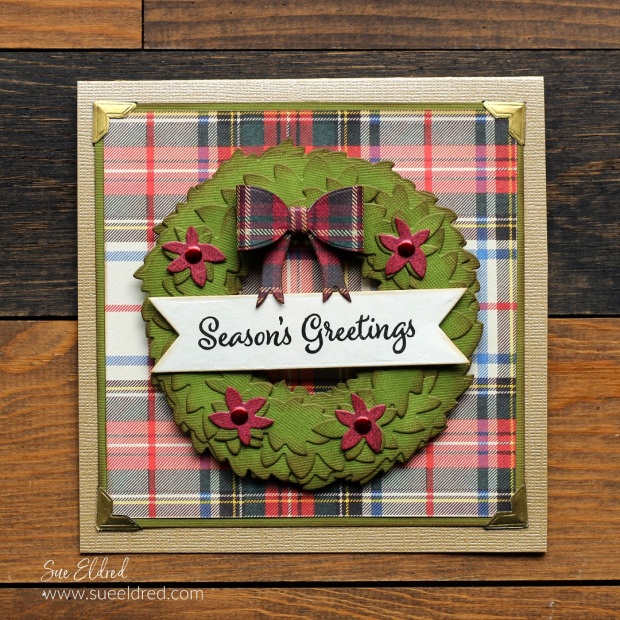
Inky Layered Christmas Wreath Card

How to make an Inky Layered Wreath Card

How to make an Inky Layered Christmas Wreath Card.

Sometimes when I’m making cards, I get the urge to get inky.

Some cards just call for it.  This card was one of those.

I summoned my inner “Tim Holtz” and inked my little heart out.  (It was fun!)

Maker's Movement

Disclosure:  This is a sponsored post for The Maker’s Movement.  I have been provided product and compensation in exchange for my creative ideas.  The view and opinions are my own. 

How to make an Inky Layered Wreath Card

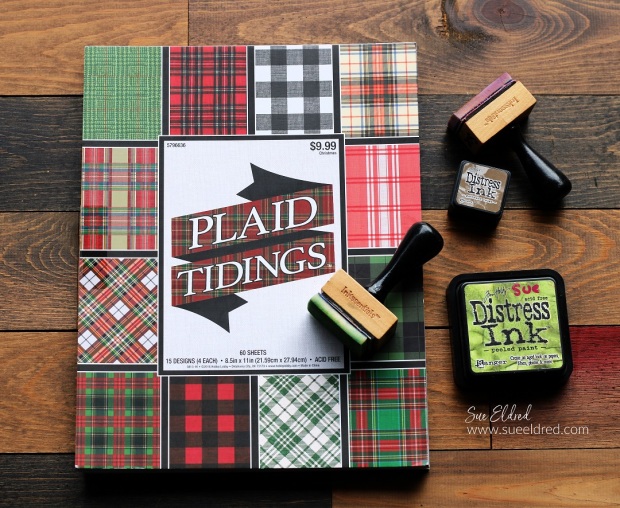
Materials Used: (*affiliate links)

*Disclosure:  This blog uses ads and affiliate links.  If you choose to make a purchase using one of the links, I receive a small commission (at no additional cost to you) that helps offset the costs of maintaining this blog.  Thanks for your support!

How to make an Inky Layered Christmas Wreath Card.

Directions:

  • Optional:  For easier assembly, I used the Xyron Creative Station* to add adhesive to the back of the cardstock before die-cutting.  (As the paper goes through the Xyron Creative Station*, it adds a complete layer of adhesive to the back.)
  • Die-cut the pieces for the wreath, as shown above, using the Wreath Die Set and green cardstock.
  • Die-cut the pieces for the bow using plaid scrapbook paper.
  • Using the Ink Blending Tool and Peeled Paint Distress Inkpad, generously ink all over the front of each die-cut piece.
  • Use the blending tool and Gathered Twigs and ink the edges only of the die-cut pieces.

How to make an Inky Layered Christmas Wreath Card.

  • Starting with larger die-cut wreath pieces, apply them to the wreath base.  Continue with the smaller wreath pieces.
  • Die-cut a cream banner using the banner die from the Snowflake Kisses stamp and die set. Stamp “Season’s Greeting” onto the banner using the Black Onyx Versafine Inkpad*. Put small foam dots on each side of the banner and place it centered on the wreath.
  • Create the bow by gluing the two outside edge pieces to the center of the back of the bow.  Wrap and glue the small rectangle piece around the center of the bow.  Glue bow to ribbon end piece.
  • Die-cut four small red wreath pieces to use as flowers for the wreath. Add a small Red Nail Head Sticker to the inside of each flower.

How to make an Inky Layered Christmas Wreath Card.

  • Cut layers to add onto a gold square card. My card measures 5 1/2″ x 5 1/2″.
  • To give the layers a worn look, ink the edges of each layer using Tim Holtz Gathered Twigs Distress Inkpad.
  • Place Gold Foiled Photo Corners* onto the edge of the layers and adhere them to the gold card.
  • Put foam dots onto the back of the wreath and adhere the wreath to the center of the card.

Home for Christmas Mini Album

Home for Christmas Mini Album

How to make a Holiday Mini Album…

I wanted to share with you a Simple little Christmas Album that I made for

the Eileen Hull Comfort & Joy Event over on Eileen’s Facebook Fan Page.

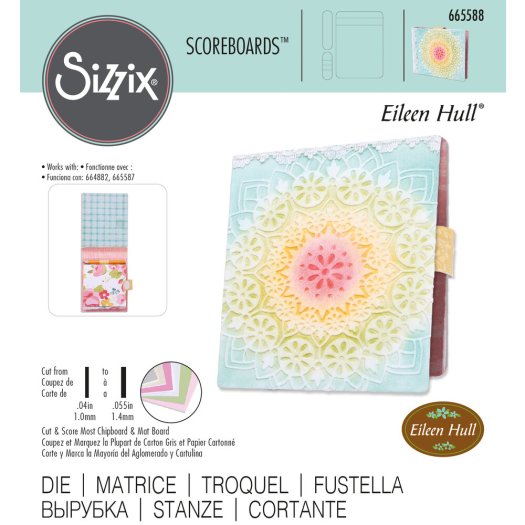
Sizzix Notepad Scoreboards Die by Eileen Hull

I used the Sizzix Notepad Scoreboard Die by Eileen Hull* and paper from

Simple Stories Simple Vintage Christmas Lodge Collection* to create the mini album.

Materials Used:  (*affiliate links)

*Disclosure:  This blog uses ads and affiliate links.  If you choose to make a purchase using one of the links, I receive a small commission (at no additional cost to you) that helps offset the costs of maintaining this blog.  Thanks for your support!

Home for Christmas Mini Album

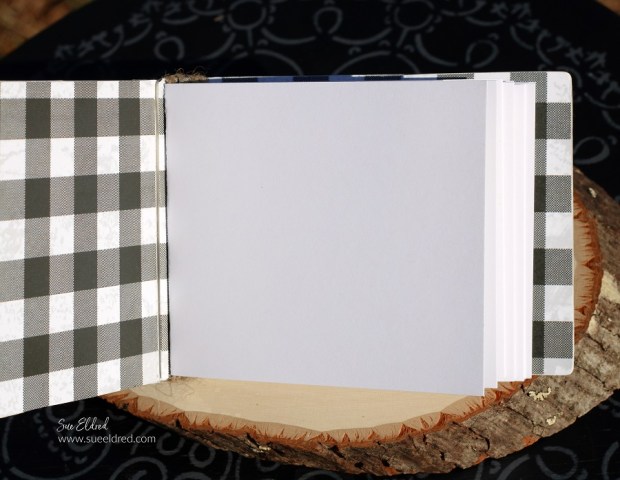
The album may be small, but it has plenty of room for Holiday pictures.

It measures approximately 3 1/2″ x 4 1/2″.

Home for Christmas Mini Album

Sue’s Tips for Making the Home for Christmas Mini Album:

  • I used the Xyron Creative Station* to add adhesive to the back of the paper before adhering it to the mat board and die-cutting the pieces to make the notepad.
  • I adhered the spine of the front and back cover using Rapid Fuse Adhesive*.
  • For the inside of the album, I created four small “signatures” to place inside the album.
  • To secure the “signatures” inside the album, wrap thin twine around the spine and the paper.

Home for Christmas Mini Album

Home for Christmas Mini Album

When it comes to family, Home is the best place to be.

Eileen Hull Educator Logo

Disclosure:  This is a sponsored post.  As a member of the Eileen Hull Educator Team, I have been provided product in exchange for my creative ideas.  The view and opinions are my own. 

Quick and Easy Stenciled Card

Quick & Easy Stenciled Card

How to make a Quick and Easy Stenciled Card. 

Just Add Ink!

Quick & Easy Stenciled Card

Materials Used:  (*affiliate links)

*Disclosure:  This blog uses ads and affiliate links.  If you choose to make a purchase using one of the links, I receive a small commission (at no additional cost to you) that helps offset the costs of maintaining this blog.  Thanks for your support!

Directions:

  • Place the stencil over the cardstock.  Place a piece of removable tape on the corners to keep the stencil from moving.
  • Rub the ink blending tool over the ink pad.  Rub on a piece of extra paper to smooth out the ink before using it on the stencil.
  • Gently rub over the stencil with the ink blending tool.  I started in the middle and worked my way out towards the edges.

Quick & Easy Stenciled Card

  • Remove the stencil to reveal the design.
  • I forgot to remove the removable tape used to hold the stencil down.   So, I have tape lines.  Mistakes lead to opportunities.  Making the most of it, I cut the stenciled design down to size.

Quick & Easy Stenciled Card

  • I adhered the stenciled design onto a 4 1/2″ x 4 1/2″ piece of light gray cardstock and onto a 5″ x      5″ card.
  • I added a small greeting on the bottom right of the card.
  • To finish the card, I tied a sheer cream ribbon on the top of the card.

Maker's Movement

Disclosure:  This is a sponsored post for The Maker’s Movement*.  I have been provided product and compensation in exchange for my creative ideas.  The view and opinions are my own. 

Fall Floral Stained Glass Card

Fall Floral Stained Glass Card

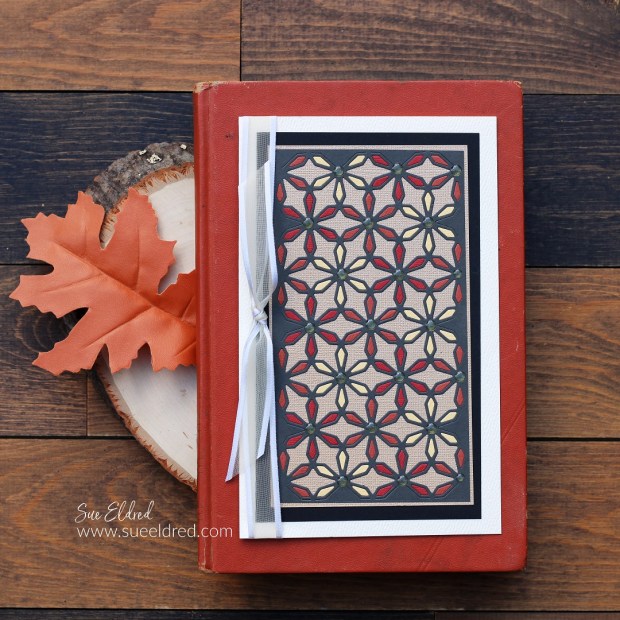
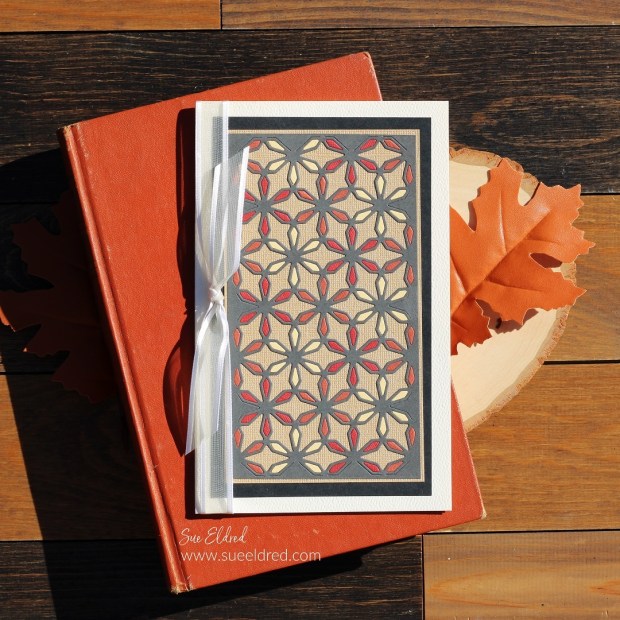
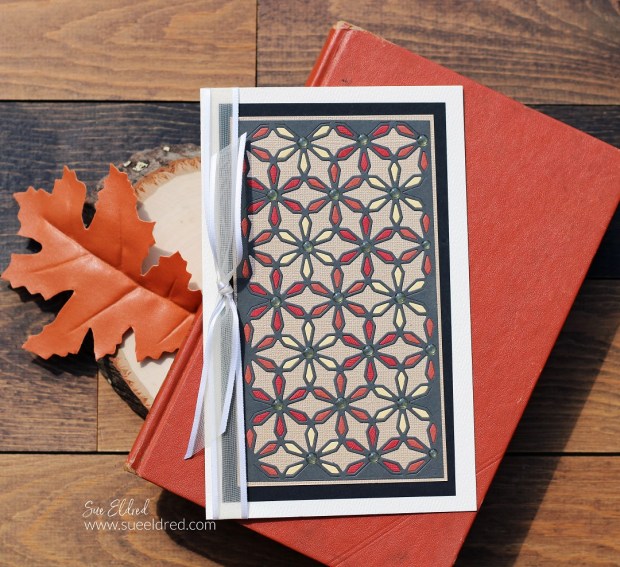
Fall Floral Stained Glass Card made with the Sizzix Skinny Mini Elements Thinlet Die by Eileen Hull.

I was lying in bed the other night when I got the idea for this card.

(That’s when I get some of my best ideas.)

It was perfect for the Eileen Hull Card Bonanza Month over on her blog.

Eileen Hull Educator Logo

Disclosure:  This is a sponsored post.  As a member of the Eileen Hull Educator Team, I have been provided product in exchange for my creative ideas.  The view and opinions are my own. 

Xyron Creative Station

The Fall Floral Stained-Glass Card is a fairly simple card to make.

The one thing that made this card easy was using my Xyron Creative Station*

on the cardstock before die-cutting.

Fall Floral Stained Glass Card

Directions:

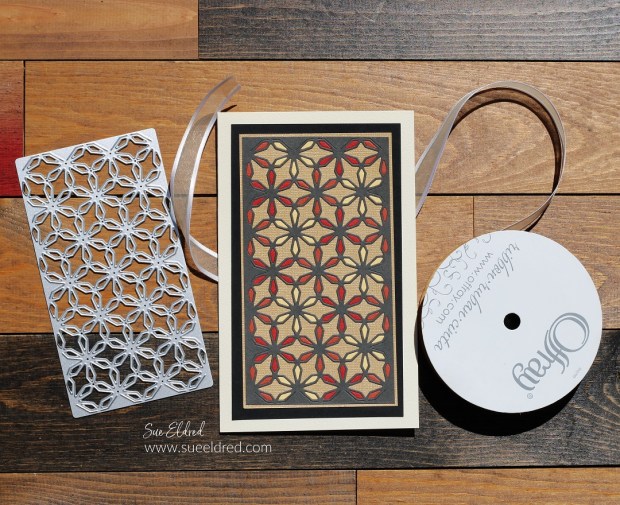
  • Cut a piece of gold cardstock slightly larger than the Skinny Mini Elements Die* to use as the base of the card.
  • Choose a dark gray cardstock for the outline and three pieces of fall-colored cardstock for the inside pieces.
  • Place the cardstock into the Xyron Creative Station* and crank the handle to run the paper through the machine. The Xyron Creative Station* adds a complete layer of adhesive to the cardstock making each little piece a sticker. That made assembling the card simple or “simple-ish.”
  • Place the die on the cardstock and die-cut the gray and the fall-colored paper using a Sizzix Big Shot Die-Cutting Machine*.
  • Trim the gray paper to the size of the die.  Remove and discard all the tiny inside pieces using a craft pick*.  Remove the protective liner from the back of the cardstock and center it onto the gold cardstock layer.
  • Use a craft pick* to place the inside flower pieces from the colored cardstock.

Materials Used:

*Disclosure:  This blog uses ads and affiliate links.  If you choose to make a purchase using one of the links, I receive a small commission (at no additional cost to you) that helps offset the costs of maintaining this blog.  Thanks for your support!

Fall Floral Stained Glass Card

  • Finish creating your flower pattern and add several cardstock layers to a cream card.
  • Add a sheer cream bow.

Fall Floral Stained Glass Card

There’s so much more that you could add to the card, like a greeting or a small tag.

But I decided to keep it simple. (or as I mentioned before…”simple-ish”.)

Fall Floral Stained Glass Card

I thought I was finished with this card.

But then again, sometimes things just evolve.  

A stained-glass card needed rhinestones.

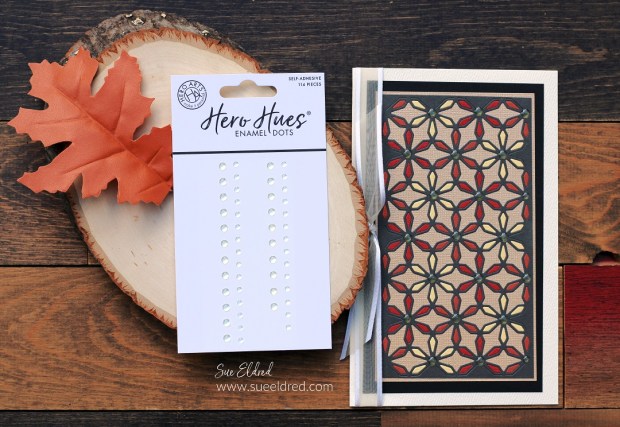
I added Clear Enamel Dots from Hero Arts* to the center of each flower.

Fall Floral Stained Class Card

For another card idea using the Sizzix Skinny Mini Elements Die,

check out the Skinny Mini Christmas Poinsettia Card below.

Skinny Mini Elements Christmas Poinsettia Card.

Skinny Mini Elements Christmas Poinsettia Card

Shop Scrapbook.com

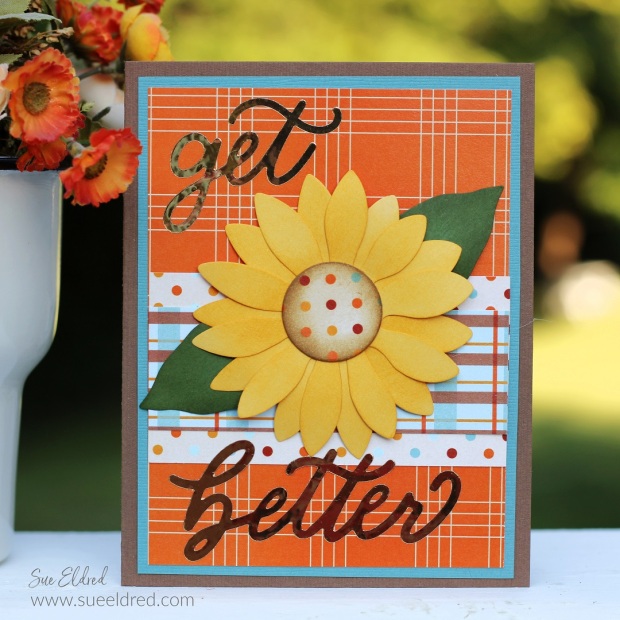
Fall Sunflower Get Well Card

Fall Sunflower Get Well Card

A Bright and Cheery Card to brighten someone’s day.

This simple Get-Well card uses dies and paper from The Maker’s Movement.

Maker's Movement

Disclosure:  This is a sponsored post for The Maker’s Movement.  I have been provided product and compensation in exchange for my creative ideas.  The view and opinions are my own. 

Fall Sunflower Get Well Card

Materials Used:  (*affiliate links)

*Disclosure:  This blog uses ads and affiliate links.  If you choose to make a purchase using one of the links, I receive a small commission (at no additional cost to you) that helps offset the costs of maintaining this blog.  Thanks for your support!

Fall Sunflower Get Well Card

Directions:

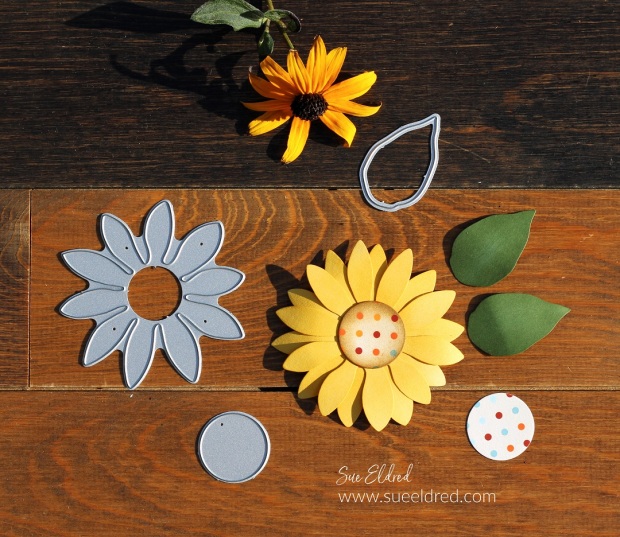
  • Die-cut the pieces for the flower out of cardstock. You will need two flowers cut from the large flower die.
  • Ink the cardstock flower with yellow ink to give the petals a little color variation and depth.

Fall Sunflower Get Well Card

  • Use the side of a pencil to gently round the edges of the petals.

Fall Sunflower Get Well Card

  • Glue the center of the flowers together using Tombow Mono Aqua Liquid Glue*.
  • Instead of a brown center for the sunflower, I cut a circle using polka dot paper from the Autumn Breeze Paper Pad.

Fall Sunflower Get Well Card

  • Die-cut the words “get better” using StyleTechCraft Gold Chrome Adhesive Vinyl*and the Get Better Die Set.
  • The card uses simple layers using the Autumn Breeze Paper Pad.
  • Finished Card Size 4 1/4″ x 5 1/2″.

StyletechCraft products brought to you by ATSM Craft*

Three Projects with Eileen Hull’s New Chapter 3 Release

Projects using Eileen Hull's New Chapter 3 Dies from Sizzix

Eileen Hull’s New Chapter 3 Dies from Sizzix.

I am excited to share three projects I created using Eileen Hull’s New Chapter 3 Sizzix

die collection!

They are a fun group of dies.

Each piece in the set stands alone but also coordinates with the others

to make a truly versatile and valuable addition to your collection.

Back to School Gift Box

Back to School Teacher Gift Box

If you’re looking for to “butter up” the new teacher, this BTS gift box is a fun project to make.

The Back-to-School Teacher Gift Box uses Eileen’s New XL Card Box Die*.

I LOVE this Die* and I can’t wait to share all the ideas I have for this die for the Holidays.

*Disclosure:  This blog uses ads and affiliate links.  If you choose to make a purchase using one of the links, I receive a small commission (at no additional cost to you) that helps offset the costs of maintaining this blog.  Thanks for your support!

Puppy Love Skinny Mini Album-Sue's Creative Workshop www.sueeldred.com 4902

Puppy Love Skinny Mini Album

Eileen’s Skinny Mini Book Box Die* makes the perfect sized album for pictures

of my pup Dexter.

The die also comes with the side parts to make it into a box.  (genius!)

Puppy Love Skinny Mini Album

I created accordion pages for the inside of the album by scoring and attaching 6″ x 12″ cardstock.

Skinny Mini Elements Christmas Poinsettia Card.

Skinny Mini Elements Christmas Poinsettia Card

While the Skinny Mini Elements Die* is not a Christmas Die,

it sure makes one cute Christmas card.

It coordinates perfectly with the Skinny Mini Book Box Die*.

Sizzix Skinny Mini Elements Christmas Poinsettia Card-Sue's Creative Workshop www.sueeldred.com 4940

This card comes with a little back story.

After I made this card, I sent Eileen a picture of the finished project.

She messaged me back that I was brilliant for making the poinsettias using the cut-outs

from the die.  I agreed that “would have” been brilliant, but (darn it) I had used premade

paper poinsettias for the card.

Up for the challenge, I remade the red poinsettia using the cut-outs from the die.

I left the white poinsettias for comparison.  (and laziness)

I cut the points off the side and arranged the petals on foam mounting squares.

Voila, a poinsettia!

Eileen Hull Chapter 3 Release Party

Check out the Eileen Hull’s Blog below for even more ideas. 

Here’s the list of Chapter #3 Blog Hop Stops:

Eileen Hull Educator Logo

Disclosure:  This is a sponsored post.  As a member of the Eileen Hull Educator Team, I have been provided product in exchange for my creative ideas.  The view and opinions are my own. 
Sending Sunshine on a Cloudy Day

Sending Sunshine on a Cloudy Day

Everyone can use a little Sunshine on a cloudy day.

This simple card is made with stamps and dies from The Maker’s Movement.

The card uses a little subtle play with different patterns.

Maker's Movement

Disclosure:  This is a sponsored post for The Maker’s Movement.  I have been provided product and compensation in exchange for my creative ideas.  The view and opinions are my own. 

Sending Sunshine on a Cloudy Day

Materials Used:       (*affiliate links)

*Disclosure:  This blog uses ads and affiliate links.  If you choose to make a purchase using one of the links, I receive a small commission (at no additional cost to you) that helps offset the costs of maintaining this blog.  Thanks for your support!

Sending Sunshine on a Cloudy Day

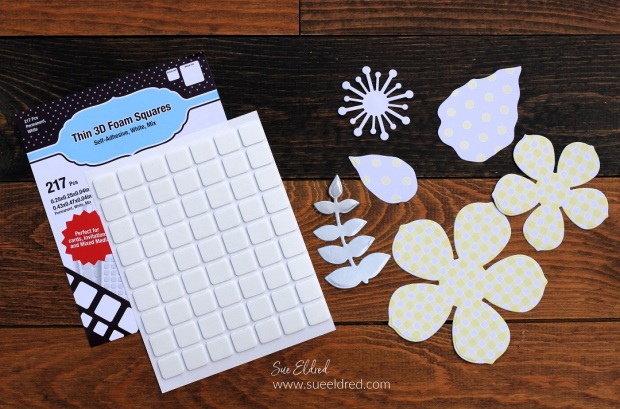
  • I die-cut pieces using the Stacking Flowers Die out of yellow patterned paper from the Cloudy Day paper pad.
  • The flower was assembled using 3D Thin Foam Squares*.

Sending Sunshine on a Cloudy Day

  • I used the “Hello Sunshine Stamp & Die Set” for the sunshine layers on the bottom of the card.
  • I also used the “Hello Sunshine Stamp & Die Set for the small banner with the stamped words “sending you”.
  • My favorite tip for die-cutting small or thin pieces is to add a layer of adhesive using a Xyron Creative Station®* before die-cutting.

Sending Sunshine on a Cloudy Day.

This card was fast and easy to assemble and is sure to brighten up anyone’s day.